Adventure Time Process
- Published:
- Length: 1093 words
- Reading Time: 6 minutes
Back in early January 2019, I was closing tabs in my browser and came across a call for entry for "Quilted Comics & Sci-Fi", a special exhibit of quilts to be displayed at the upcoming International Quilt Festival and Comicpalooza, both in Houston. I had initially dismissed entering this exhibition because Link did not meet the size requirements and I had no current plans to make another fanart quilt. However, that morning I completely changed my mind and decided I did want to enter this exhibition after all!
There was a slight complication, though...because it was already January, and the entry deadline was March 15, I now only had 2 months to complete a (for me) fairly large quilt, all while managing purchase of a new house and moving in while my husband was out of town for work. It was going to be a challenge, but I decided to go for it.
Step 1: Draw the Design
I'm a pretty big nerd, so I had quite a few sources of inspiration to choose for this quilt. I ultimately decided to go with Adventure Time!, a fun, crazy, bizarre, and emotional TV show that ended in September 2018 after 10 seasons. This quilt would be a nostalgic tribute to the "good old days" of the show and only depict characters from the first three seasons.
As always, my initial sketch was done in Concepts on my iPad. Here it is:

Step 2: Create a Template
I took my drawing into Adobe Illustrator and turned it into a finished, colored template. I also added all of the text along the border, which is the theme song for the show.

Step 3: Figure Out Overlap
Each filled area of the template ends up being one piece of fabric. The pieces that are underneath other pieces get overlap (so that the pieces on top will be able to fuse to the pieces below).
During the process of figuring that out, each piece also gets its own number so I know where it goes after it's cut. I separated groups of characters, the background, and treehouse into their own files to simplify things. For example, here is Jake, Finn, and Gunter the penguin. The artboards to the right have all of the individual pieces separated and grouped by color for cutting on my Cricut.

Step 4: Pick Fabric
Picking fabric is pretty tricky for me, and this quilt was no exception. I needed a whopping 120 separate fabrics for this picture, which is more than I've ever before needed for a single quilt. It was time to pull out my stash (and make a trip to my local quilt shop)!
My method of choosing fabrics involves printing swatches of colors used in my template and matching those swatches to actual fabrics. I also use my phone to check value. Here are two photos of the fabrics I ultimately choose for this quilt. On the left are all the fabrics arranged with their swatches on the kitchen table. The right photo shows all 120 fabrics stacked on top of each other.

Step 5: Cut Everything!
Before cutting, all of my fabric gets backed by Wonder Under and treated with either Fray Check or Mod Podge to prevent frays. This is how it looks when it's drying on my floor:

Once the fabric dried, my Cricut was hard at work cutting all 1021 pieces of fabric that make up this quilt. Here is my setup for cutting:

Step 6: Assemble the Pieces
After cutting, I use the numbers for each piece to match them up to their correct location on the template. Here is the treehouse partially assembled so the template is visible under my non-stick pressing sheet:

Here is a close-up of the logo and the swords used in the border:
Step 7: Stitch It!
I stitch my designs from back to front, so the sky got sewn before the mountains and treehouse. Here is my a partially complete quilt before any of the characters (except Lady Rainicorn) were sewn down.
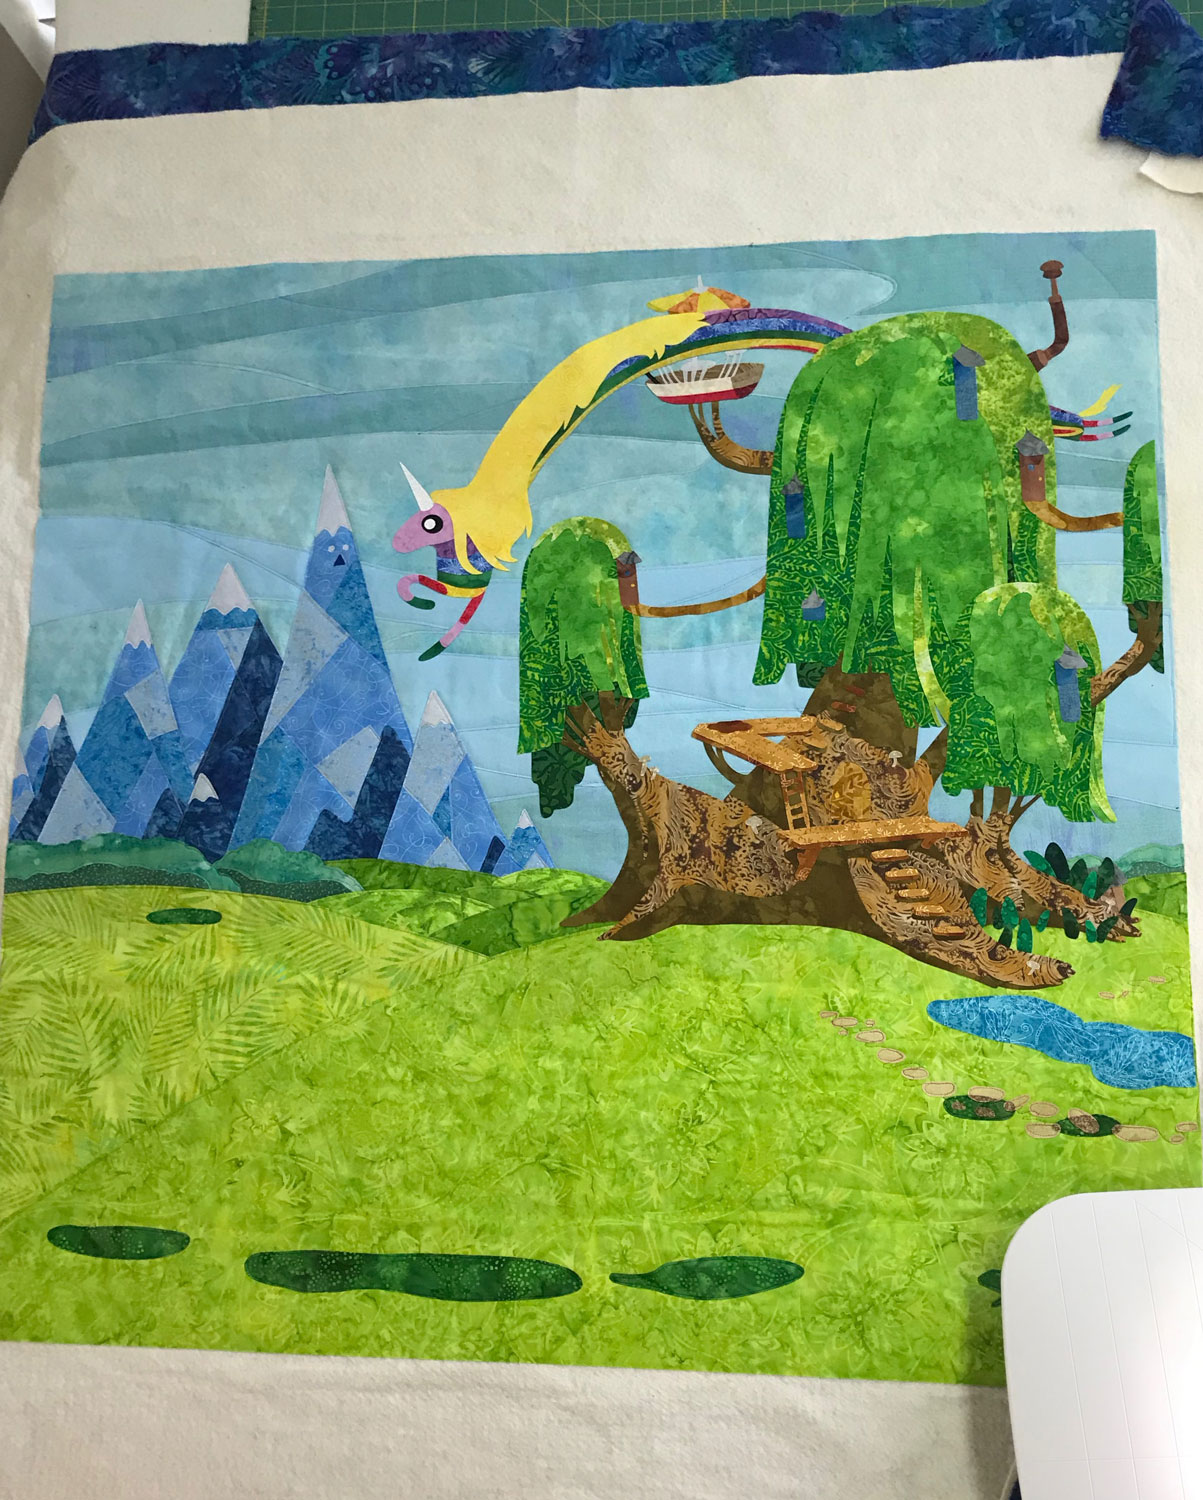
I do all my sewing with 100wt thread in a raw-edge applique technique.
Step 8: Paint the Outlines
I try to avoid using any paints or dyes on my quilts but I had to make an exception for this one. I wanted to outline everything as it would be in the show, and to do that I used liquid acrylic paint.
Here is a before and after look at how the outlines enhanced the artwork:

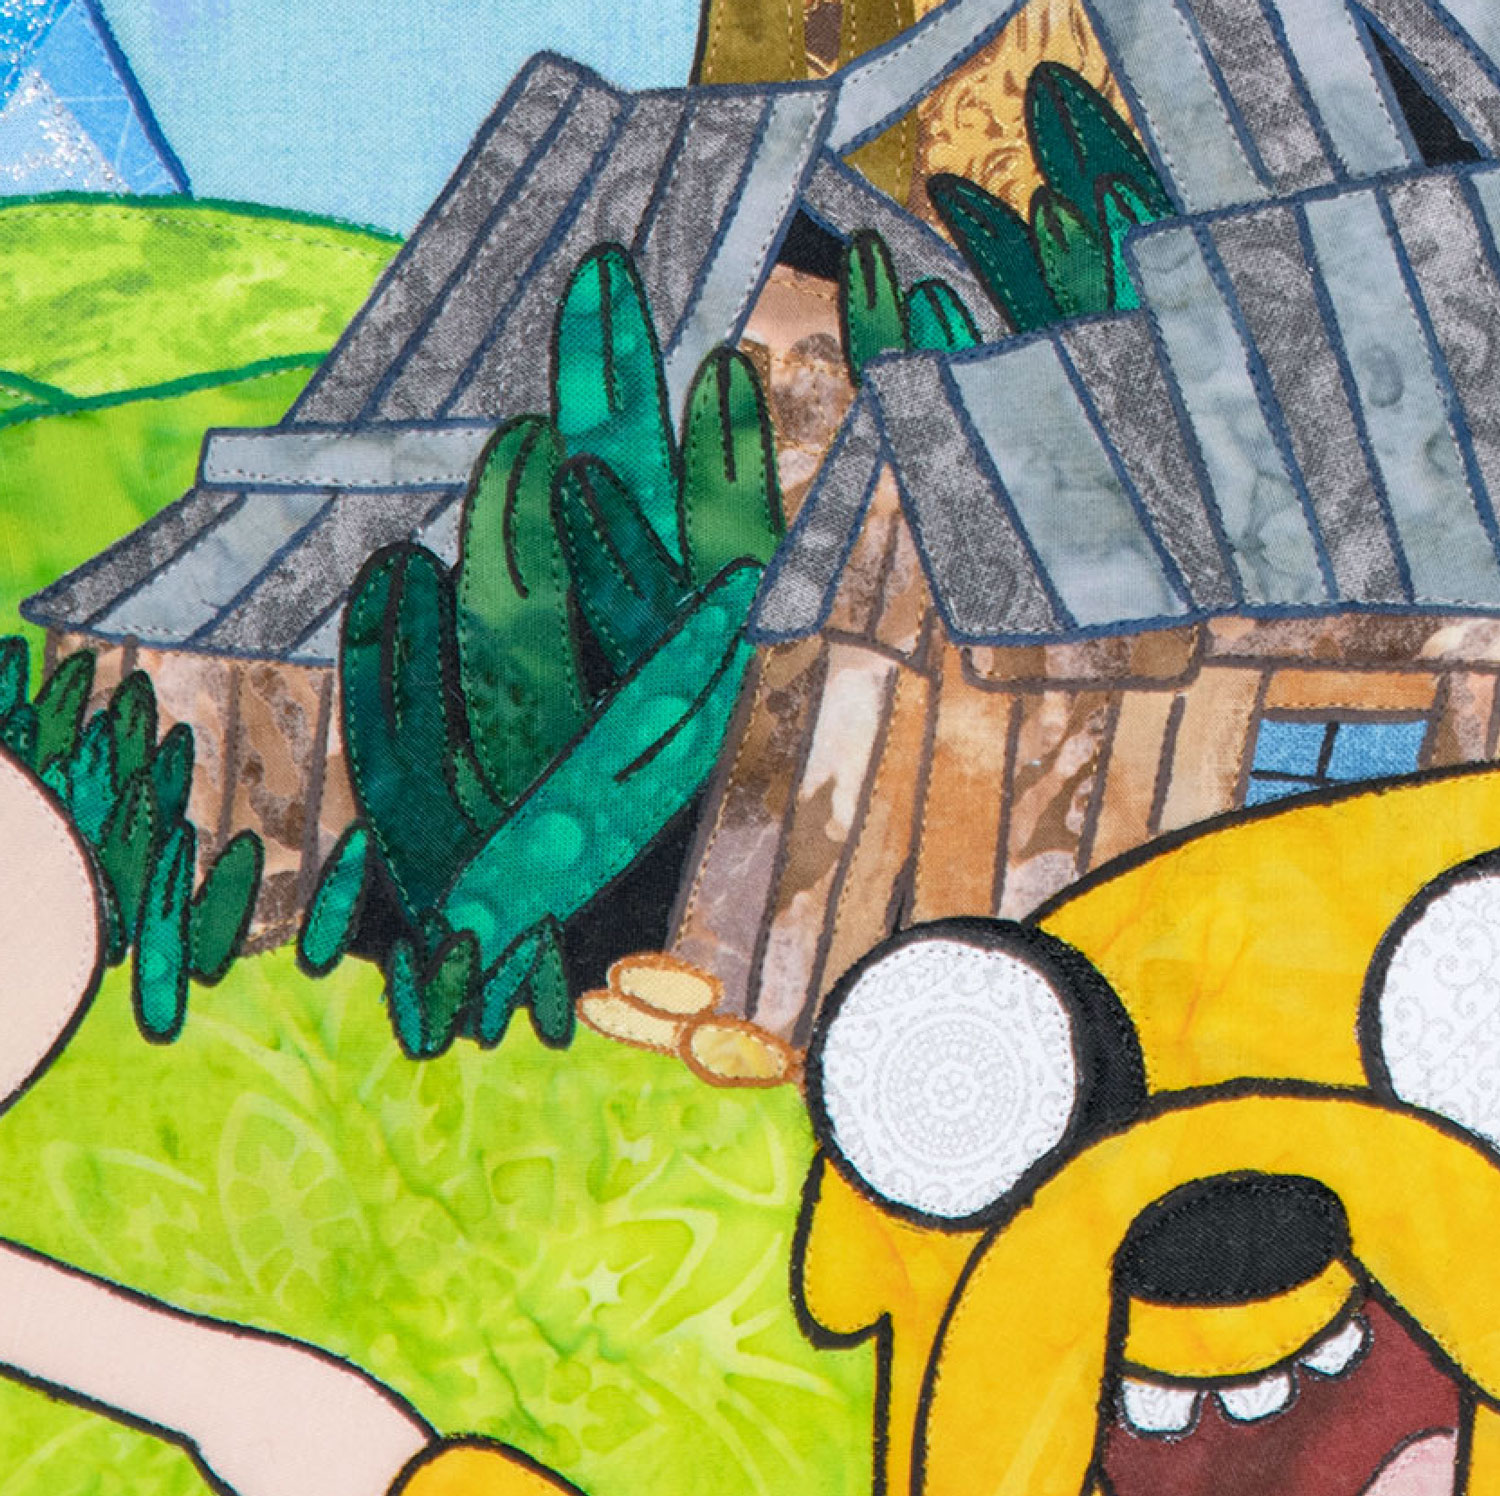
This is a close-up look at the painted outlines:
Step 8: Binding, Hanging Sleeve, and Signature
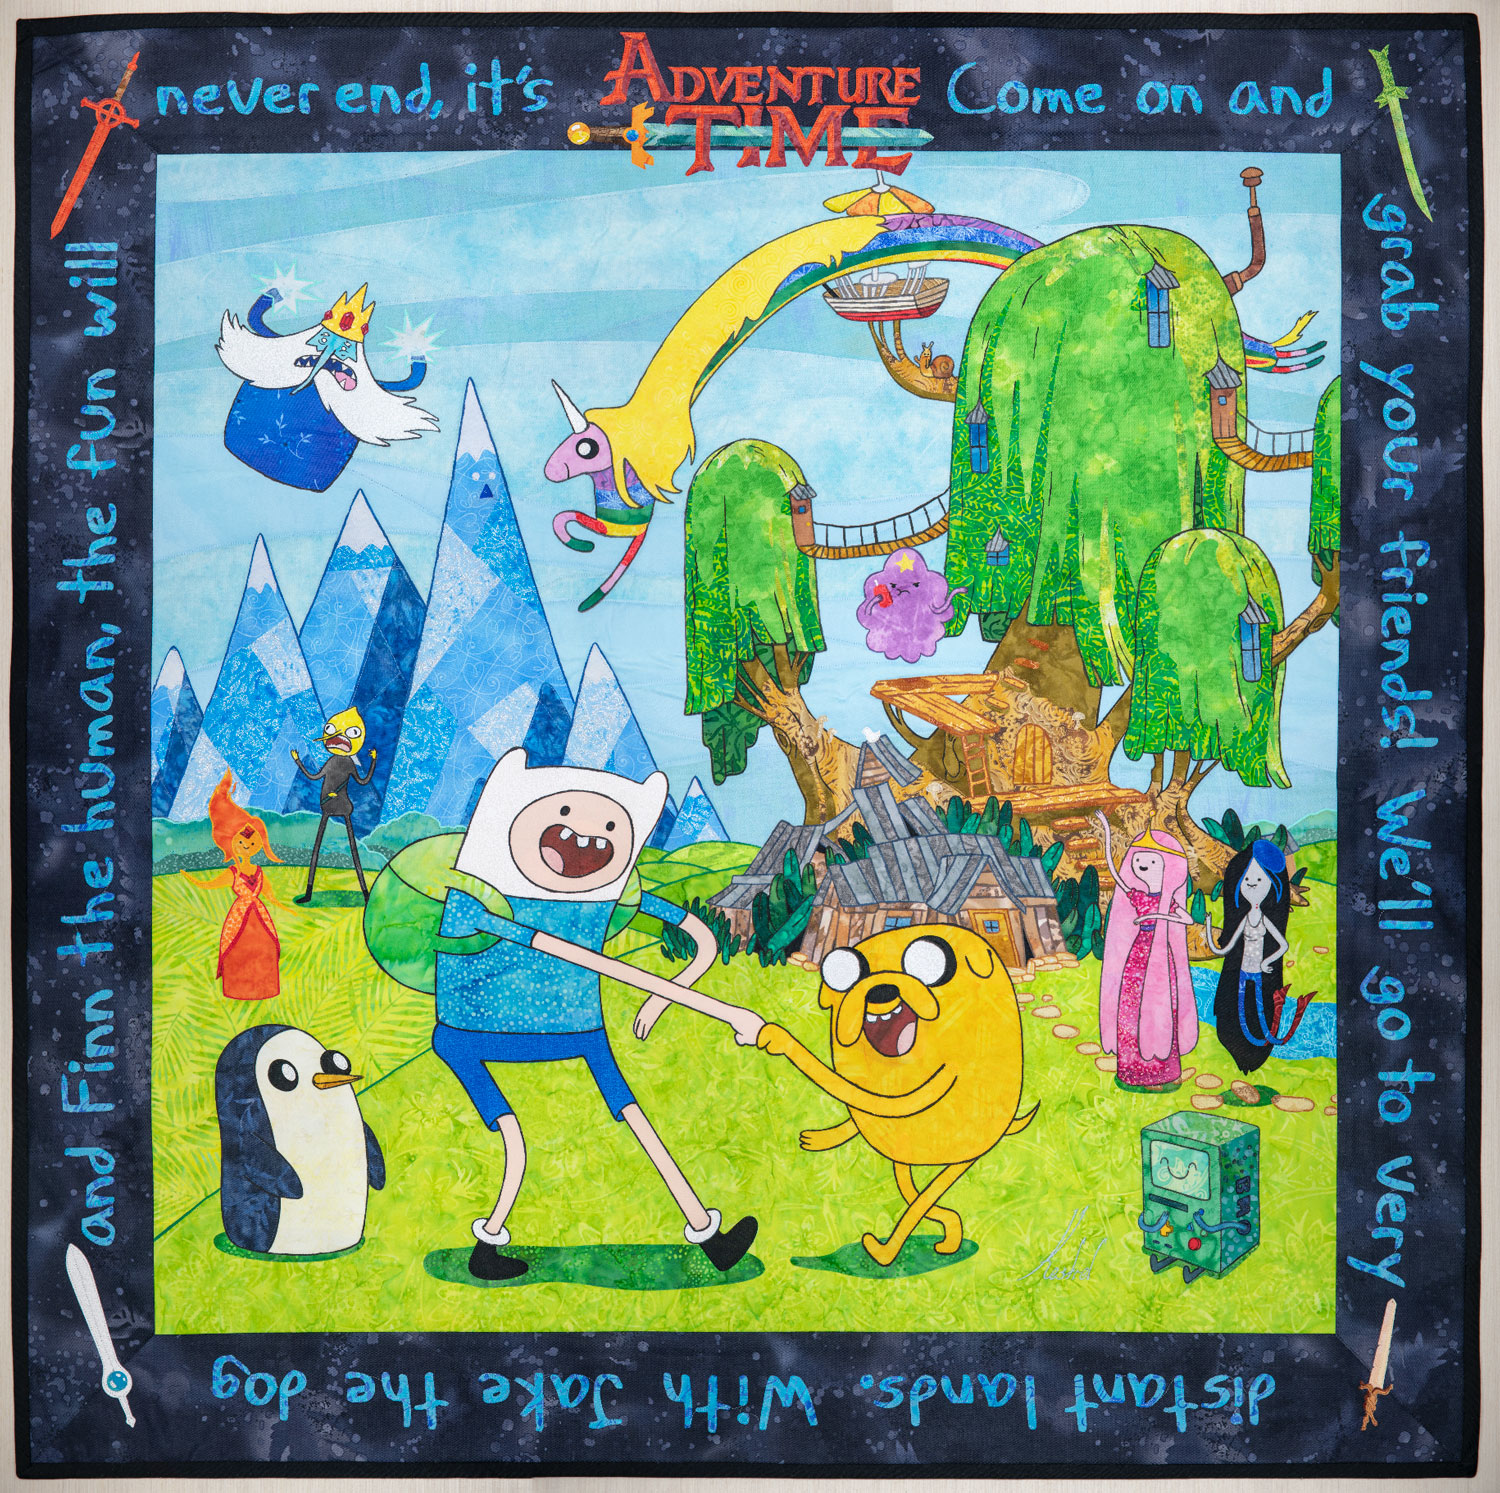
Last but not least, I finished the edges with a black binding and added a 4" sleeve to the back. I also embroidered my signature in the bottom right corner. Here's the finished quilt.
In Closing
It was right to the wire, but I did successfully finish Adventure Time before the deadline. (Actually, I finished the day of the deadline, but that still counts!) When I went to submit it to the exhibition, I realized either I had misread the size requirements back in January or they had been changed. I was delighted to see that Link now qualified, so I was able to submit both quilts!
