Morning Commute Process
- Published:
- Length: 1526 words
- Reading Time: 8 minutes
My method of making quils involves putting hundreds and thousands of pieces of fabric together to make a larger picture. This process has its drawbacks, one of which is I have no way to use smooth gradients. The only way for me to transition from one color to another is to find all the values of color in between. Like this:
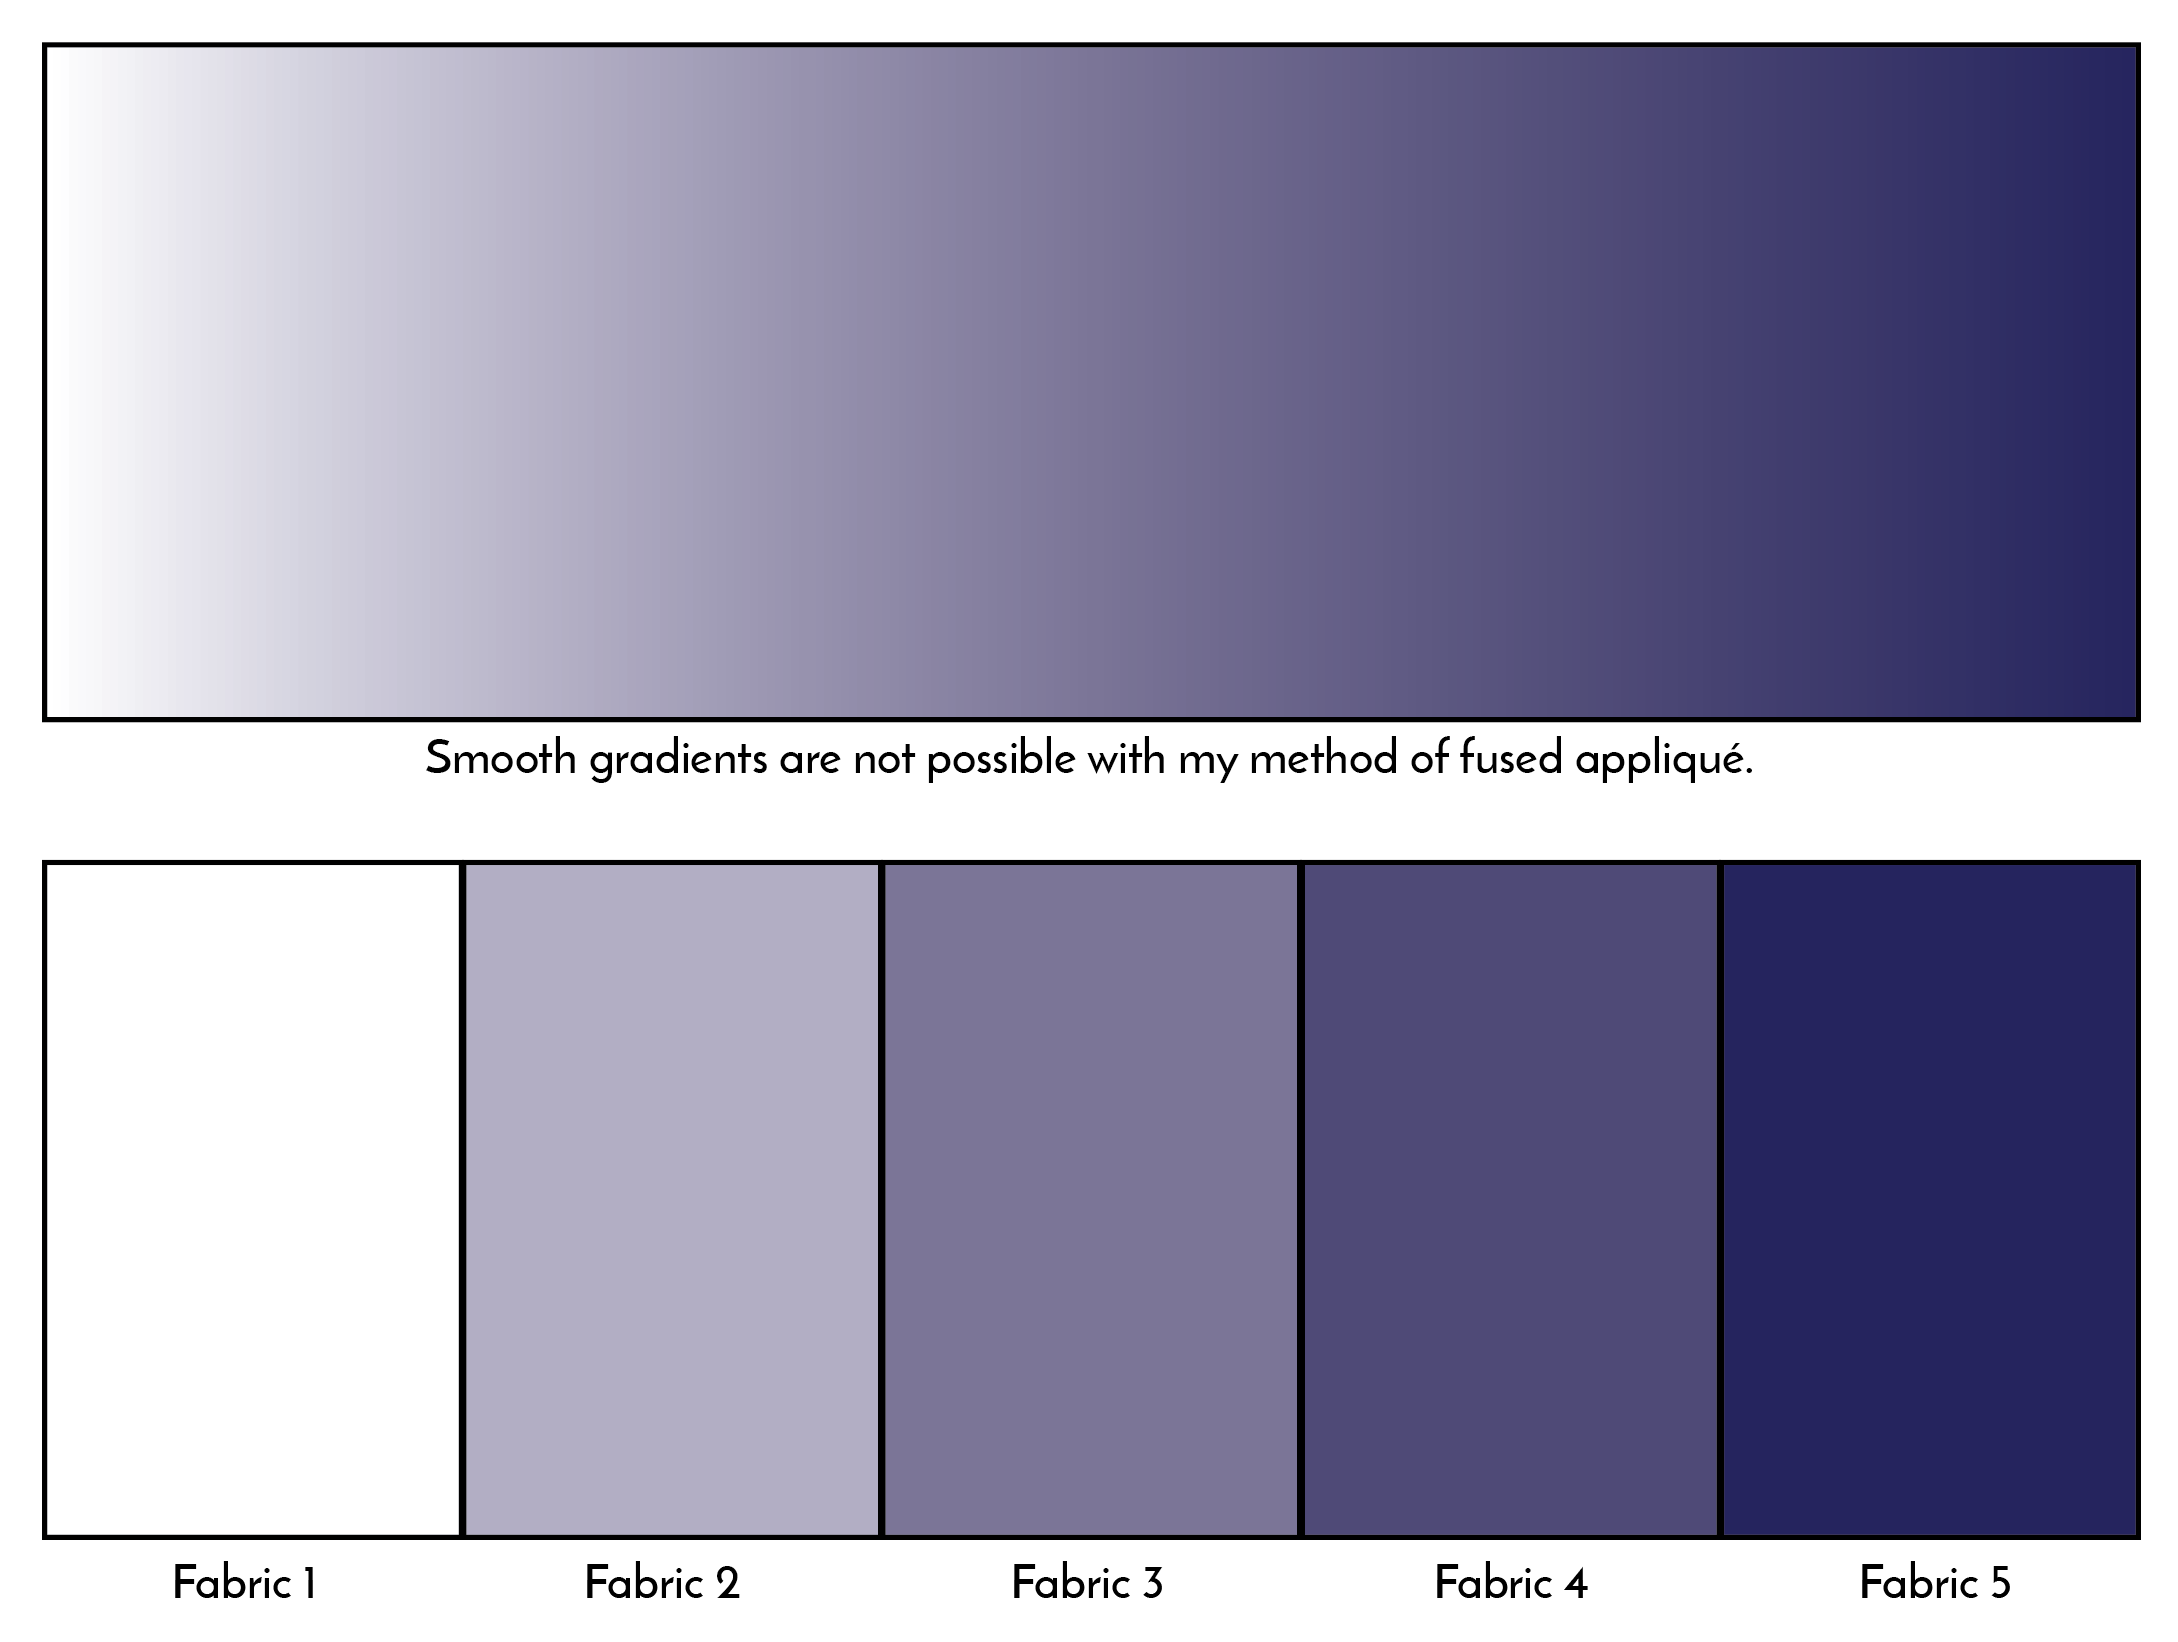
The only way I can show a transition from white to dark blue, in fabric, using my chosen method of fused appliqué, would be to find three fabrics in the correct colors and values and fit them between the white and dark blue.
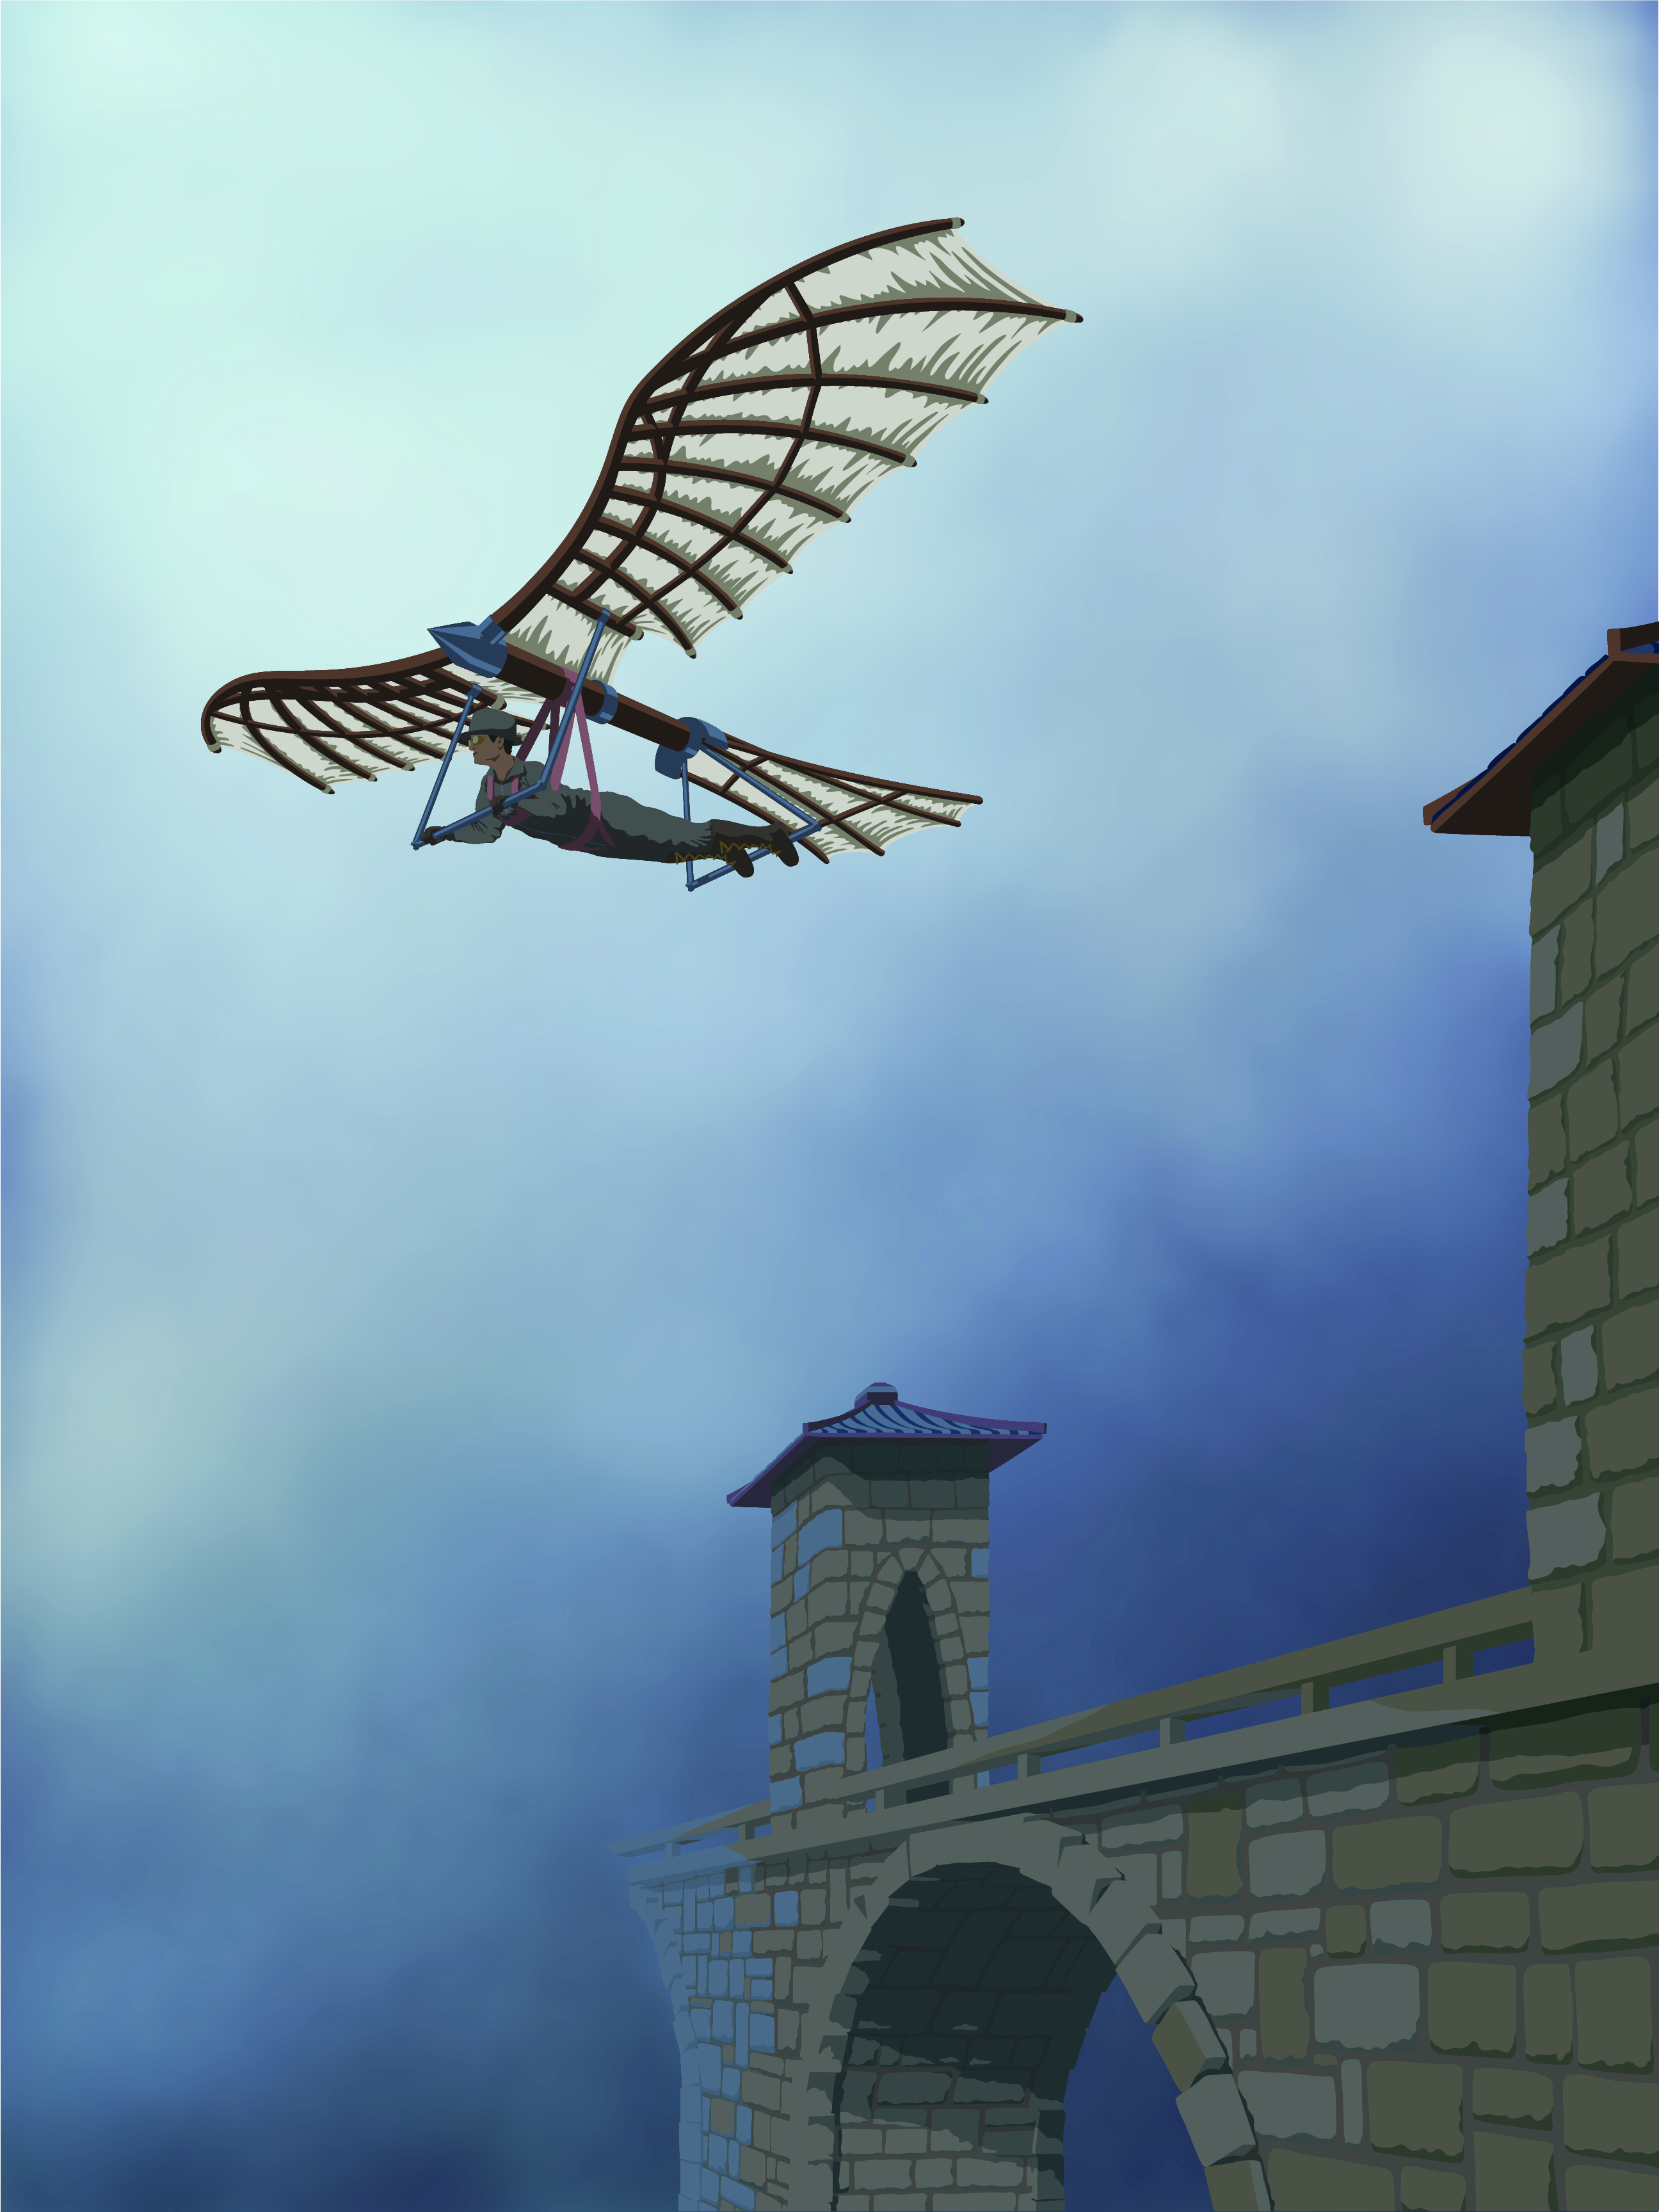
Using that method has worked out pretty well so far, but life wouldn't be fun without challenges. I thought about it for quite a while, trying to think of a situation where a gradient would be a necessity. Finally, I came up with the idea of a structure, like a bridge, disappearing into fog. The gradual transition as the bridge was slowly obscurred by mist would be pretty hard to simulate with individual pieces of fabric. So, naturally, I started planning to do just that as a quilt.
For the rest of this post, I'll detail the steps I took to make Morning Commute.
Start with Design
I knew in my head how the bridge should look. This quilt was always going to be in my Steampunk world, so I couldn't use any old steel or concrete bridge. This bridge had to look old, be made from stone, and look like it was built by hand.
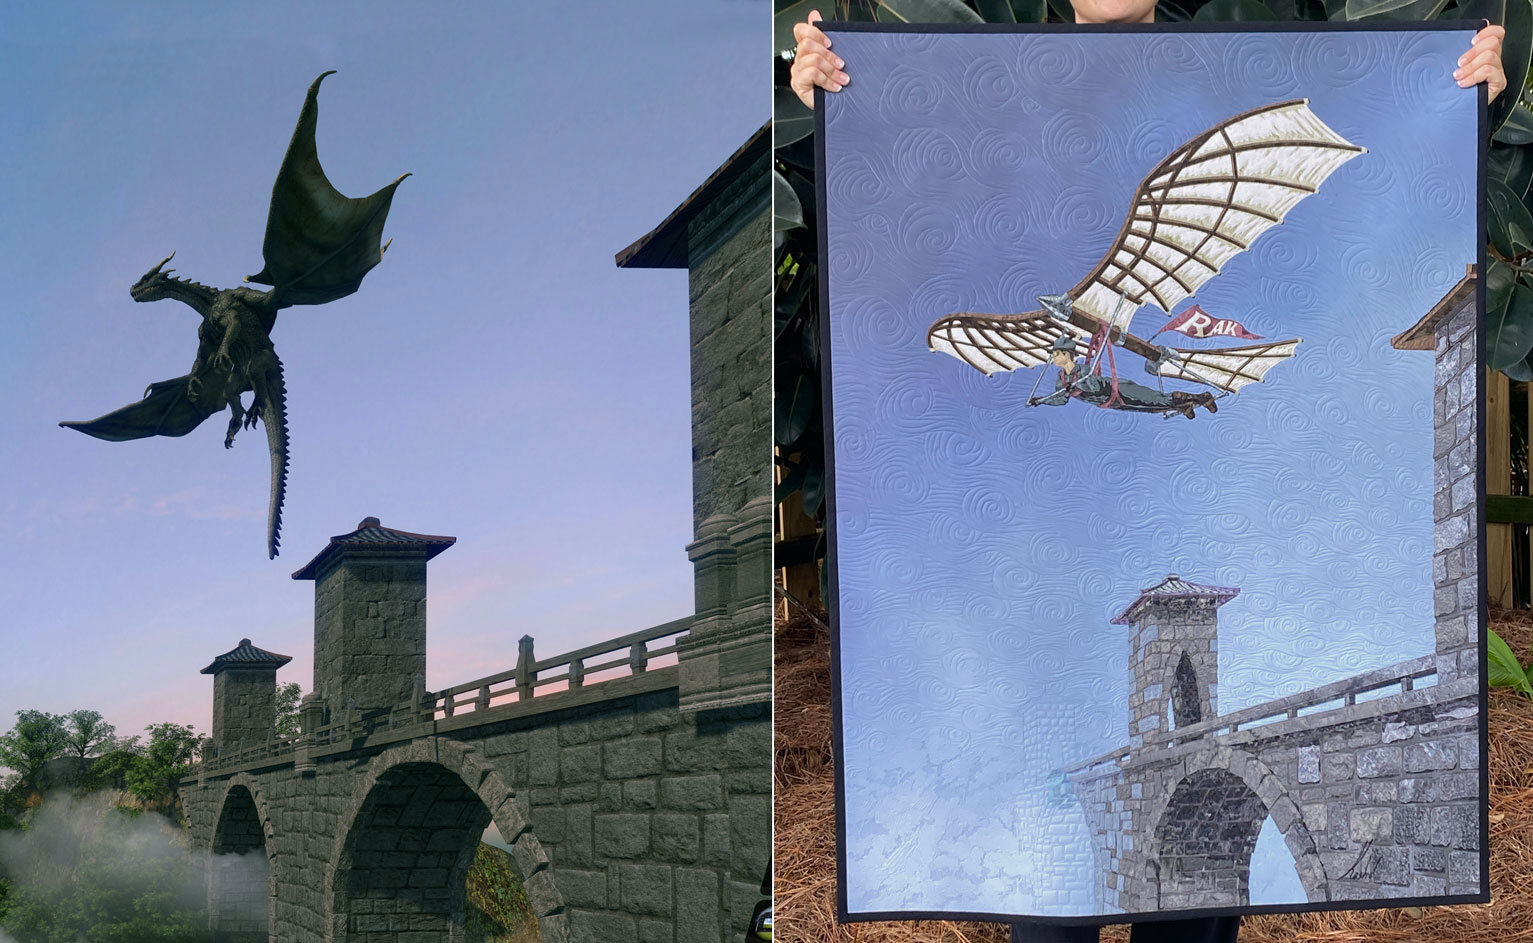
I spent hours looking at bridges online, but I just couldn't find a reference photo that would work. My solution was to make my own reference photo using a program called FlowScape. FlowScape is a 3D world creator. It allows users to quickly and easily make their own little, three-dimensional scenes and landscapes. I wrote an entire blog post about FlowScape, so I won't go into more detail here. The long story short is I made a bridge in FlowScape, adjusted the lighting, and angled the camera just so to get the perfect reference shot.
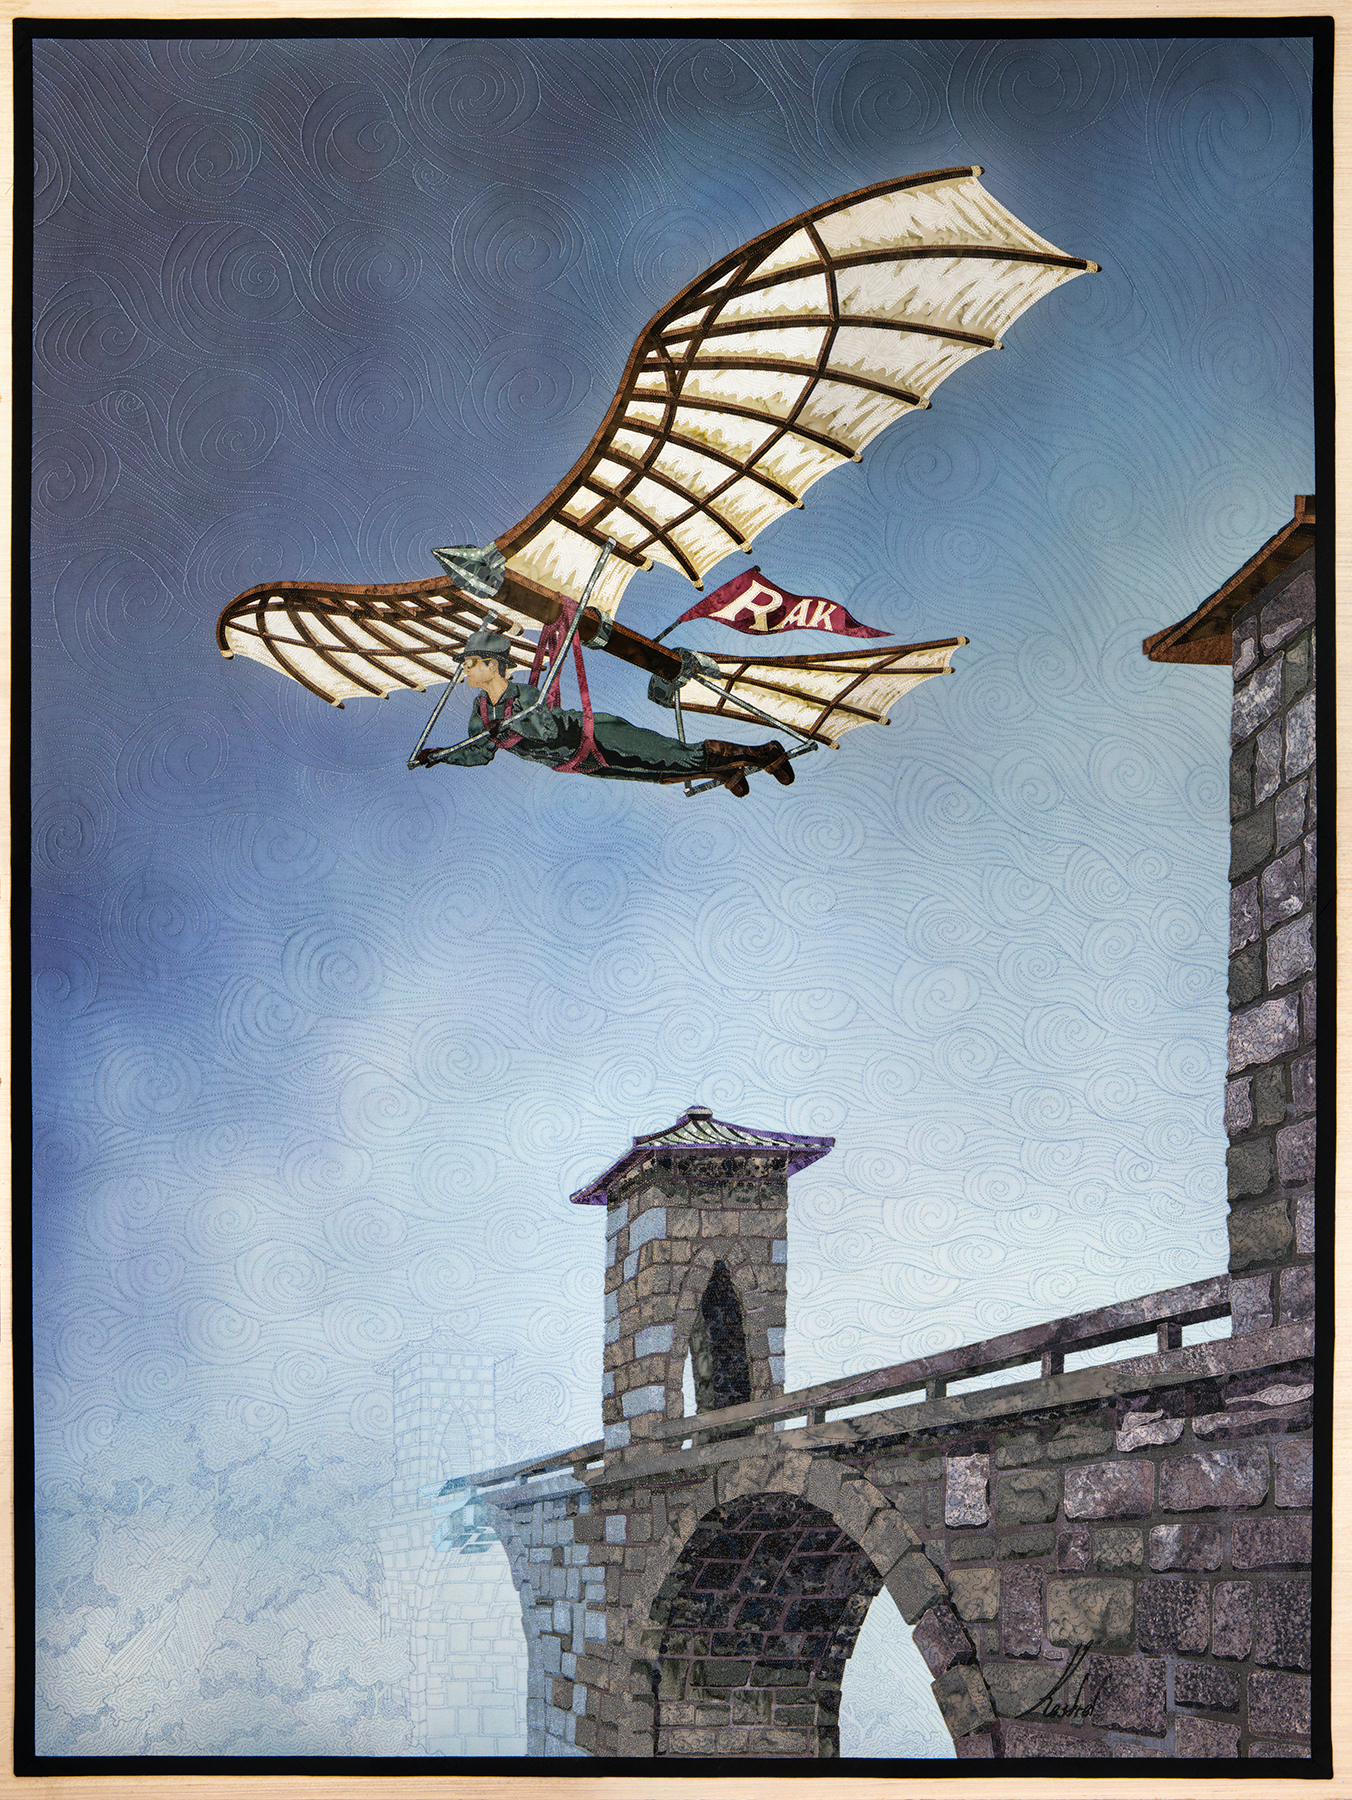
Here's the screenshot I took from FlowScape (left) next to a pic of me holding the finished quilt (right).
I then used a dry brush in Procreate, a raster drawing app on my iPad, to create a misty, textured background. I combined that background with the FlowScape screenshot for a proof-of-concept image.
When I made the FlowScape scene, I knew I wanted a man on a flying machine in my quilt, but had not yet worked out what that would look like. I used the dragon as a placeholder for the position of the wings so I'd have an idea of the perspective that would look natural.
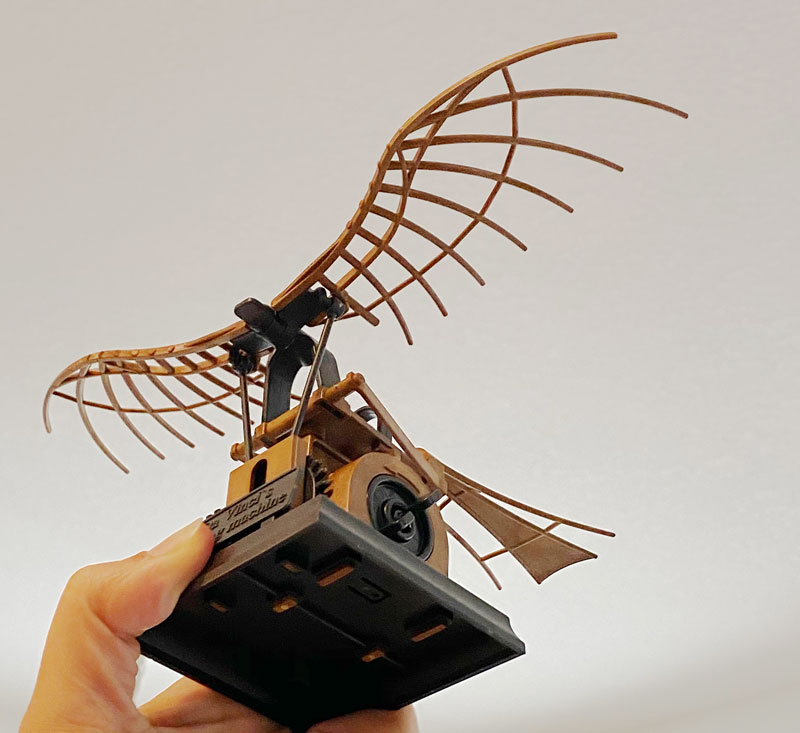
I ended up purchasing a small toy model of a Da Vincian flying machine that I assembled and photographed to get my reference. I drew the man using the machine by hand after looking at dozens of pictures of hang gliders.
Create the Template
From the beginning, I'd planned to treat the sky and section of bridge hidden by fog as a "wholecloth", which means the details would be visible through stitching only. The appliqué part of my quilt would only be the bridge and the man on flying machine. Now that I had a good reference for both, I felt confident moving on to the full-color template.
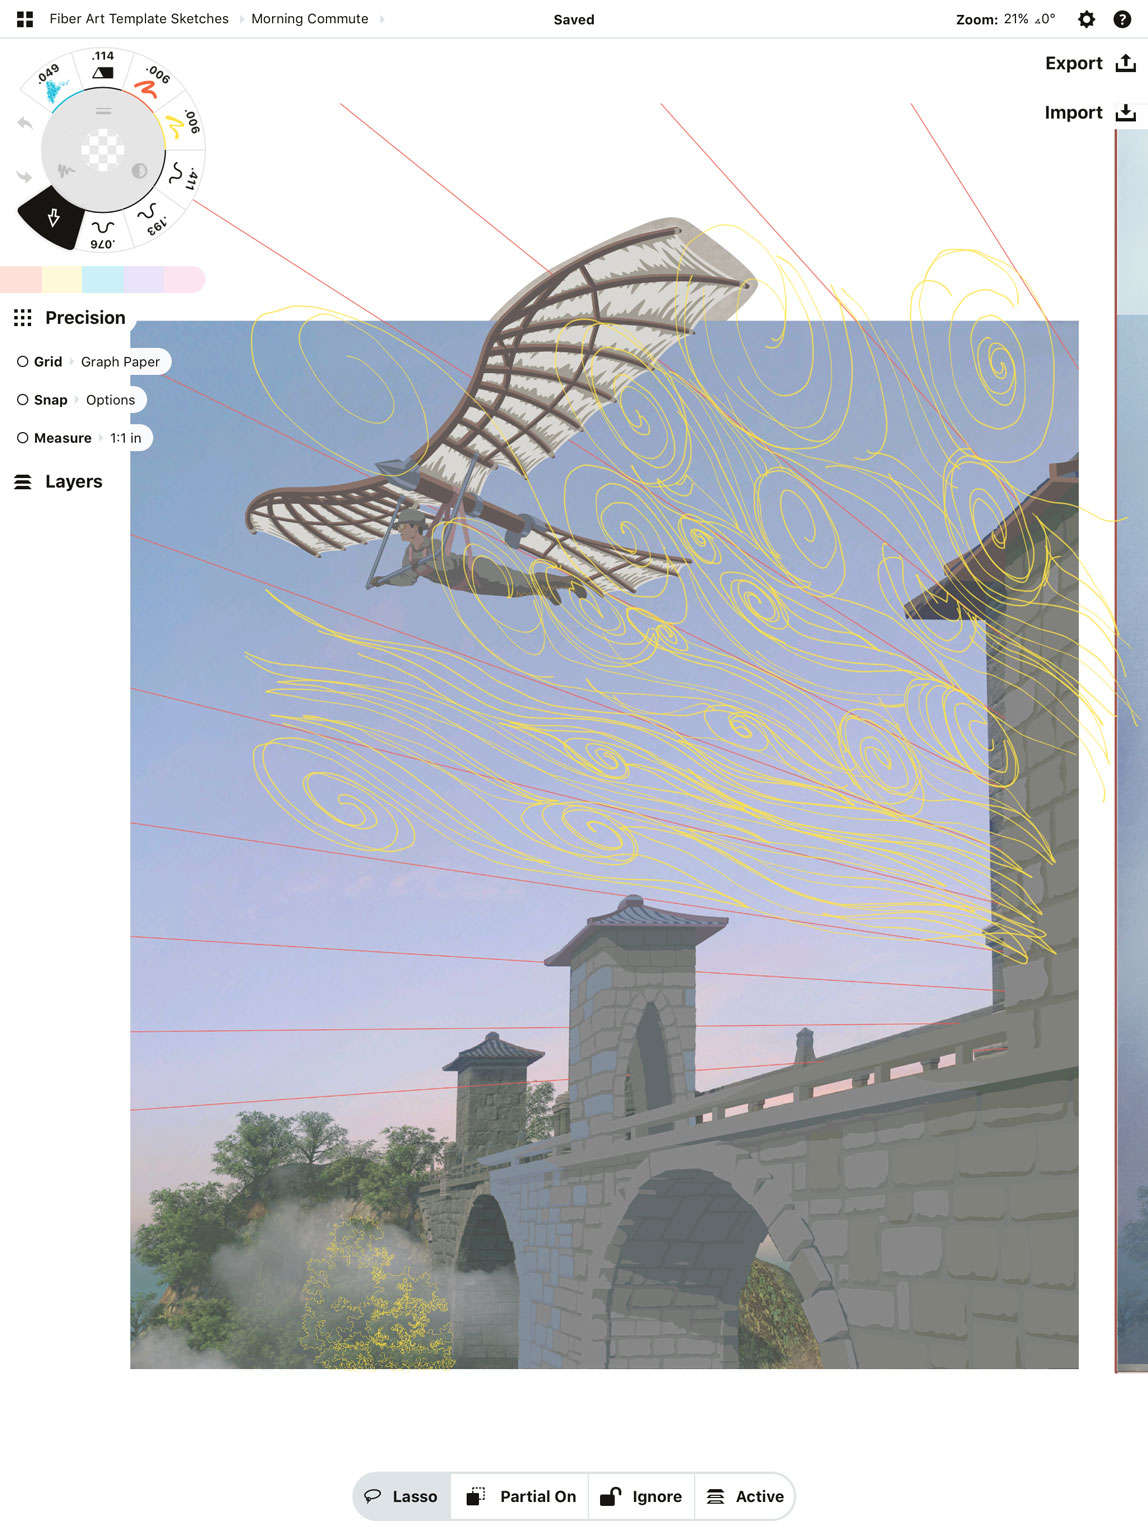
As always, I do my drawing in Concepts, a vector drawing app on my iPad. I imported the FlowScape screenshot into Concepts and traced over the bridge to create my drawing.

The thin, orange lines in the image above are the "finished" lines. those lines became the cut lines for my Cricut and they mark the edge of each piece of fabric.
After drawing in Concepts, I exported an SVG and took the file into Adobe Illustrator to figure out colors and clean up the design. The finished template looked like this:
Pick and Print the Fabric
All but one of the fabrics used in this quilt were off-the-shelf prints and batiks purchased at several local quilt stores:
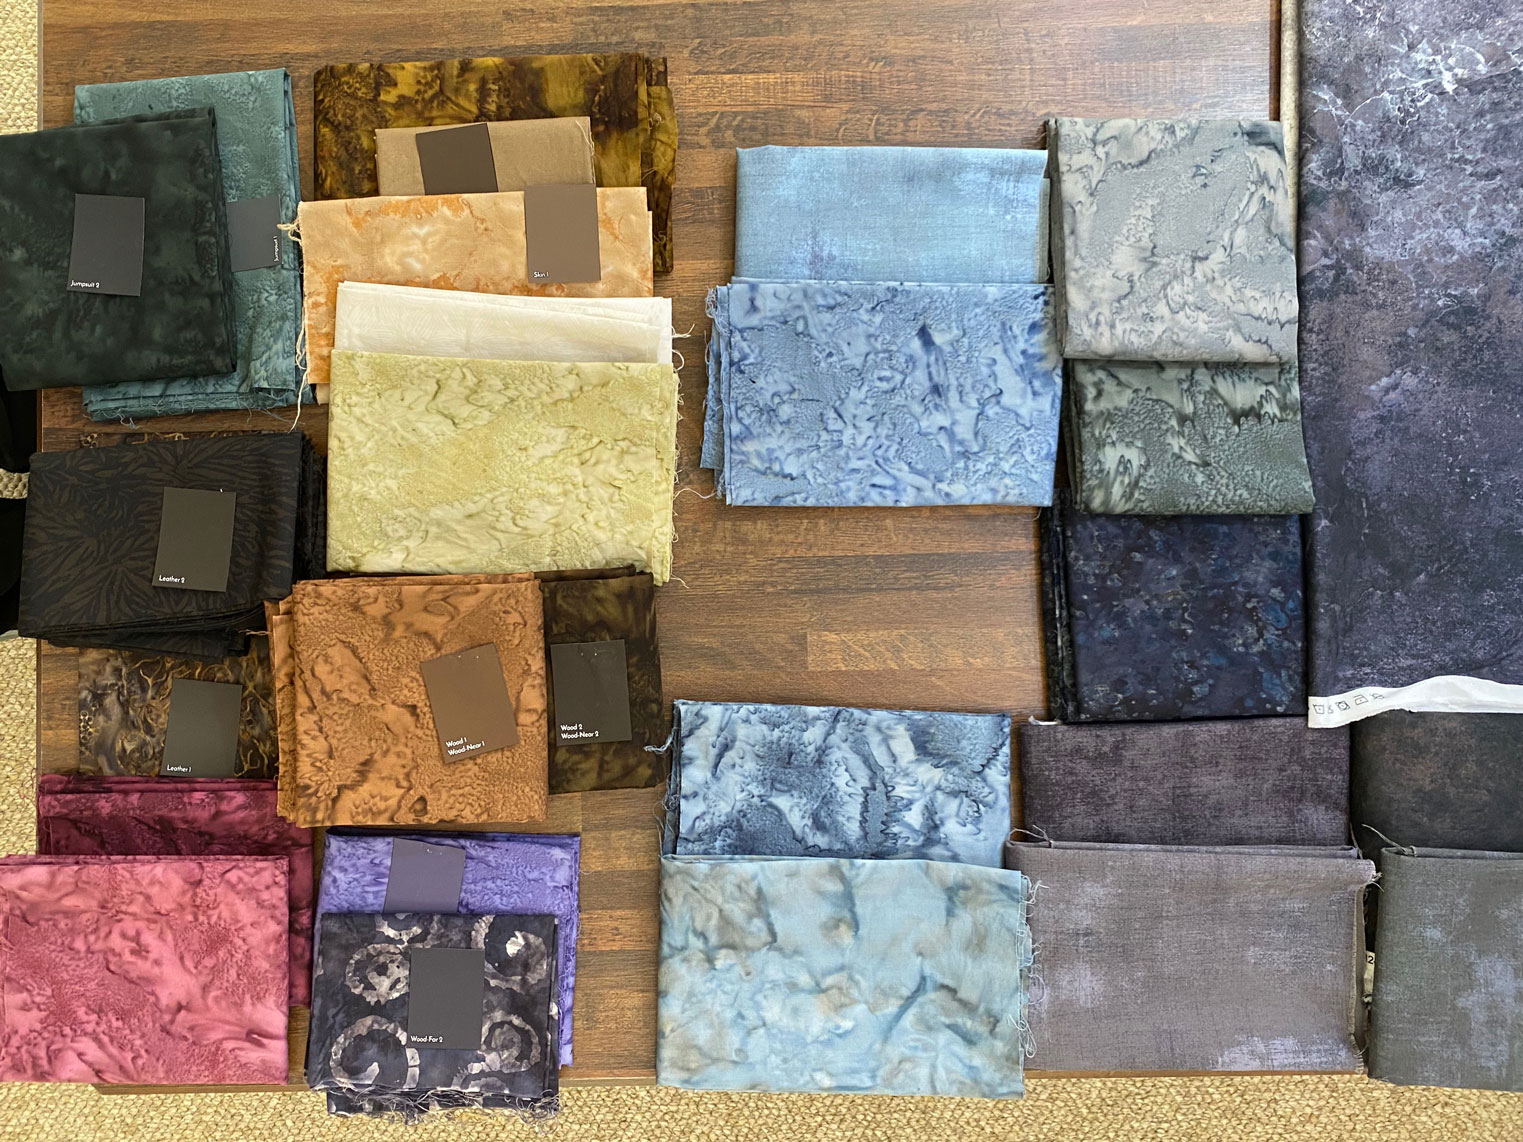
The one fabric that was not purchased locally was the sky. I took the misty background I had drawn in Procreate and had it printed through Spoonflower on one yard of Cotton Sateen fabric.
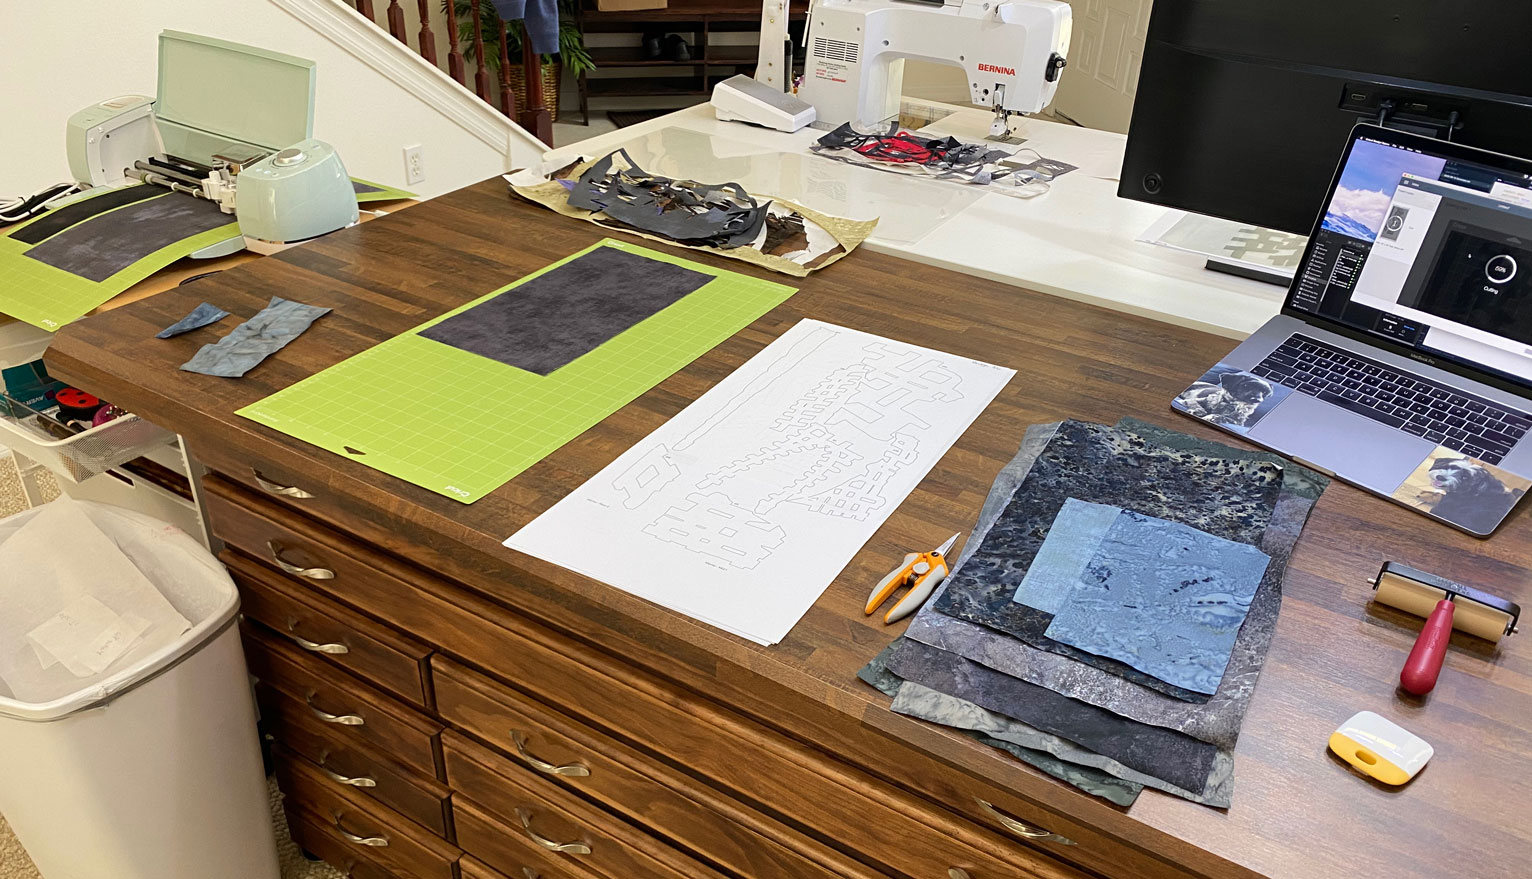
Treat and Cut the Fabric
I use Wonder Under fusible and treat all of my fabric with a diluted Mod Podge solution to prevent fraying. Once the fabric is wet, I let it dry overnight in the A/C and then it's ready to cut.
Part of the process of creating the template is to add overlap to each piece. I do this so the pieces of fabric will be able to stick to each other after being cut.
I then arrange those pieces by color on individual artboards (pages) that match the size of a Cricut sticky mat. Each artboard layout will be one sticky mat layout that gets fed through the machine for cutting. Here is a screenshot of the artboards containing all wing pieces for the flying machine.

My Cricut Explore Air 2 cutting machine does all the cutting for me. Here's a look at the setup I use for cutting. The Cricut is in the top left corner.
Assembly
When I add overlap to each piece back when creating the template, I also assign each piece its own unique number. The numbers tell me where that piece goes within the overall design.
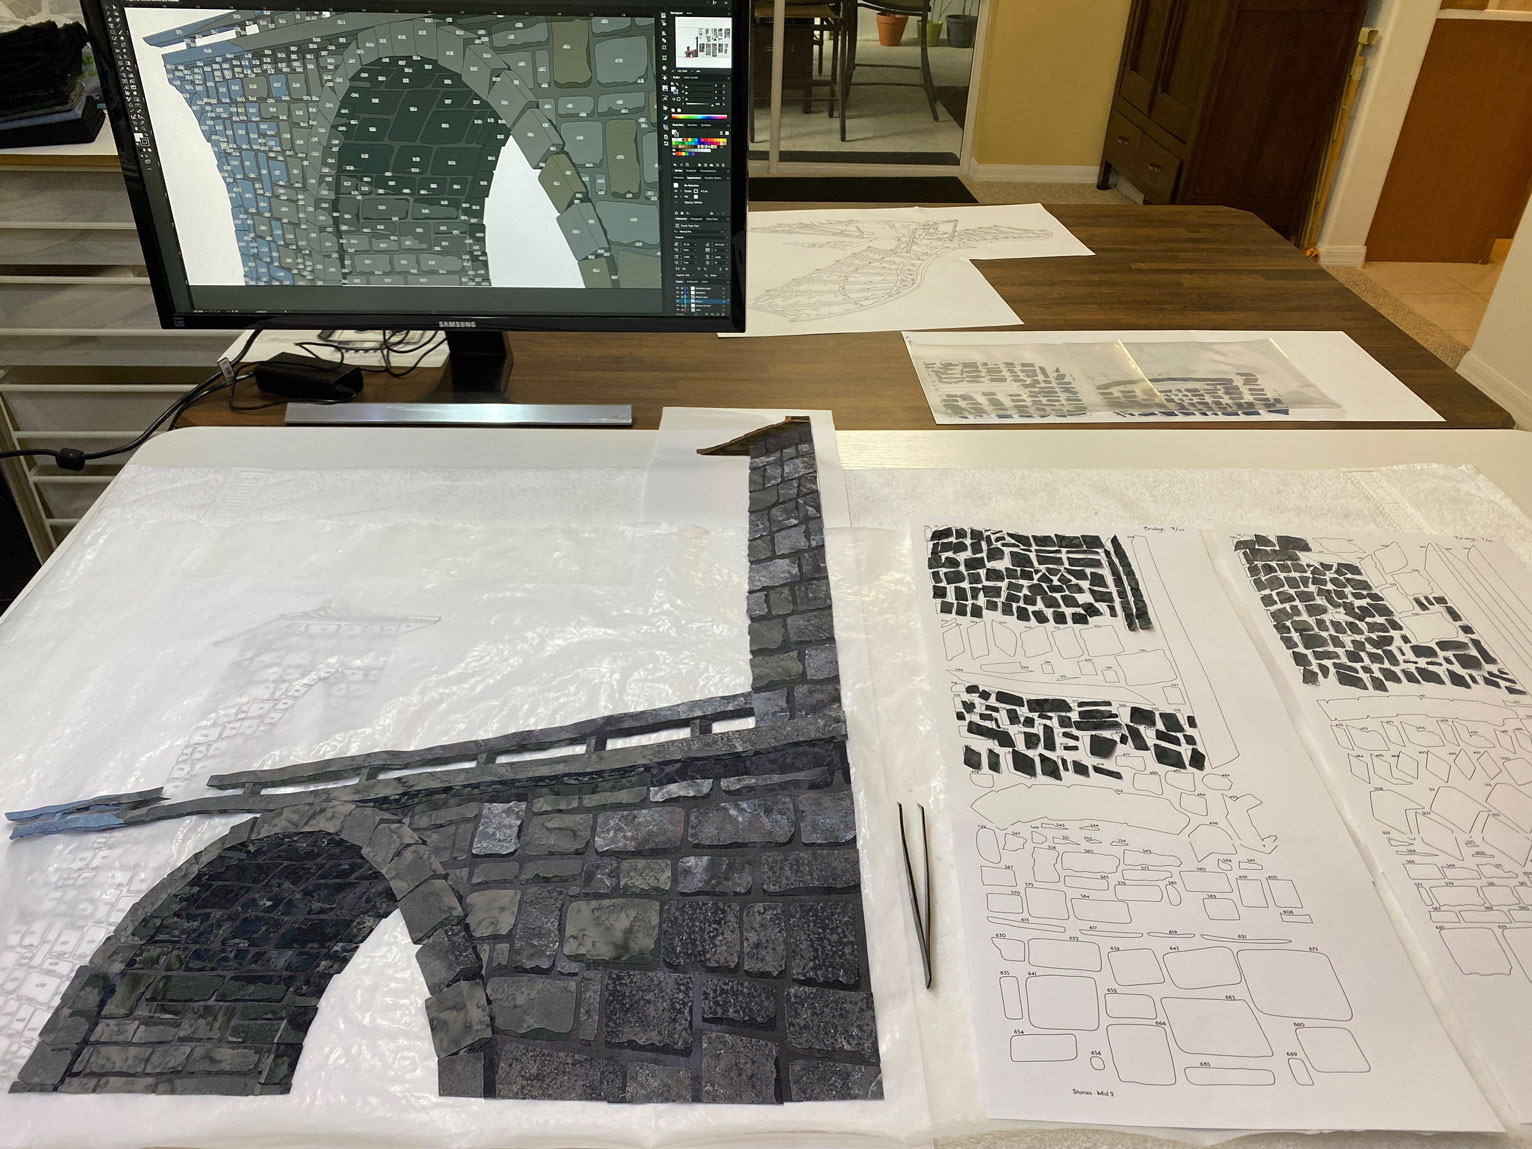
To assemble my quilt, I print a full-size copy of the template with all the numbers. That paper template goes under a Teflon sheet (that's the shiny surface in the photo below.) Then I just match the number of each piece to its location on the template and iron it in place.
In this photo, I've just started assembling the bridge. Look at all those pieces of fabric!
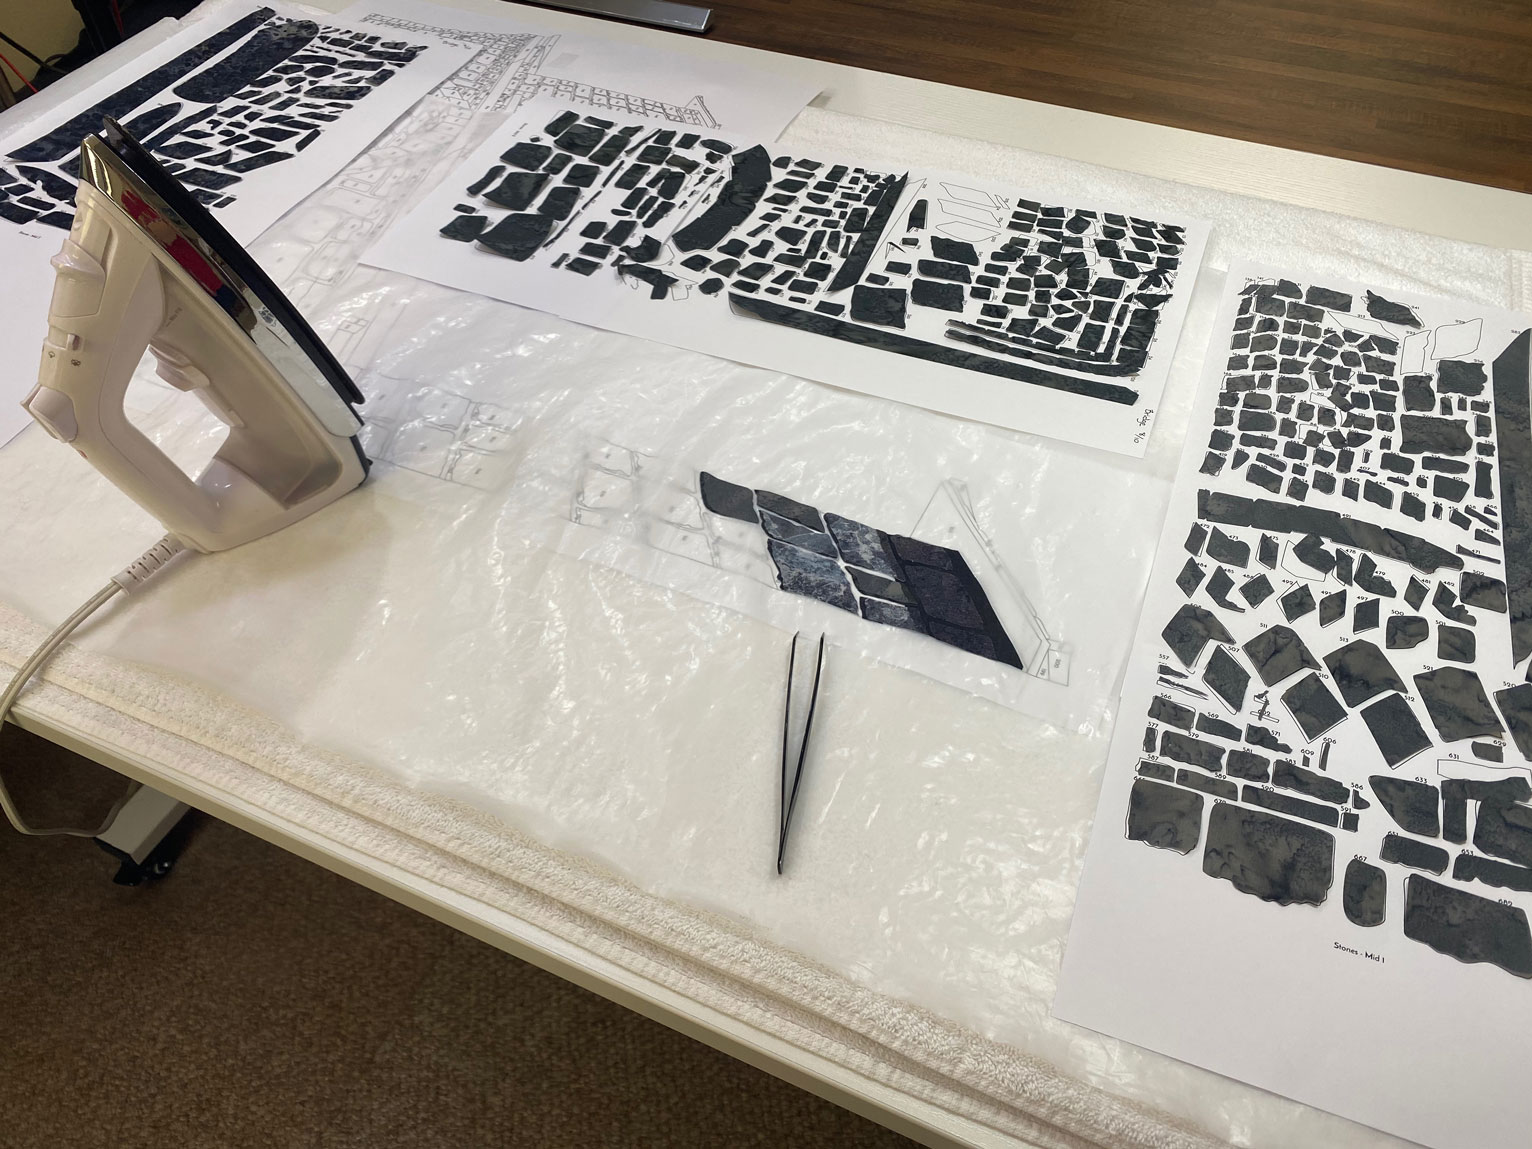
The iron melts the fusible on the back of each piece, causing it to stick to the other pieces. Once the glue dries, however, it can be peeled off of the Teflon sheet without any adverse effects.
Here's another photo showing the bridge much more complete.
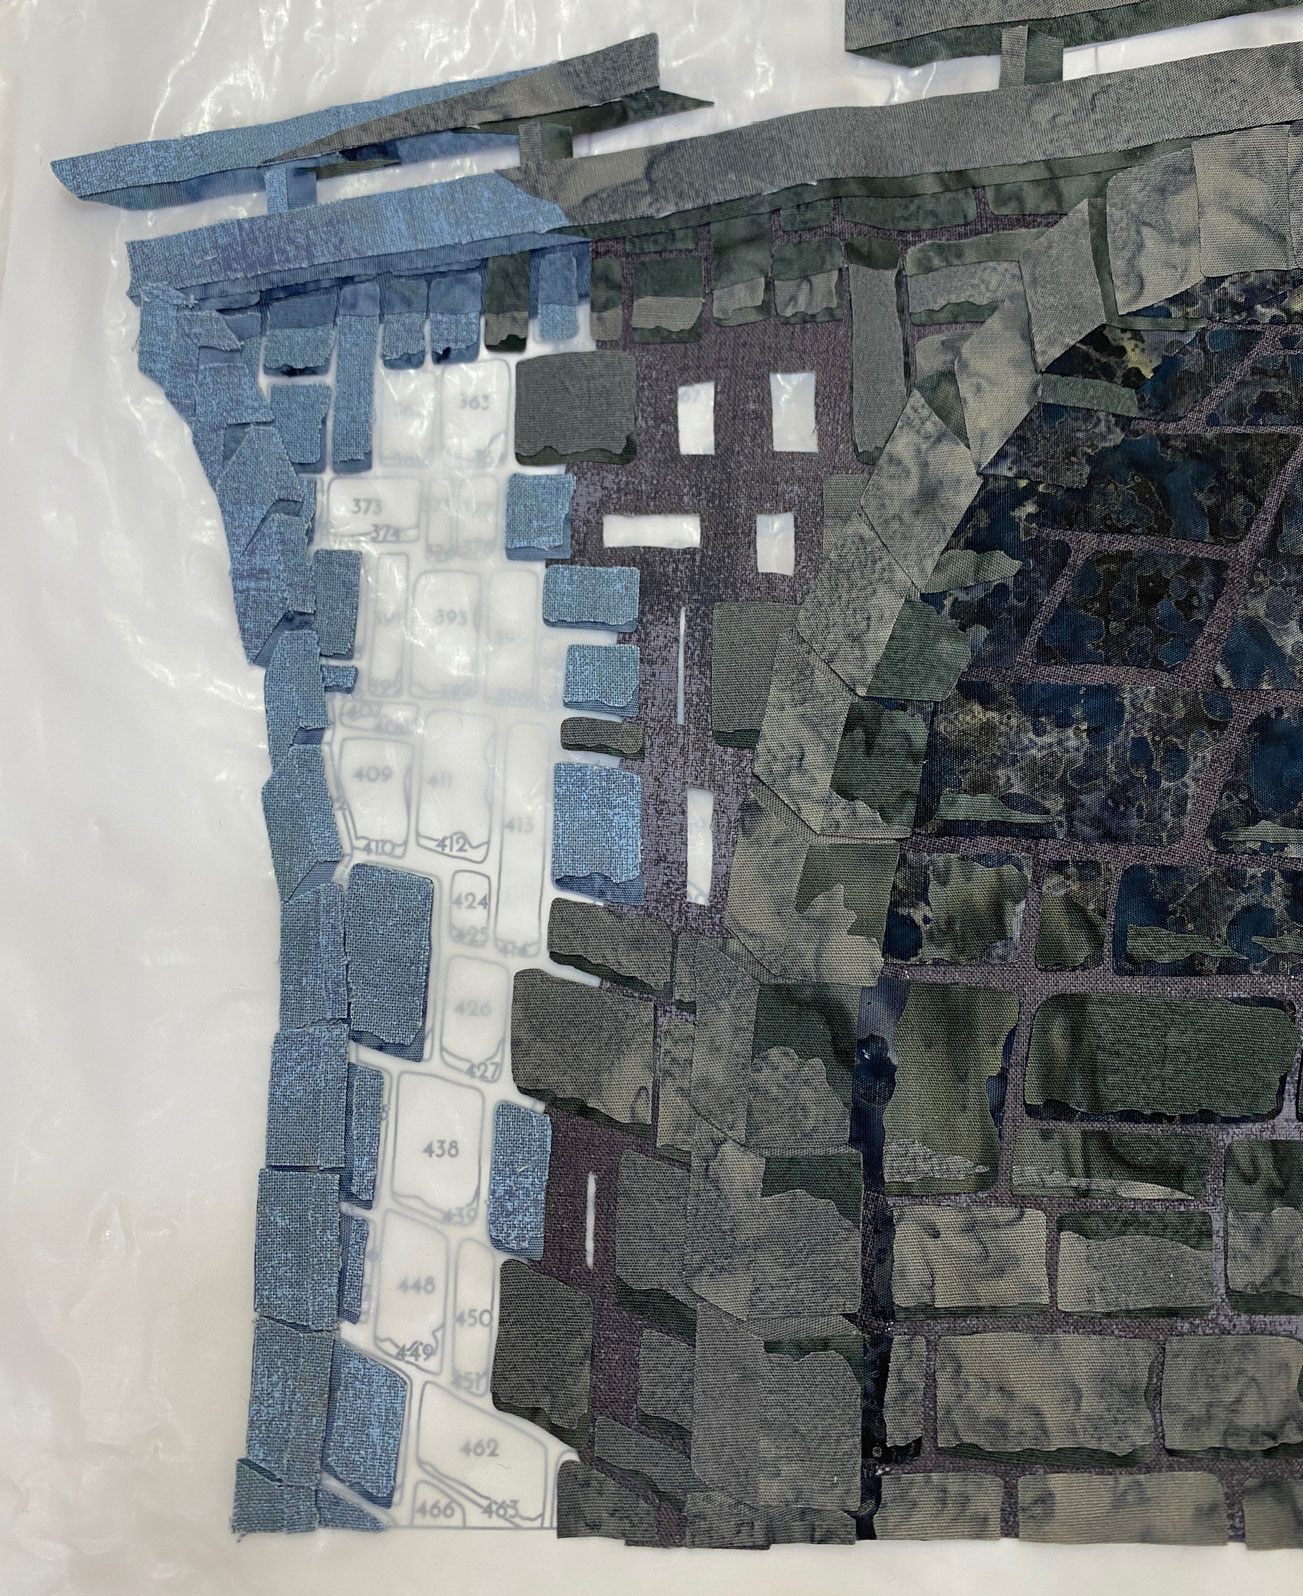
One last photo showing a close-up of the partially assembled bridge. The template with all the numbers is clearly visible under the Teflon sheet.
A Happy Accident
To quote Bob Ross, I had a "happy little accident" at this point in the quilt creation process which caused me to decide the sky looked better upside down. That's a whole conversation in and of itself, so I've put that story in a second blog post.
Time to Sew
All along I'd been planning what I wanted to do for the stitching. I even did a bit of practice sketching to plan how I wanted the sky to look:
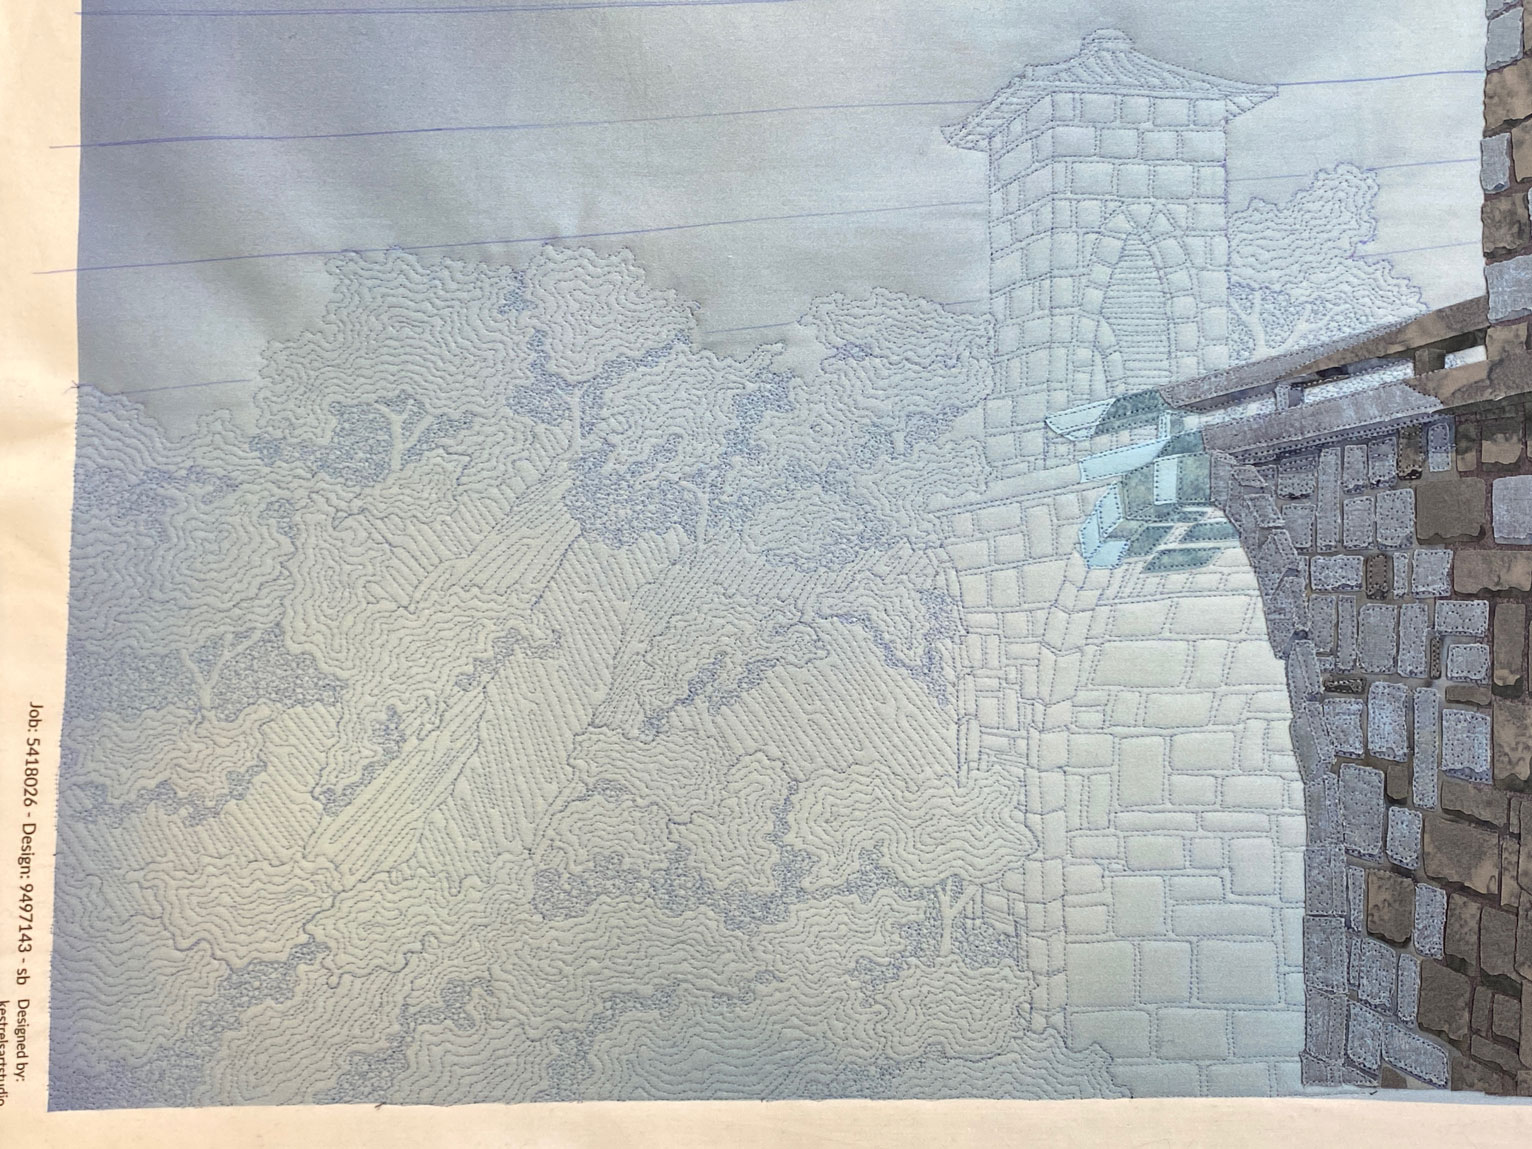
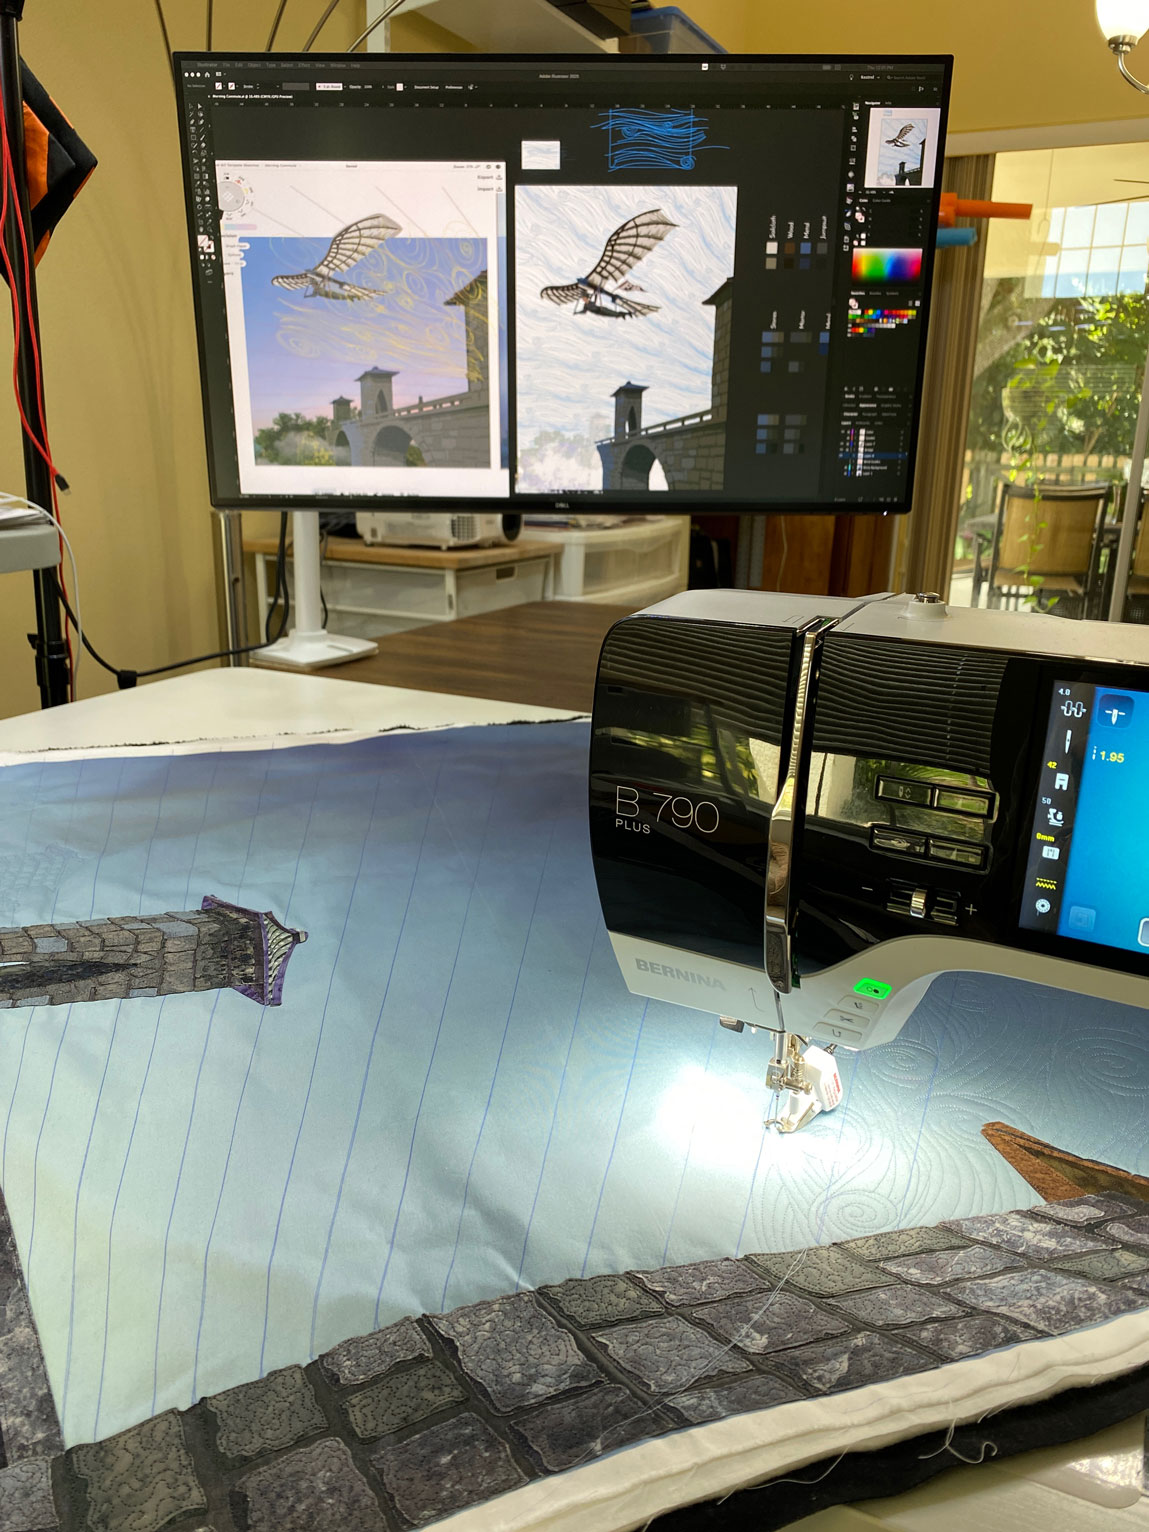
I also used my projector to project the design from my computer onto my quilt sandwich. Then I used heat erase pens to draw the bridge and trees in the lower left corner of the quilt to give myself a sewing guide.

Actually starting to sew was the scariest step of the entire process for me. I'd never before designed a picture where so much of the detail relied on stitching. It was terrifying, and I let this quilt sit on my tabletop for a solid week before I worked up the nerve to finally put needle to quilt.
I started in the bottom left corner:
From there, I sewed the sky. I started in the top right corner of the quilt and sewed each line of swirls, working my way gradually down to the bottom.
When the sky was done, I finished up by sewing the man and flying machine on top in raw-edge fashion.
All done!
Once the binding and hanging sleeve were added, this quilt was done!