Kestrel's Modified Hanging Sleeve
- Published:
- Length: 1611 words
- Reading Time: 9 minutes
If a quilt hangs on the wall, it gets a 4" sleeve. There are other methods of hanging, but all traditional quilt shows and SAQA shows require a standard 4" sleeve. Making sleeves comes with the territory of being an art quilter.
Unfortunately...the traditional hanging sleeve created a problem for me. I want my quilts to hang in quilt shows as well as traditional fine art and gallery shows, and fine art shows don't have the hanging systems that quilt shows use.
Quilt shows use a bar and frame method of hanging quilts. A bar is slid through the sleeve and attached to a frame on either side of the quilt. This is why a standard 4" sleeve is required. Fine art shows, on the other hand, hang artwork on nails — one nail per artwork. The only way to hang a quilt on 1 nail is to attach two eyehooks to a dowel or slat, slide the dowel or slat through the sleeve, and string picture hanging wire between the eyehooks. It works, but it doesn't look good — the wire is visible above the top of the quilt — and the wire has to be undone if the quilt goes back to a quilt show.
I needed a better method...and I came up with one. Now I'm sharing it with you, my lovely readers.
Keep reading for instructions on how to make modified quilt sleeves yourself. At the very bottom of the post I've provided a download link to a PDF with all of these instructions for easy printing.
Kestrel's Modified Hanging Sleeve
In a nutshell, I created a way of cutting a hole in the center of my hanging sleeves and use a D-hook on a dowel rod to hang my quilts. It looks like this:
Here's a photo of Link hanging on my living room wall. I modified the sleeve on this quilt like the photo above.
My quilts with modified hanging sleeves have hung at museums, galleries, art centers, and international quilt shows with no issues. Some of these venues include:
- Schweinfurth Art Center
- Foosaner Art Museum
- Fifth Avenue Gallery
- AQS QuiltWeek in Daytona
- SAQA's Aloft, a travelling exhibition
- International Quilt Festival in Houston
How to make Kestrel's Modified Hanging Sleeve
These instructions are written for the complete process of making a hanging sleeve, from cutting the fabric to blind-stitching it on the quilt.
Step 1 - Determine size of hanging sleeve fabric and cut
Measure the width of your quilt.
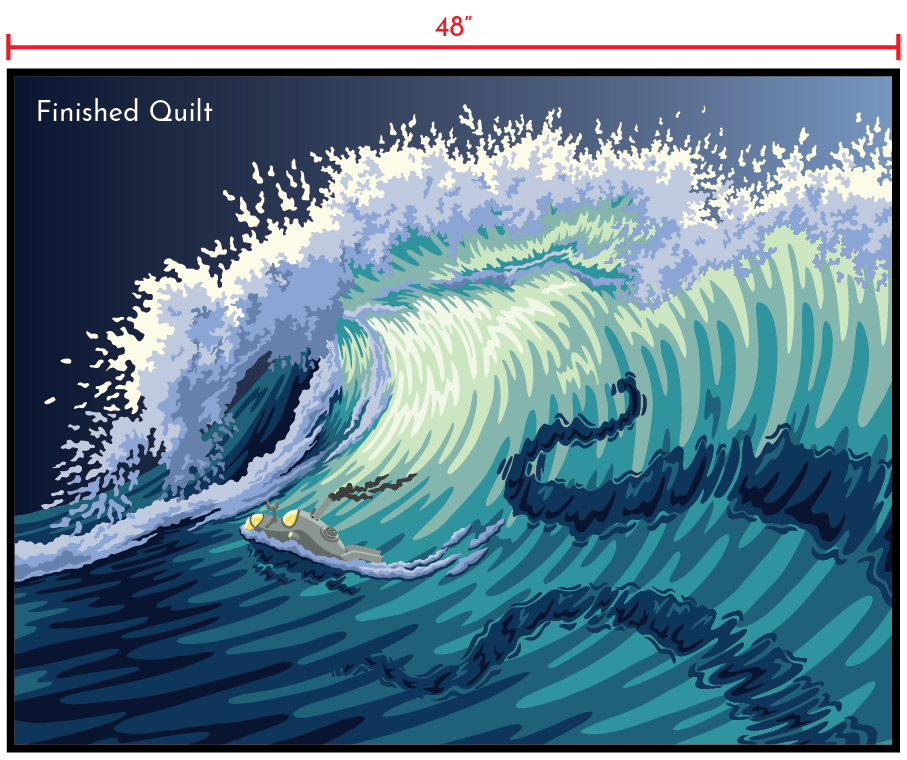
The width of the hanging sleeve fabric is one inch less than the width of the quilt. The height of the hanging sleeve fabric is always 9.5" to make a standard 4" hanging sleeve.
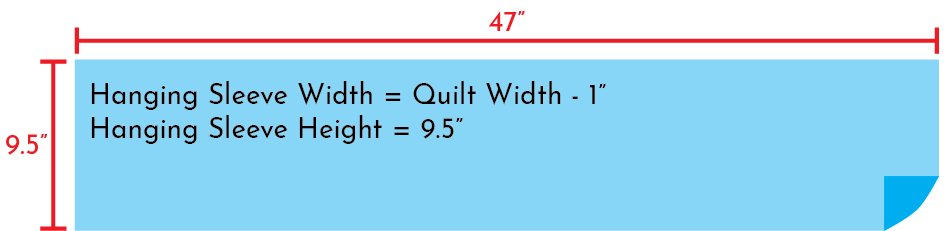
Cut your hanging sleeve fabric. At the end of this step you should have a long, skinny rectangle of fabric ready to sew. Make sure the back of the fabric is facing up.
Step 2 - Mark a hole for hanging
Use a ruler to find the center of the hanging sleeve fabric.
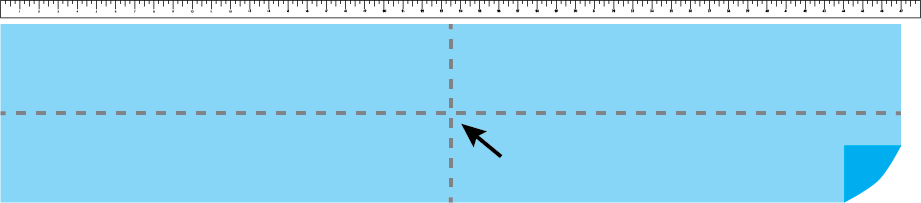
Set a standard 14oz can on the fabric. The can should be centered horizontally in the top half of the fabric. The bottom edge of the can should touch the centerpoint of the fabric.

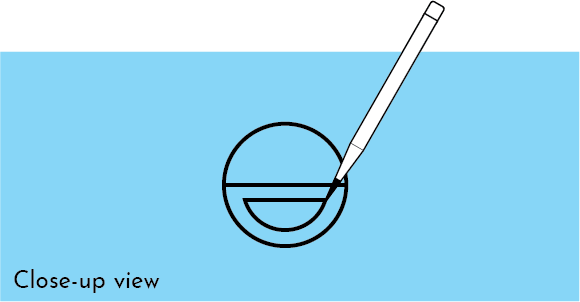
Use your preferred fabric marking pen or tool to trace the bottom of the can onto the fabric.

Remove the can. You should now see an approximately 3" diameter circle on the fabric.

Use a ruler and the marking pen to draw a line horizontally through the center of the circle.

Step 3 - Cut hole and finish edges
Draw a second semi-circle 1/2" inside the first with the marking pen. The new semi-circle should be inside the lower half of the original circle.
Use the marking pen to draw the additional six lines, as shown in red in the diagram below.
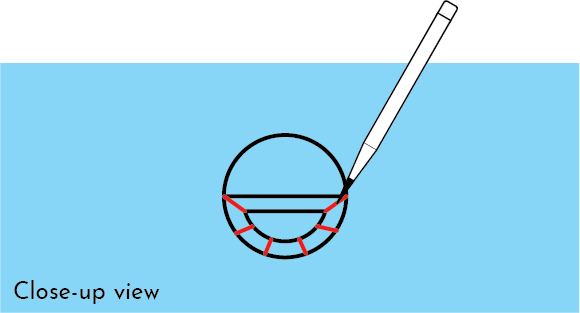
Use scissors to cut and remove the inner semi-circle of fabric, shown in red in the diagram below.
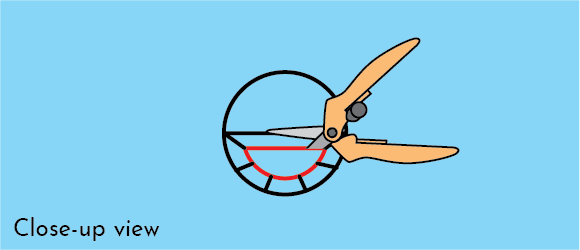
Use scissors to slice the six extra lines, indicated in red in the diagram below. This will create six tabs: one long one along the top of the semicircle and five smaller ones along the curved edge. DO NOT cut past the outer circle.
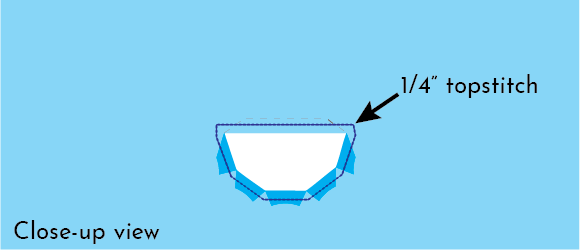
Fold the five bottom tabs back and iron them in place. DO NOT fold the top tab.
Flip the fabric over so the front is now facing up. It should now look like this.

Fold the top tab up and iron it in place.
Flip the fabric so the back is now facing up. It should look like this.

Sew a 1/4" topstitch around the outside of the opening to finish the edges and hold the tabs in place.
Step 4 - Finish the sleeve
Fold the left edge over 1/2" and sew a 1/4" topstitch. Repeat on the right edge.
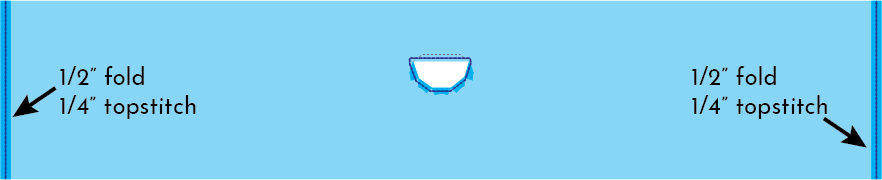
Fold the long sides together, right side out, and sew a 1/4" seam.

Fold the sleeve so the long tab is along the top edge. The seam running the full length of the sleeve will be partway down. Iron the sleeve to crease the top and press the long seam open. DO NOT press the bottom edge of the sleeve.
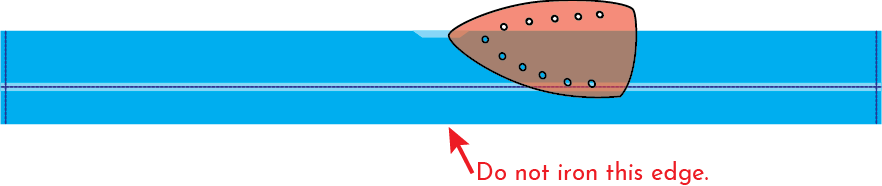
Adjust the sleeve so 1/2" of the sleeve extends above the top crease. There should be about 4" between the top crease and the new fold along the bottom. Iron to crease the bottom fold. DO NOT iron the top of the sleeve.
Step 5 - Attach sleeve to quilt
Align sleeve to back of quilt. Sleeve should have 1" clearance on left, top, and right sides.

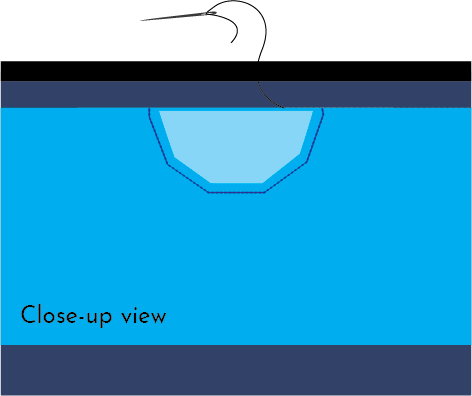
Fuse or pin the sleeve to the quilt. Blindstitch along the outside edge to secure it in place.
Step 6 - Cut and prepare dowel for hanging
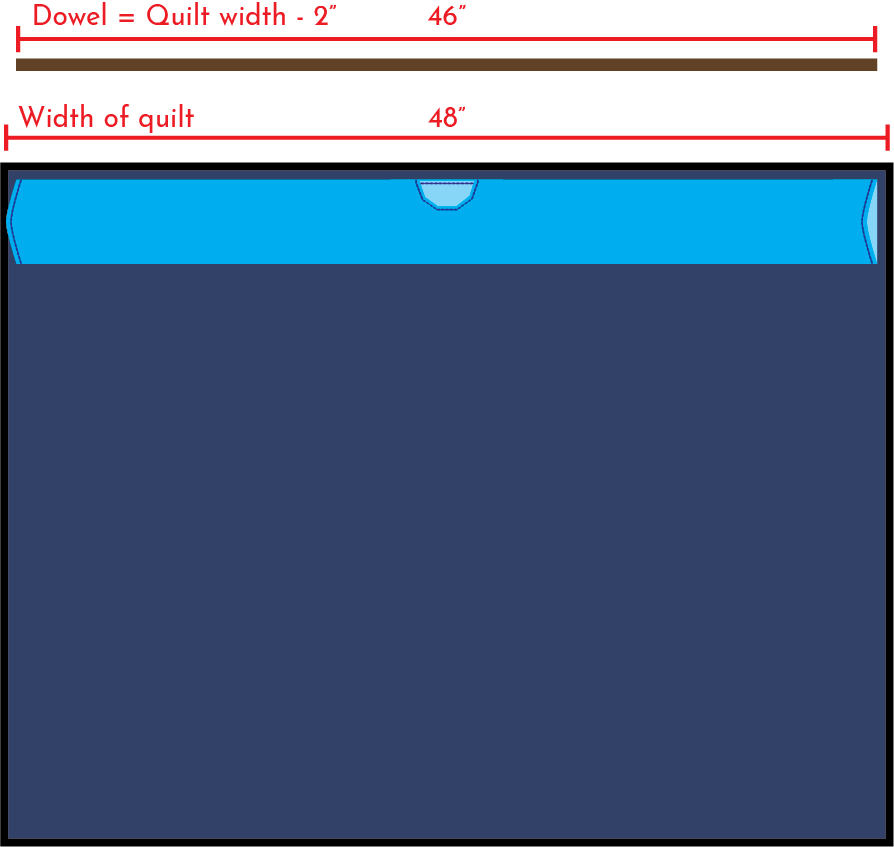
Choose a dowel rod appropriate for the width of your quilt. Wider quilts require a thicker dowel to stay straight. Below are the three sizes I use. For the 48" quilt used as the example in these instructions, I used a 3/4" dowel.
Cut the dowel to two inches shorter than the width of the quilt, which should match the width of the sleeve.
Use a ruler to find the center of the cut dowel. Mark the centerpoint.

Attach a D-hook to the dowel at the marked centerpoint. Drill a hole for the screw to avoid splitting the wood.
I've included a large view of a D-hook below. A screw will be included with it. Only use a D-hook that has 1 screw hole. The kind with 2 holes are difficult to attach to dowel rods.

Slide the dowel into the quilt sleeve. The D-hook should face out.

Your quilt is now ready to hang. Yay! You may need to shift the quilt slightly left or right on the dowel to ensure it hangs level.
Instruction PDF
I've prepared a PDF with the instructions from this post. Please use and share it freely.
Kestrel's Modified Hanging Sleeve Instructions
The PDF allows high-resolution printing but no copying or modification to protect my intellectual property. Thank you for understanding.
