Designing Overlap in Illustrator
- Published:
- Length: 964 words
- Reading Time: 5 minutes
I was recently asked to explain how I make individual pieces in Illustrator. How do I go from this:
To this:
To this:
All of my appliqué fabric pieces overlap, which is why I'm able to fuse them together. But where does the overlap come from? Is there a tool or a filter that creates it?
The short answer
Simply put, there is no tool, filter, or "quick fix" to creating overlap in my designs. Each solid-filled area in my templates will be one piece of fabric when cut. I manually draw overlap for every individual piece of fabric in every quilt. If a design has 1508 pieces in it, each and every one of those 1508 pieces gets personalized attention. Let me explain in more detail below.
Note: I use Adobe Illustrator to create all of my templates. In the description below, I will bold the names of tools, features, and terminology specific to Illustrator (tool and feature names will be capitalized). Most of these tools are available but called a different name in other vector software, such as Affinity Designer, CorelDraw, or InkScape.
The long answer
I'll use Steampunk Pup, the quilt I donated to the SAQA Benefit Auction this year, as an example.
As you can see, this quilt is finished. Now I'm going to show some screenshots taken during the design of this quilt. We're going to "step back in time", so-to-speak, for me to better explain how I get the end result.
This is a close-up of the digital template for Steampunk Pup, taken well before I was ready to start cutting fabric:
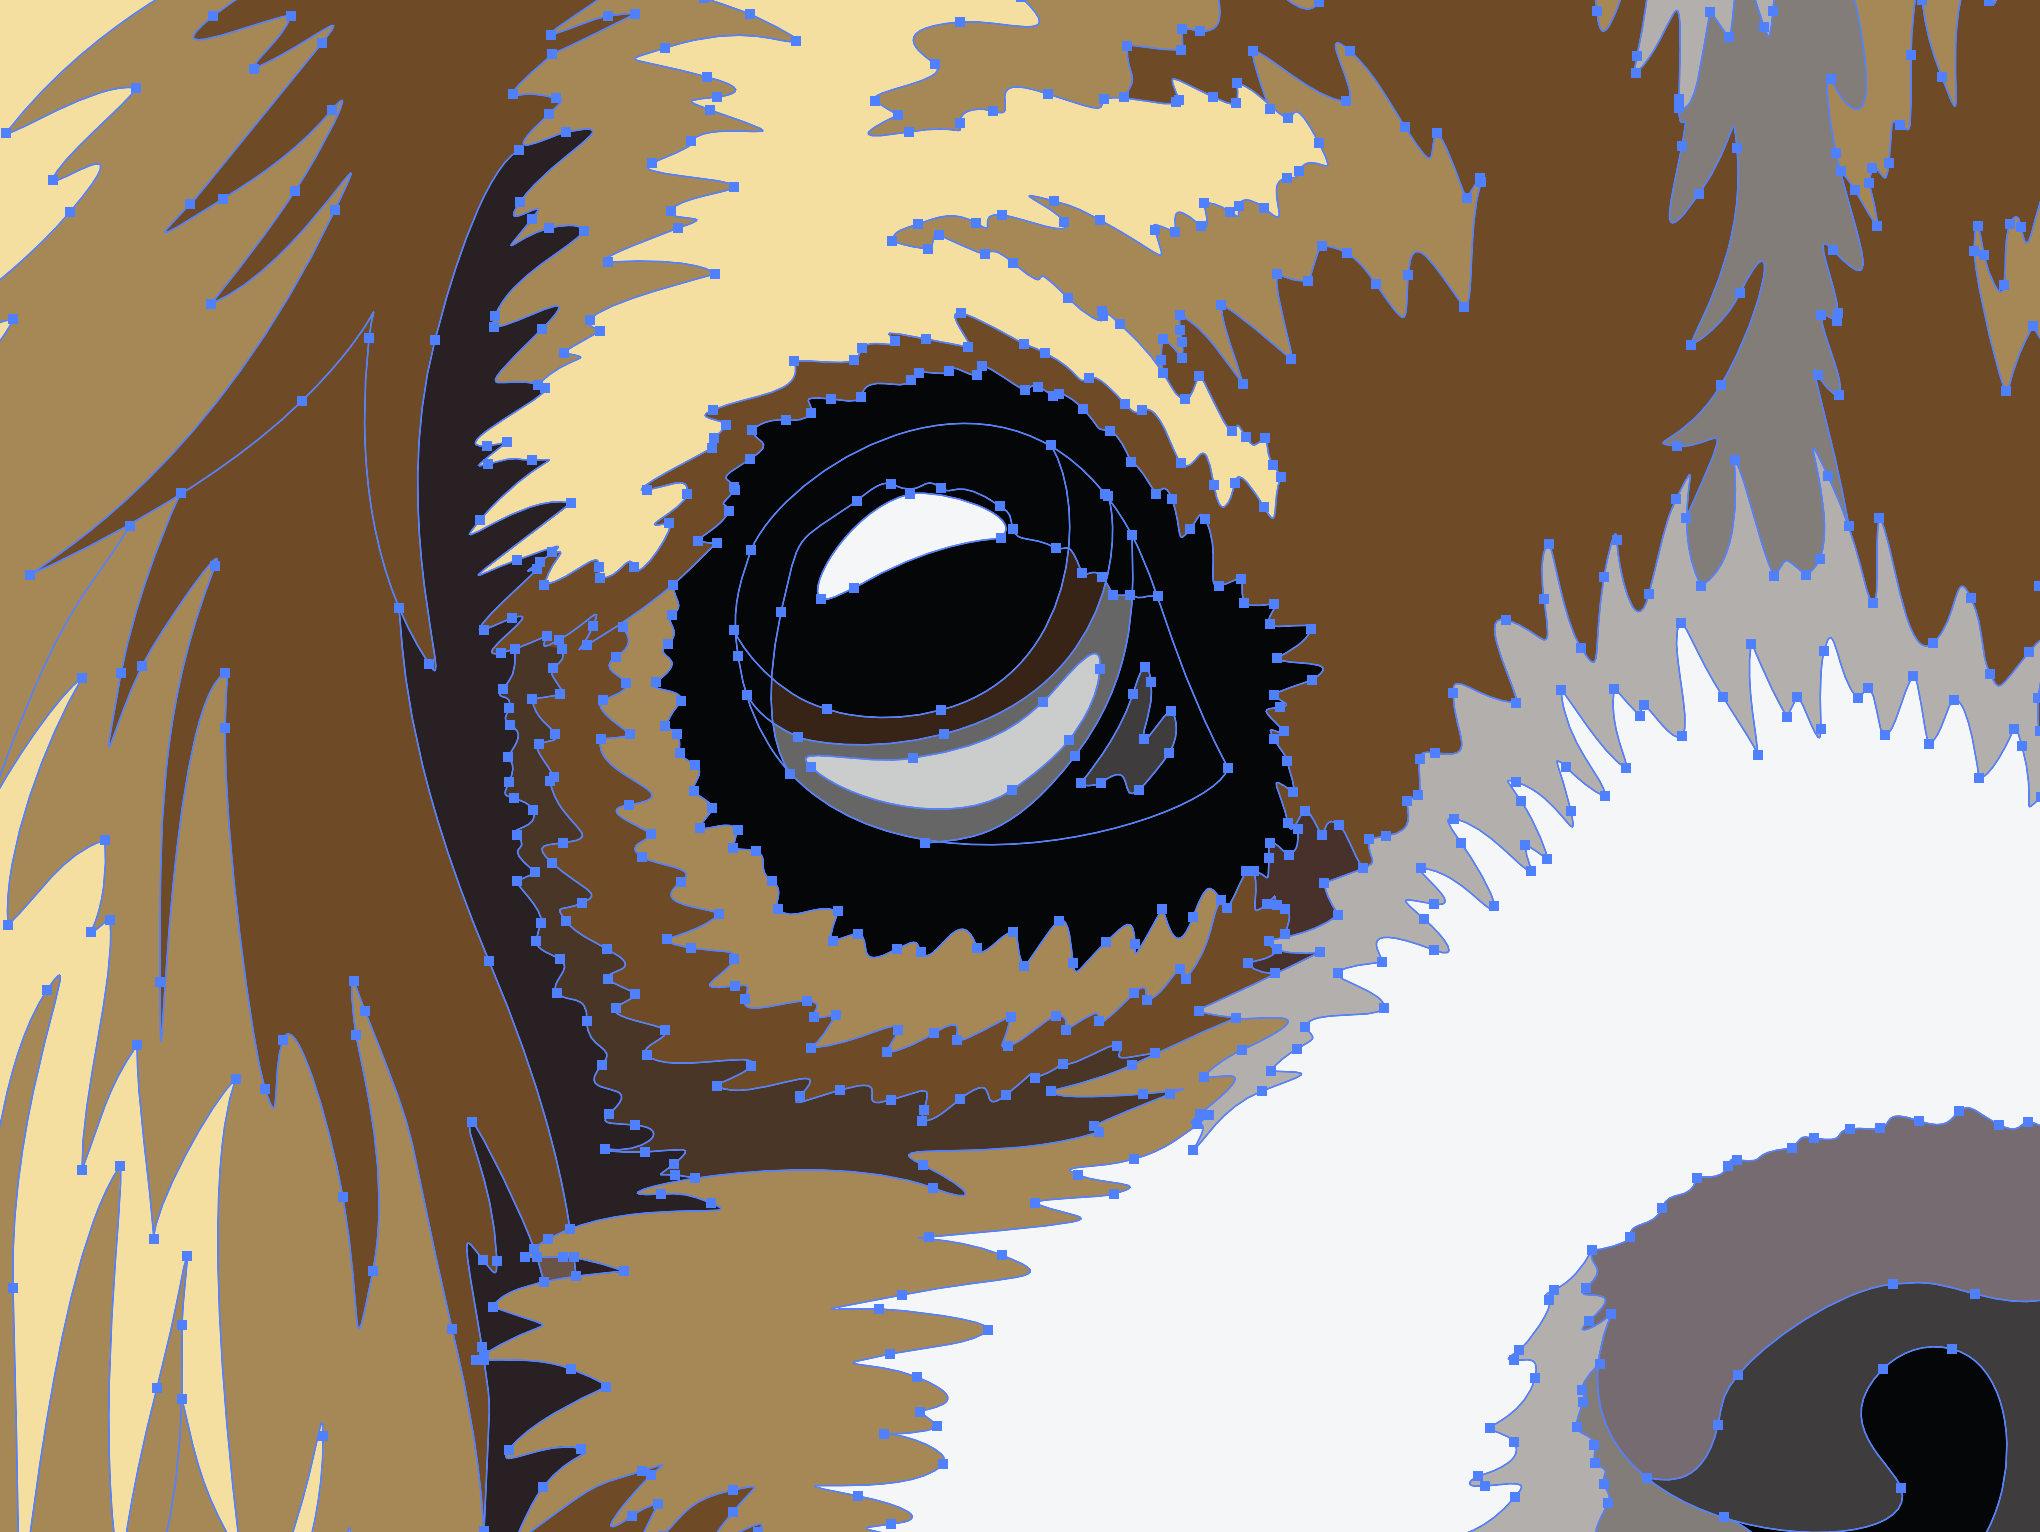
At this stage of the design process I've drawn my picture, imported it into Adobe Illustrator, and used a Live Paint Group to fill in color to the drawing. The Live Paint feature is a very fast way of adding color to a line drawing.
The blue lines and points (the small blue squares along the lines) indicate the edges and corners of each piece. (Remember, each filled, ie. colored, area in this drawing will be one cut piece of fabric in the quilt.) Right now, all the pieces perfectly line up against each other. There is no overlap, yet.
Next, I go through the entire picture and work on each piece individually to add overlap. I'll either move the points or draw a new line where I want the overlap to be and connect it to the piece, using a Wacom tablet. My rule-of-thumb is lights go on top of darks, with a few exceptions, but this generally means my dark pieces have far more overlap than the lighter pieces.
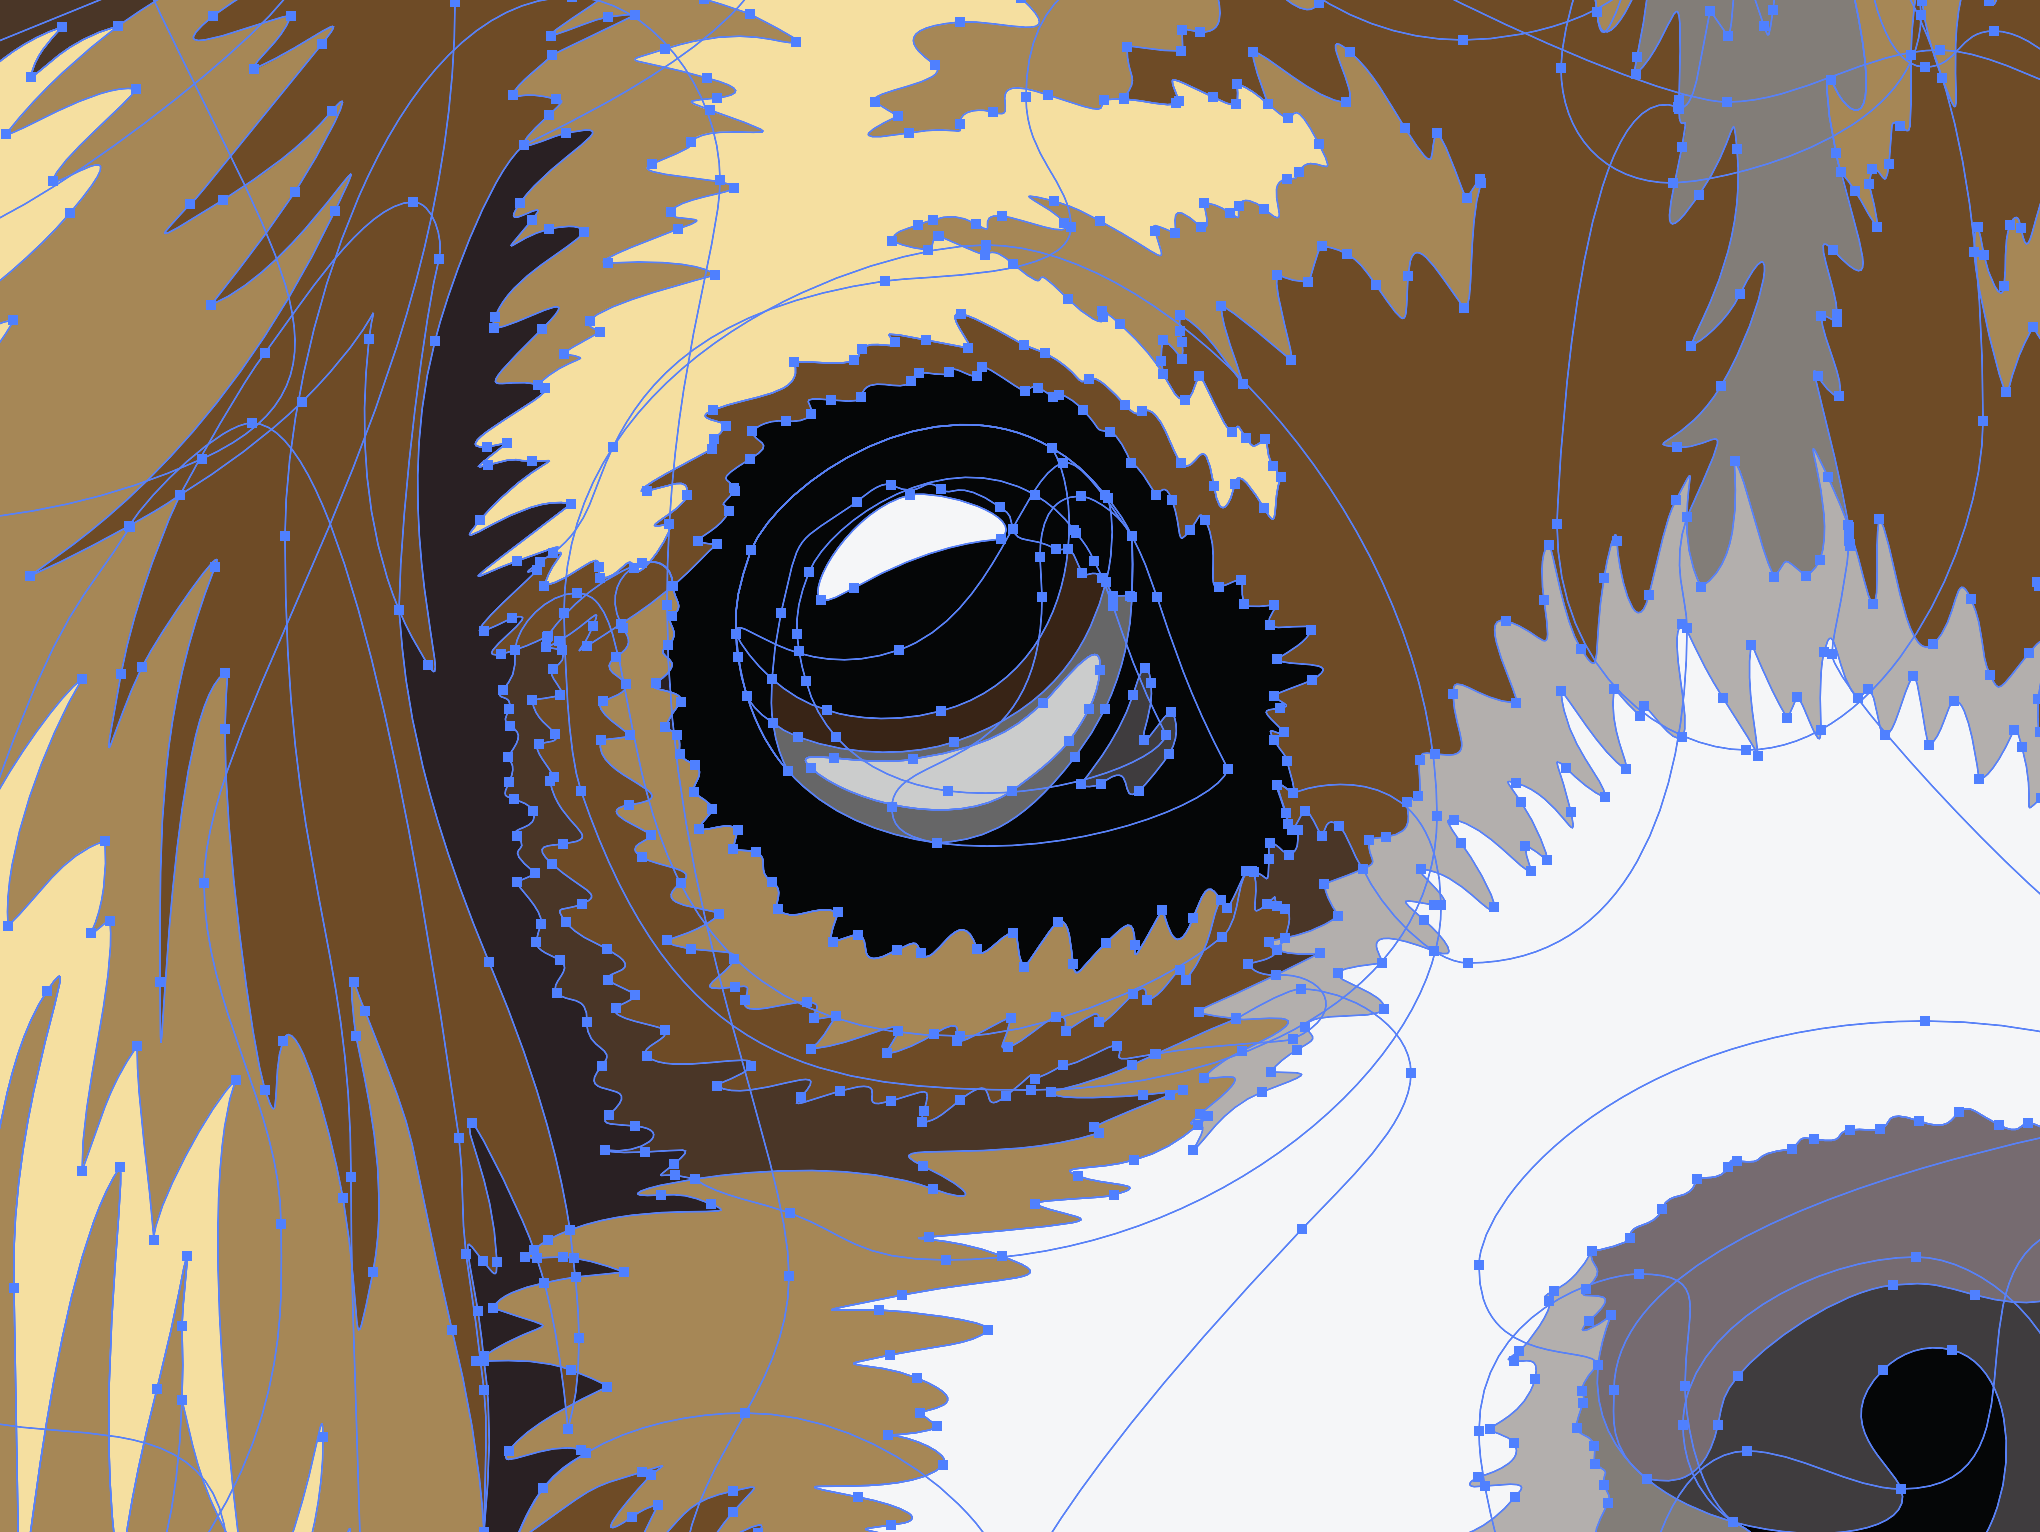
The colors of the dog haven't changed, but now there are blue lines and points all over the place. The blue lines are showing the edges of each piece, which now have overlap.
Look at the blue lines that cut through the white area on the dog's muzzle. Those lines indicate other pieces extending underneath the white.
At this point, all of my overlap is created, but my work is not quite finished. I need to rearrange the pieces so they can be cut by my Cricut.
To cut on my Cricut, I arrange the pieces by color on artboards (ie. pages) that match the size of a sticky cutting mat. (Actually, the cutting area on a sticky mat is 11.5" x 23.5". My artboards are usually 10.5" x 23.5" because I have to print them on paper, too. The 10.5" width fits easily on standard tabloid and letter paper.)
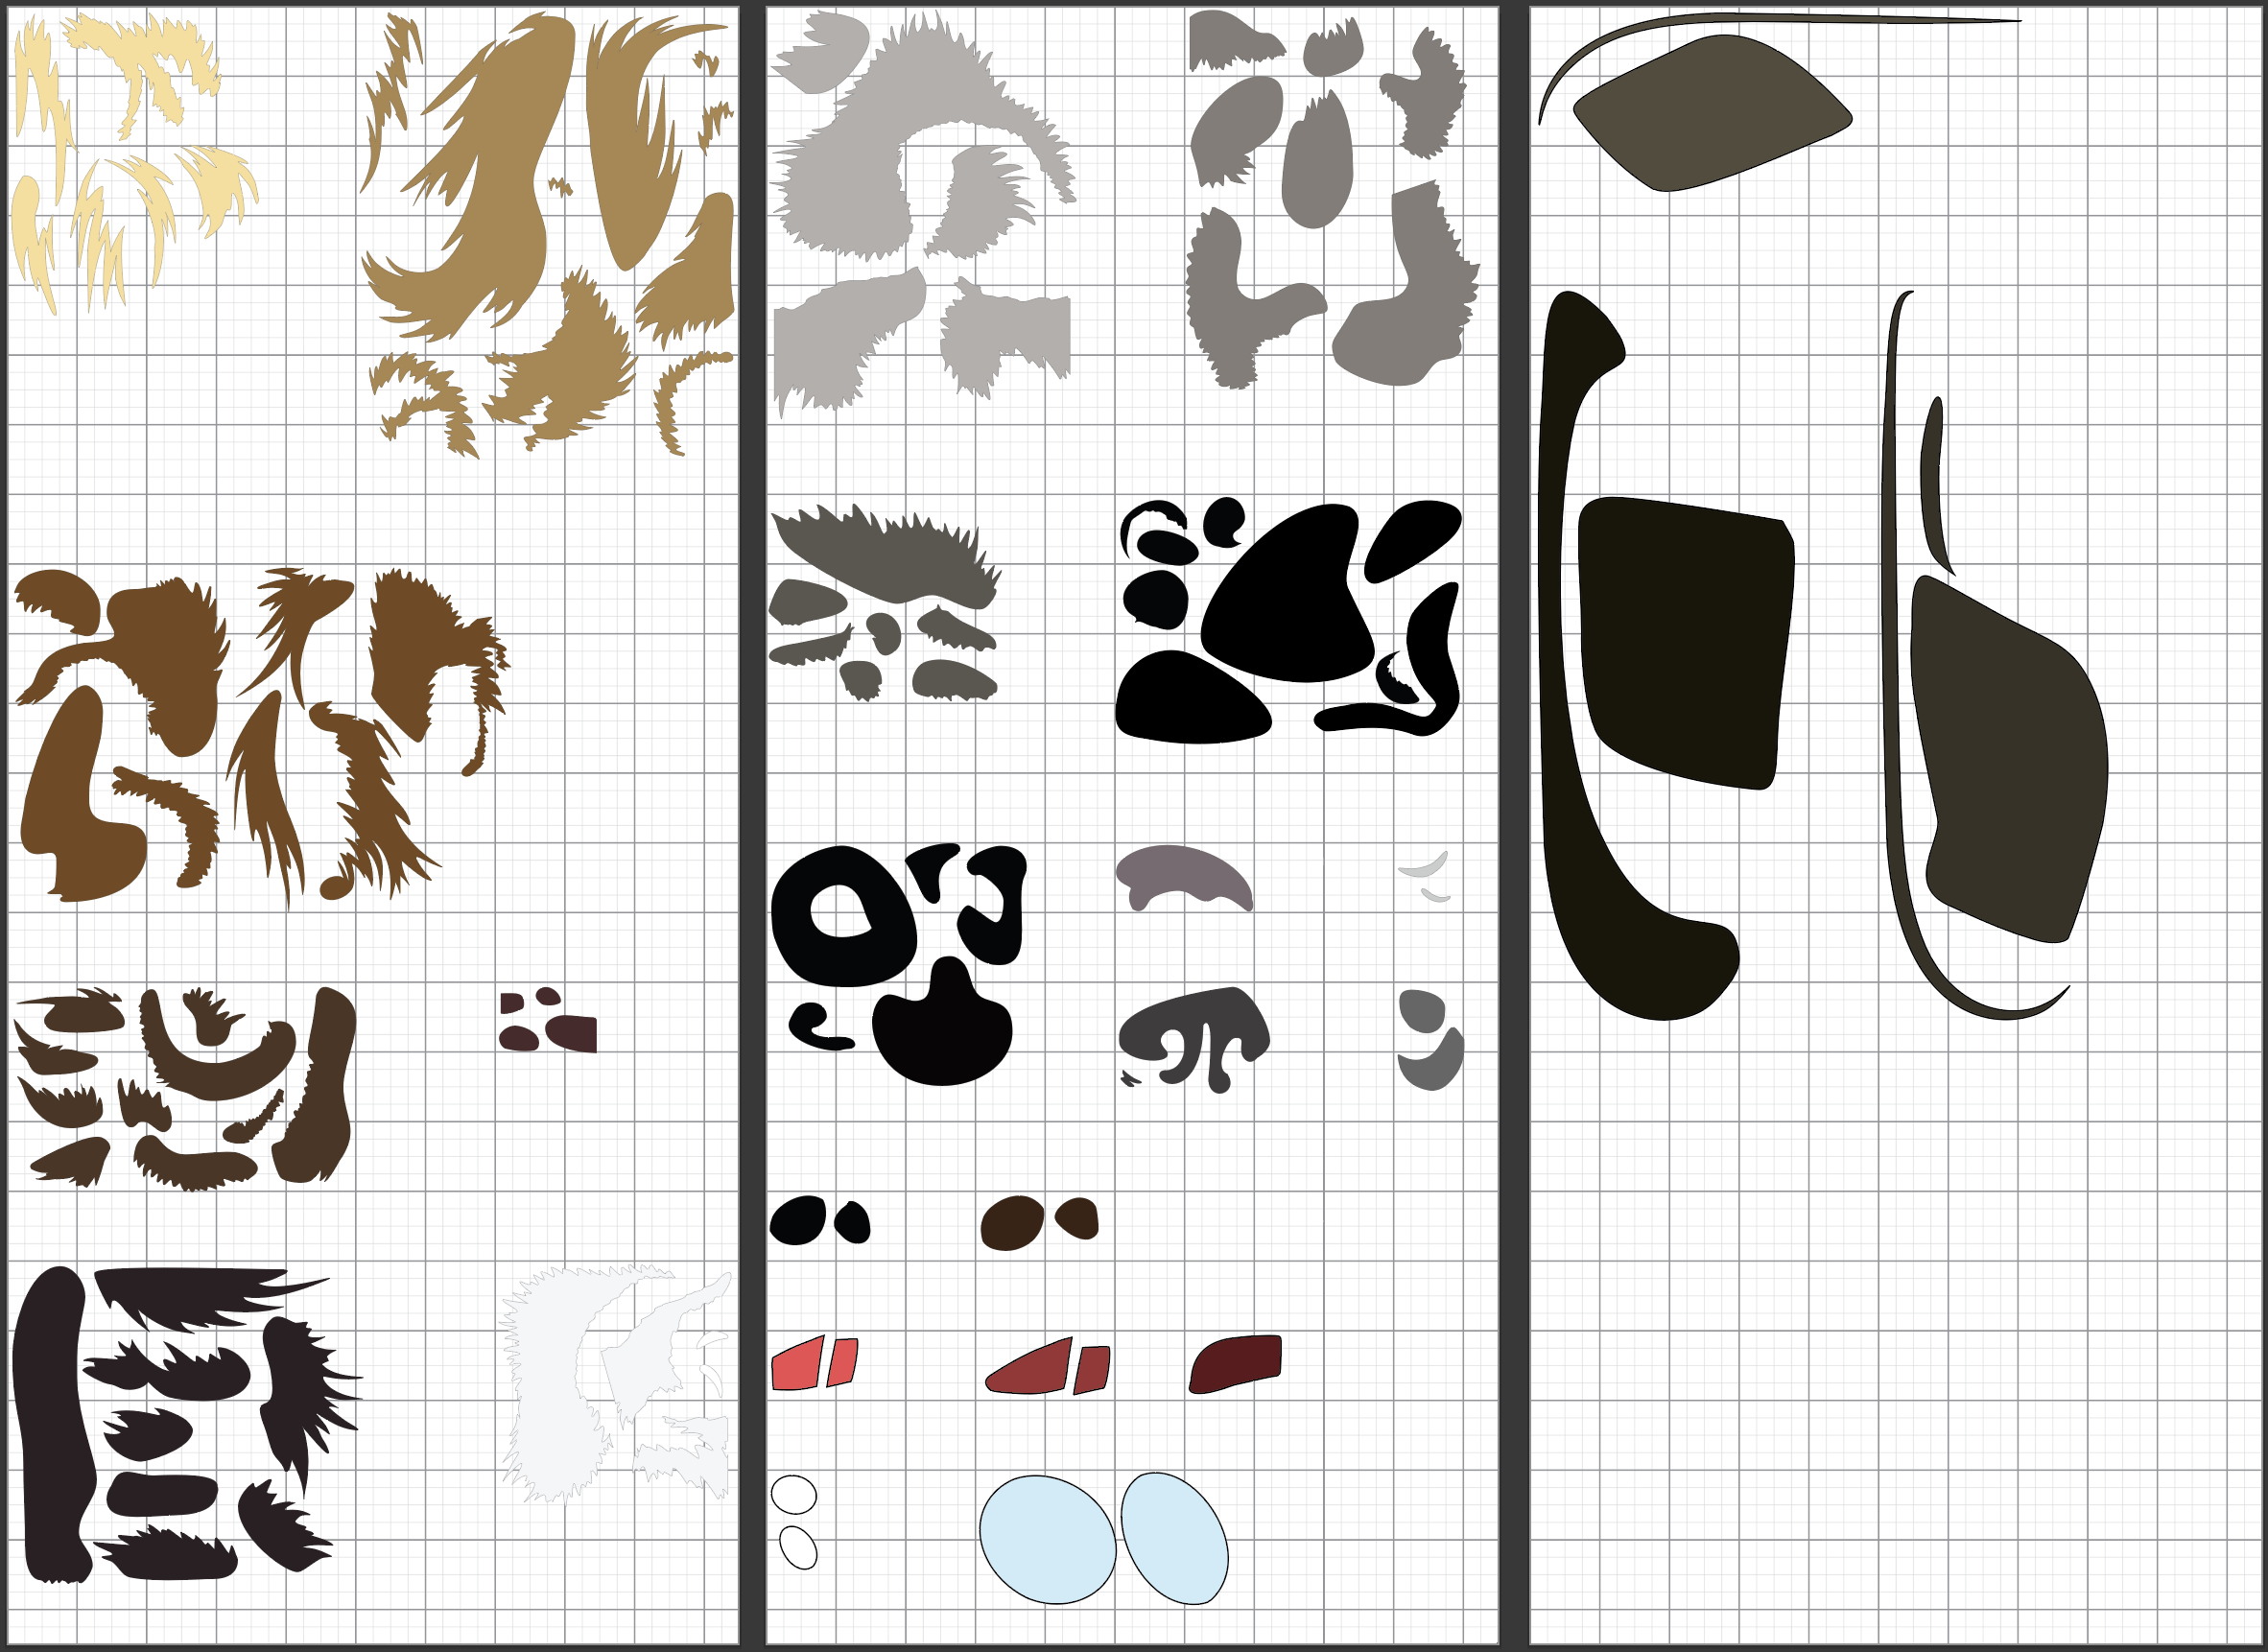
The above picture is a screenshot showing the dog's fur, nose, eyes, and parts of the hat and goggles arranged on Cricut-sized artboards. These artboards are what I export as SVGs and upload to the Cricut software for cutting.
The reason I print these artboards on paper is so I can see each piece's number and so I have somewhere to store the fabric pieces until I can assemble the quilt. I turned the number layer off in the above photos so it wouldn't be confusing, but at the same time I add overlap to each piece, I assign a number to each piece:
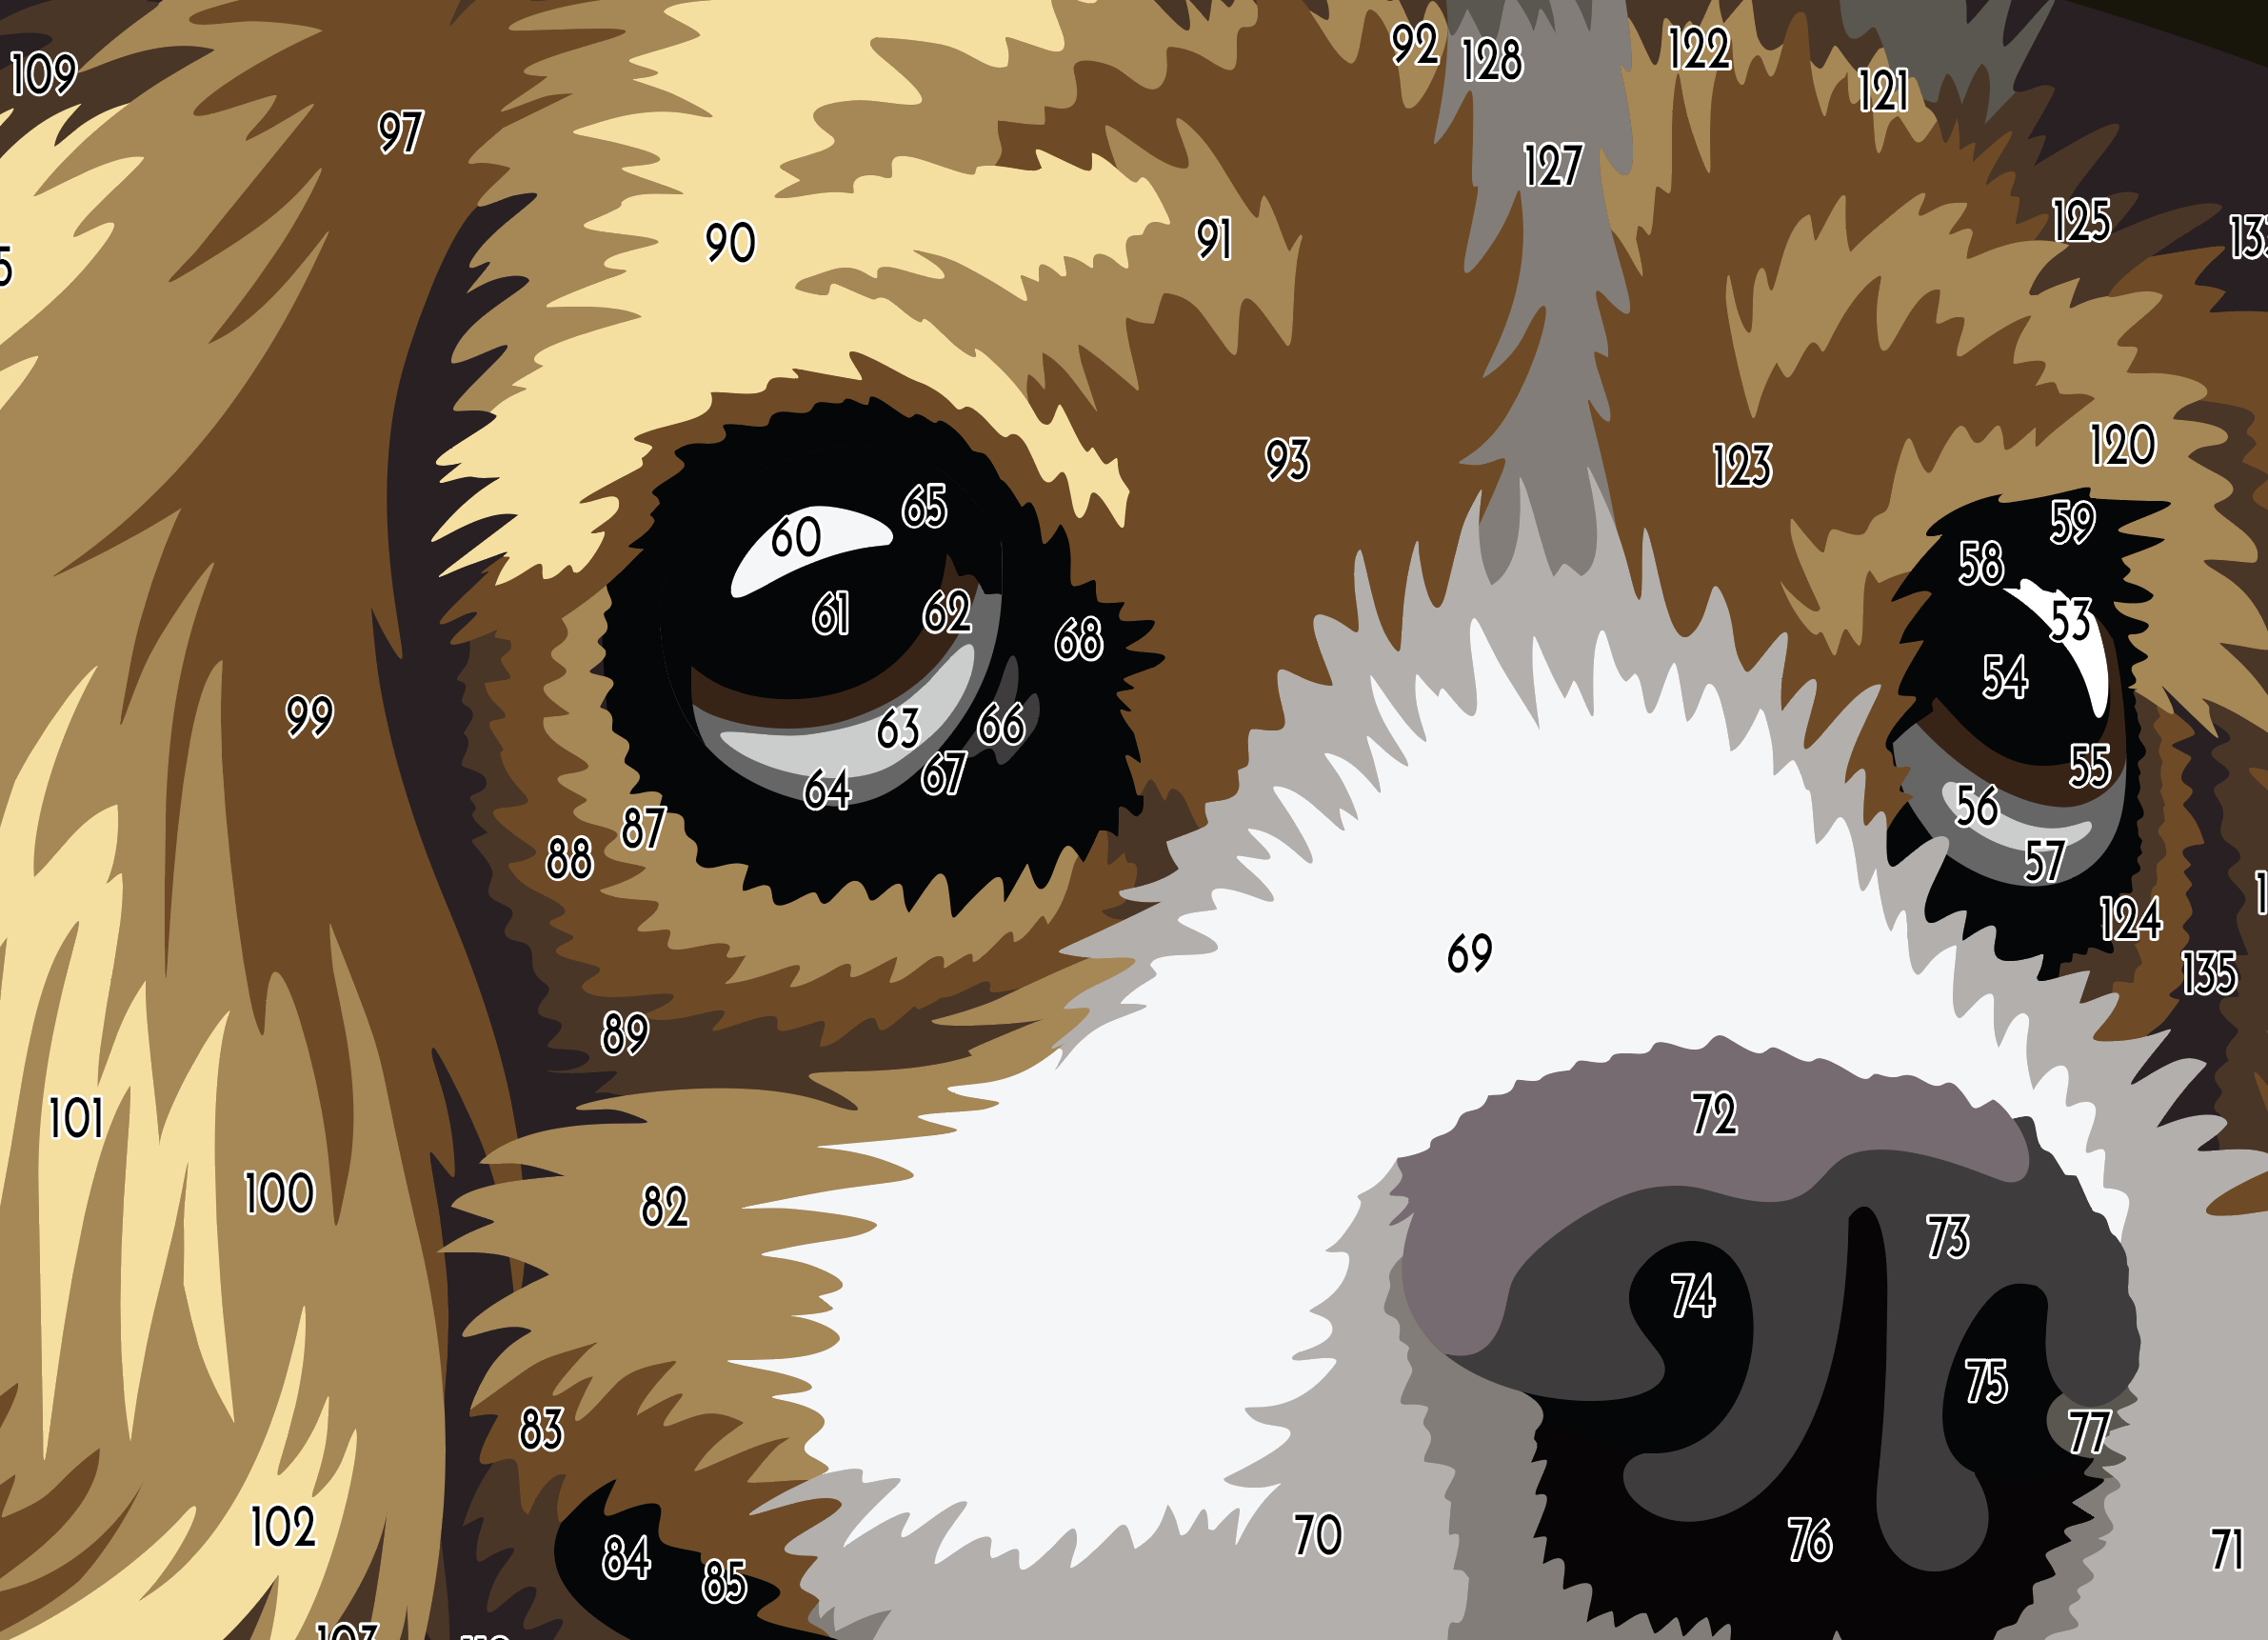
Each piece's number is printed next to it on the paper. After the fabric pieces are cut, I transfer them to the printed page (I call the printed pages "Number Match Sheets") so I know what its number is.
To assemble the quilt after all the fabric is cut, I print a full-size, black-and-white template with the numbers to act as my guide. That template goes under the clear teflon sheet, and I match the cut pieces of fabric to their spots on the template by matching the numbers. This quick video shows how I assembled Steampunk Pup:
