How to Make Continuous Bias Tape
- Published:
- Length: 886 words
- Reading Time: 5 minutes
Knowing how to make my own continuous bias tape out of a single square of fabric is wonderful when it comes to finishing my quilt edges. The process is quick and easy (it requires sewing just 2 seams), efficient (it uses less fabric than traditional methods), and can produce as much length as needed for any quilt size. This post is all about sharing the step-by-step technique.
Note that this post is the first of three posts about bias tape. It turns out I have a love-hate relationship with the stuff, or at least the traditional methods of calculating it. I explain why the traditional formula is unreliable here.
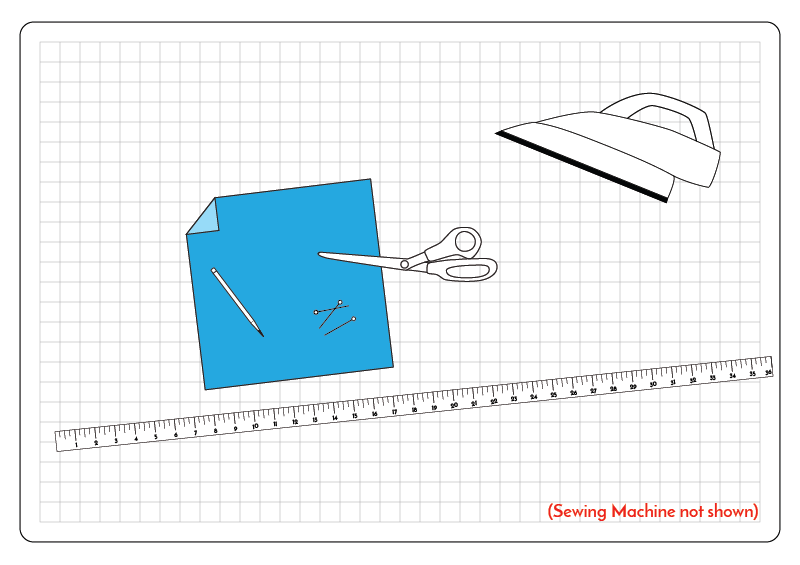
Supplies
To make your own continuous bias tape, you will need:
- Scissors
- Sewing Machine
- Your preferred fabric-marking pen or pencil
- An Iron
- Pins
- Straight edge & 1" gridded surface
- A square of fabric (see chart below)
How much fabric?
The size of fabric square depends on the length and width of the bias tape you need. First, figure out how much bias tape you need by measuring the perimeter of your quilt and adding 10. (The extra 10 will give you some wiggle room to make sure you don't end up with a seam on a corner, as well as provide enough scrap to connect the two ends when finishing your quilt.) Assuming you have a rectangular quilt, your bias tape length calculation should look something like this:
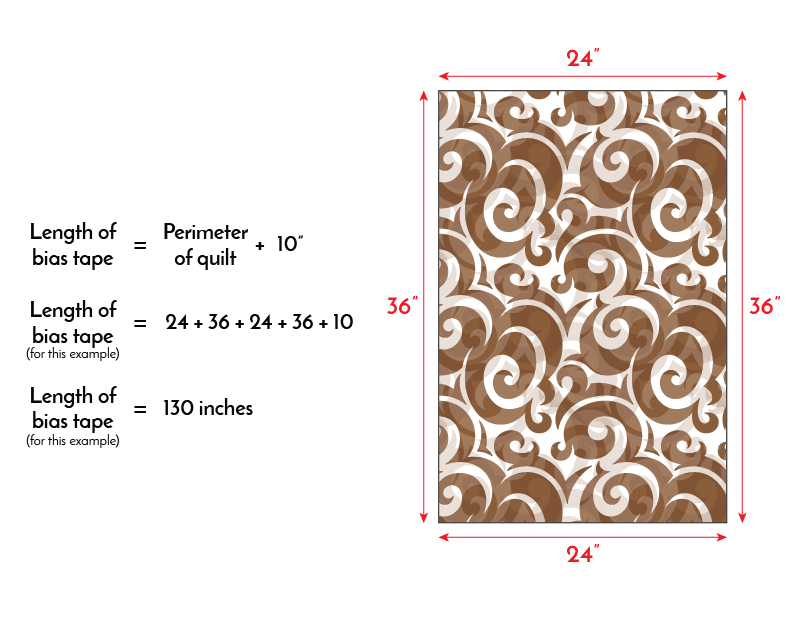
Second, decide how wide you need your bias tape to be. This will be determined by whether you need single- or double-fold tape, and how thick of a binding you want on your quilt. (For example, a standard 1/2" binding is made from 2" wide, double-fold bias tape.)
Once you know both numbers (length and width), use the chart below to figure out what size fabric square you need.
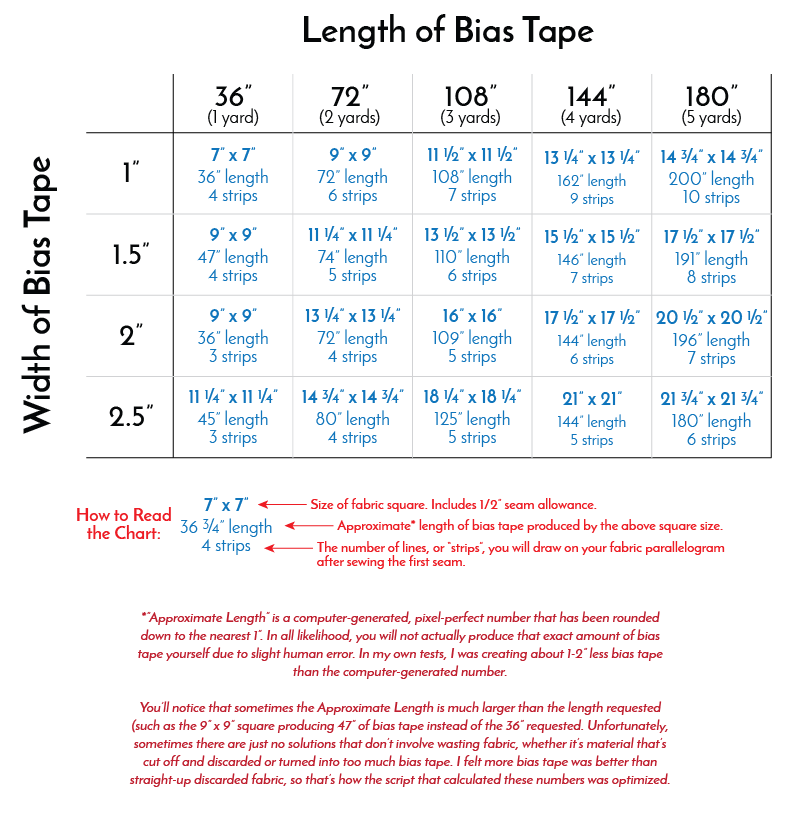
I will be using a 9" square to make 36" of 2" wide bias tape in the diagrams for this blog post.
The numbers in the chart above are different than those provided on many other websites. The reason for that is the calculator my amazing husband wrote to determine the numbers above does not use the "standard" formula for calculating bias tape, because that formula is unreliable. I explain why in a future blog post.
My goal is to eventually provide Alex's bias tape calculator free-to-use on my website, but he tells me that's complicated and will take some time.
Part 1: The First Seam
Follow these steps (and see diagrams below for visual instructions):
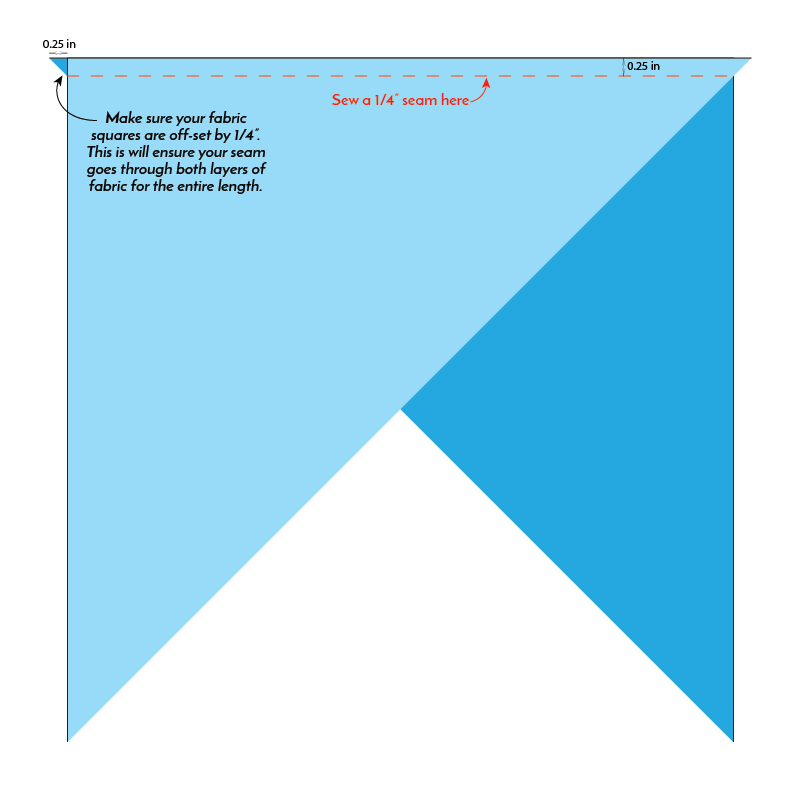
1. Cut your square of fabric diagonally in half.
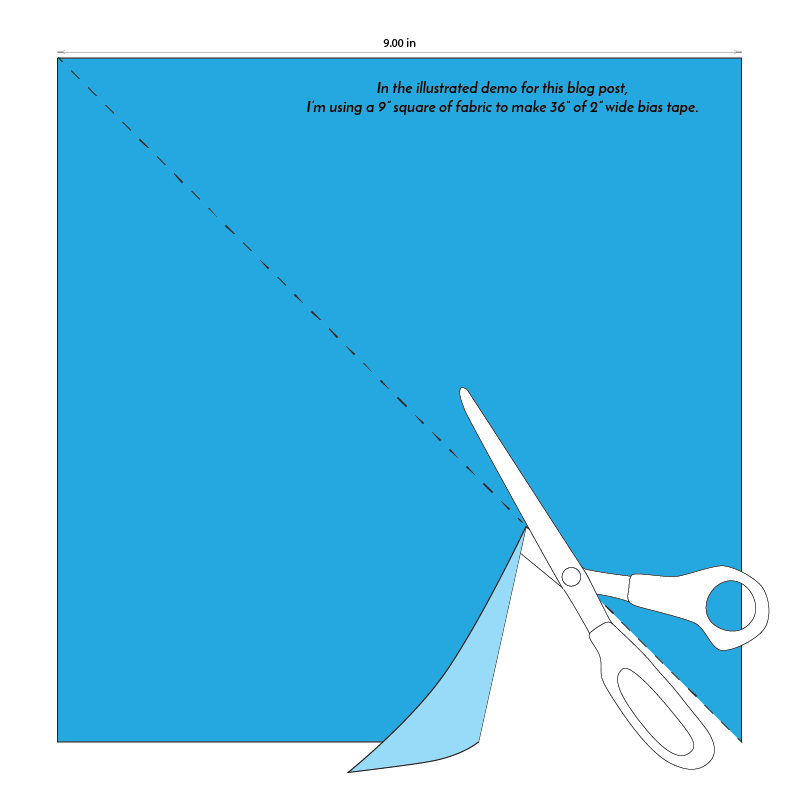
2. Reverse one triangle and place on top of second triangle, right sides together. The aligned edges should be offset by 1/4" in both directions.
Sew a 1/4" seam along edge where both triangls align.
Part 2: Iron and Measure
1. Open your fabric triangles so they now make a parallelogram. Iron the seam open.
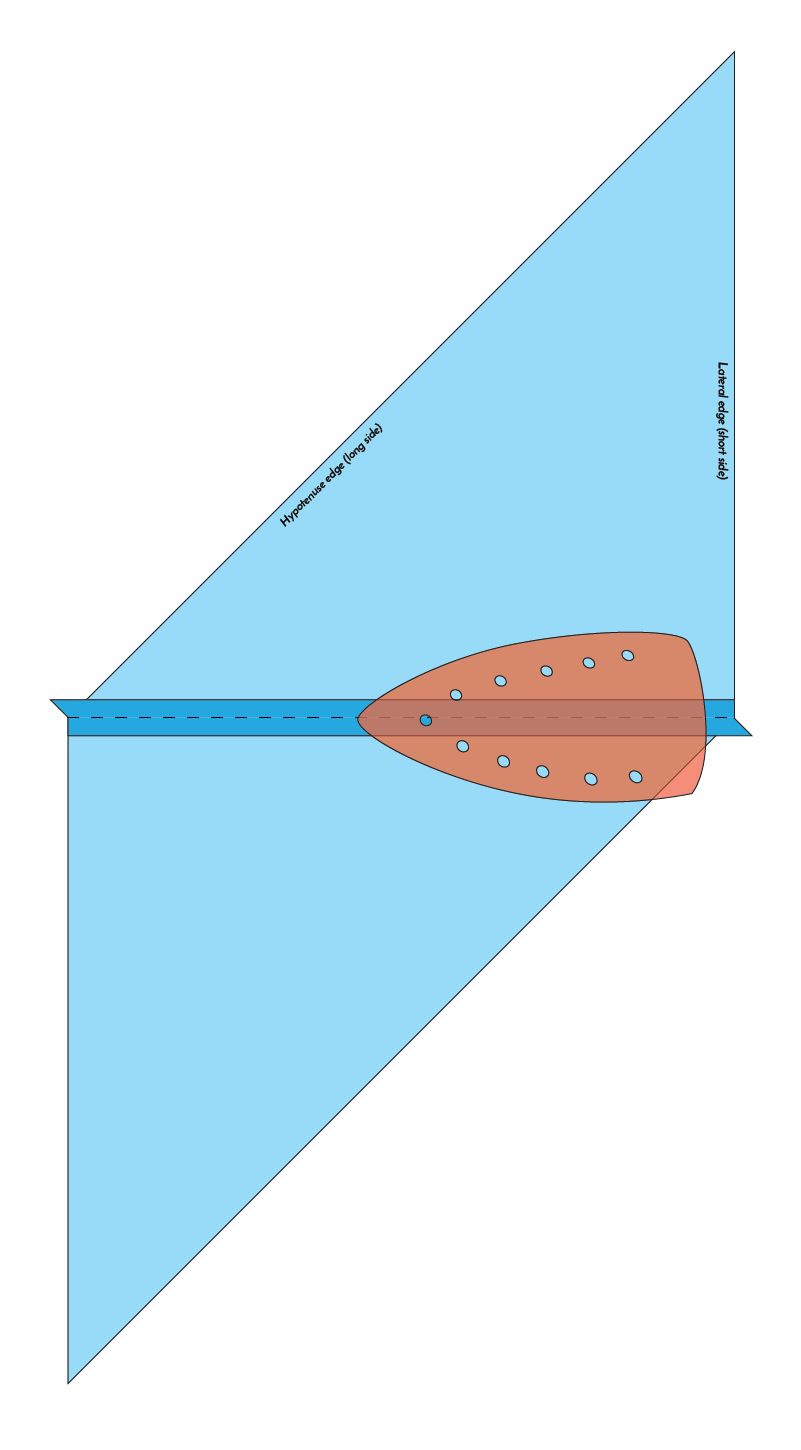
2. Lay your fabric right-side-up on your grid surface, aligning the long sides parallel to the grid. The seam should be facing up.
Use your fabric marking pen or pencil and straight edge to draw parallel lines on your fabric. These lines should be separated the width of your bias tape. (If you need 2" bias tape, your parallel lines should be 2" apart.)
Trim any excess material.
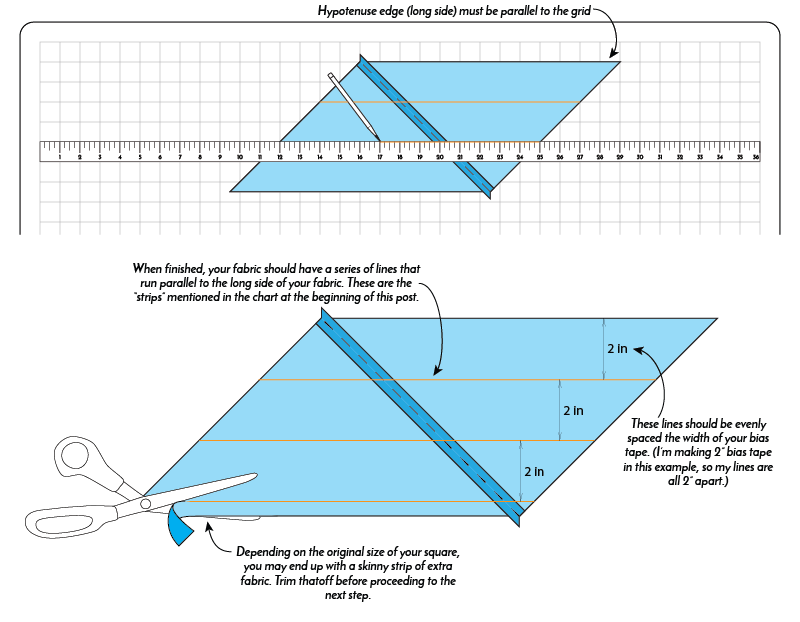
Note: For the example I'm using in this post, the chart tells me I need 3 strips to make 36" of tape from my 9" square. Therefore, I need to draw two lines to make three 2" wide strips.
Part 3: The Second Seam
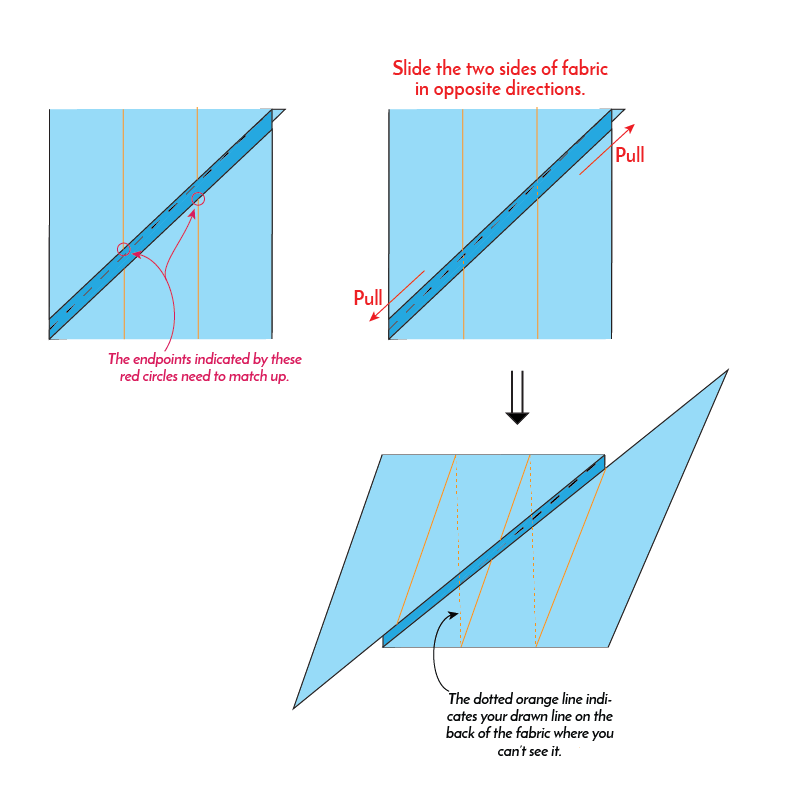
1. Turn your fabric so it's right-side-up. Fold two pointy corners toward each other into the center. You should now be able to see the drawn lines on the underside of the fabric that's folded in.
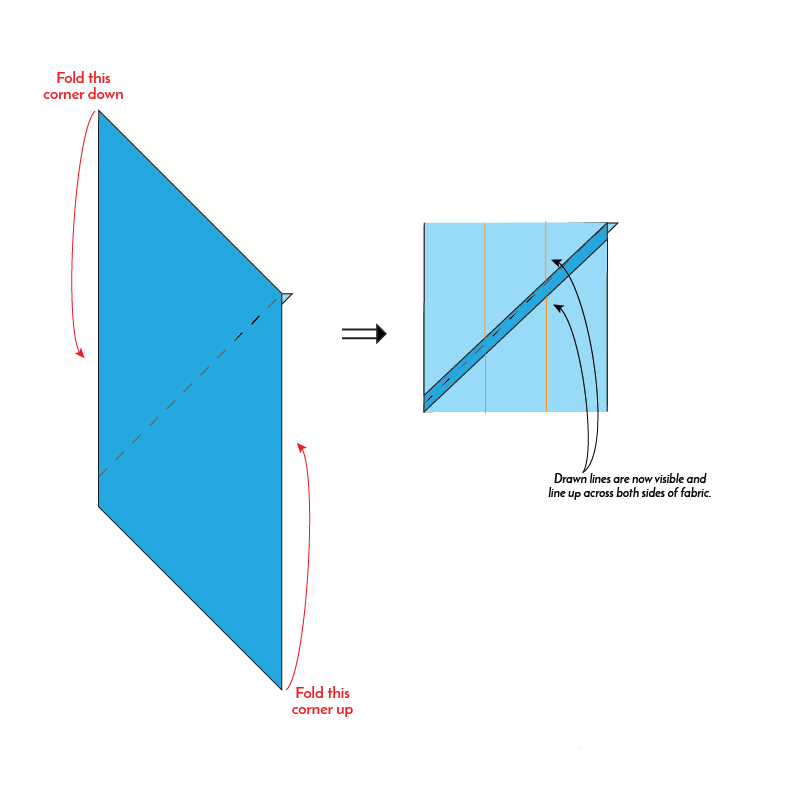
2. Slide the two halves of your fabric in opposite directions. This will cause your drawn lines to align with the adjacent line. Your lines MUST be offset by one bias-tape width to make the continuous loop. See the diagram below.
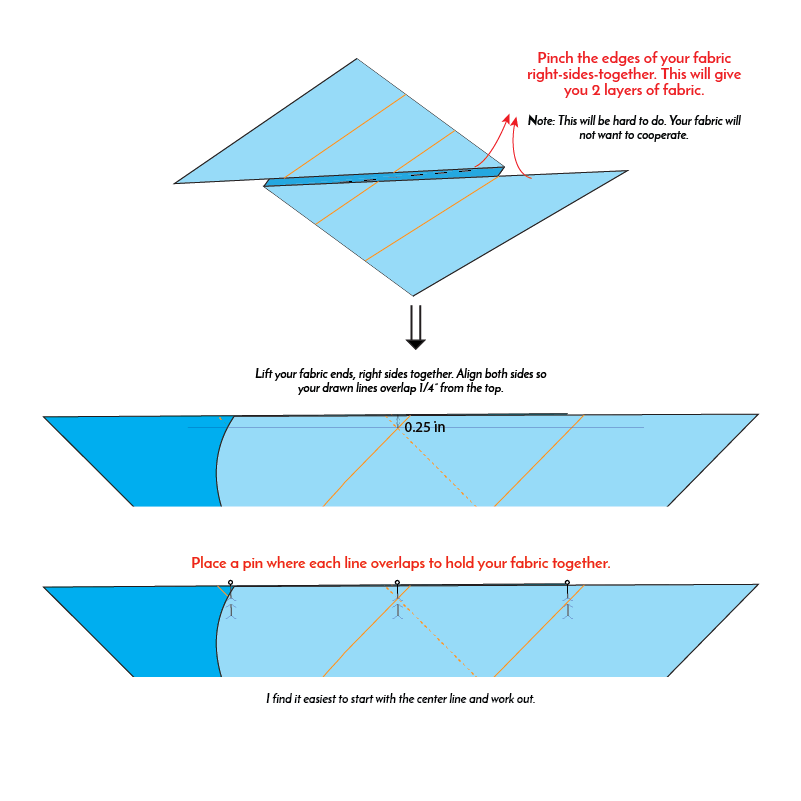
3. Lift the two halves of your fabric and hold with right-sides together. Slide the fabric so the lines on each side cross 1/4" from the edge. Pin each line as you go.
Note: This will be difficult to do because your fabric will not want to be stretched this way, so just be patient and align one line at a time.
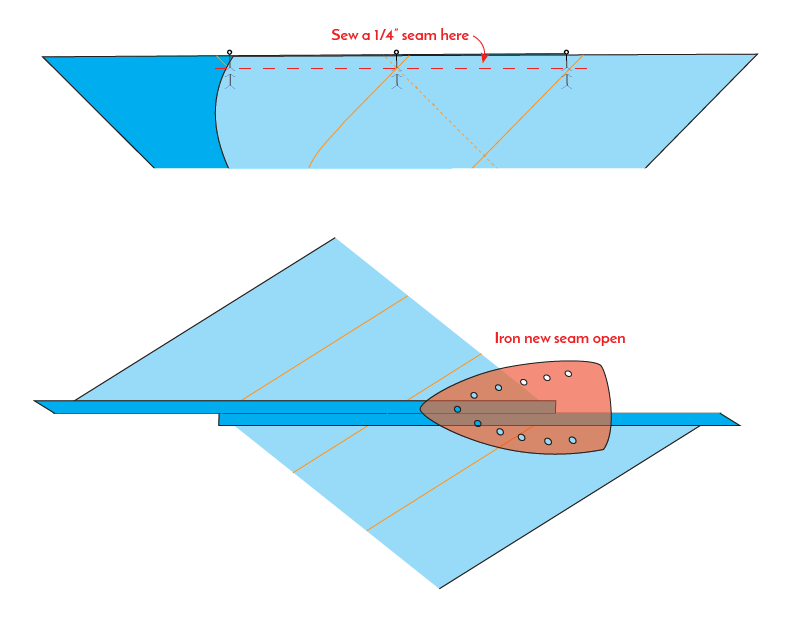
4. Sew a 1/4" seam and press it open.
5. Cut along your drawn lines (that are now a single, continuous line).
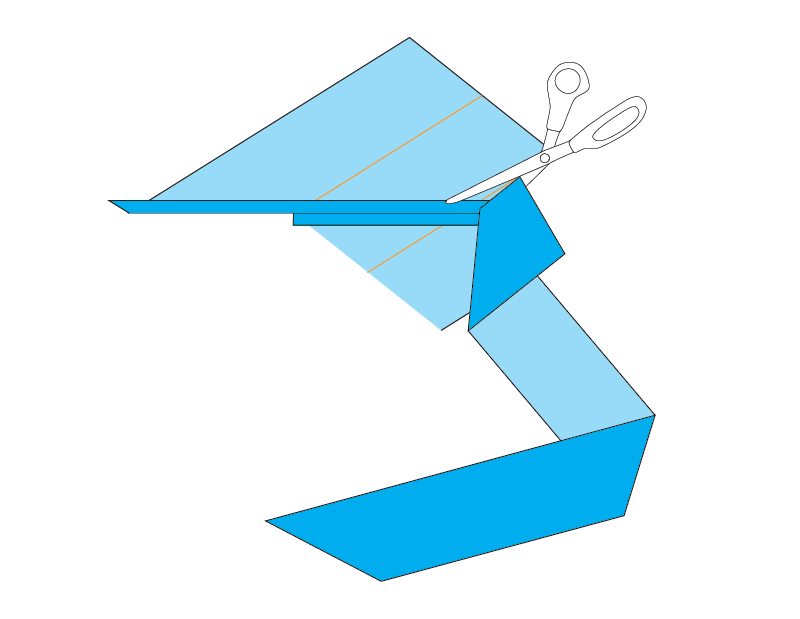
Congratulations! You've successfully made your own continuous bias tape.
