Stitch Theory
- Published:
- Length: 863 words
- Reading Time: 5 minutes
My art is designed to tell a story through fabric. All the information a viewer needs to understand what is going on is right there, no sewing required. I only started stitching my art out of necessity: I couldn't enter it into quilt shows unless my art was in quilt form, and that meant it had to be sewn.
I have two objectives when it comes to stitching my quilts:
- The stitching should be as subtle as possible. It should in no way distract from the picture.
- The stitching should enhance or compliment the story being told with fabric and add a new dimension to the artwork on close inspection.
Goal 1: "Invisible" Stitching
My preferred thread is Invisafil, a 100wt polyester. 100wt thread is some of the finest, thinnest thread available on the market, so it's extremely subtle when sewn onto a quilt. It also requires a very thin needle, a 60 or 70 microtex, so the machine makes very small holes. Compare the first four threads in the photo below.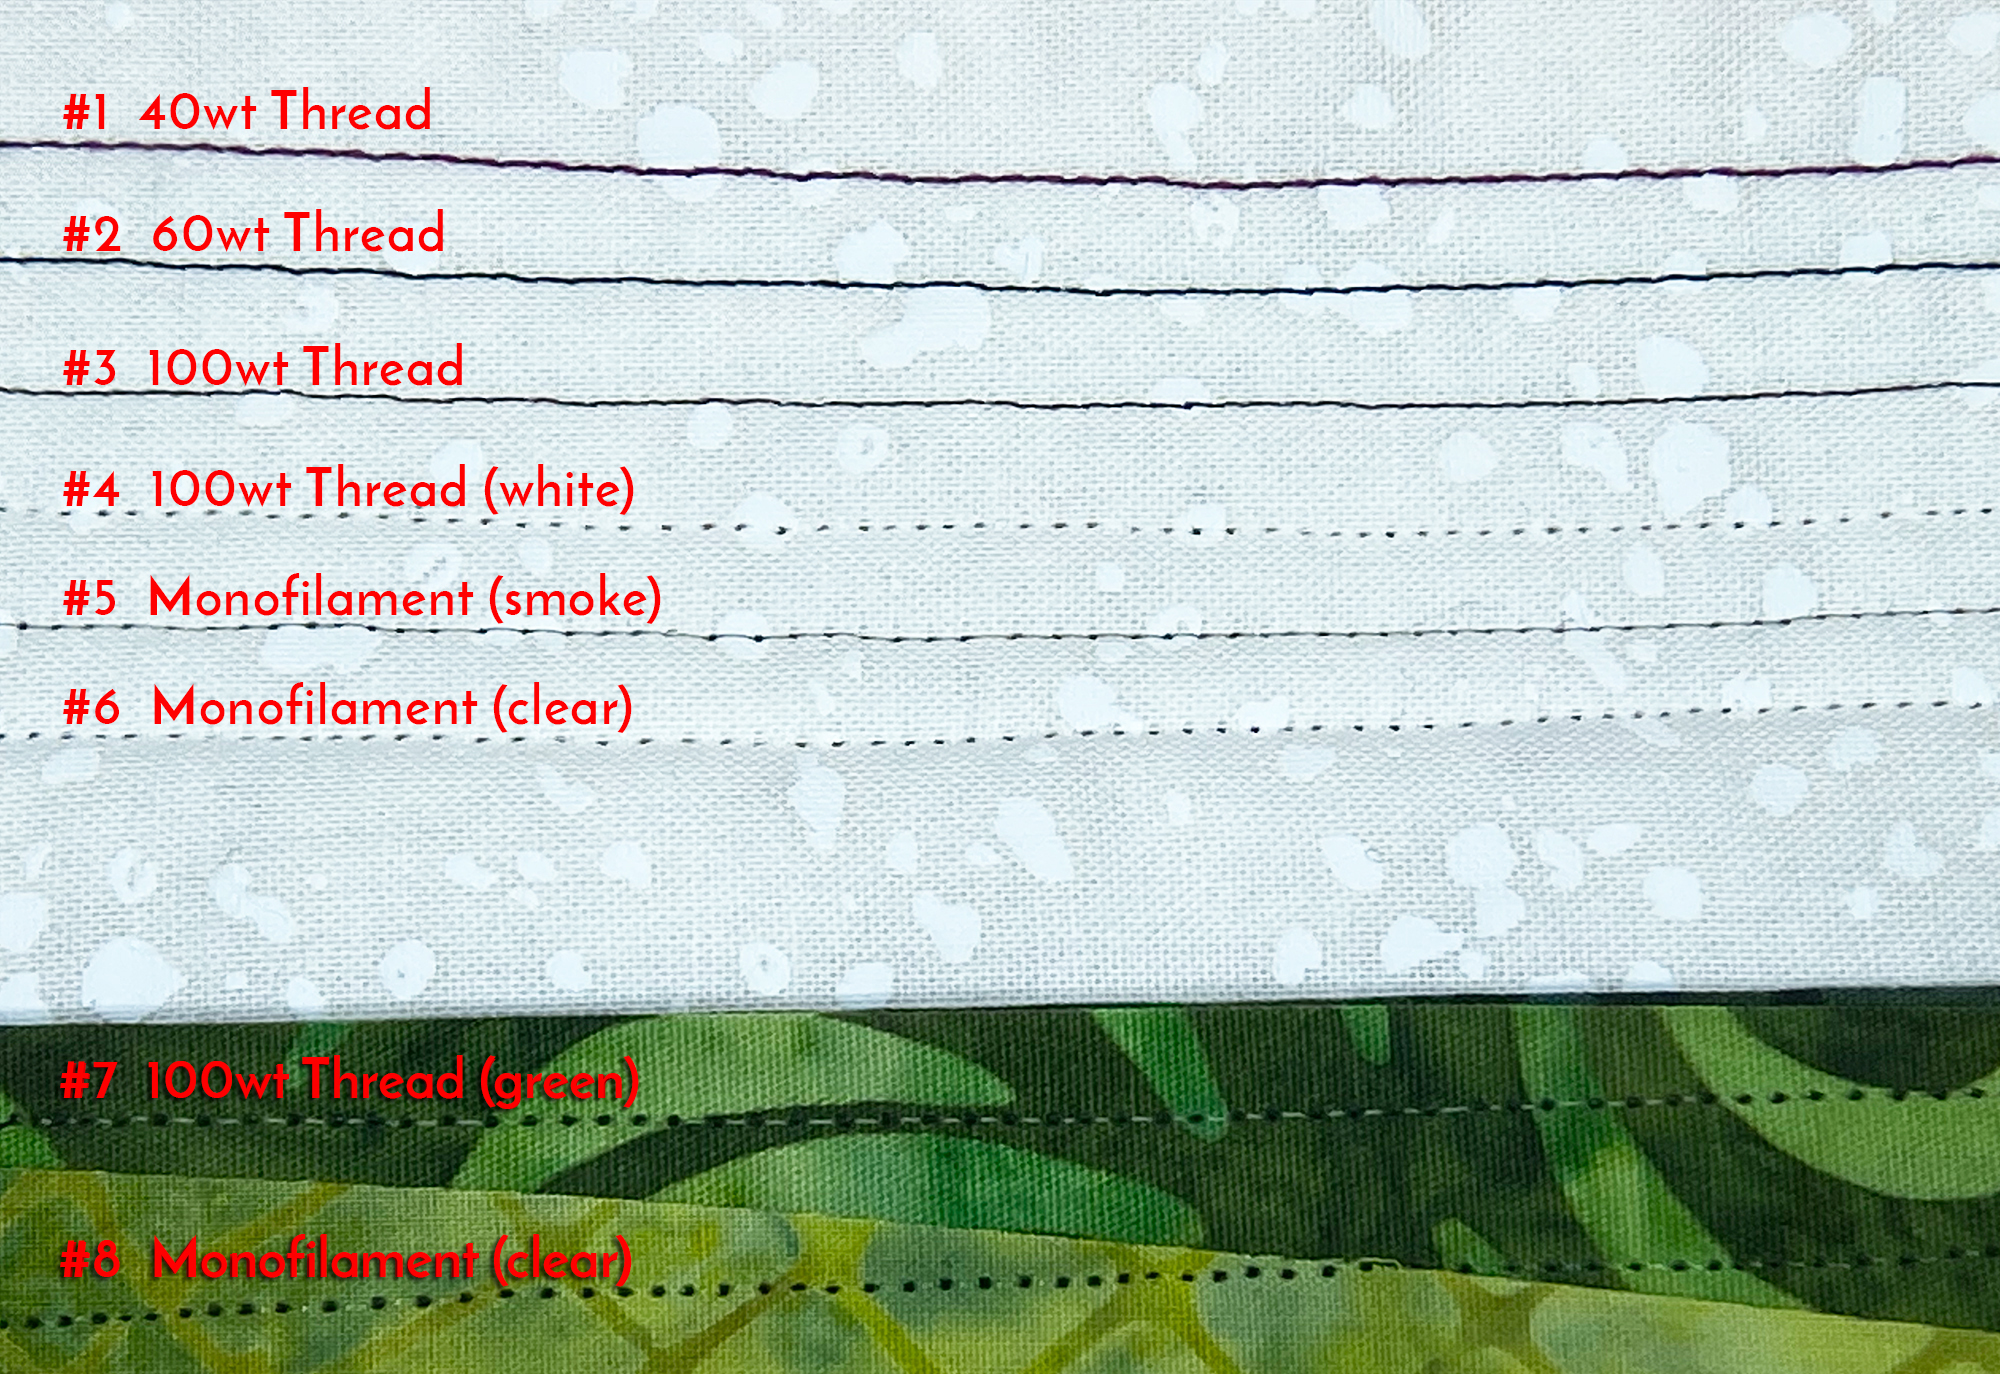
#3, the 100wt thread, is noticeably thinner than #1 and #2. #4 is only visible from the needle holes (because the thread matches the color of the fabric).
What about monofilament?
For those of you not familiar, monofilament looks like very fine fishing line. It comes in two varieties (clear and smoke), for use on light and dark fabrics respectively.
I don't use monofilament because it is literally invisable. Once sewn in to fabric, the only visible part of monofilament are the holes left by the needle, regardless of how close a viewer gets. I want my stitching to be visible, but only up close. If I used monofilament, even up close my quilts would look as though they were filled with needle holes, but the design of the stitching wouldn't be apparent.
To get a better idea of how this would look on my quilts, compare #7 and #8 above. My quilts are made up of layers and layers of appliqué fabric. I tried to simulate this by adding a few layers of green on top of the white of my test quilt sandwich. The needle holes are much more defined as a result (they don't collapse in on themselves the way they do on the single layer of white fabric above.)
The thread in #7 is visible between the needle holes. The monofilament in #8 is completely invisible.
In conclusion: I want my stitching to be next-to-invisible, not actually invisible, so that's why I use 100wt thread.
Goal 2: Complimentary stitching
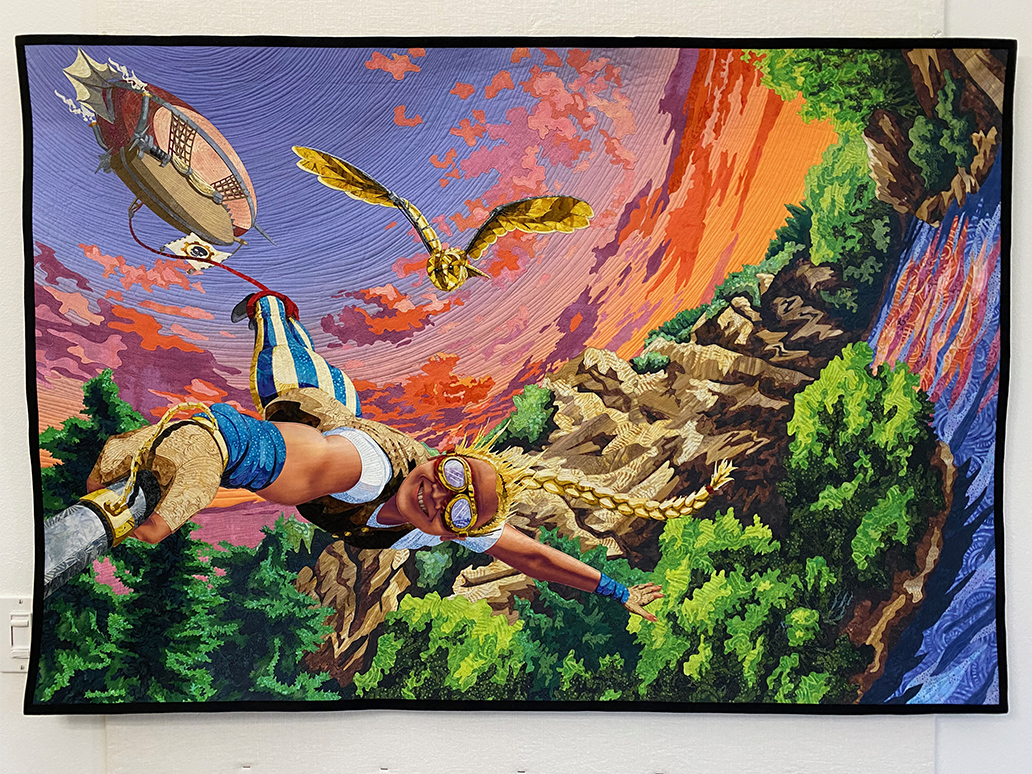
To achieve my second goal, I chose to use freemotion stitch patterns that worked with the subject on which I was stitching at the time. I will be using Leap of Faith as my example.
First, here is the finished quilt, which took 80 hours to sew.
Now for some details! This is a close-up of some of the rock cliffs:
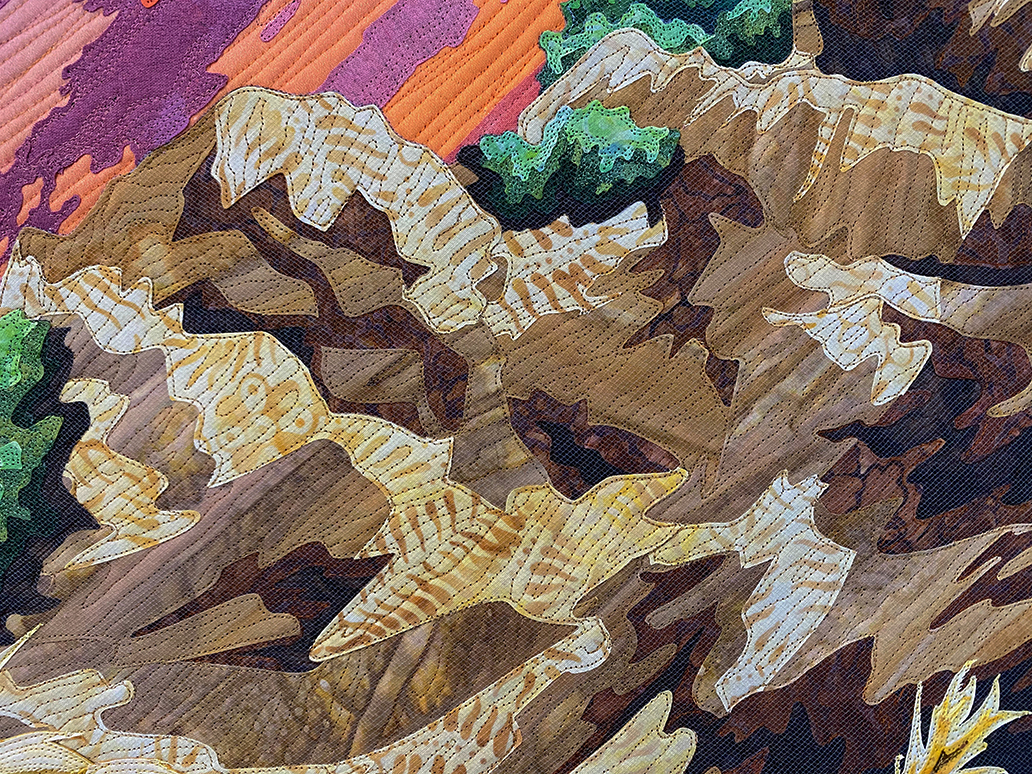
The lines of stitching on these cliffs range from about 1/8" to 1/4" apart. My goal was to imitate rocks that have been pushed out of the earth on a dramatic angle, making their layers of sediment visible. I tried to follow the pattern in the fabric itself where possible.
Here is a close-up of the shore and some of the trees:
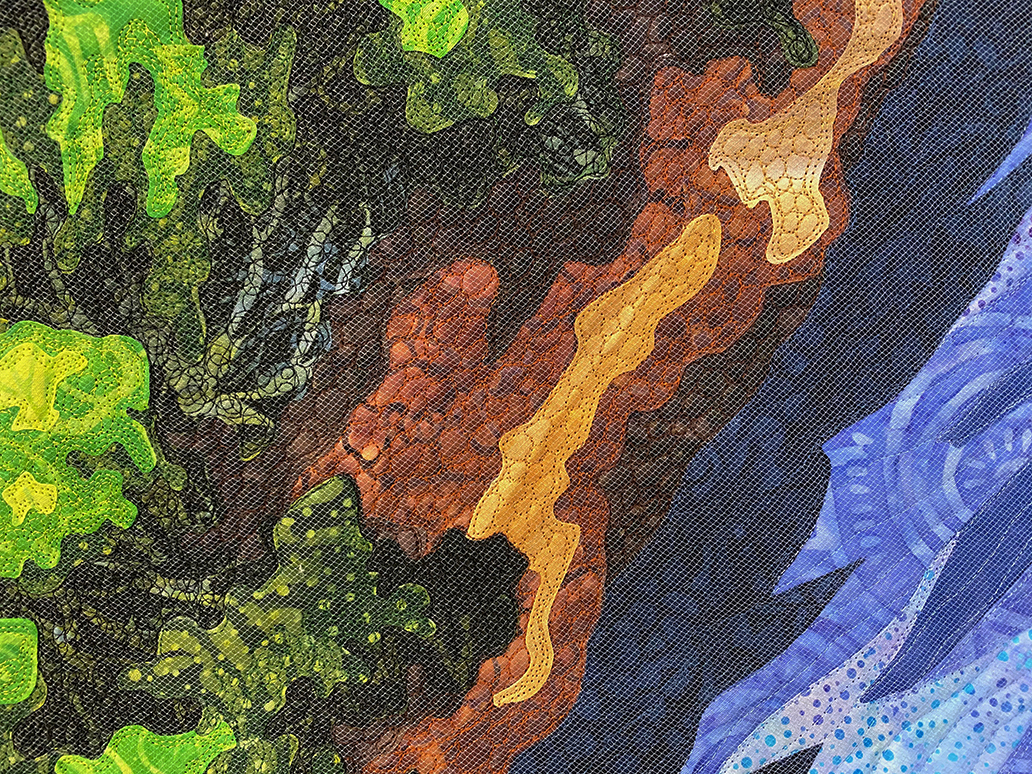
I stitched pebbles along the shore to simulate a rocky beach. The trees are filled with stippling. The trees themselves are far enough away that they'd look more like a chaotic jumble than individually-defined leaves, and I thought the tightly-overlapping loops of stitching gave that impression well.
Next, take a look at the river:
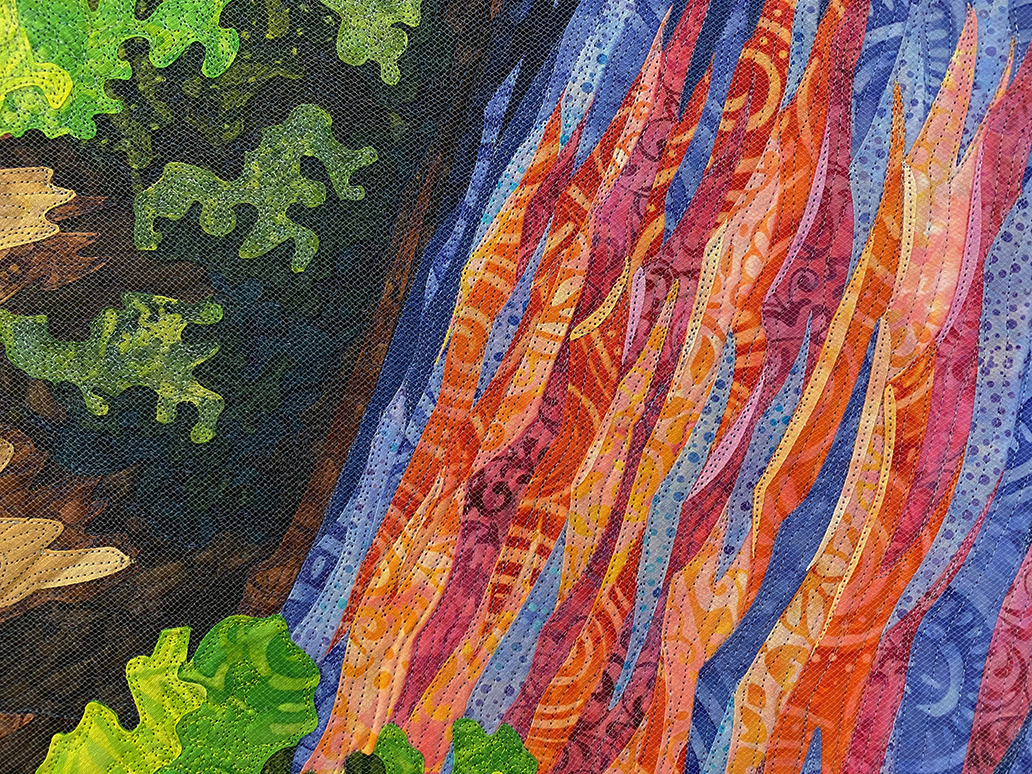
I used a modified echoing pattern for all the waves. Echoing normally means parallel lines of stitching that are equidistant from each other. In this case, my lines run more or less parallel, but not evenly. I think this adds to the choppy feeling of the waves.
Here's Faith herself:
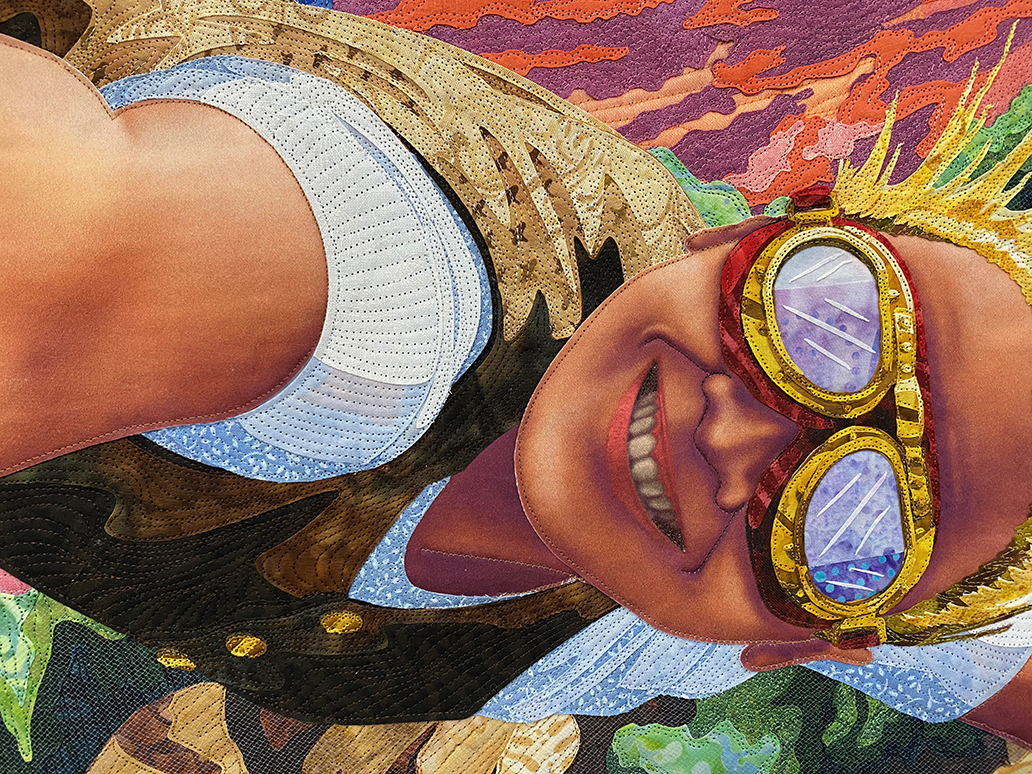
There are a few things to look at here. First, for Faith's vest I again used a modified echoing stitch. The sleeve on the left, though, has lines of stitching that run perpendicular to the curviture of her arm. This helps the foreshortened perspective of her arm be clearly seen (her arm is coming toward the viewer).
Lastly, Faith's skin has almost no stitching. There is a straight stitch that runs around the outside edge of her entire face to hold the fabric in place. The only texture stitching I added is in the corners of her smile and a single line of stiching along her laugh lines and nose. Stitching these areas emphasizes the deep recesses in her mouth and creases on her face.
