Make Your Own Color Reference Swatches
- Published:
- Length: 1368 words
- Reading Time: 7 minutes
All of my quilts are designed on the computer. Everything from the size of the quilt to the shape of each piece of fabric to the colors of the fabrics themselves is determined before even looking at a scrap of cloth.
The tricky part is transitioning from the digital world to the physical one. How do I get the colors out of my computer? How do I know the fabrics I'm choosing are correct and will work in the finished design?
The answer is: I make custom color swatches and match the value and hue of the swatches to the fabrics.
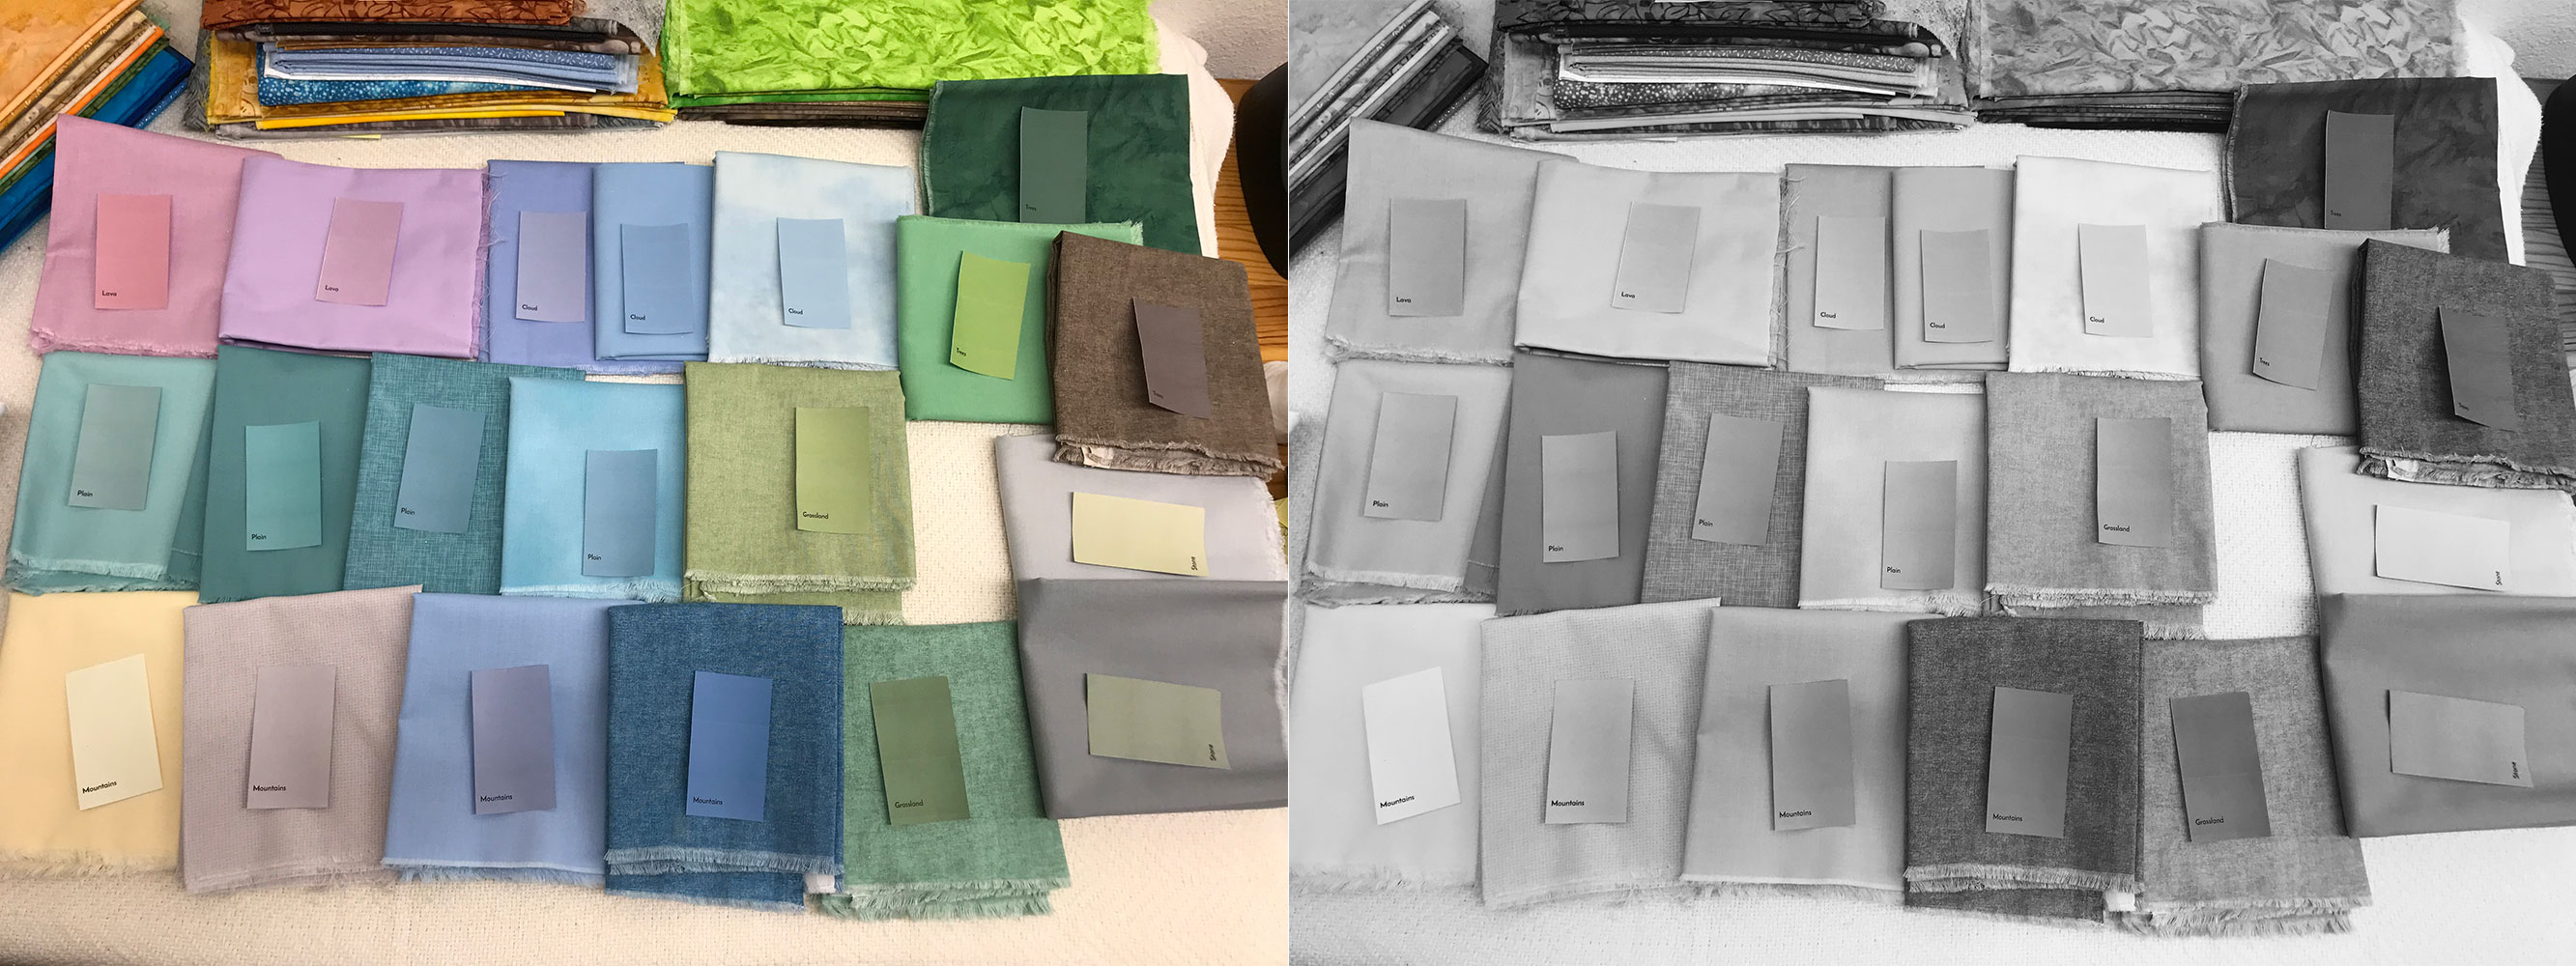
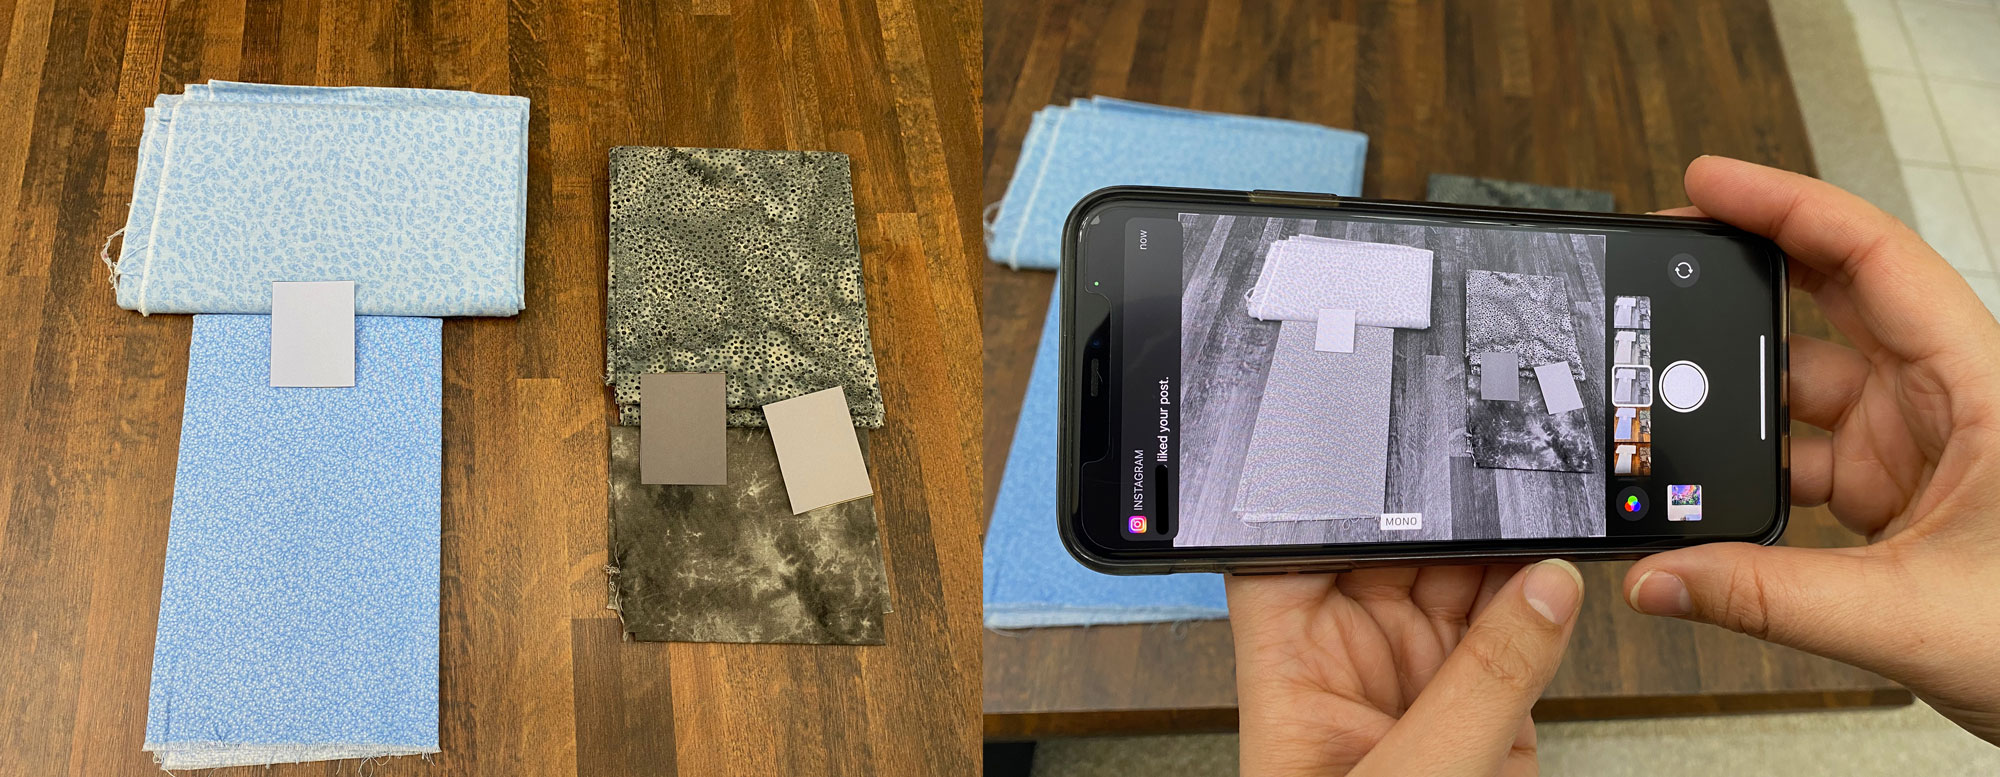
In the photo below, I've placed my printed paper color swatches on top of each fabric that matches it. The black and white photo shows the values match as well.
The rest of this post has my instructions on how you can make your own paper swatches and how to use them. I've added a FAQ at the bottom to answer some questions I've been asked about this process.
Tools, Software, and Assumptions
You will need:
- InkScape Software installed
- The SVG file linked below
- A color printer
Color Swatches Template (Click this link to download the SVG file and save it to your computer.)
Note: This guide is written for Inkscape because Inkscape is a free vector software and I want this guide to be accessible to the broadest audience. However, the downloadable swatch file and general idea behind this guide can be used by or applied to any other vector software.
If you want to read a more in-depth comparison of Illustrator vs competing software alternatives, please see this blog post.
Step 1: Open Color-Swatches-Template.svg in InkScape
Download the file linked above and open it in InkScape. It will look like this:
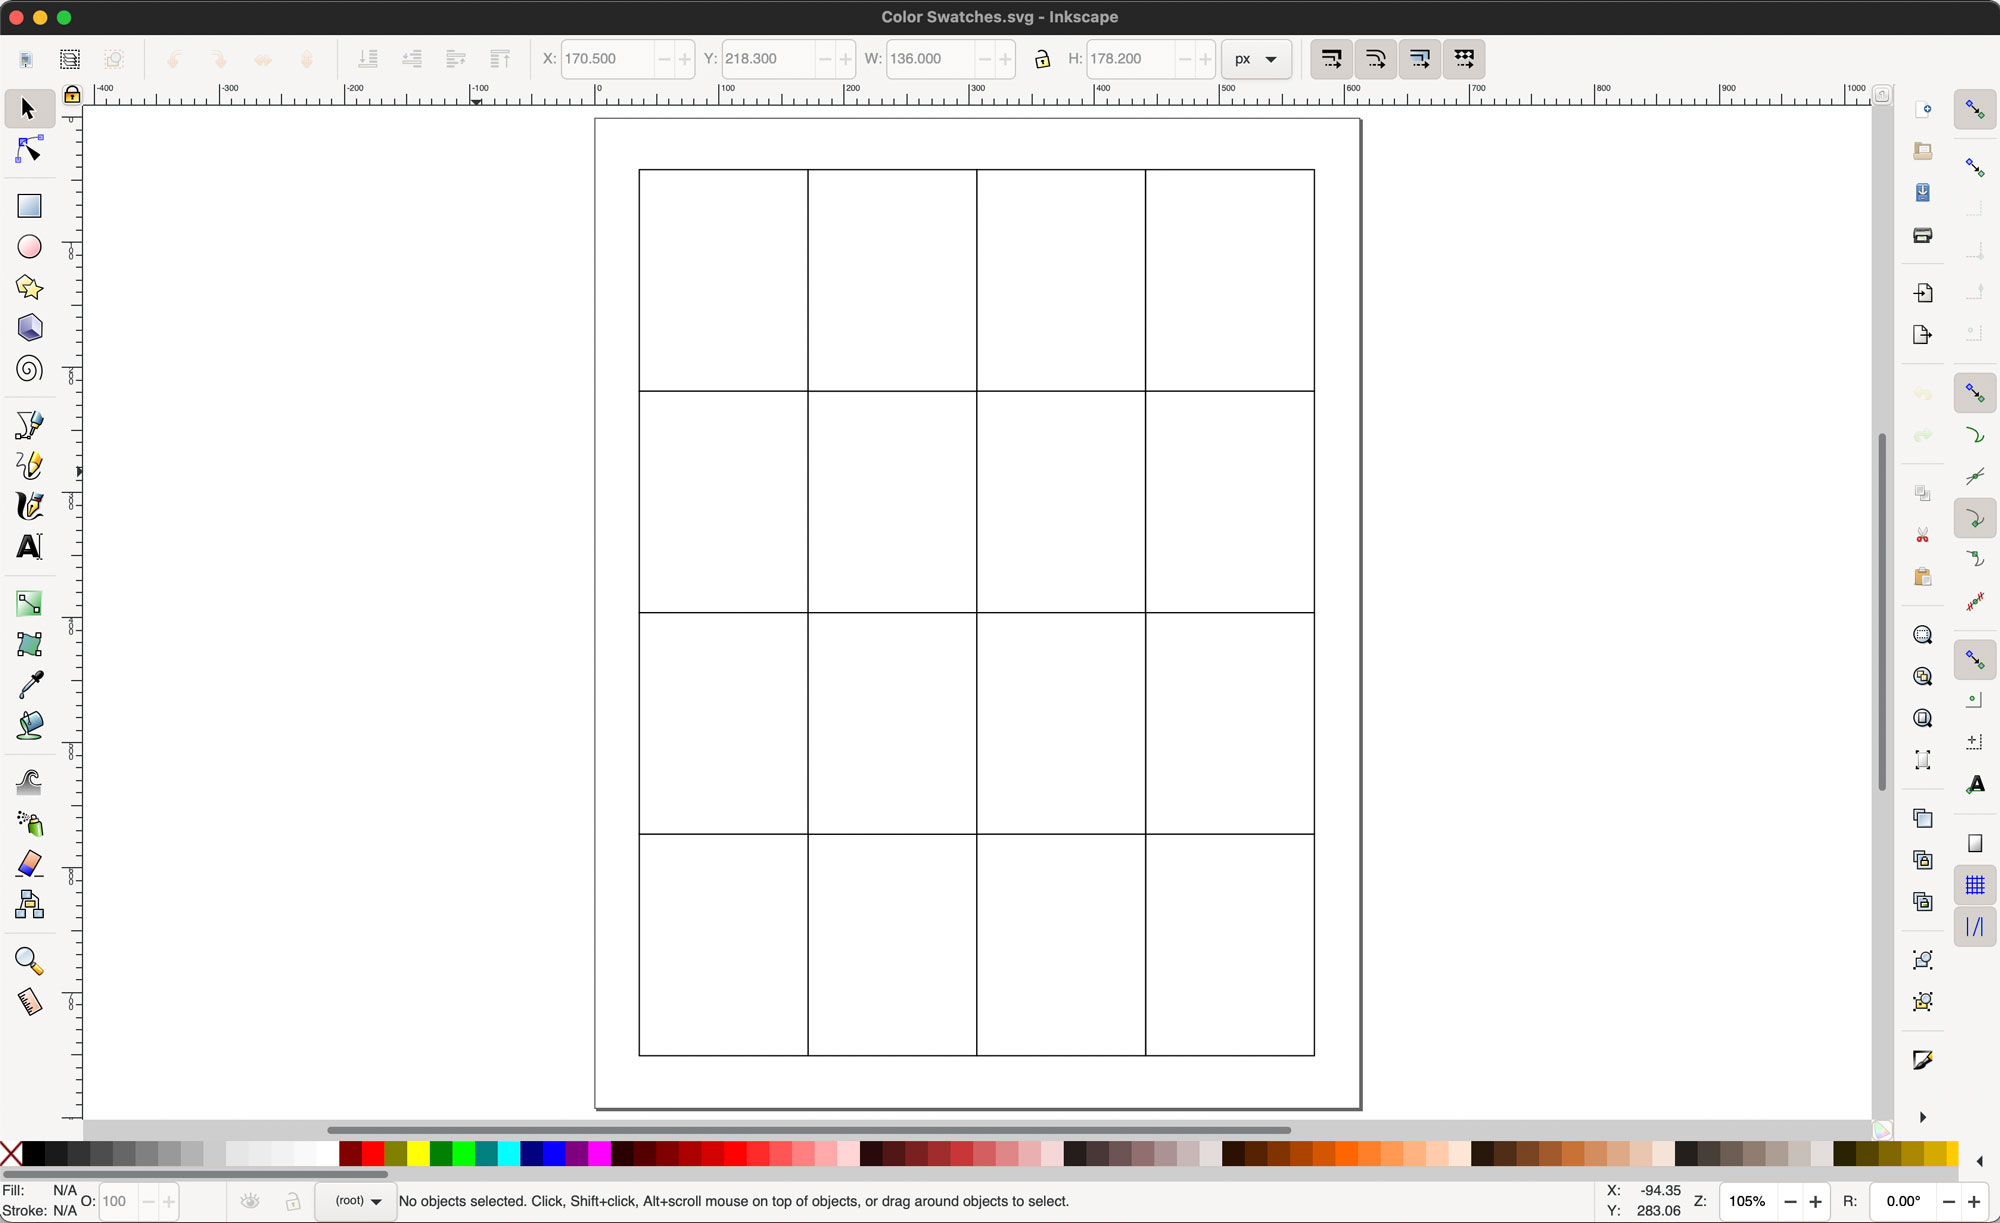
Single left click to select one of the rectangles.
Single right click on the selected rectangle to bring up a menu. Single left click on "Fill and Stroke", which is highlighted in blue in the image below.

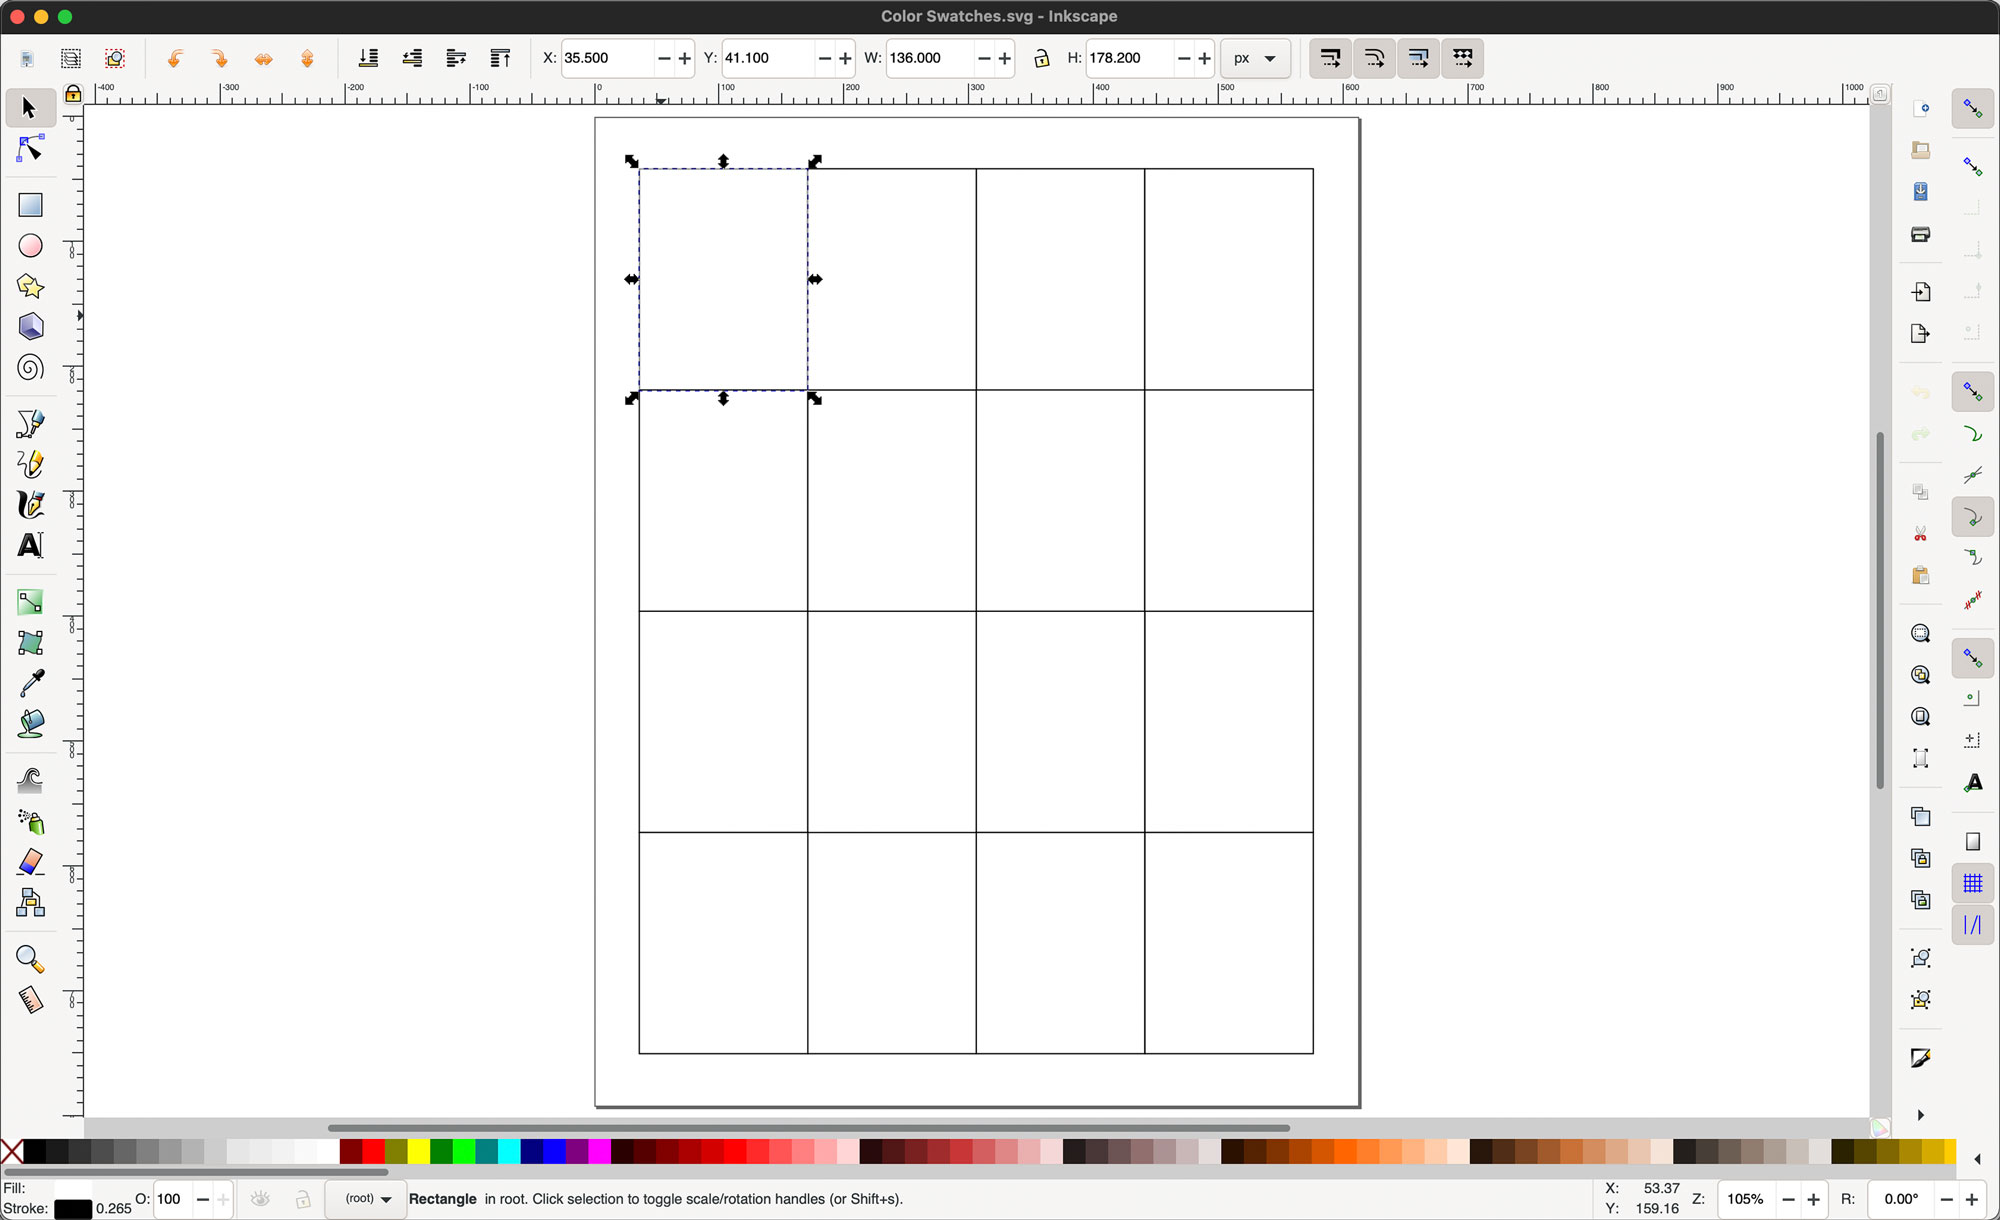
This will open the "Fill and Stroke" panel on the right.
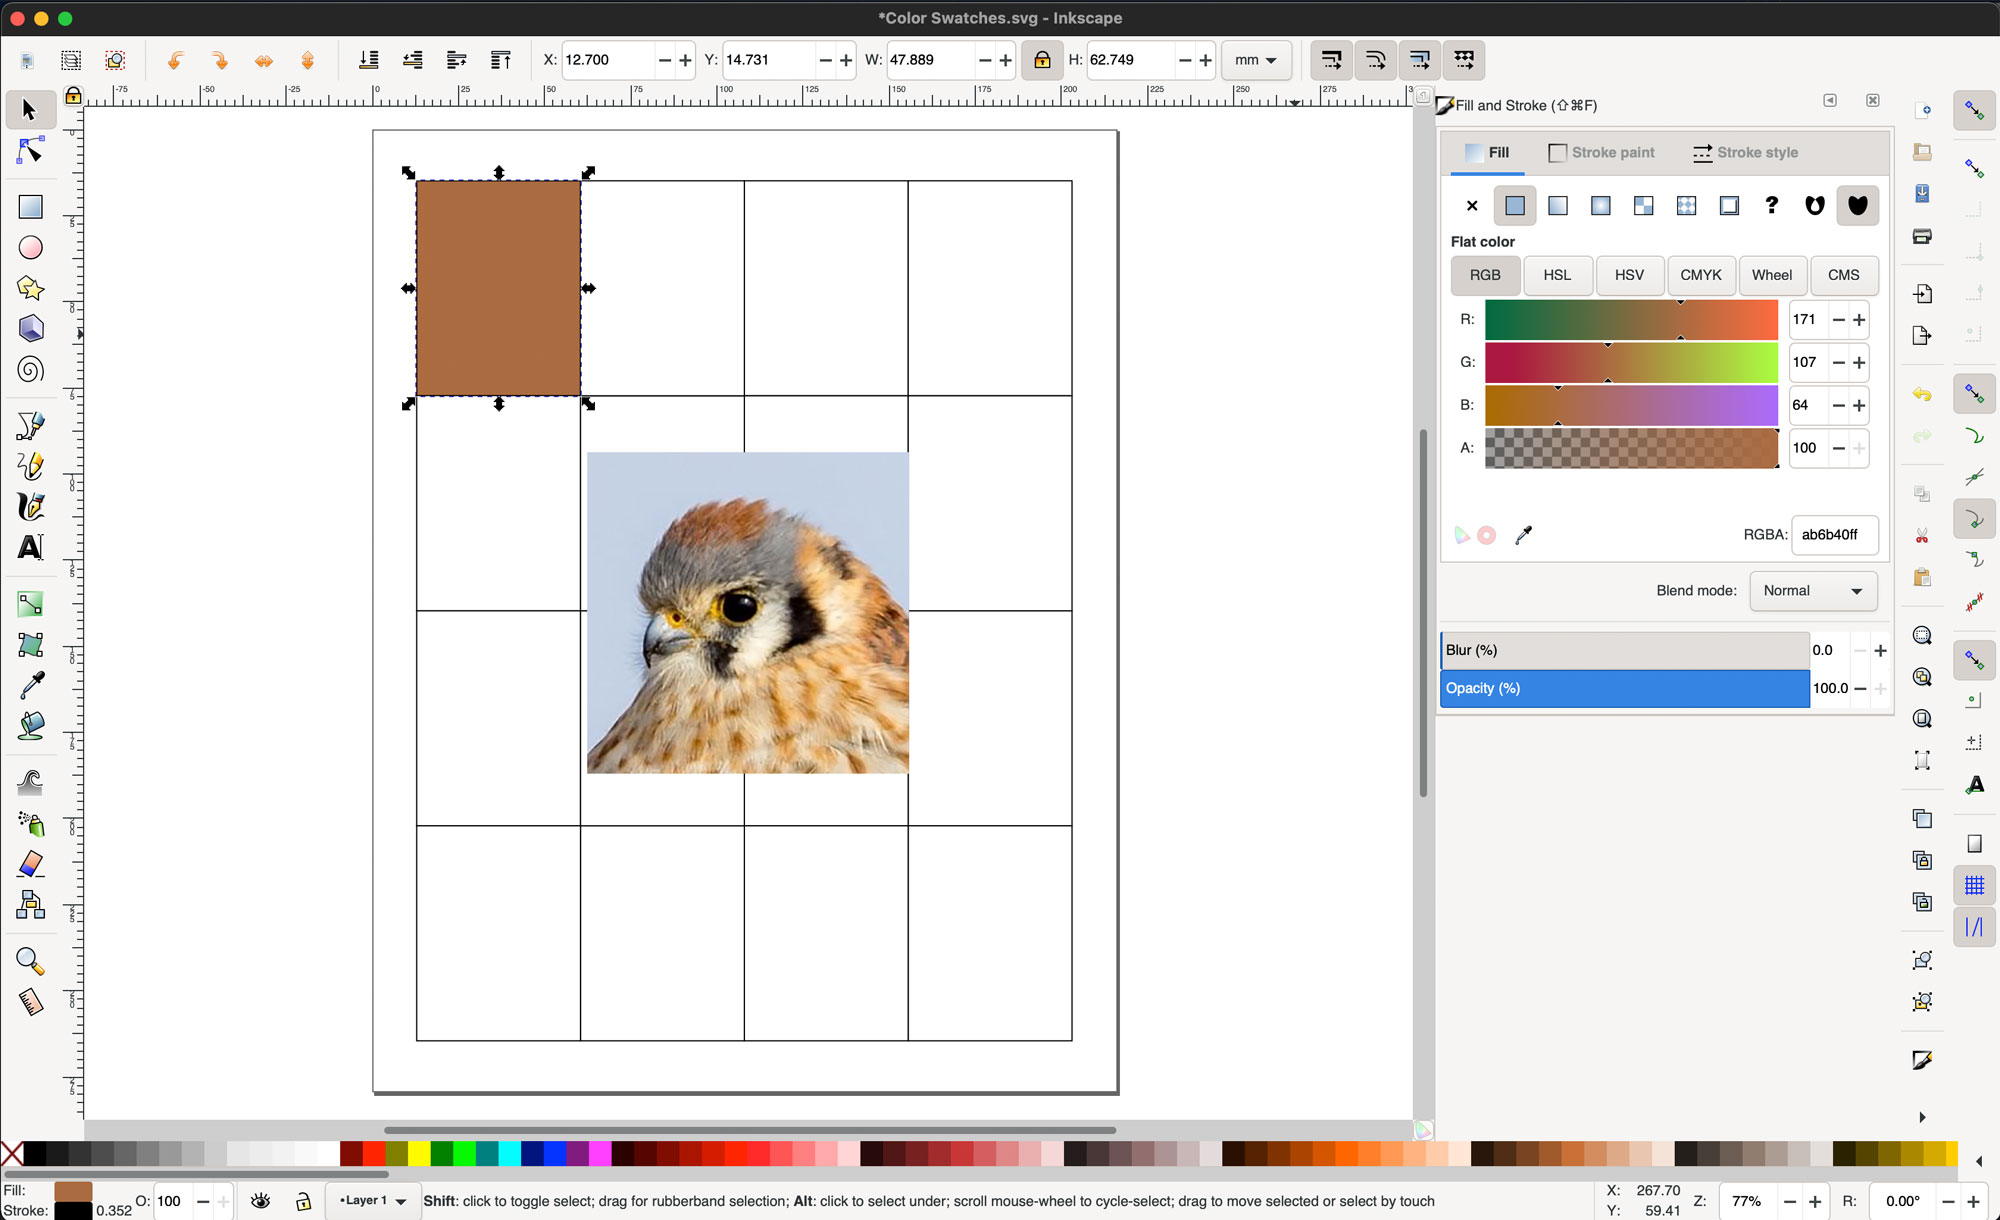
Step 2a: Add Color from Panel
The "Fill and Stroke" panel is open on the right. There are several buttons along the top, as indicated by the red line in the screenshot below. These buttons allow you to select/apply/adjust color according to different methodologies. I have chosen "Wheel" for this demonstration. Single left click on any of these buttons to change the color style.
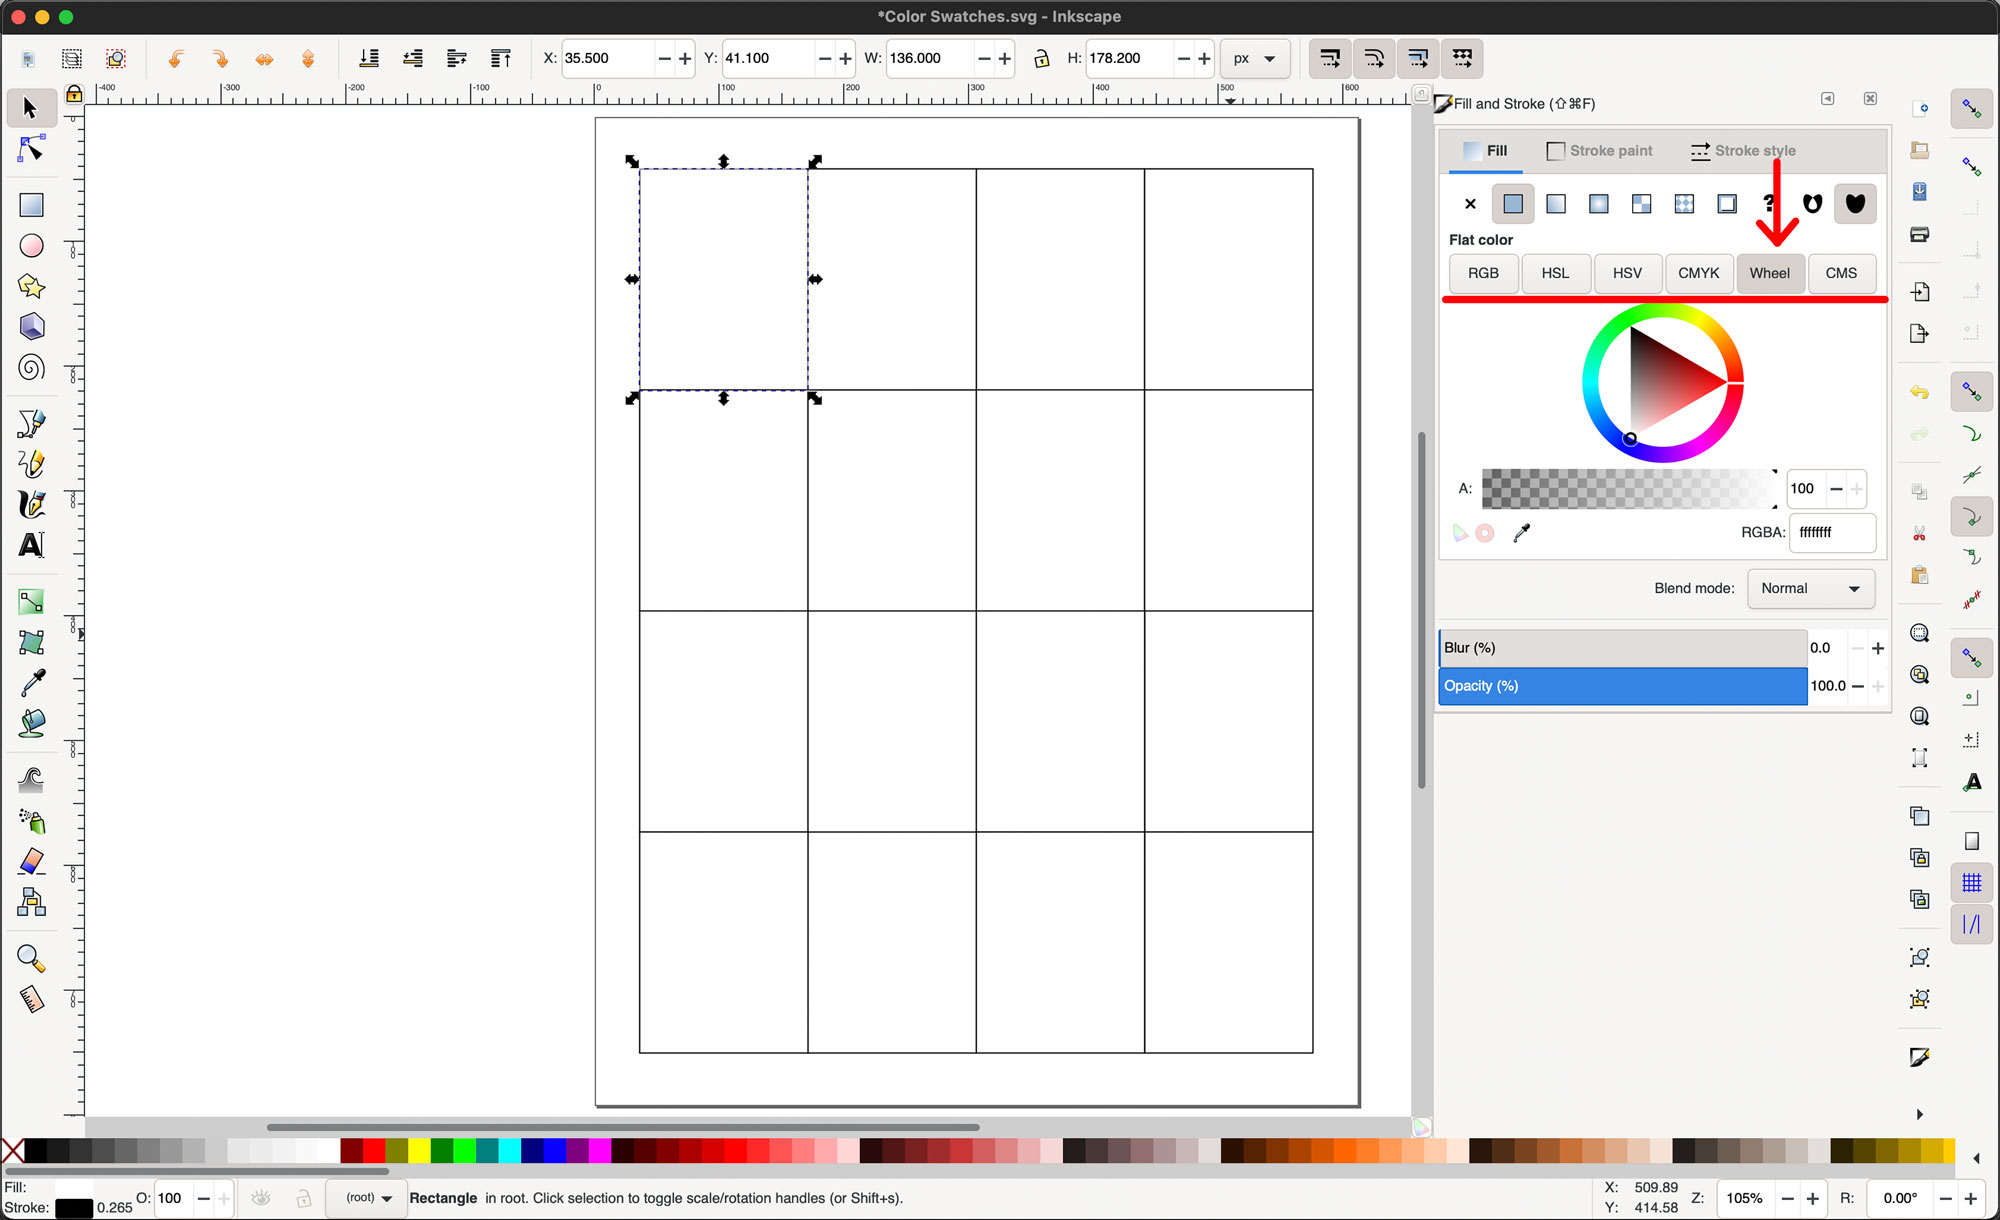
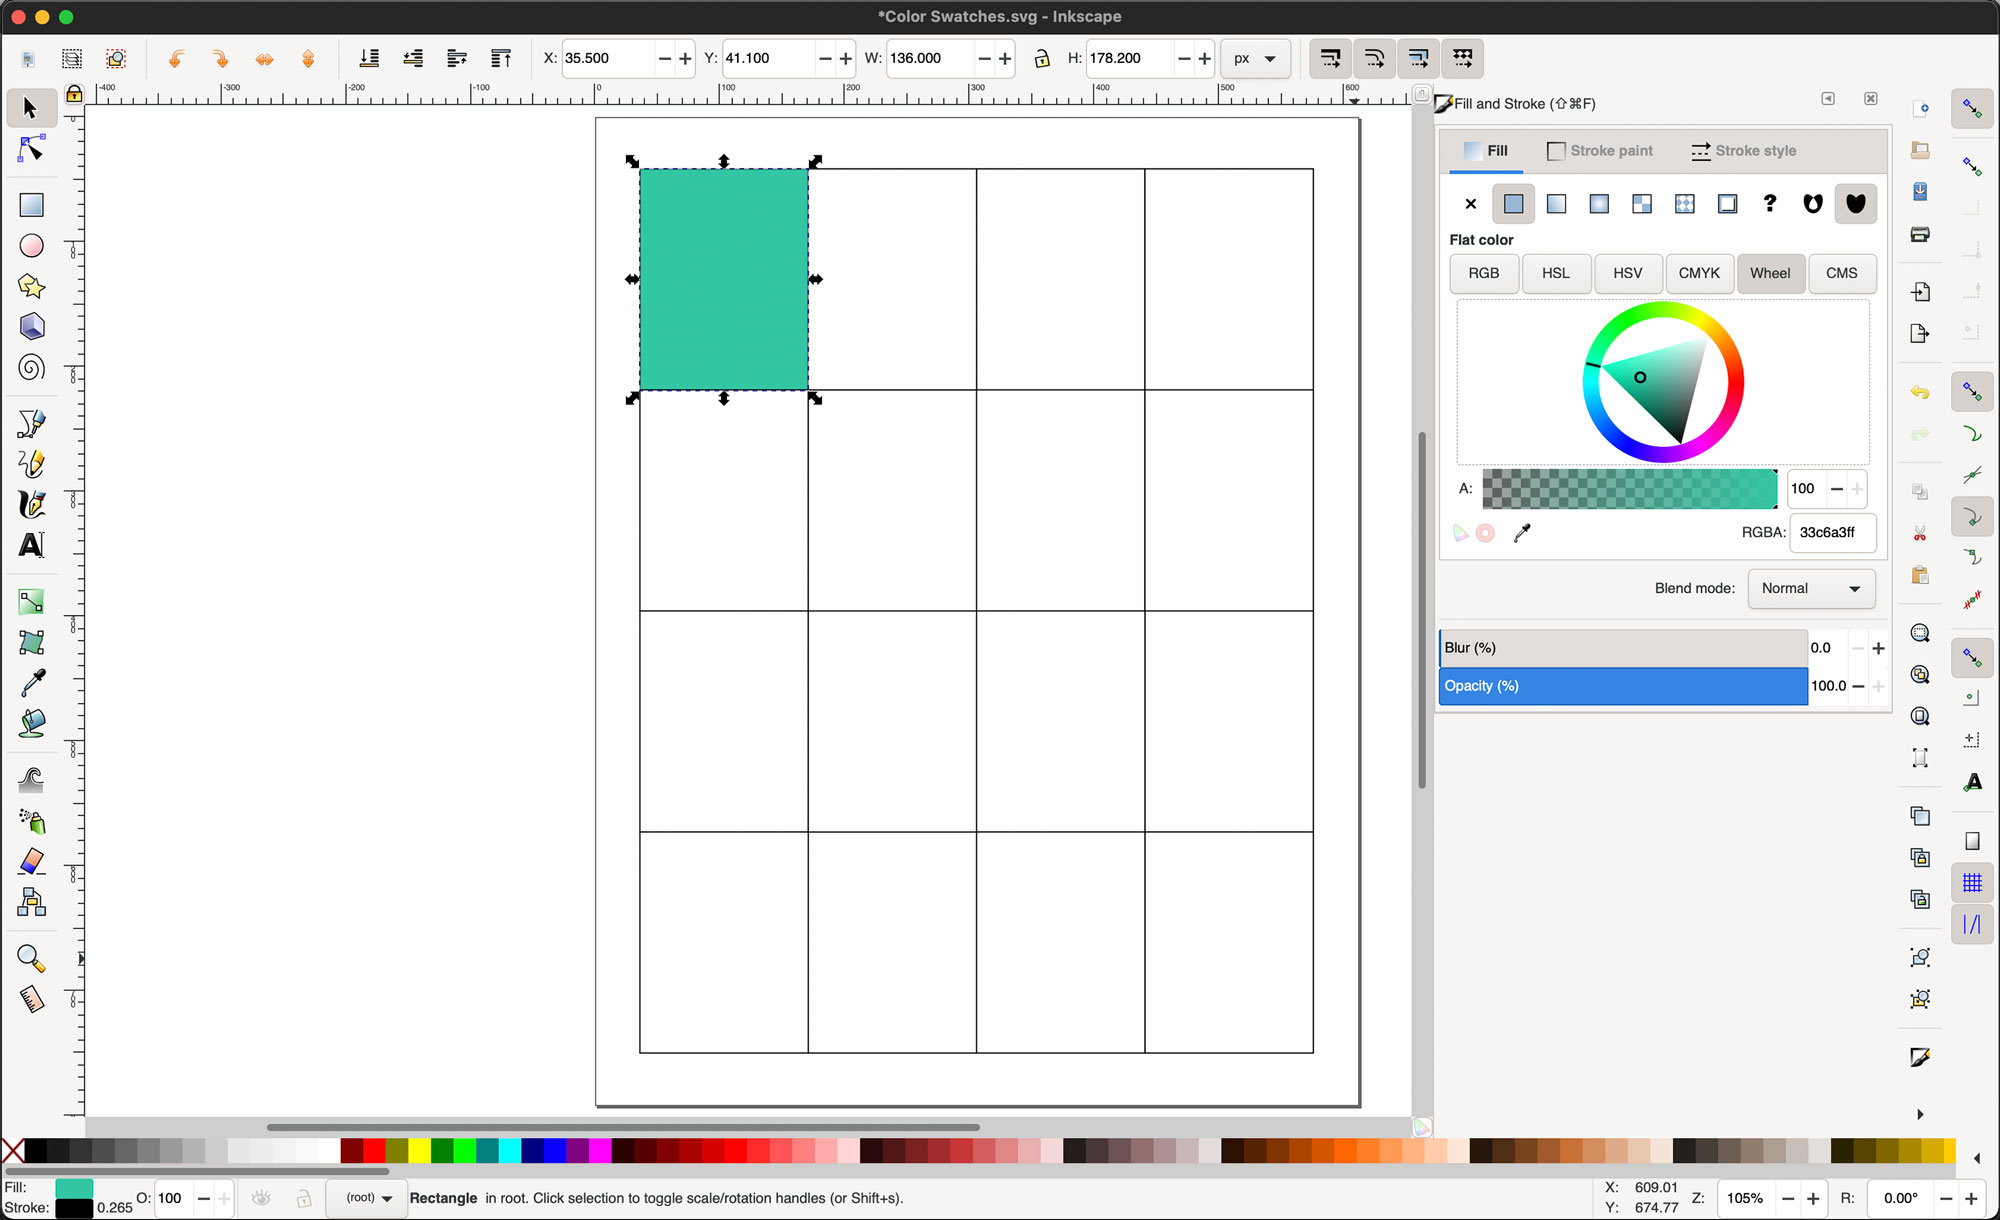
Left click and drag the white line in the circle to rotate the triangle and change the color hue. Left click and drag inside the triangle to change the color value.

The new color will update in the selected rectangle.
Select each rectangle and use the Fill and Stroke panel to apply a color fill.
Step 2b: Add Color from Hex
The "Fill and Stroke" panel is open on the right. Look for the RGBA box, circled in red in the screenshot below.
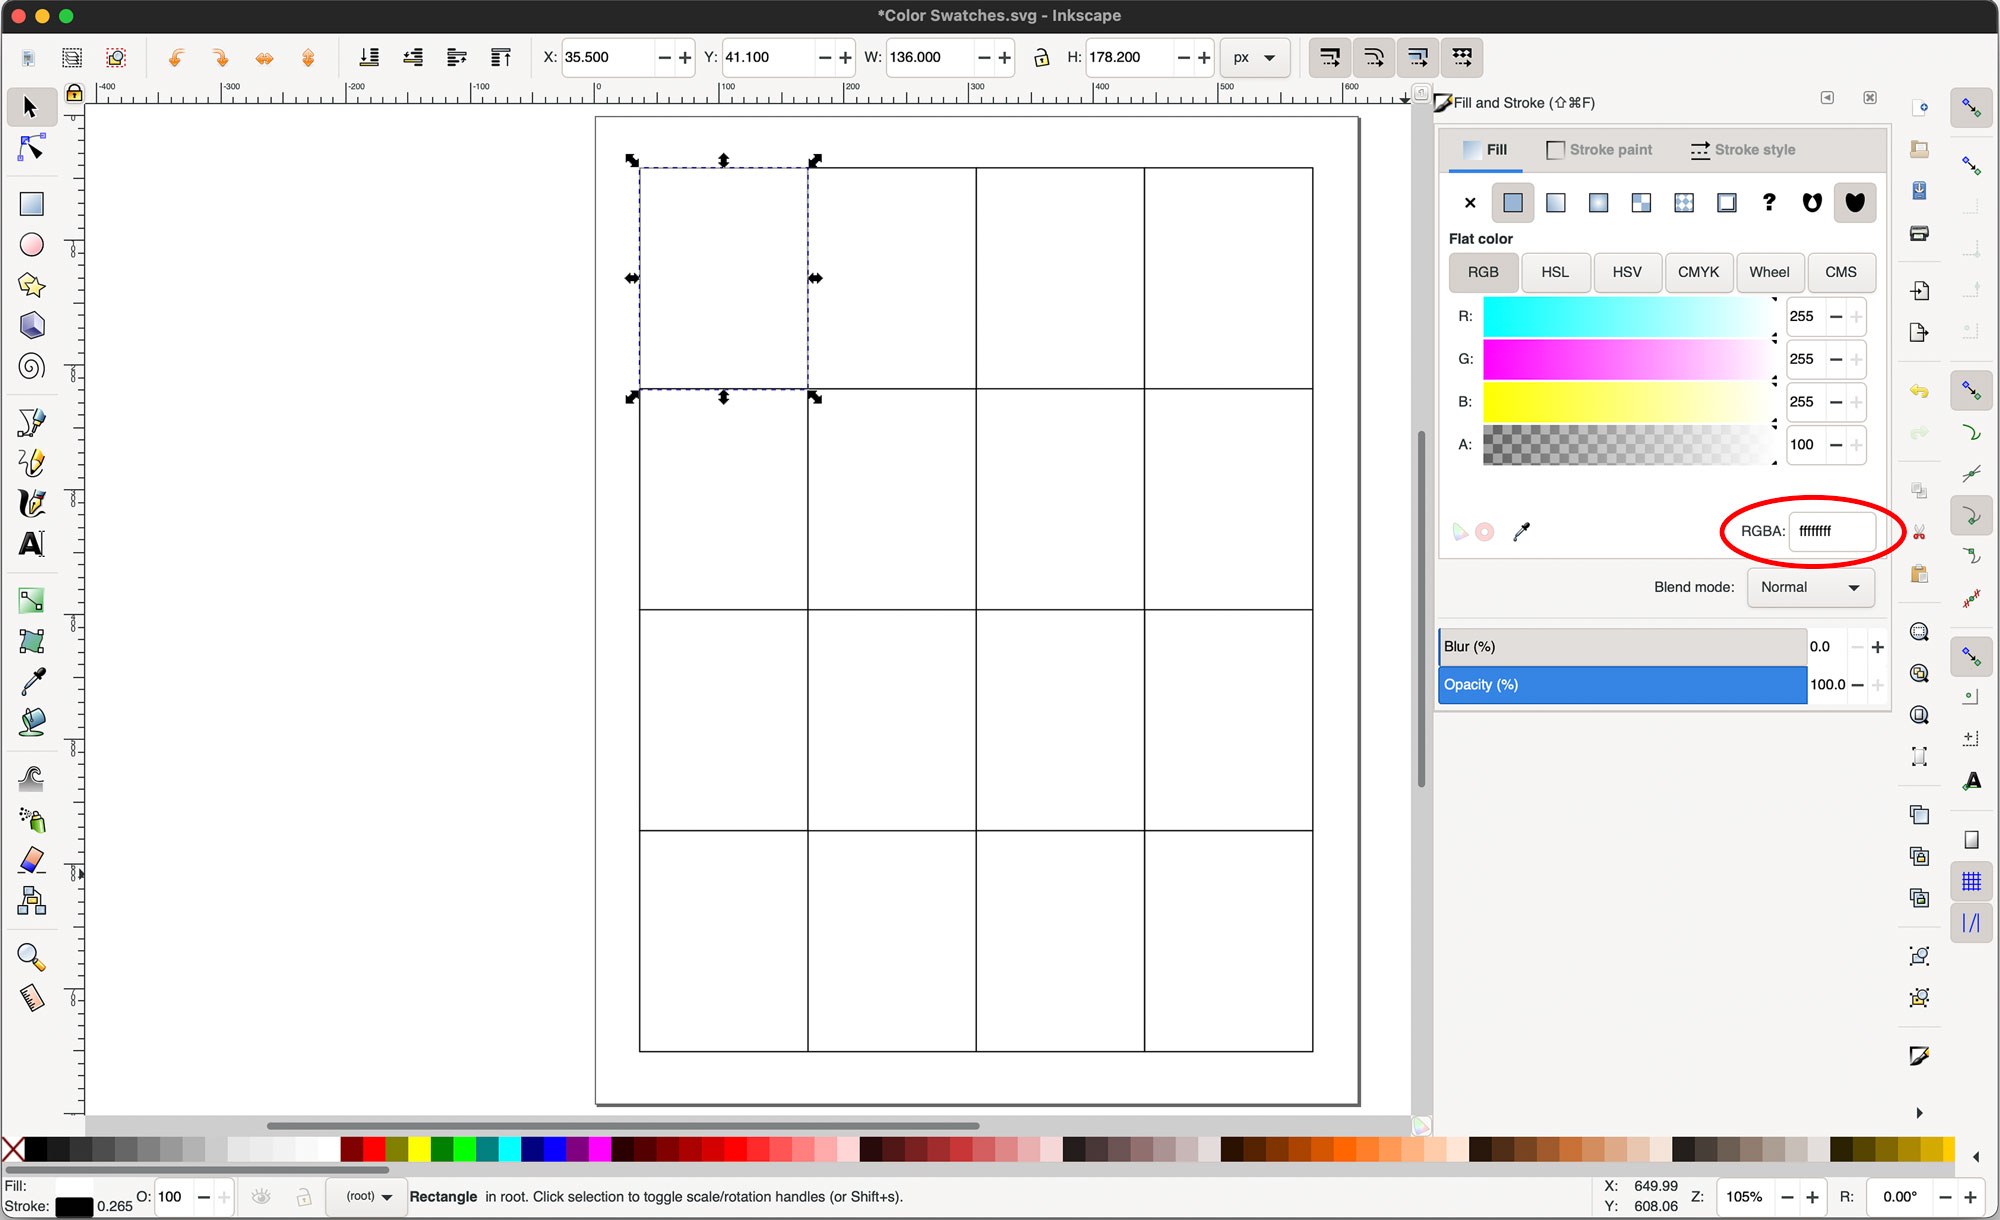
Type or paste the HEX code for your desired color in that box. The color will update in the selected rectangle.
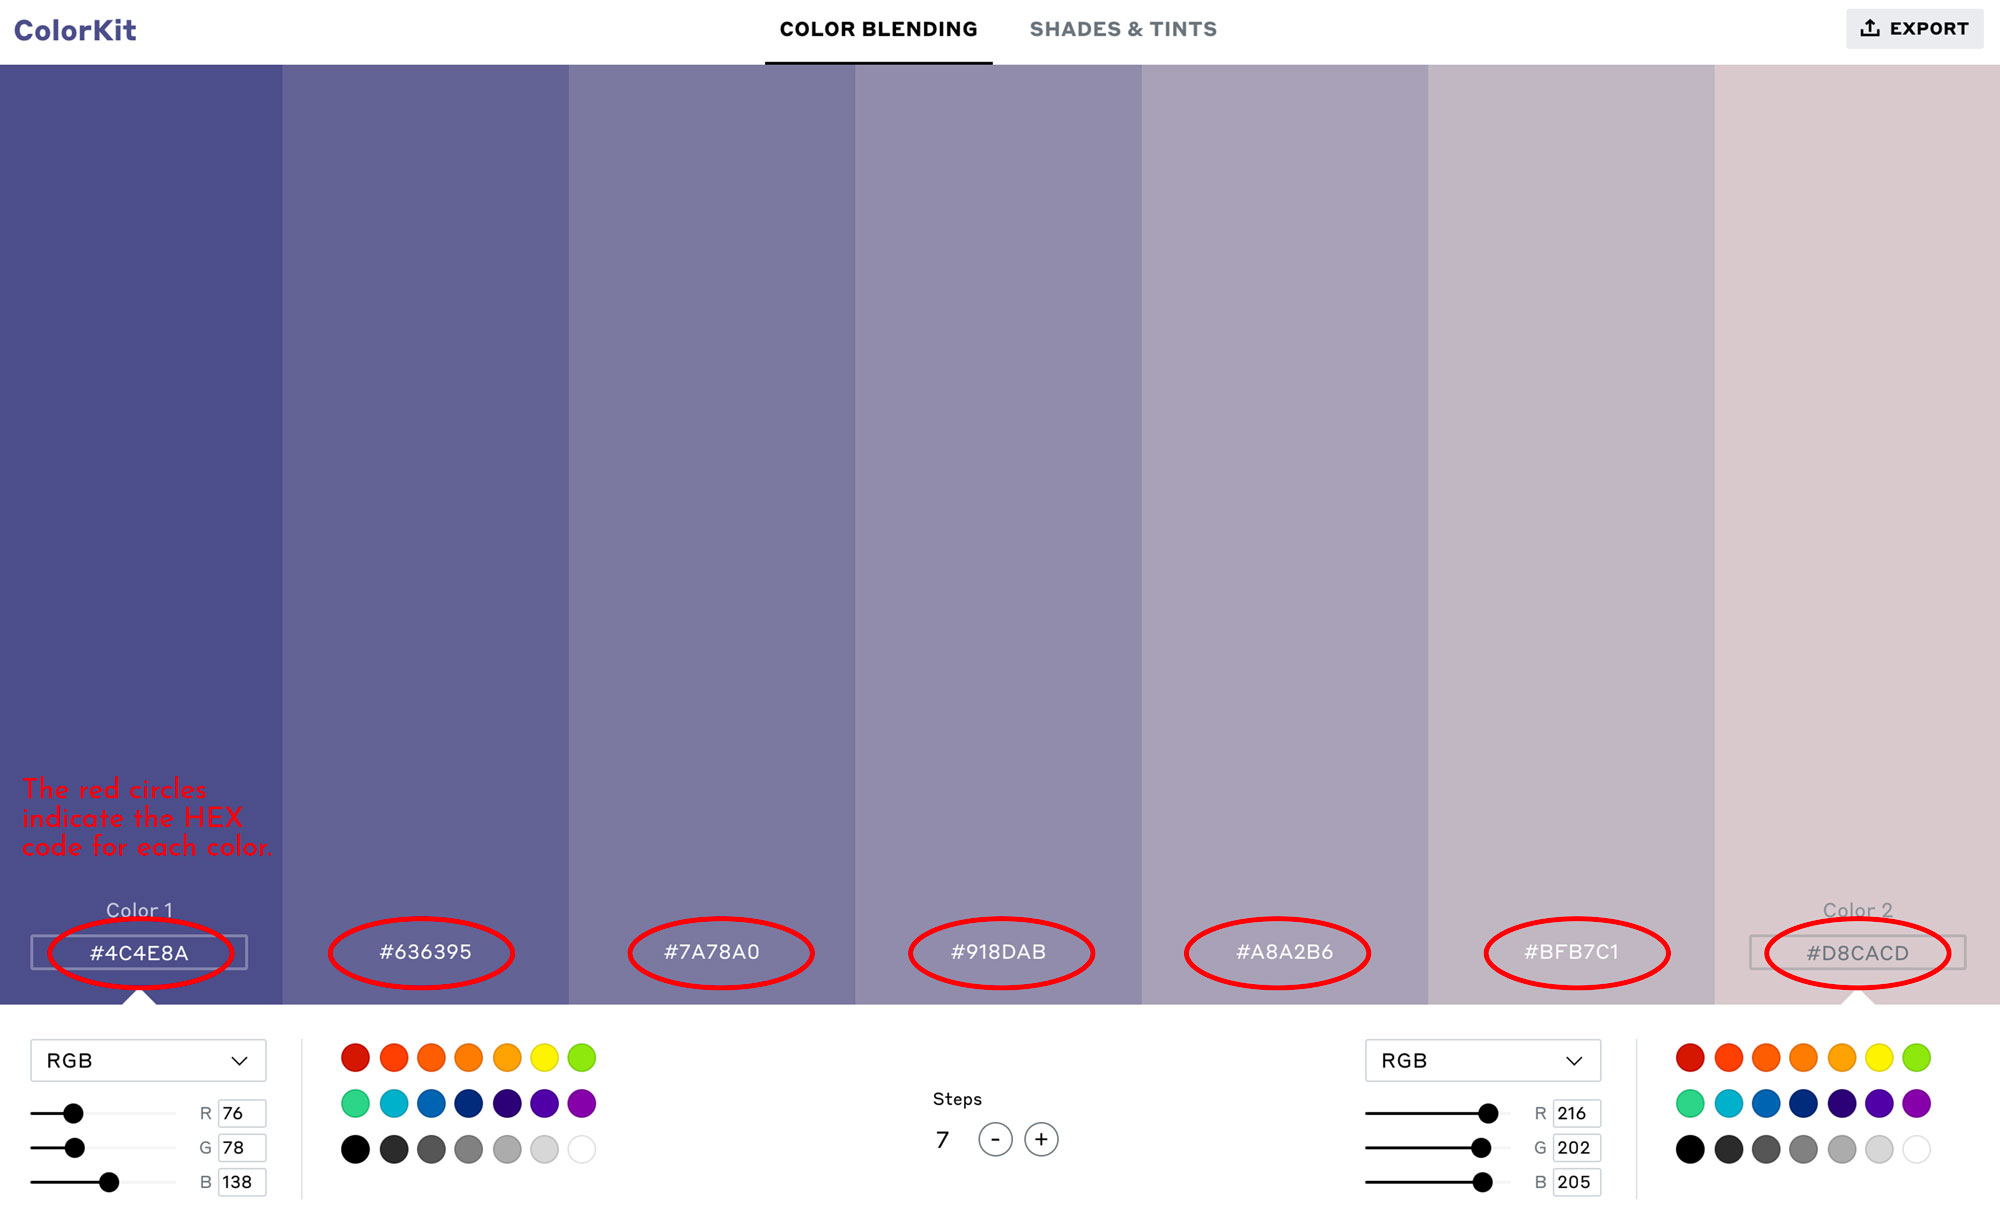
LinkNote: If you are using a website like ColorKit to make a color blend, the HEX code for each color in the blend is the hash tag code at the bottom of that color's column.
Step 2c: Add Color by Color-Picking from a Photo
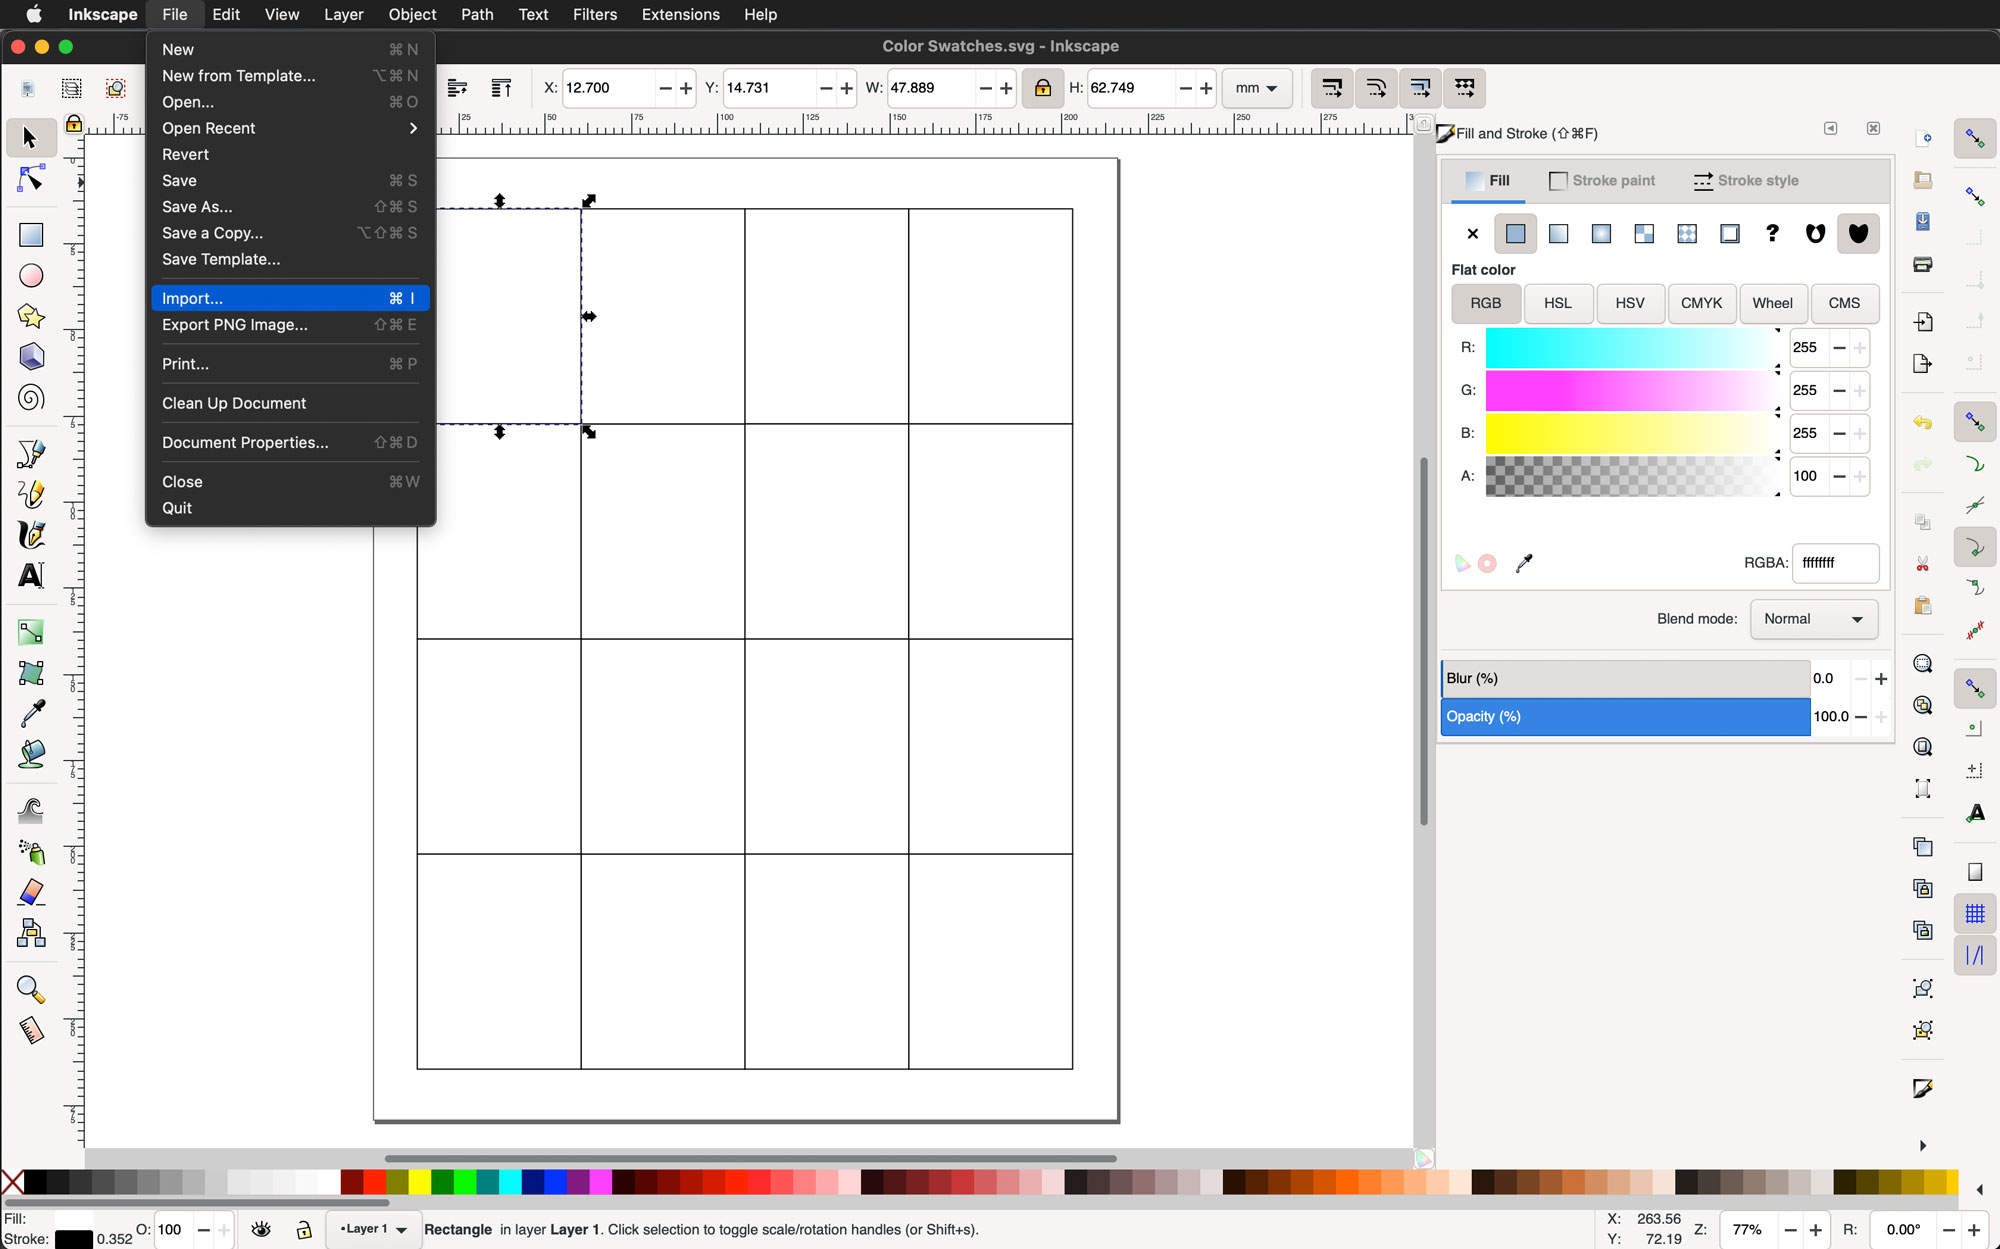
Open the File menu and click on Import.
This will open the Import menu. Use this window to navigate to the photo you want to import, select it with a single left click, and then click Open in the bottom left of the Import menu.

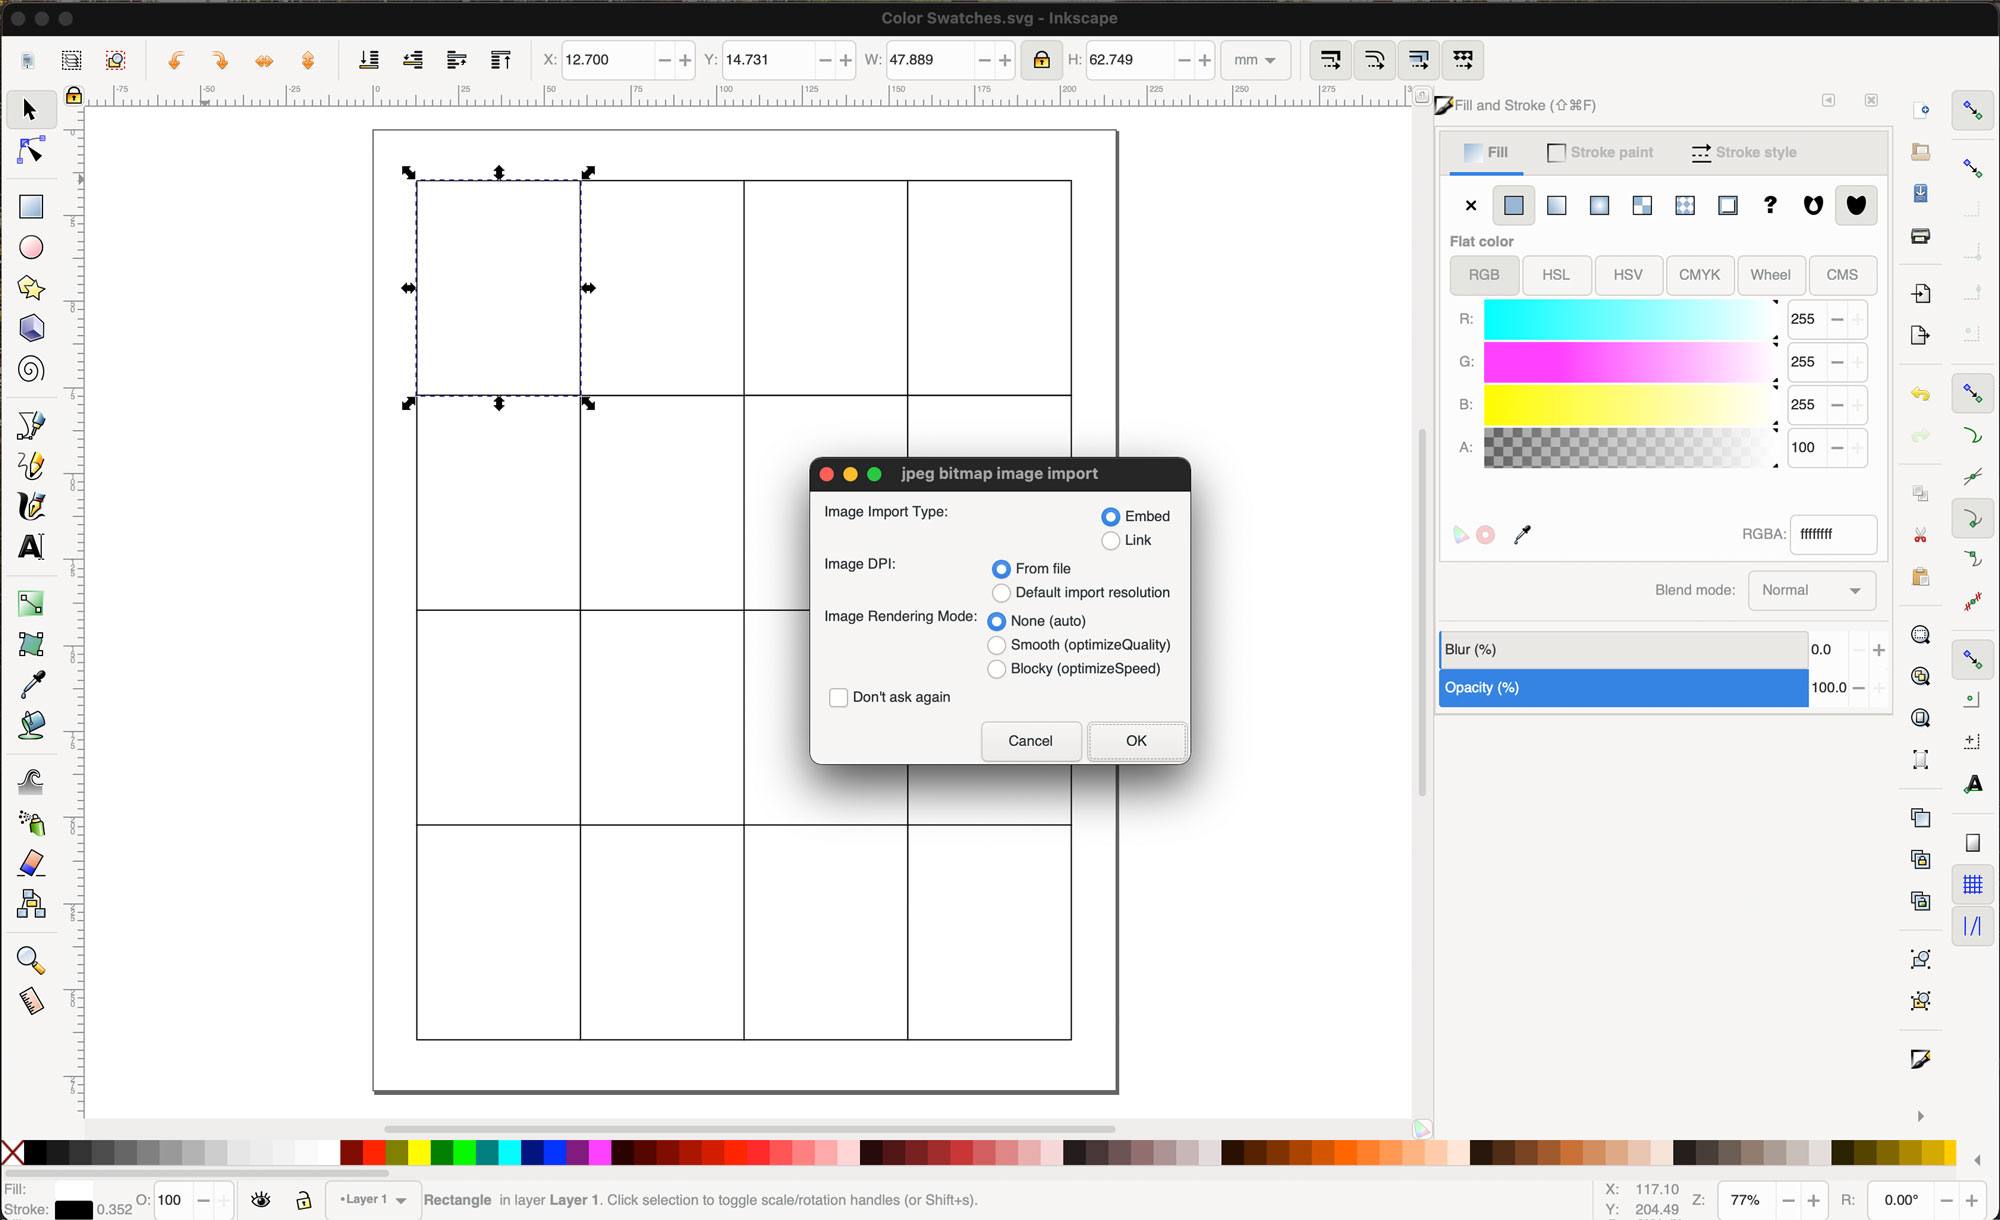
Another menu will open to confirm your image import settings. The default settings are fine. Click "OK".
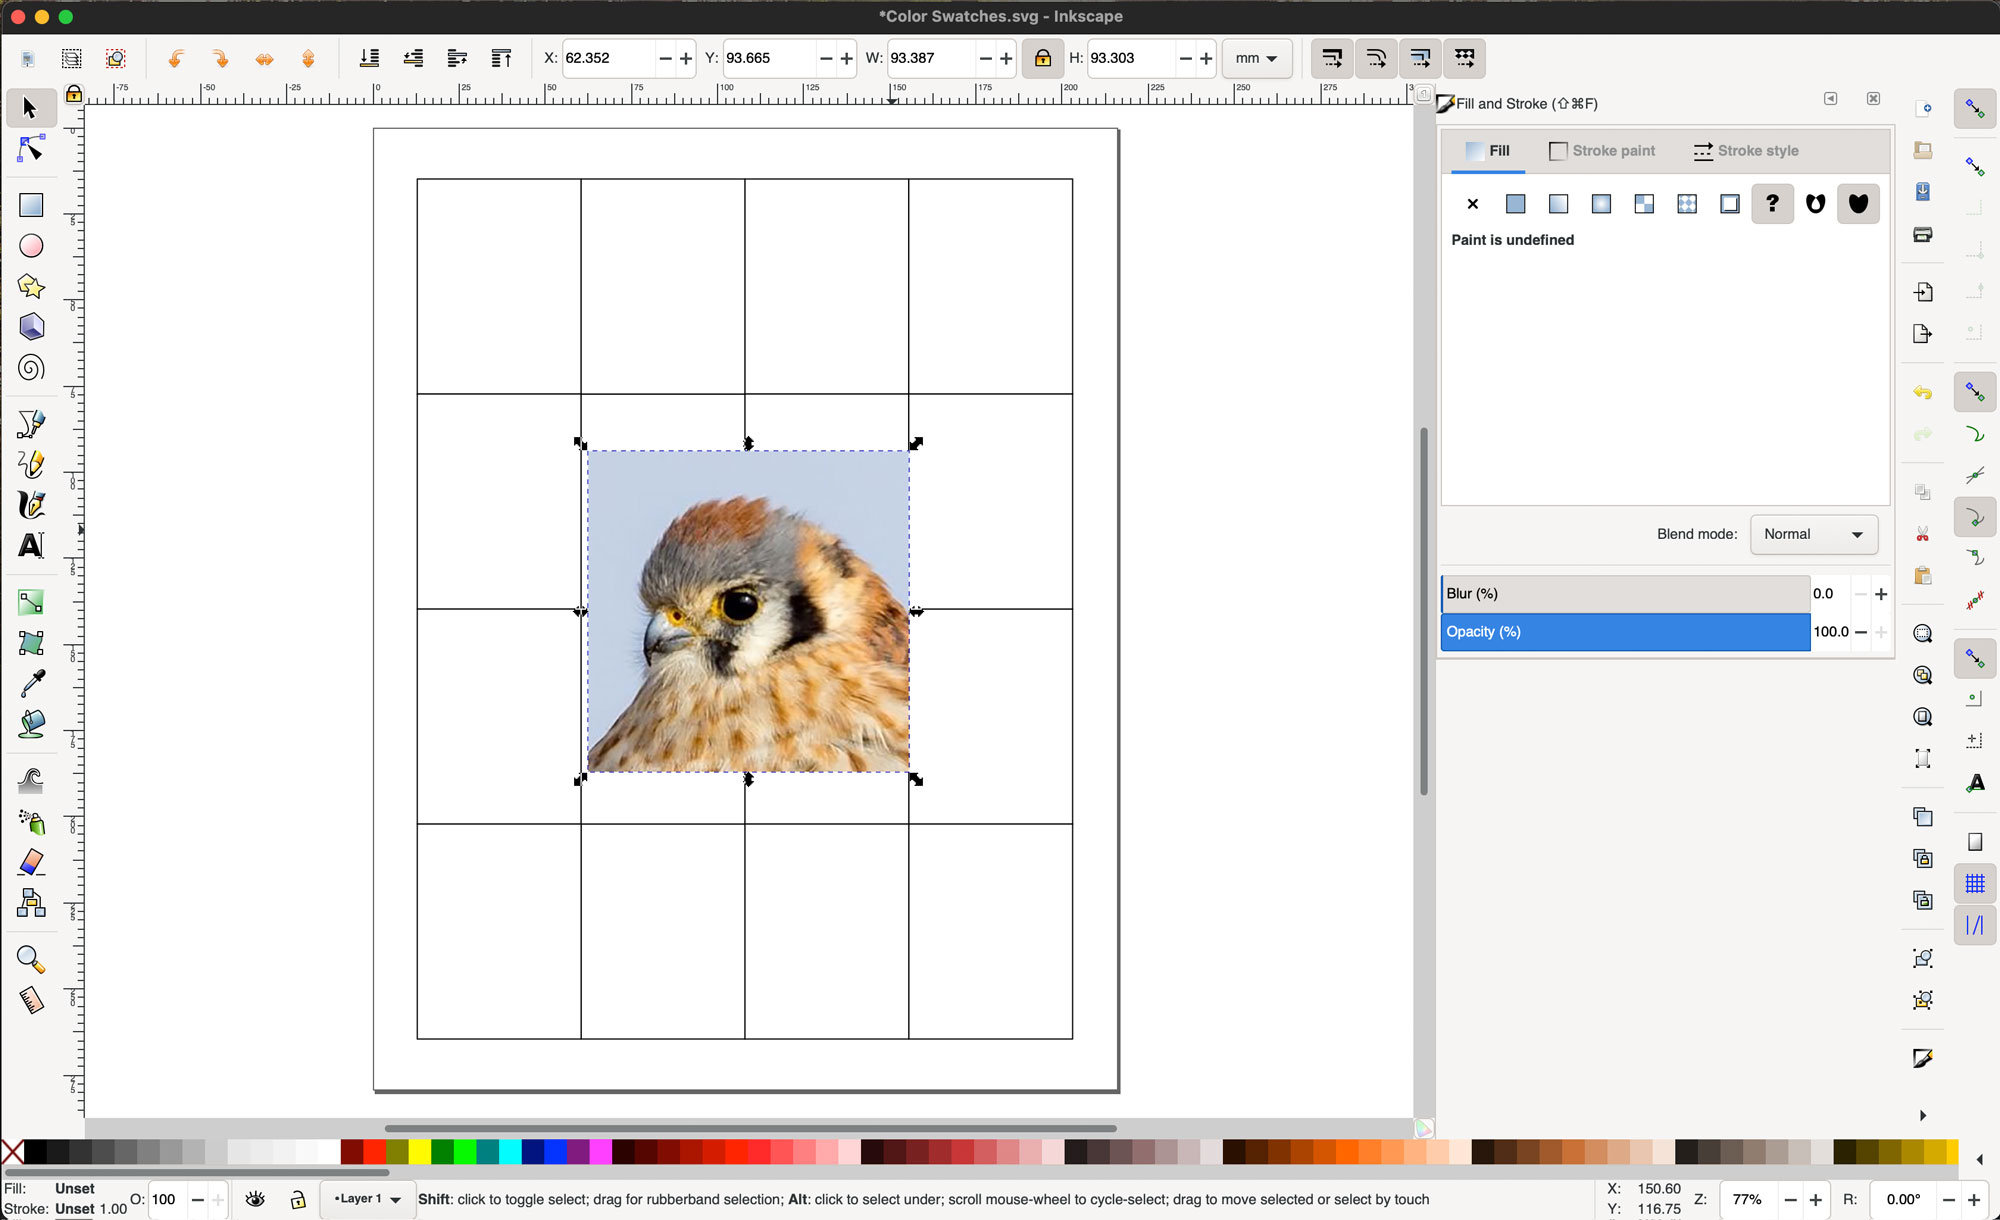
Your image will appear centered to the page.
Single left click on one of the rectangles to select it. Locate the Eyedropper in the Fill and Stroke panel on the right (indicated with a red circle in the screenshot below).
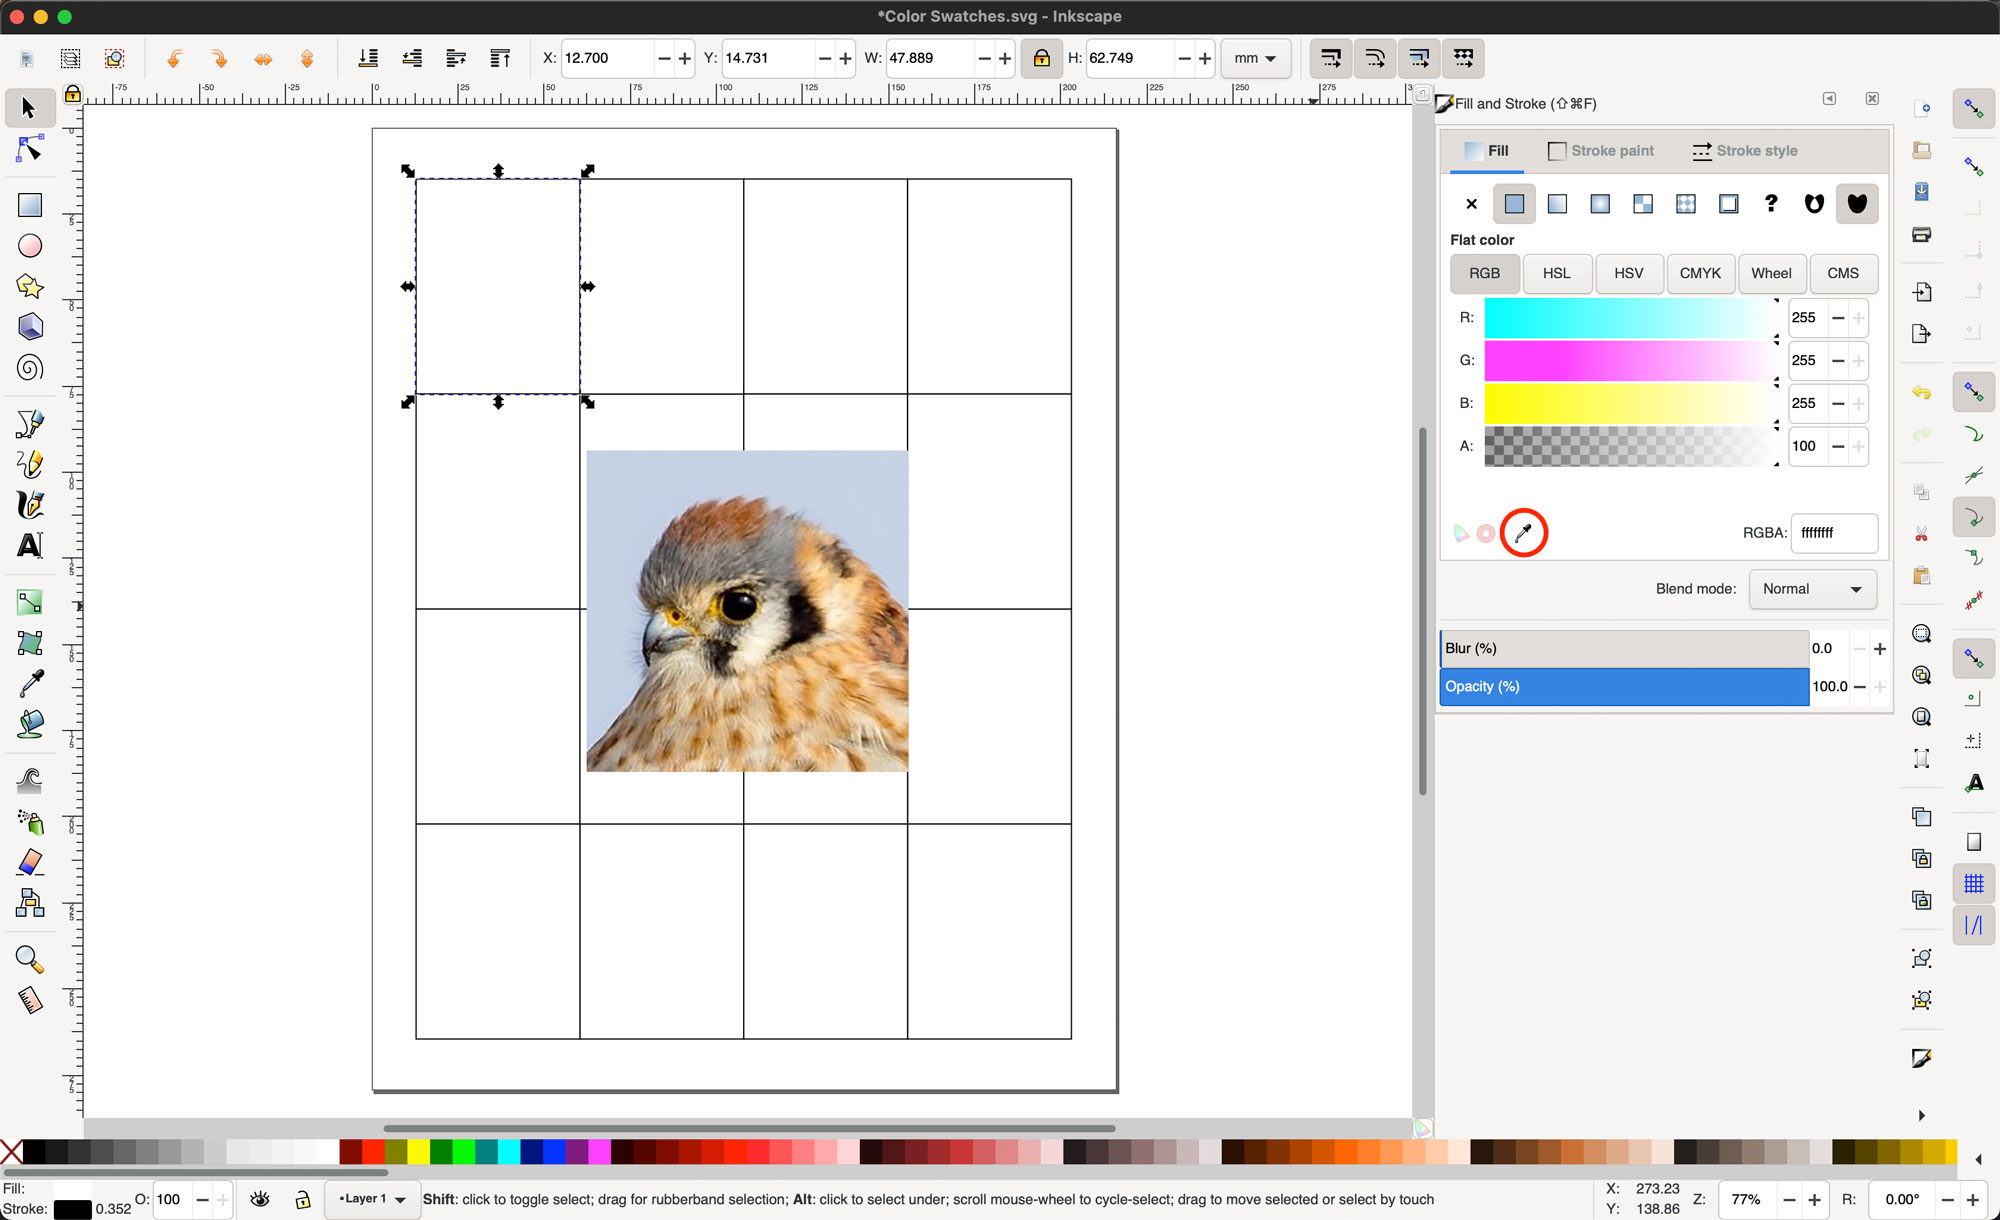
Left click the eyedropper. Move your cursor over the photo. The color under your eyedropper shows up in the little square by your cursor. Click on the color you want.

The color you clicked on will fill the selected rectangle.
Step 3: Print
Once you have filled the rectangles with color, your document is ready. Go to the File menu and click Print.
The Print menu will appear. Choose the settings appropriate for your printer and print the page.
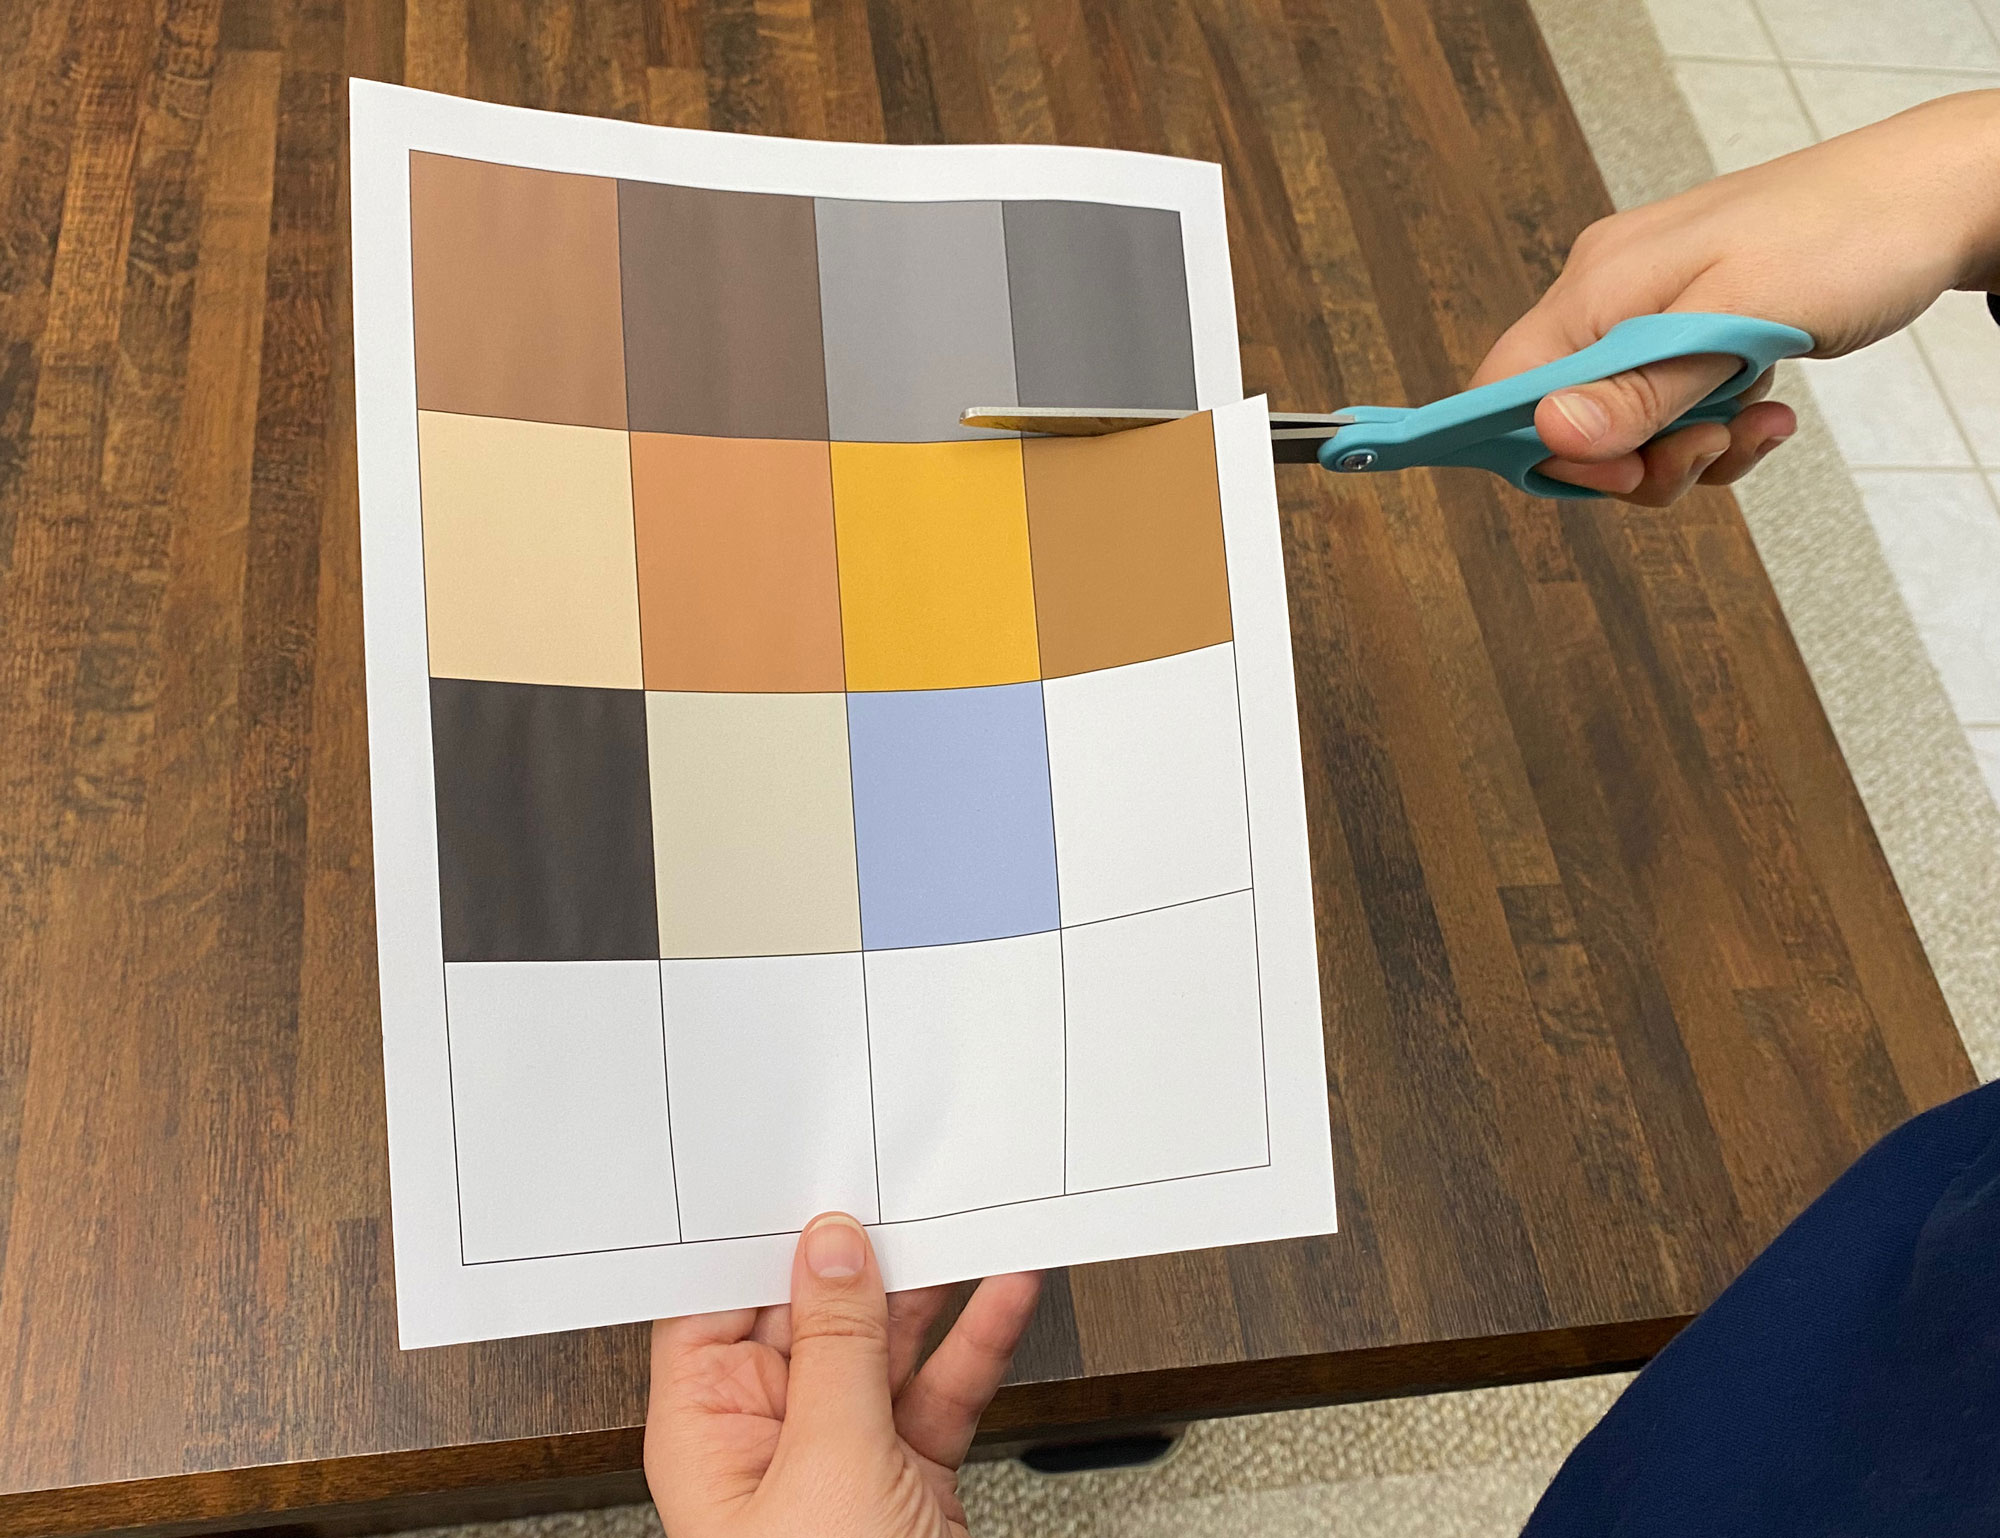
Step 4: How to Use Swatches
Use scissors to cut the swatches apart.
Visually match the color of the swatches to your fabrics. If you have an iPhone, use the "Mono" filter in the Camera app to match the value (lightness/darkness) of the swatches to the fabric.
Note: Android users, this is possible on your devices also, but depending on your version of Android, you may need to download an app that will let you do it. Not all versions of Android have filters built into the default Camera app. Google for "monochrome camera filter Android" or something along those lines.
FAQ
Q: Do I need an expensive photo printer and photo paper or will my basic printer work?
You do not need an expensive photo printer or photo paper. The printed swatches in the photos above are printed on basic, plain laser paper. This technique works as long as you have a printer that can print color.
However, if you do have a photo printer, try printing your swatches on a photo quality paper.
Q: What if the printed colors don't match the computer colors? Do I need to calibrate my screen and/or printer?
Unless the printed swatches are VERY different than the colors on your screen, you do not need to calibrate your screen or printer. The colors on the screen were designed as a unit. They look good as a group. After printing, those colors will still look like and work together as a group, even if marginally different than how they appear on the screen. As long as every fabric used in your quilt is selected by matching it to a color swatch, you won't have any surprises or oddball colors finding their way into the design.
Q: The fabric I like has a pattern that doesn't completely match the swatch. What do I do?
If your fabric has a prominent pattern, try to match the impression of the fabric to the swatch. Look at the grey fabrics in the photo above where I'm demonstrating how to use a cellphone to check value. The top grey fabric has a much more prominent pattern than the bottom grey fabric. However, the value of the top grey fabric overall matches the dark grey swatch much better than the bottom grey fabric.
In addition, try to choose fabrics with patterns that are tone-on-tone. That means a brown fabric with a brown pattern is good, but a brown fabric with a yellow pattern is not.
