Leap of Faith Process
- Published:
- Length: 1755 words
- Reading Time: 9 minutes
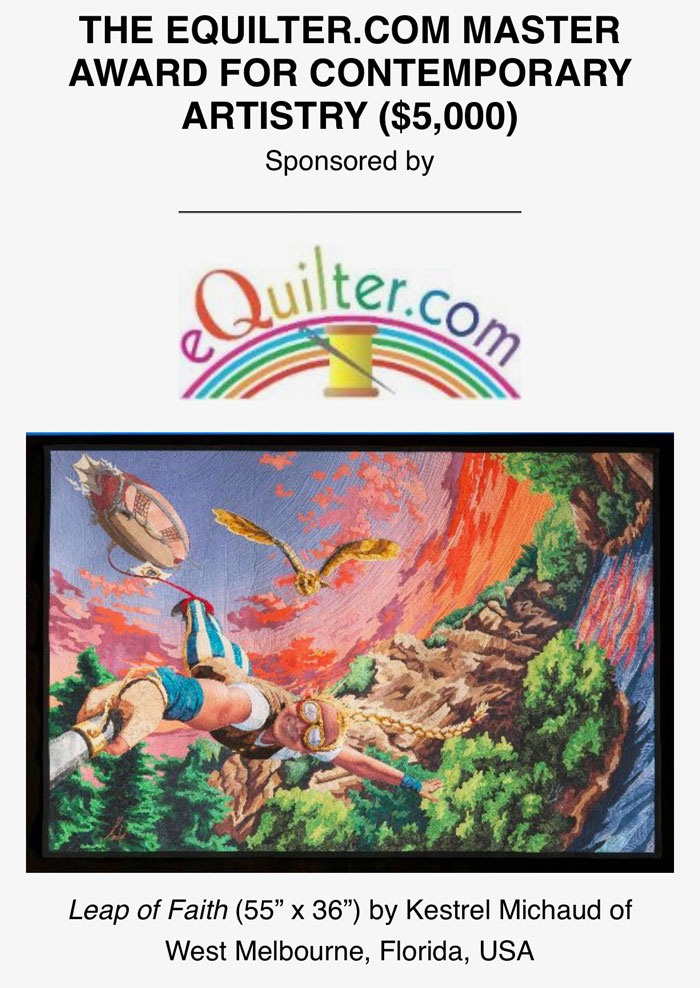
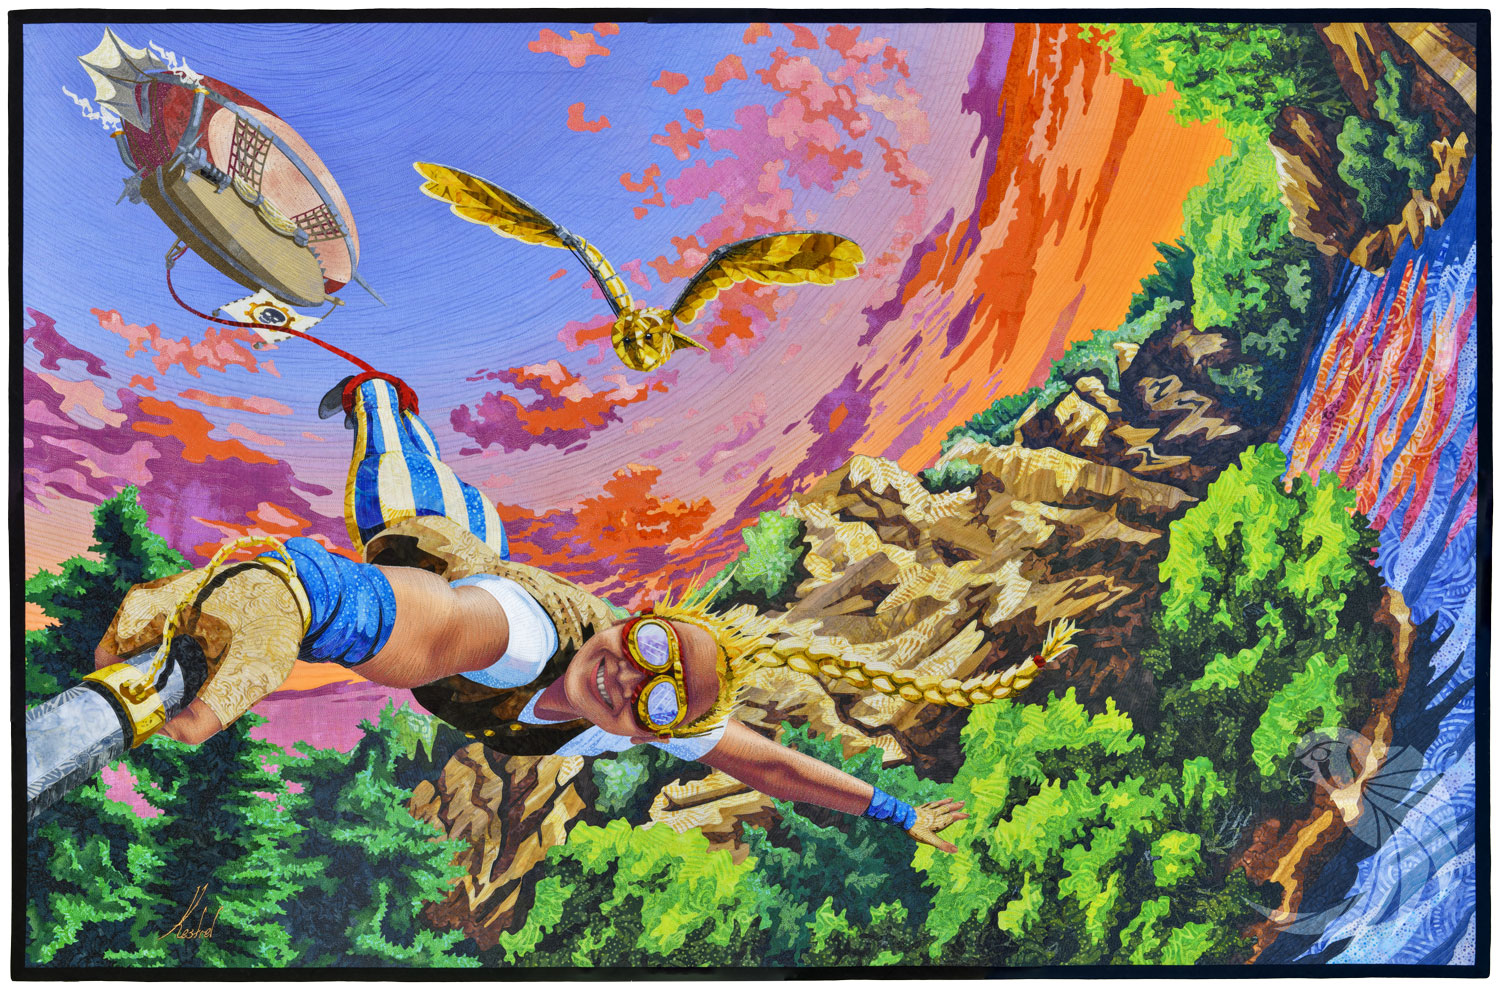
Leap of Faith is one of my favorite quilts I've created to date, and not just because the title is a pun (Faith is the name of my bungee-jumping girl). My goal is for my quilts to share an emotion with viewers. I want people to look at my quilts and feel something. Leap of Faith's adrenaline-packed subject does that unequivocally. It's thrilling. It's fun. Leap of Faith embodies everything I want my quilting to accomplish.
Another quilt of mine, Steampunk Selfie, is currently on tour with SAQA's Aloft exhibition, and it looks strikingly similar to Leap of Faith. A full explanation of why I would put so much time into making two similar quilts can be found here.
Sketch It Out
All of my quilt designs start as drawings. I freehand draw every design in Concepts, a vector drawing app on my iPad Pro. In the photo below, you can see a screenshot of my drawing of Faith in front of the outline of the sky.
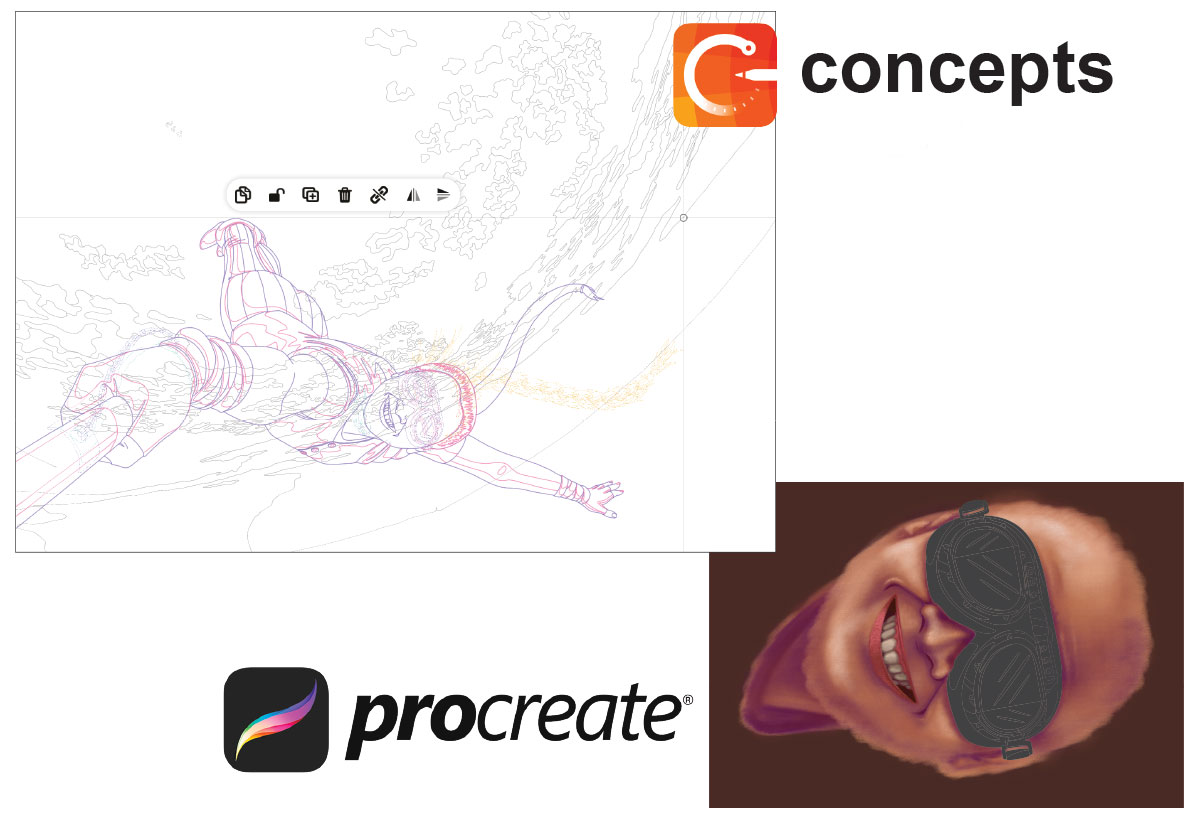
In the lower right corner of the above image is a screenshot of Faith's face from Procreate, a raster-based drawing app on my iPad Pro. All of Faith's skin areas (her face, arms, and fingers) were digital drawings I later printed through Spoonflower.
To learn about the difference between raster and vector drawing, and learn more about these two drawings apps in particular, head over to this blog post.
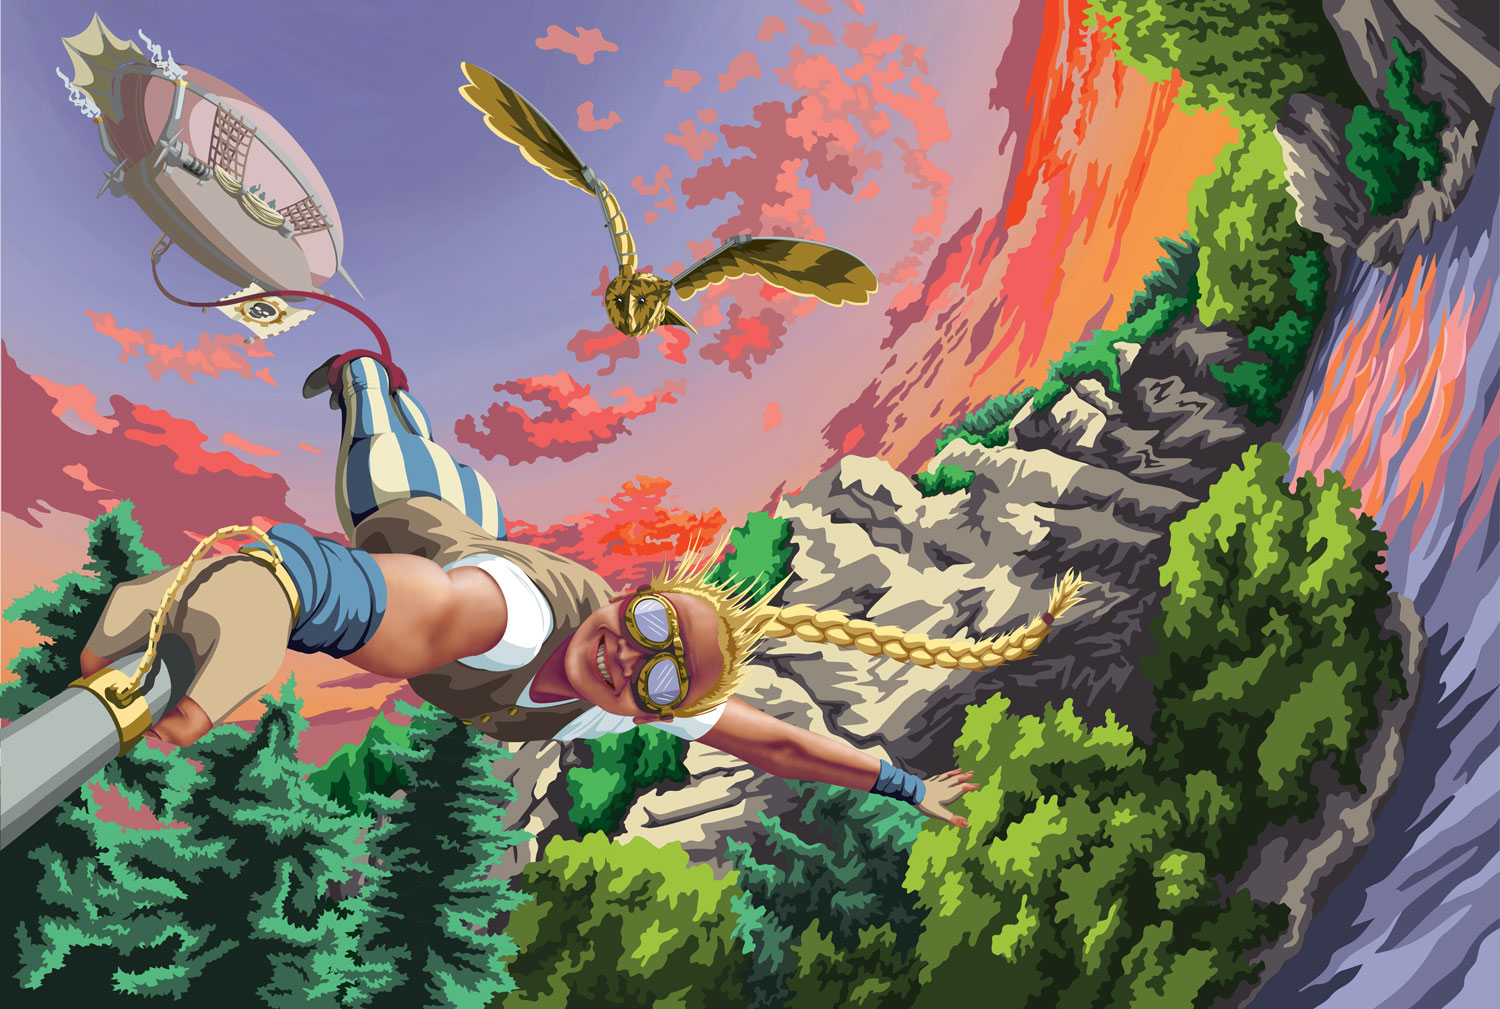
Create the Template
Once all of the outlines are drawn and the skin areas digitally painted, I take my drawing files into Adobe Illustrator and create a full-size, full-color rendering of my design. I call this rendering my template, and it's my North Star for completing the actual quilt.
Design Overlap
My quilts are made using a technique called fused, raw-edge appliqué. Let's break that down: Appliqué — in a nutshell — means small pieces of fabric are layered over each other and attached to a larger background in order to form a pattern or picture. The "fused" part means each of those pieces of fabric is backed by fusible — a heat-sensitive glue. They're ironed together, which melts the glue and attaches the fabric pieces together after it cools. Lastly, the "raw-edge" term means the edges of each piece of fabric are visible in the finished quilt; they are not turned under or otherwise hidden.
In other words, Leap of Faith is made from hundreds of pieces of fabric — more than 1500, actually — that are all backed by fusible, and I iron them on top of each other in such a way that they collectively form the overall design.
There is a catch: The template I designed in the previous step does not have any of this overlap. I have to manually design in the overlap piece by piece so that after the fabric pieces are cut, they'll be able to stick to each other.
Take a look at the photo below. The goggles on the left are from the original template. See how all the pink outlines — which indicate the edges of each shape — are all perfectly aligned along the outside of the shapes? There is no overlap. Each shape perfectly lines up to every other shape, just like a jigsaw puzzle.

The goggles on the right are from after I added overlap to every shape. Even though none of the colors have changed, the pink lines are all over the place. This shows that the pieces now overlap and underlap each other.
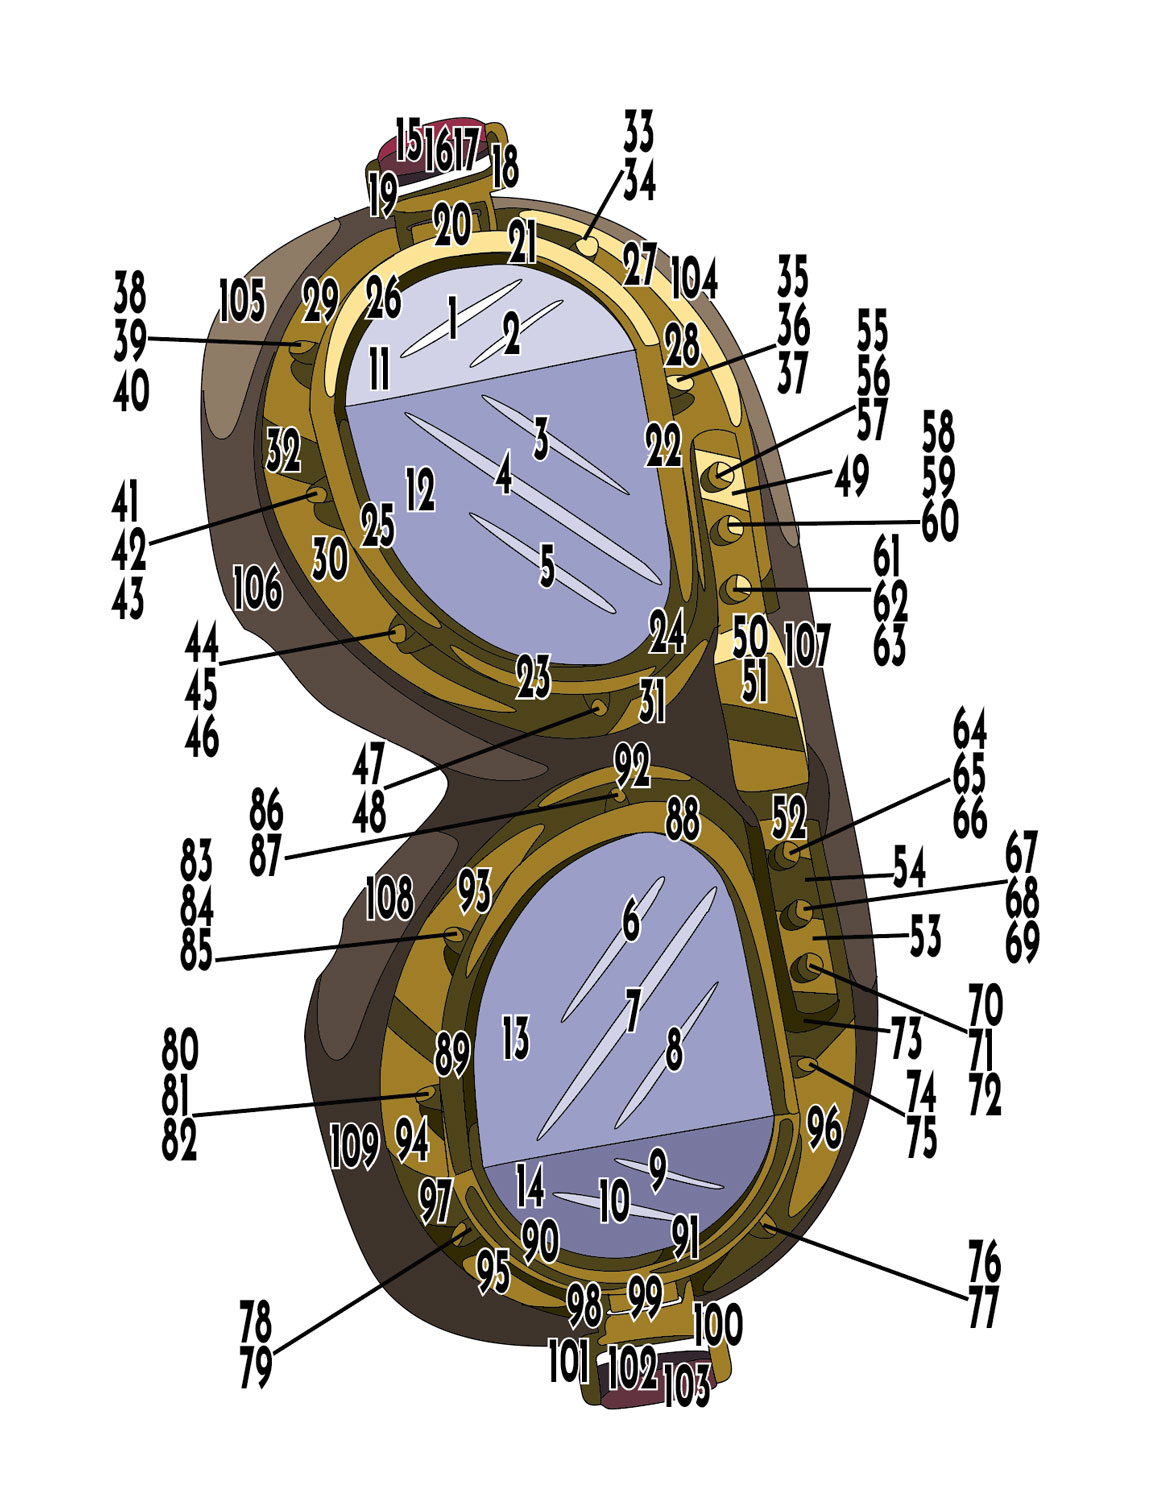
Add Numbers
At the same time I add overlap to my template, I also assign each piece a number. The number helps me re-align the fabric pieces according to the template after I cut them from fabric.
Here is the numbered template for Faith's goggles, showing all 103 pieces. These goggles are 5" tall.
Prepare for Cricut Cutting
The last part of my digital design process is to prepare my pieces for Cricut cutting. I use a Cricut Explore Air 2 to cut all my fabric pieces, and that requires arranging my pieces by color on specific artboards (pages) that match the size of a sticky cutting mat.
In the image below, Faith's full-size, numbered template is on the left. All of her pieces have been arranged by color onto the tall, skinny artboards on the right. After arranging my pieces like this, I export each artboard as an SVG file. Each SVG file will be uploaded to the Cricut software for cutting.
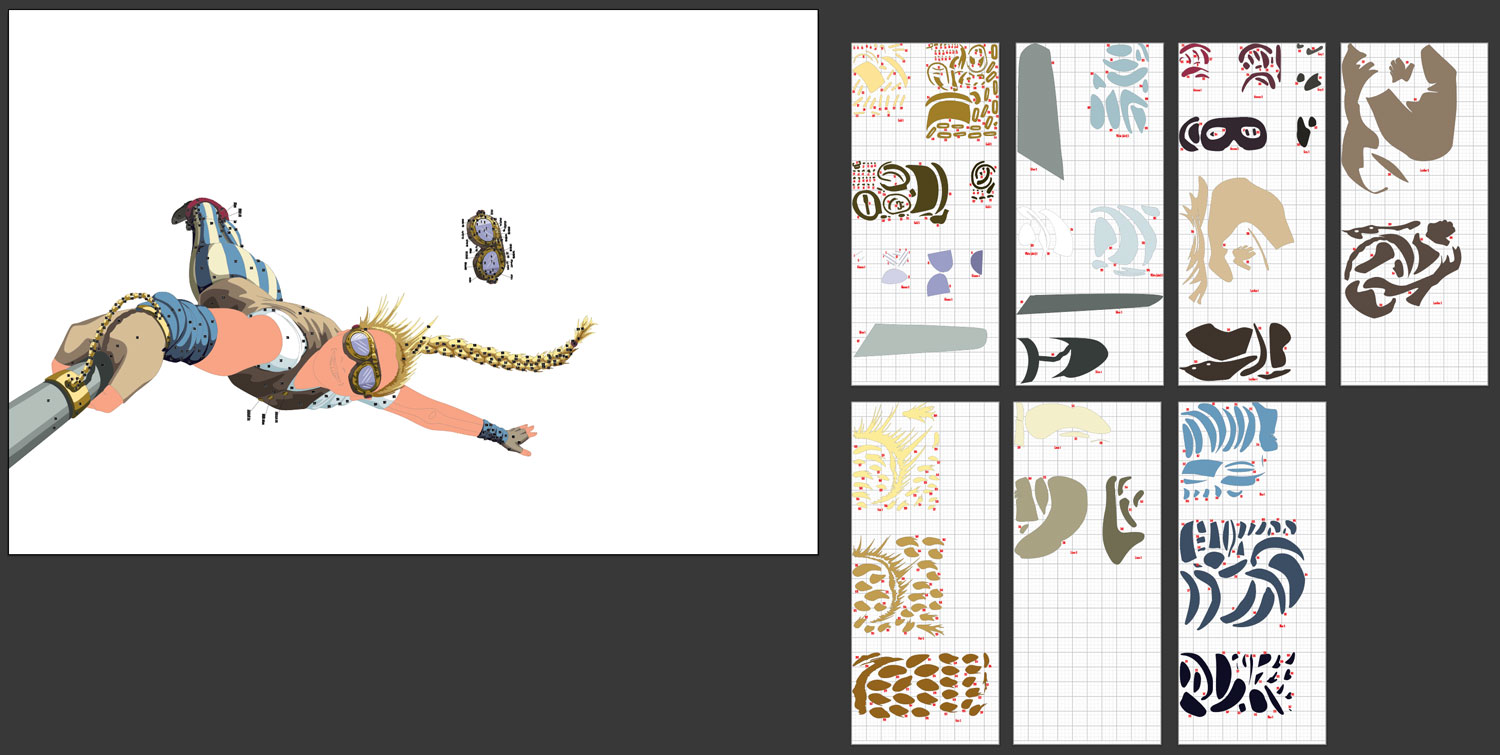
By this point in the process, I'm 40-50% finished with the entire project. In other words, if a quilt takes a total of 100 hours to complete from initial sketch to stitching the binding, the digital design portion would take me 40-50 of those hours.
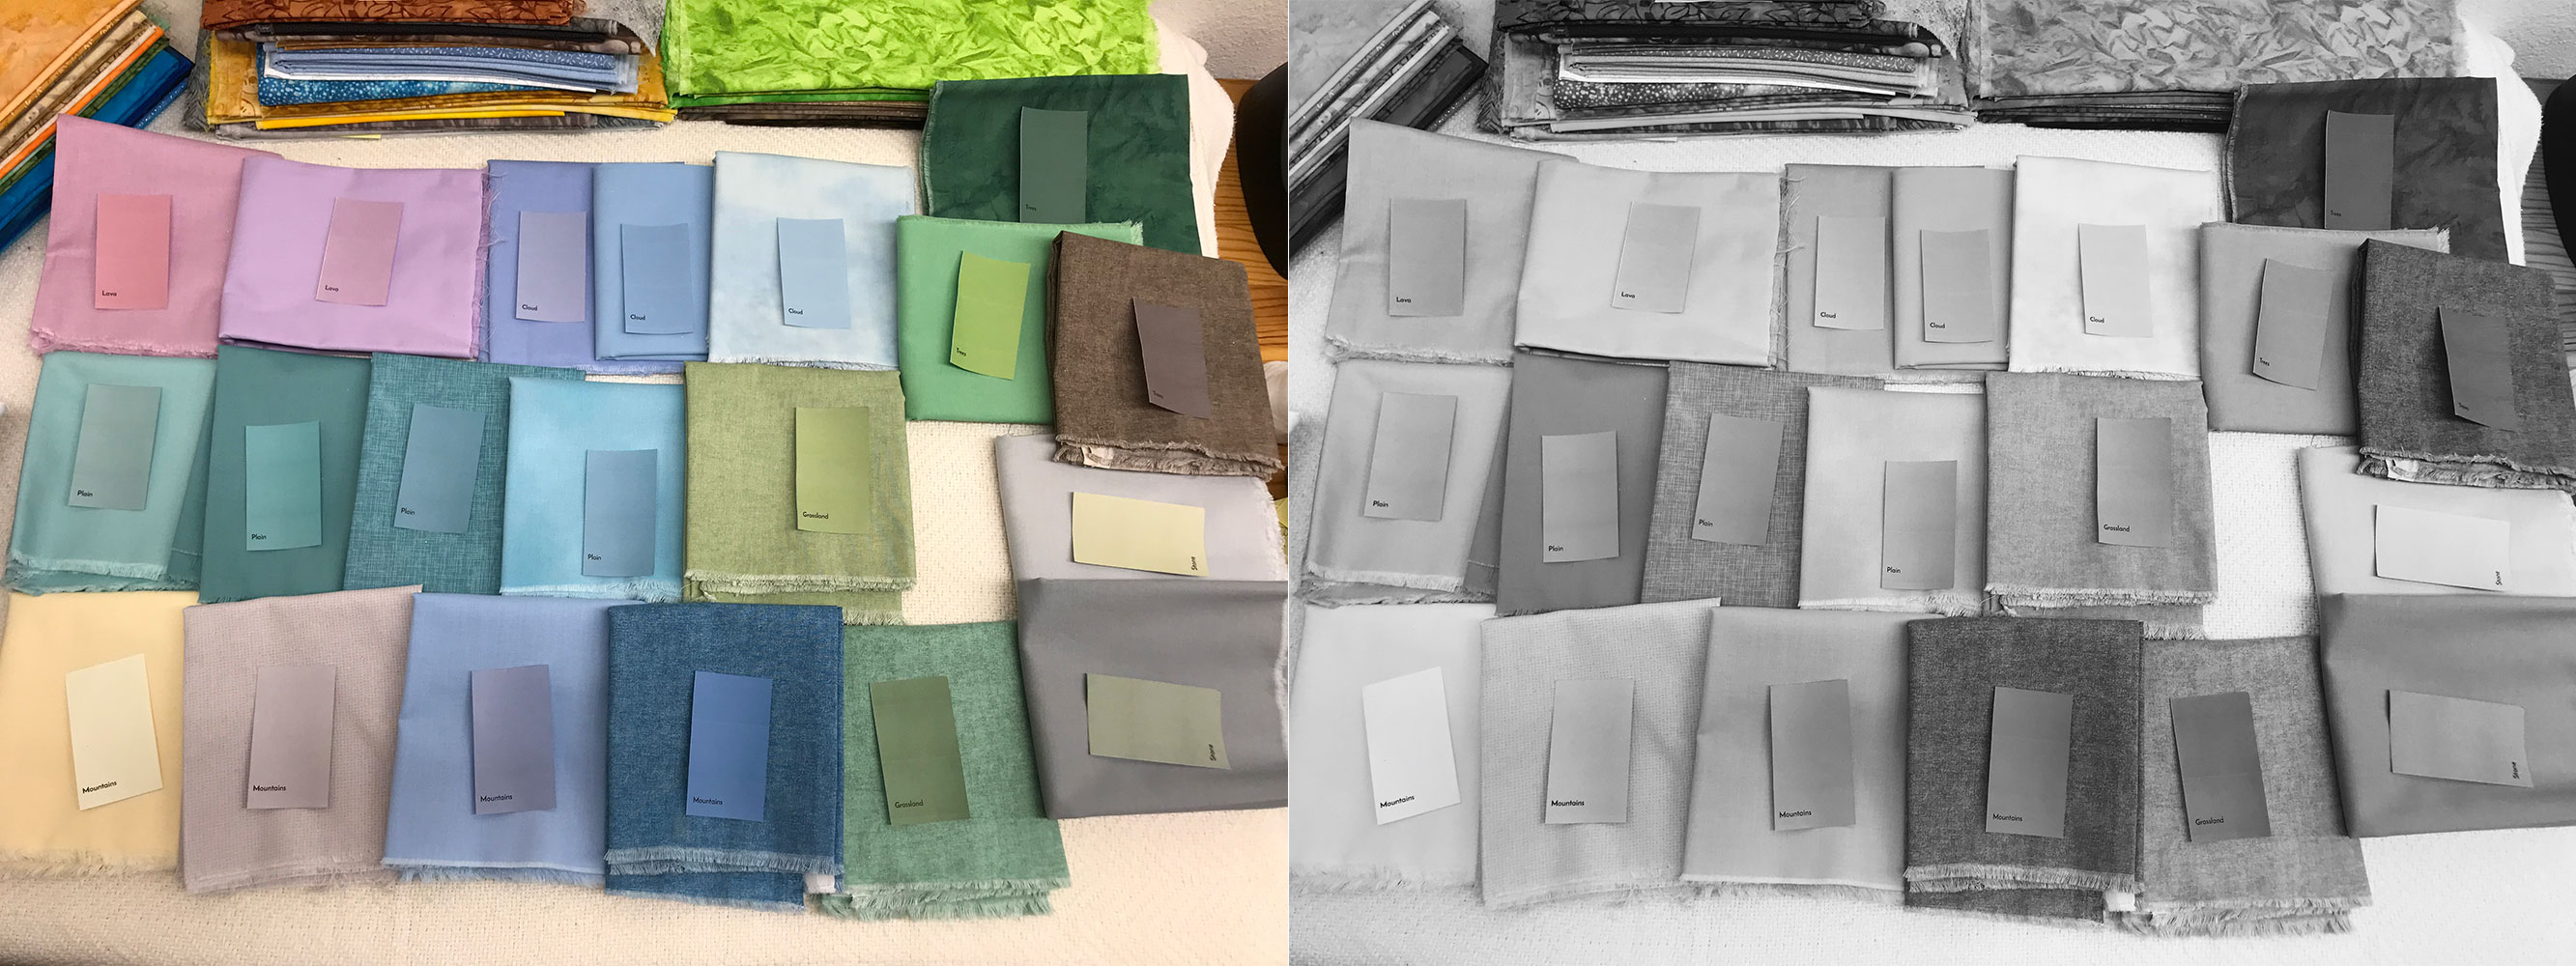
Picking Fabric
In the course of designing the template, I keep track of what colors I'm using for what areas. Those colors are shown as colored squares to the right of the template:

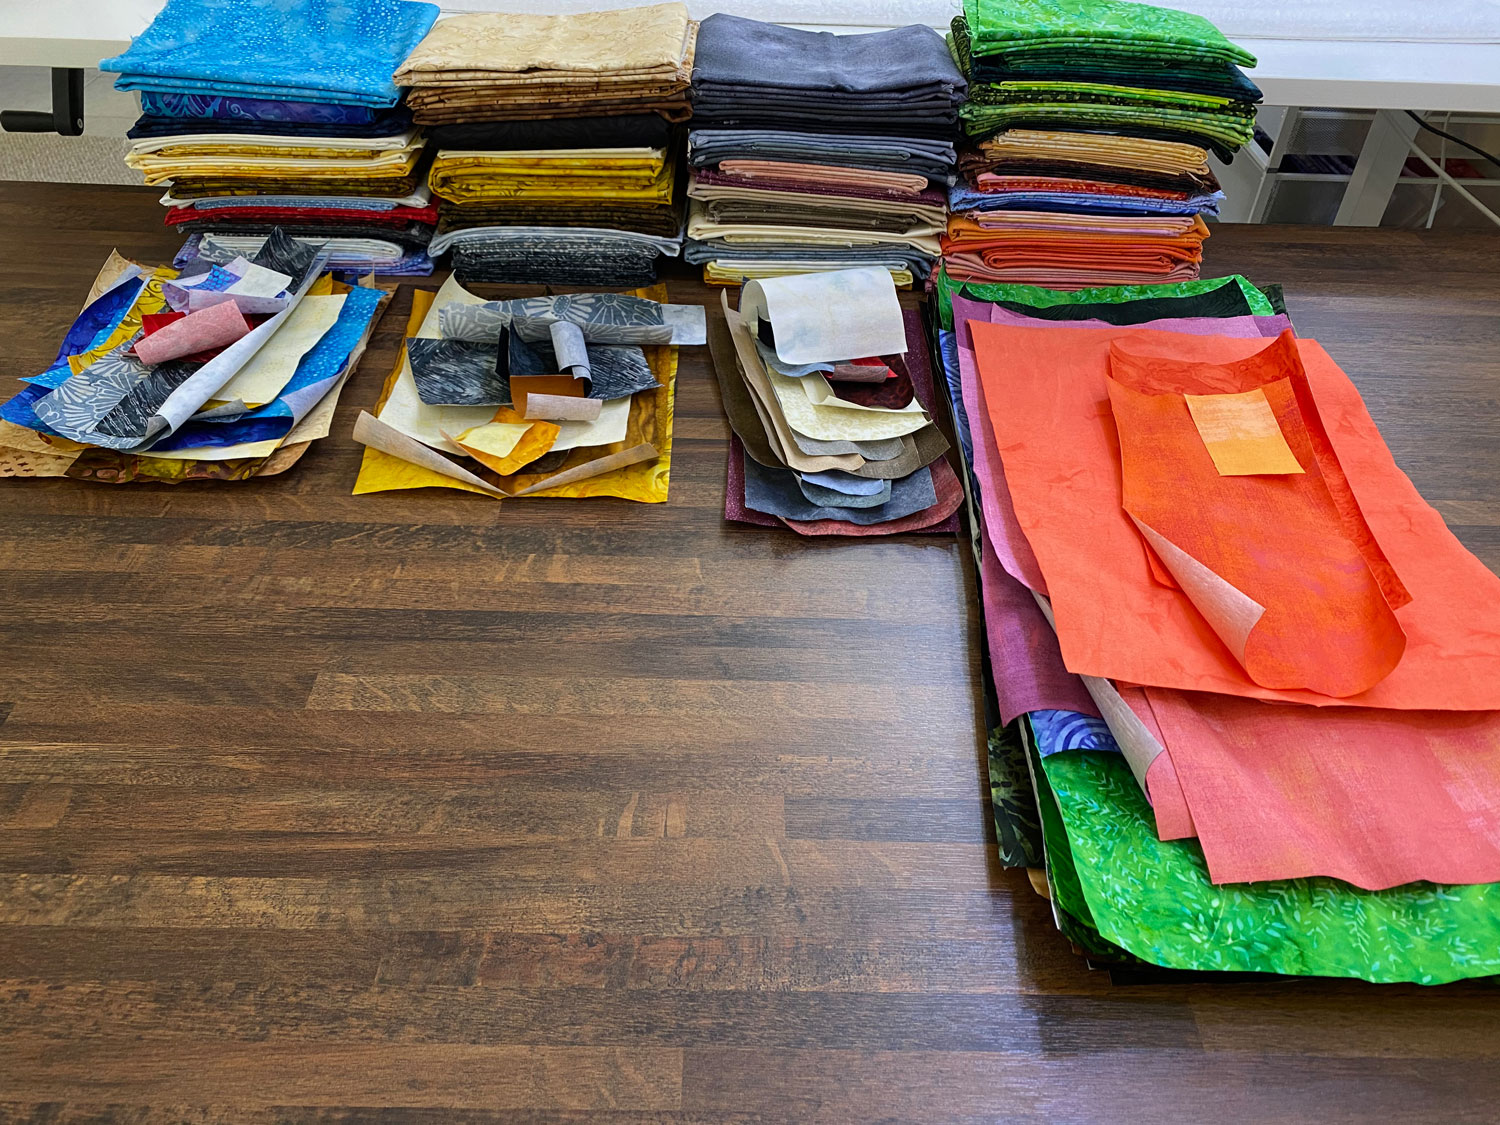
Each of the colored squares is one fabric I'll need for the quilt. I print those colors as little paper swatches and match them to fabric, using my cellphone's camera to check the value.
I realized while writing this post that I completely forgot to take a photo of all the fabrics I chose for Leap of Faith with their swatches. So the photo below shows what the process looks like with fabrics for a different quilt. On the left are the swatches on their fabrics. The right has the same view in grayscale to show how the values match.
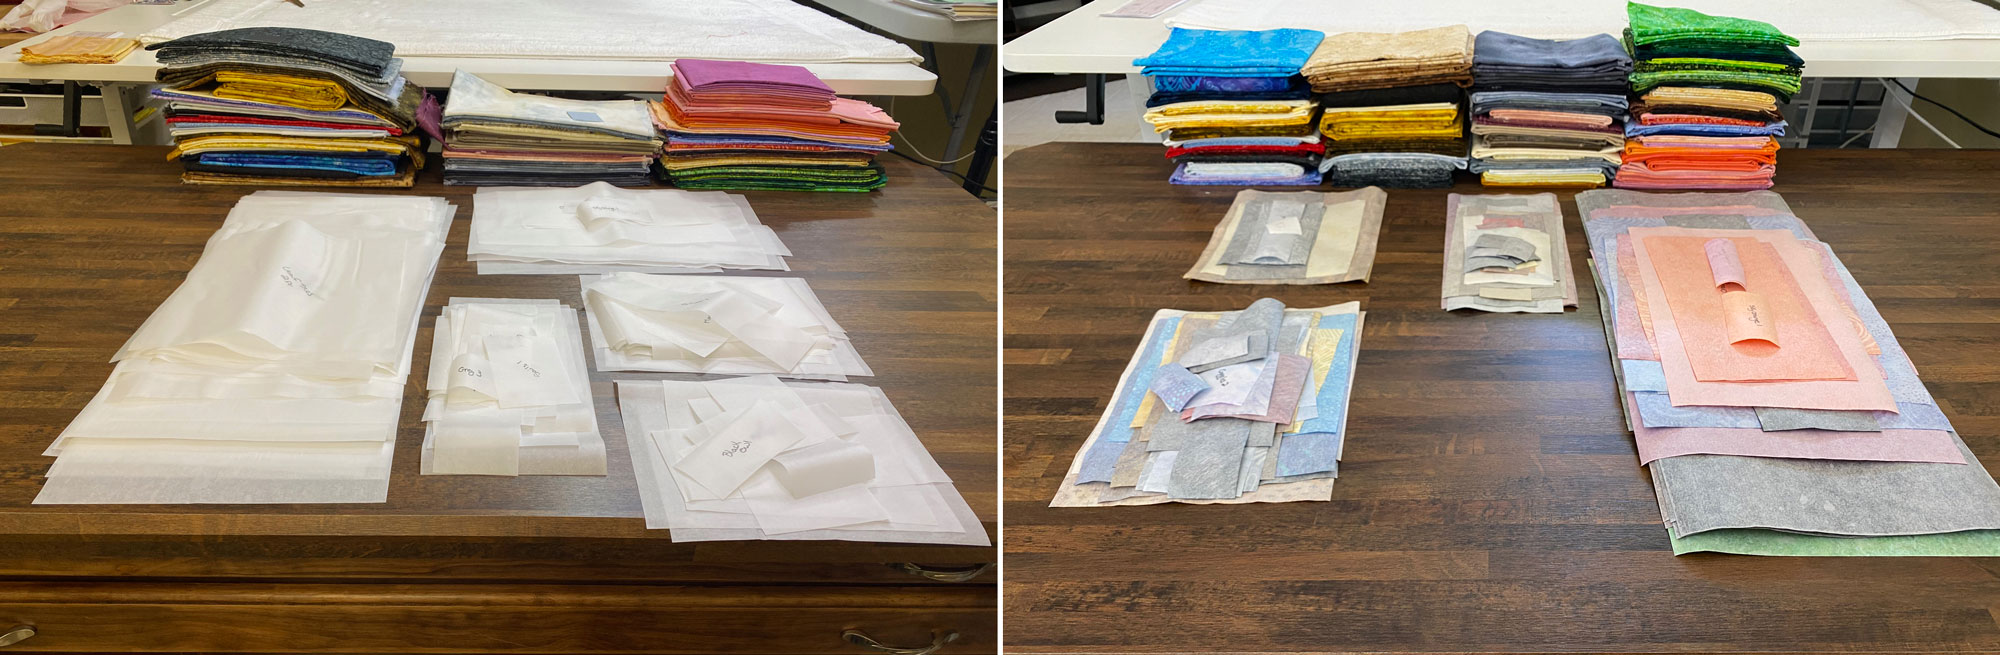
Attach the Fusible
Thanks to arranging all of my pieces into orderly rectangles on the Cricut artboards for cutting, I know exactly how much fabric I need for every color. I keep track of those dimensions and cut a swatch of Wonder Under fusible for each. For Leap of Faith, I needed 115 swatches.
Below, left I've arranged my fusible swatches in front of the fabrics I used for Leap of Faith. On the right are all the swatches after I ironed them to their respective fabrics.
Treat the Fabric
After years of experimenting with many different anti-fray products, I finally developed a method of using Mod Podge that is the most effective and least expensive option. I coat all of my fusible-backed fabrics with a diluted solution and let them dry overnight.

Here are all of my treated fabrics after they dried. At this point, they are all ready to cut.
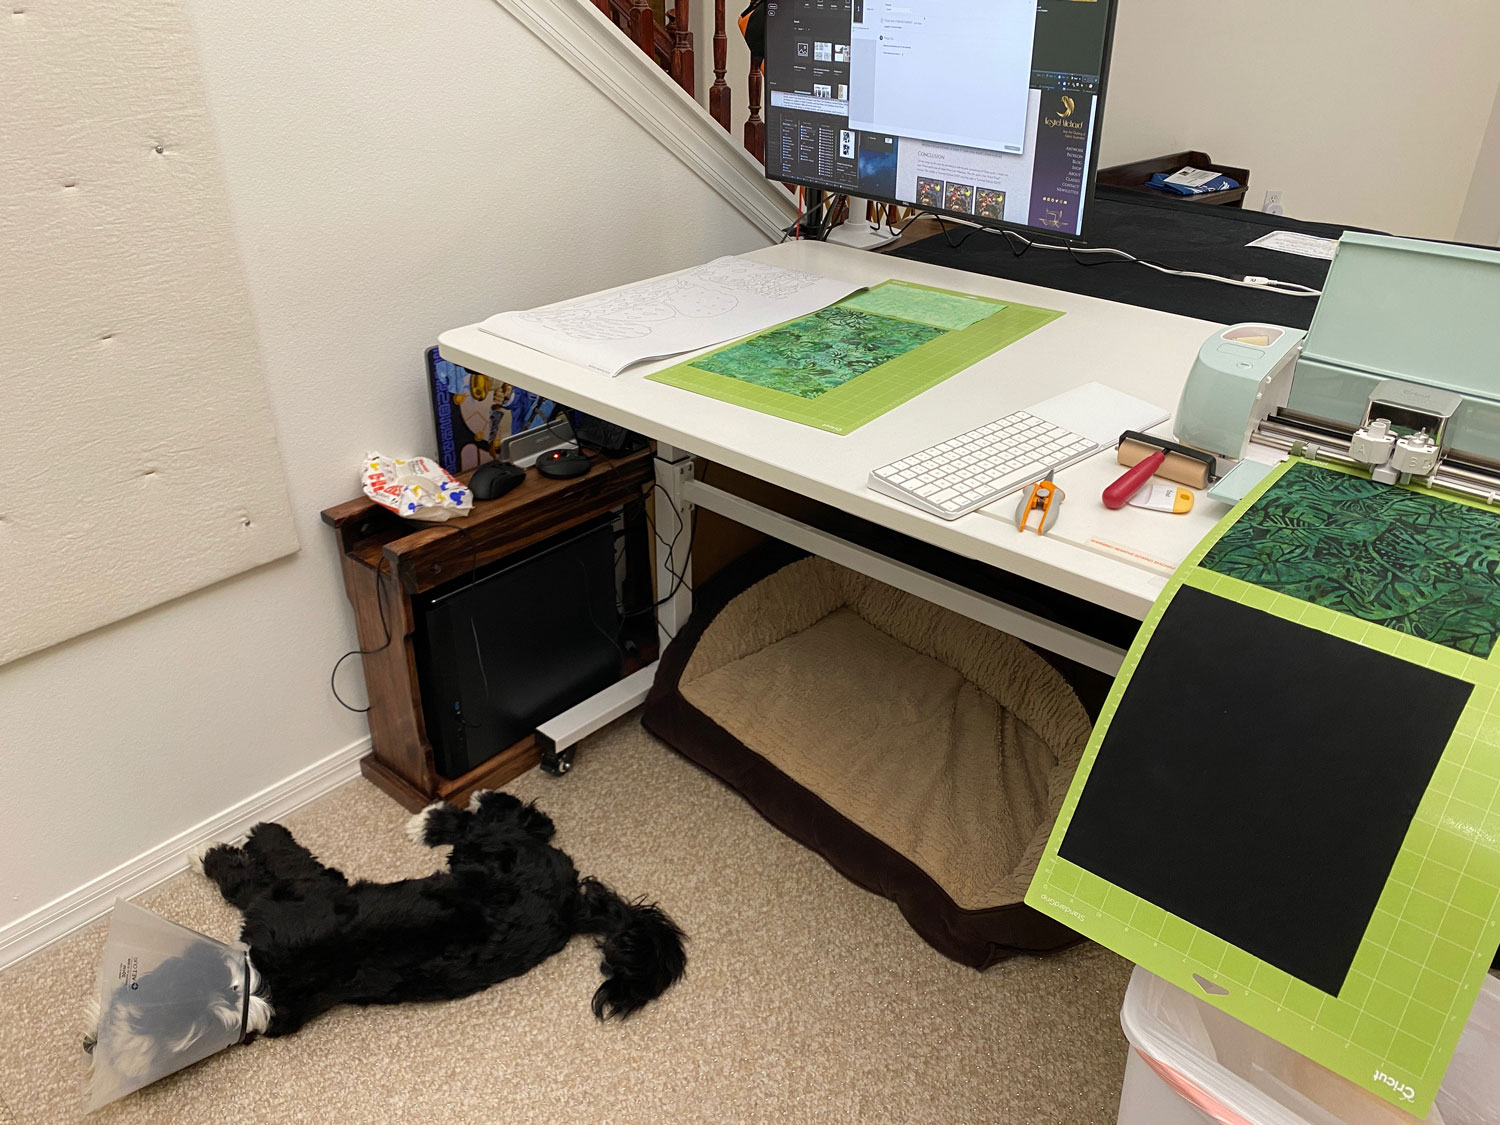
Cricut Cutting
I upload the SVGs I exported back in the "Prepare for Cricut Cutting" step to my Cricut software. Those SVGs are the exact layouts that my Cricut Explore Air 2 will cut. Here's what my setup looks like:
And here's a close-up of what the fabric pieces look like after they're cut:

For the record, I own and use a Cricut machine, but I am not a Cricut Ambassador. The SVG files I design are usable by any cutting machine that can accept custom files.
Assembly
I print my numbered templates full-size and place them on my ironing table underneath a clear, non-stick Teflon sheet. Then I match each cut piece of fabric back to its number on the template before ironing it in place. Here is Faith, fully assembled, on top of her template:

This is my favorite part of the entire process. I love seeing how the artwork I designed on my computer comes together in fabric.
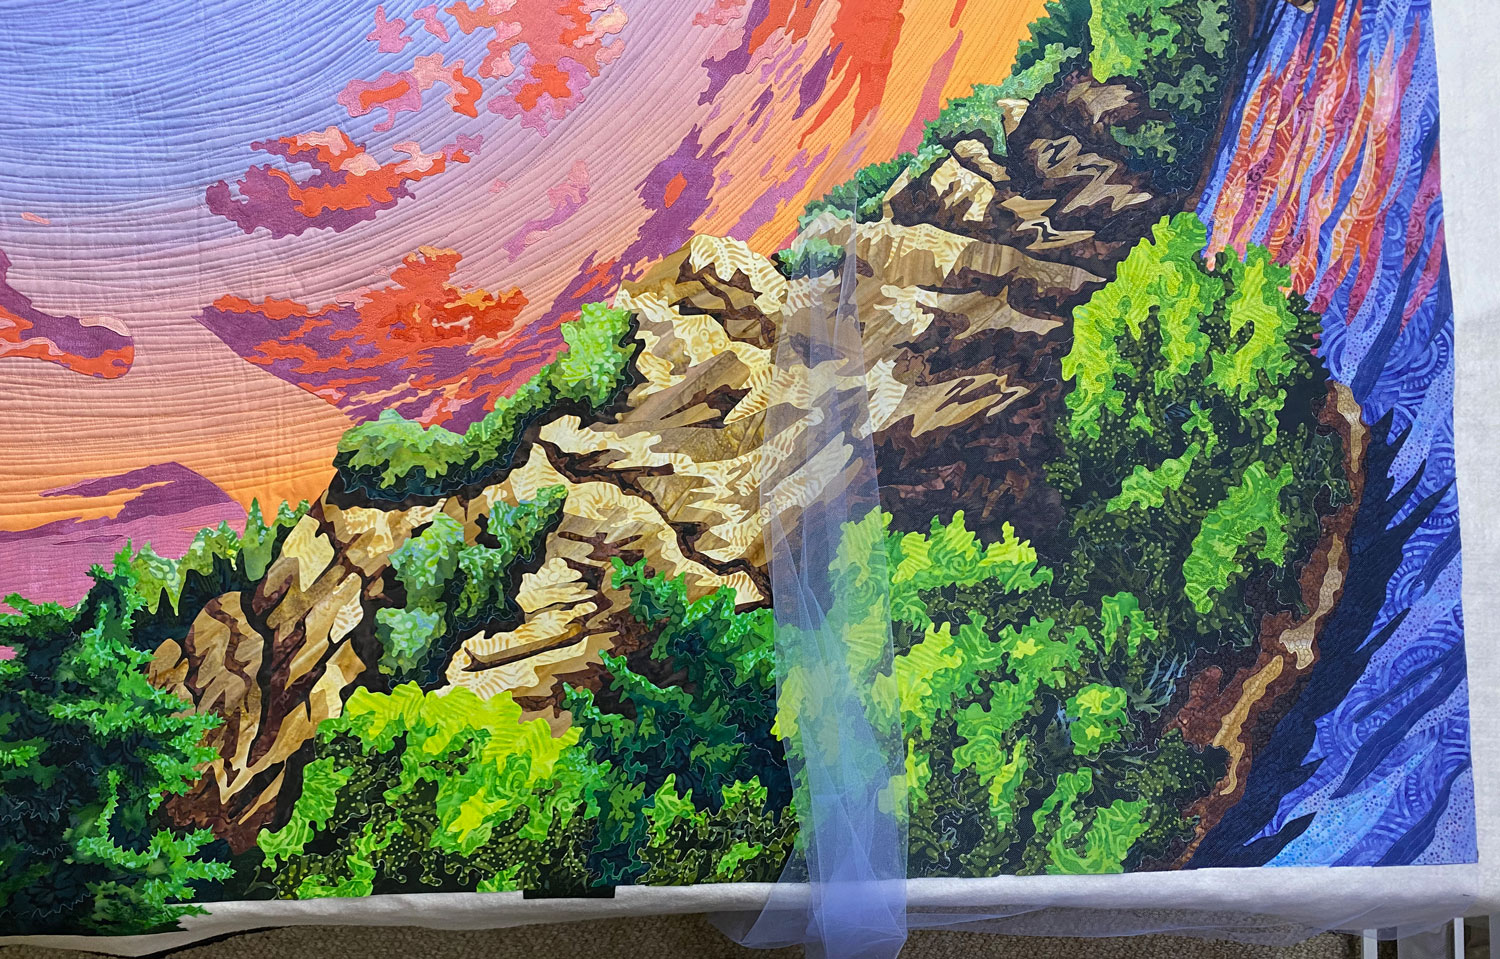
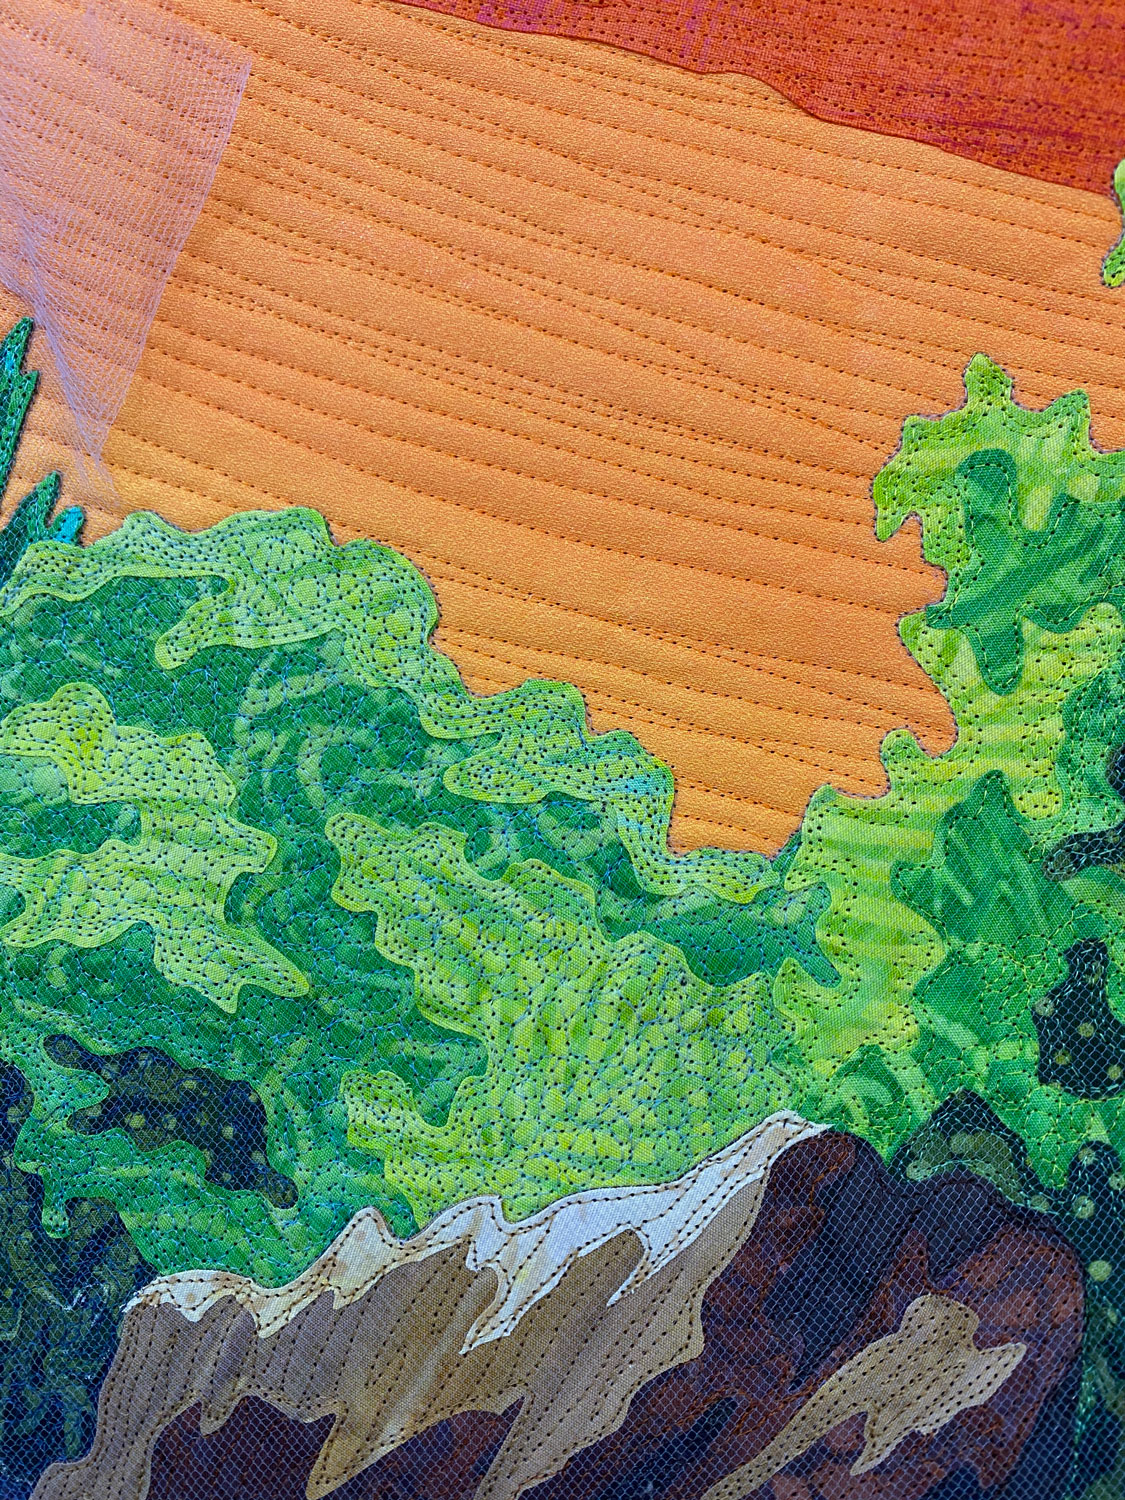
Stitching & Tulle
The final step of the process is to quilt the quilt. I stitch my quilts in layers, starting with the background. In Leap of Faith's case, I started with the sky and then the clouds.
After I fused the scenery to the quilt sandwich, but before I stitched it, I placed a single layer of light blue tulle over the entire area. This layer of tulle gave a subtle simulation of atmospheric perspective that would help Faith feel closer to the viewer, separating her from her surroundings. This photo shows the tulle. It has been attached to the right side of the scenery but not the left. There's a very subtle difference between the two sides, thanks to the light blue netting.
All of my stitching on the scenery was done on top of the tulle. Here's a close-up showing the pebbles I stitched onto the shore. The white lines were drawn with a heat-erase pen to help me see the edges of the dark fabric pieces.
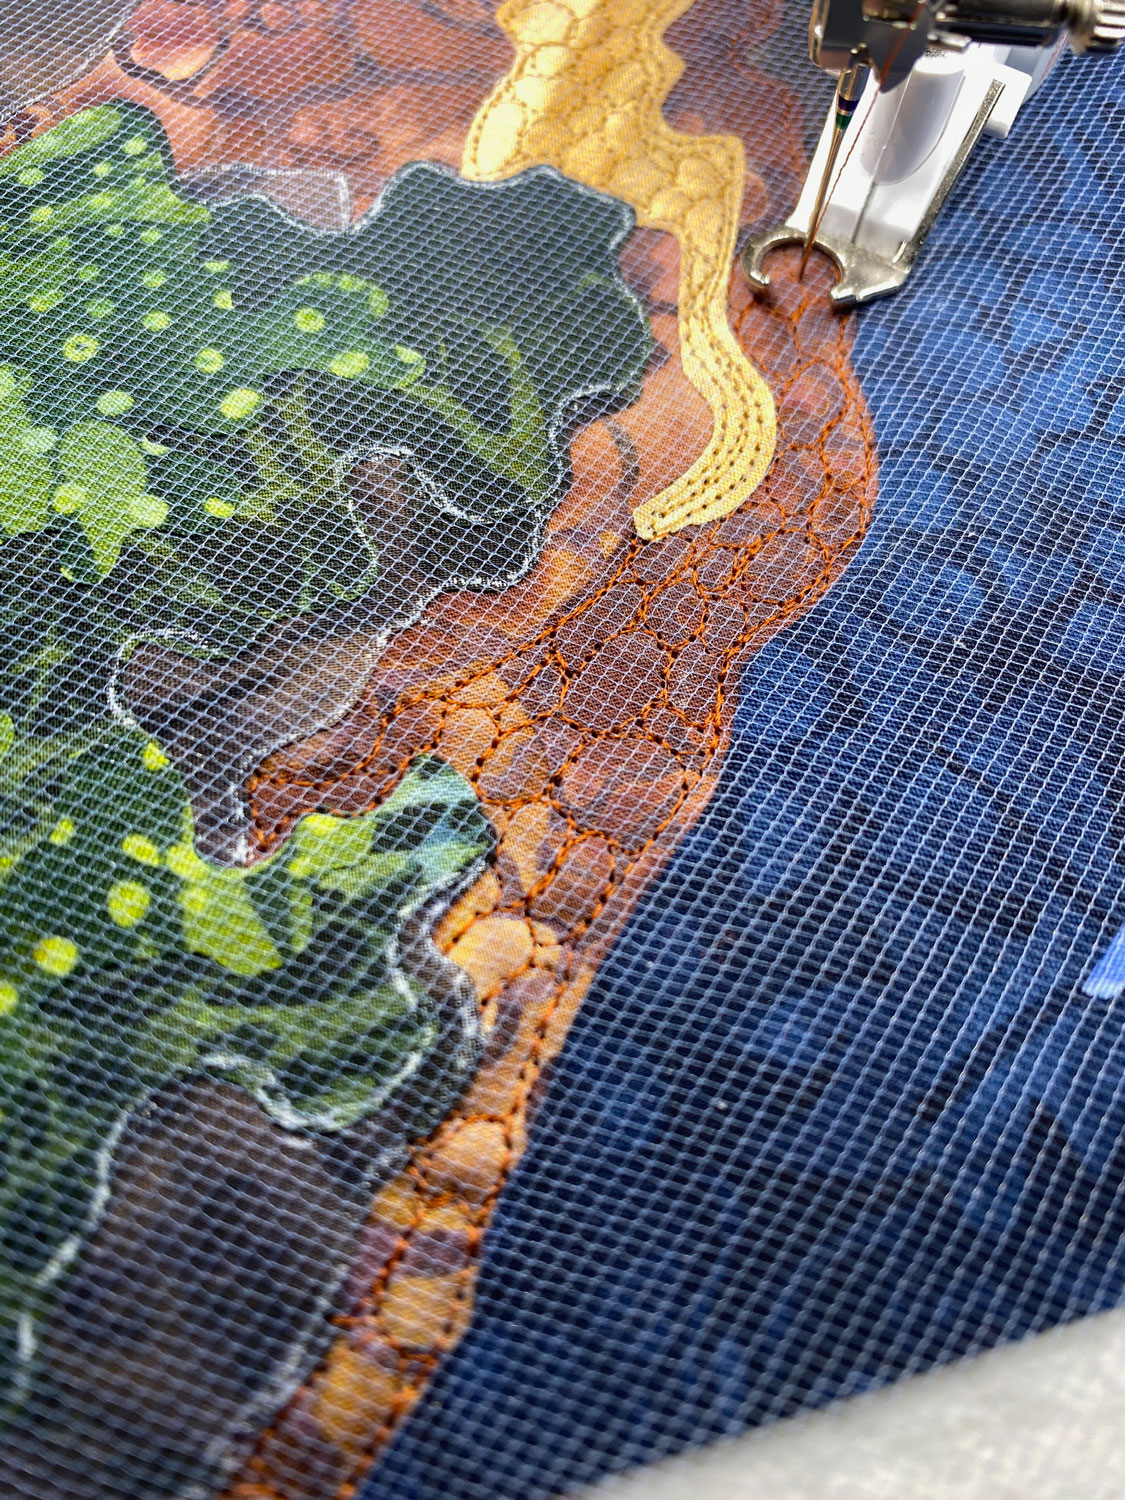
Once all the scenery was stitched, I used an Xacto knife to trim the tulle away from the upper edge of the scenery. That way the tulle would stop right along the treeline and not cover the sky.
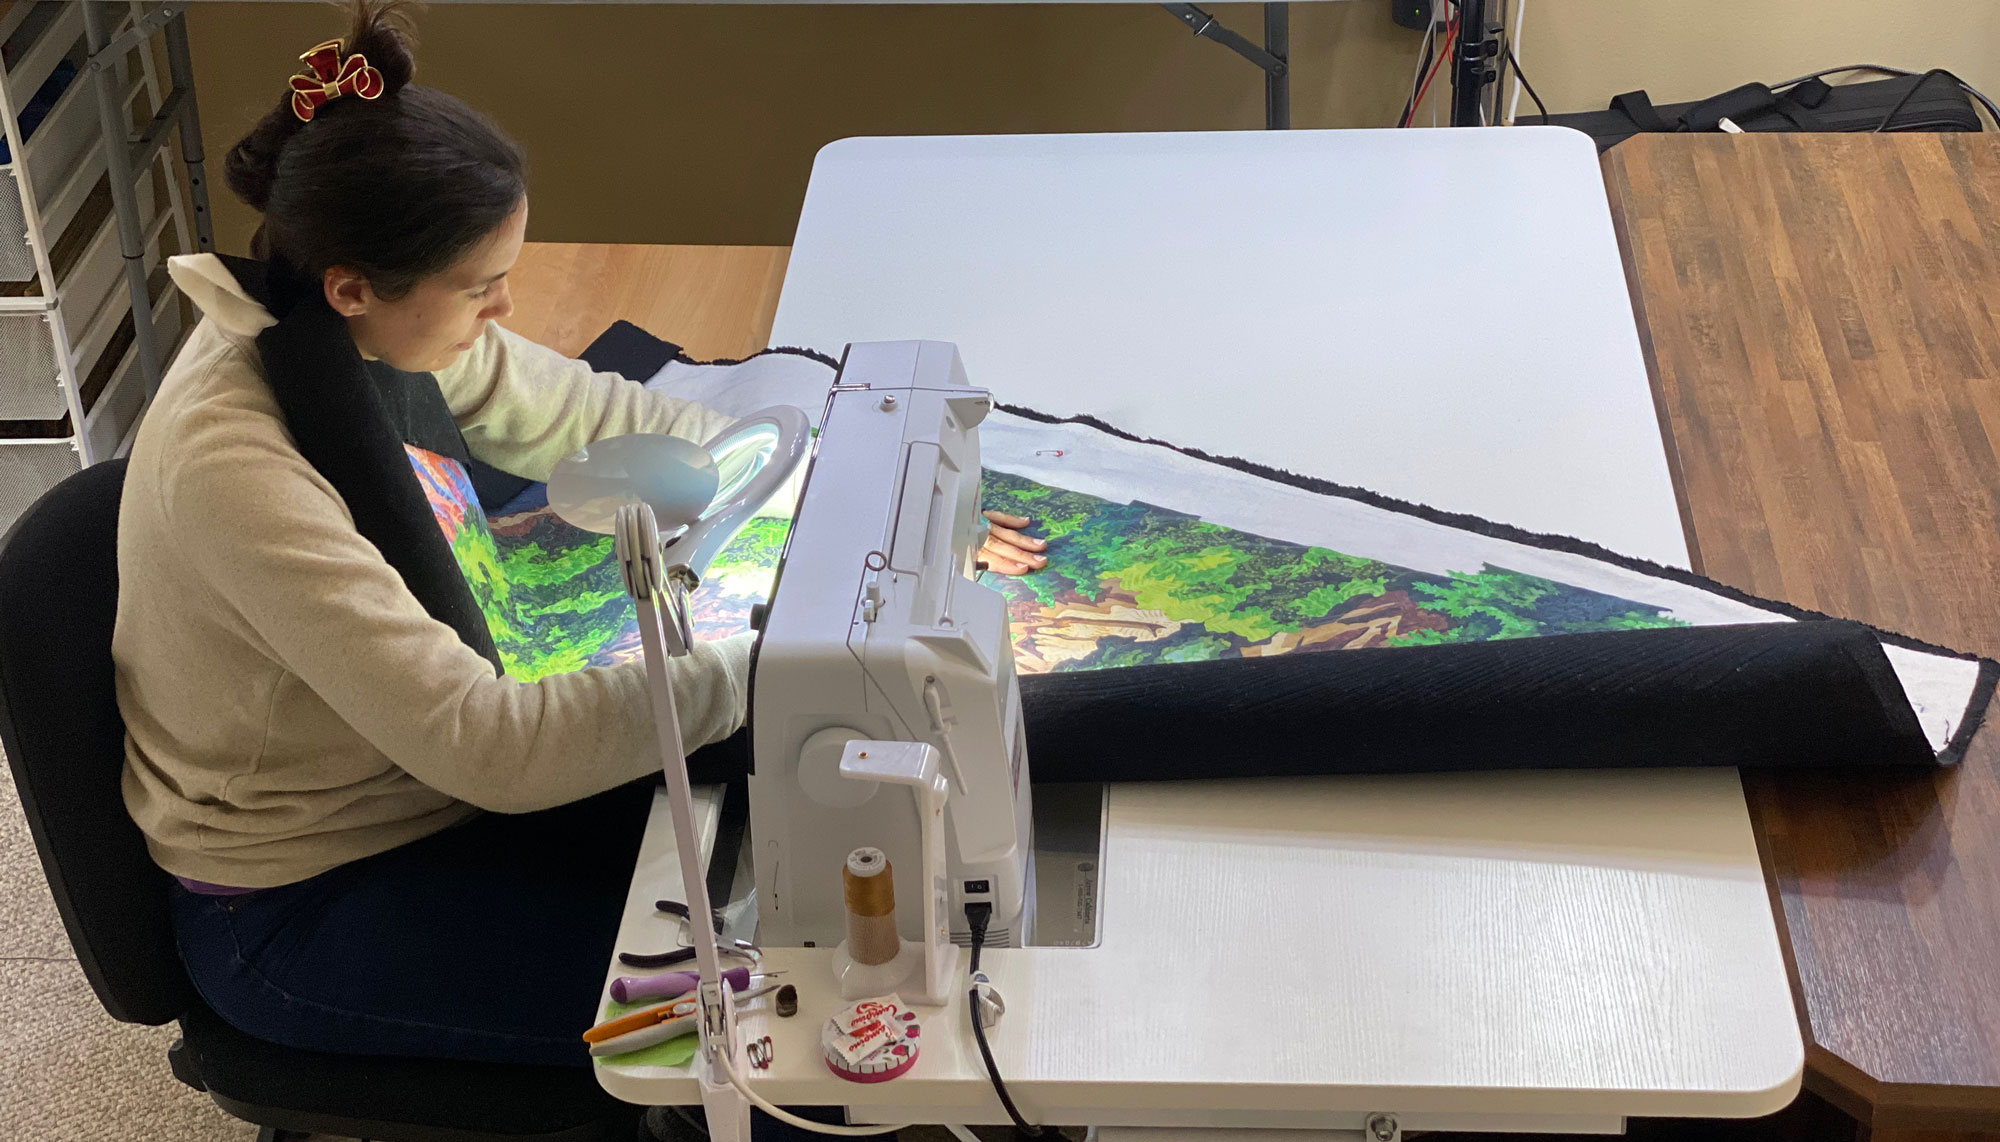
Leap of Faith is a pretty large quilt. I stitched the entire thing on my Bernina 790 domestic sewing machine using 100wt polyester thread (MicroQuilter). I had to carefully roll this quilt in order to fit it through the throat of my machine.
Hard Work Paid Off!
This year, Leap of Faith was awarded the eQuilter.com Master Award for Contemporary Artistry, a $5,000 prize, at the 2021 International Quilt Festival in Houston, Texas. This is one of the top six prizes awarded at the show, which is the largest quilt festival in the United States.