Sewing 100wt Thread on a Longarm
- Published:
- Length: 1781 words
- Reading Time: 9 minutes
A year ago, I wrote a blog post about sewing with 100wt thread on my Bernina 790Plus, a domestic sewing machine. Shortly after that post was published, my new Q20 was delivered, and I have been using that machine for all free-motion quilting ever since.
As it turns out, sewing with 100wt thread on the Q20 is faaaar easier than on the 790, but the Q20 still has its quirks. The purpose of this blog post is to share the things I do to successfully sew with 100wt thread on my Q20.
My Q20 set-up
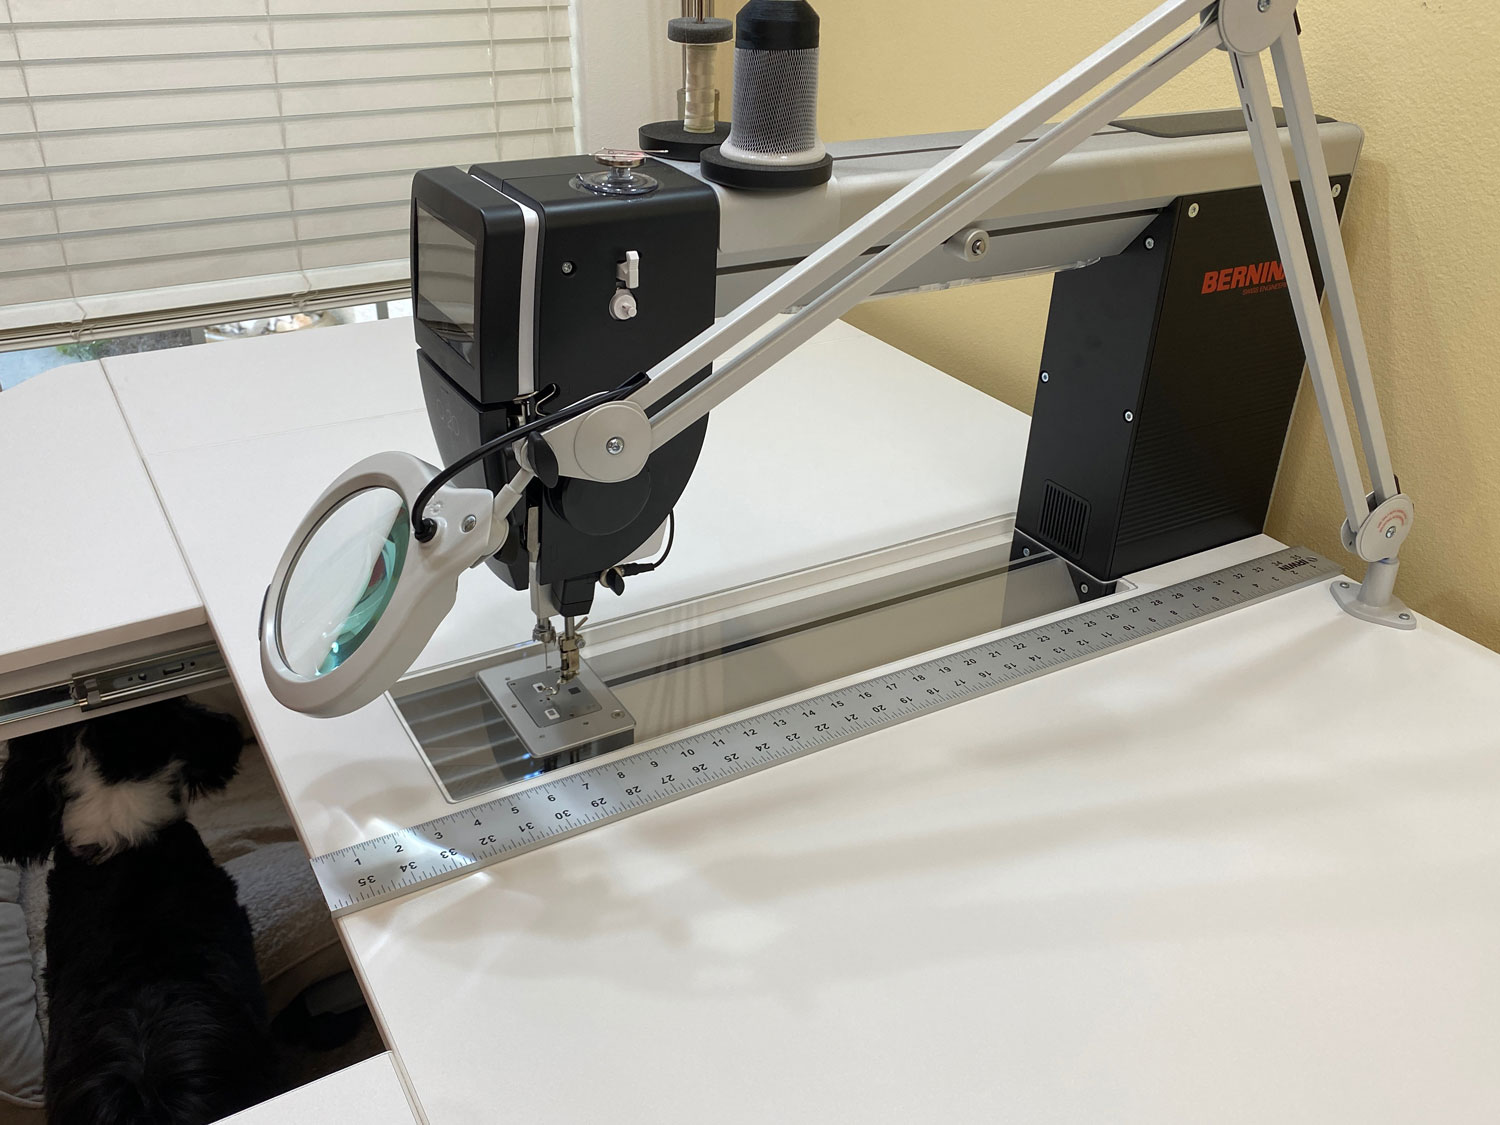
I have my Q20 on the Horn Lift Table. I've published more info about my magnifying arm in this blog post.
In the past year, I've put almost 2 million stitches on this machine, all of which were made with 100wt thread. This is what I've learned:
Kestrel's Guide to Sewing with 100wt Thread
Sewing machines all have their personalities. I've found my Q20 to be much more agreeable than my 790 diva. You will have to come to a working understanding with your own machine, as your longarm may not want the same things as my Q20. But the following information will give you a good starting point for jumping into quilting with 100wt thread. (And if you're looking to try sewing with 100wt thread on a domestic machine, head over to this post instead.)
Suspension System
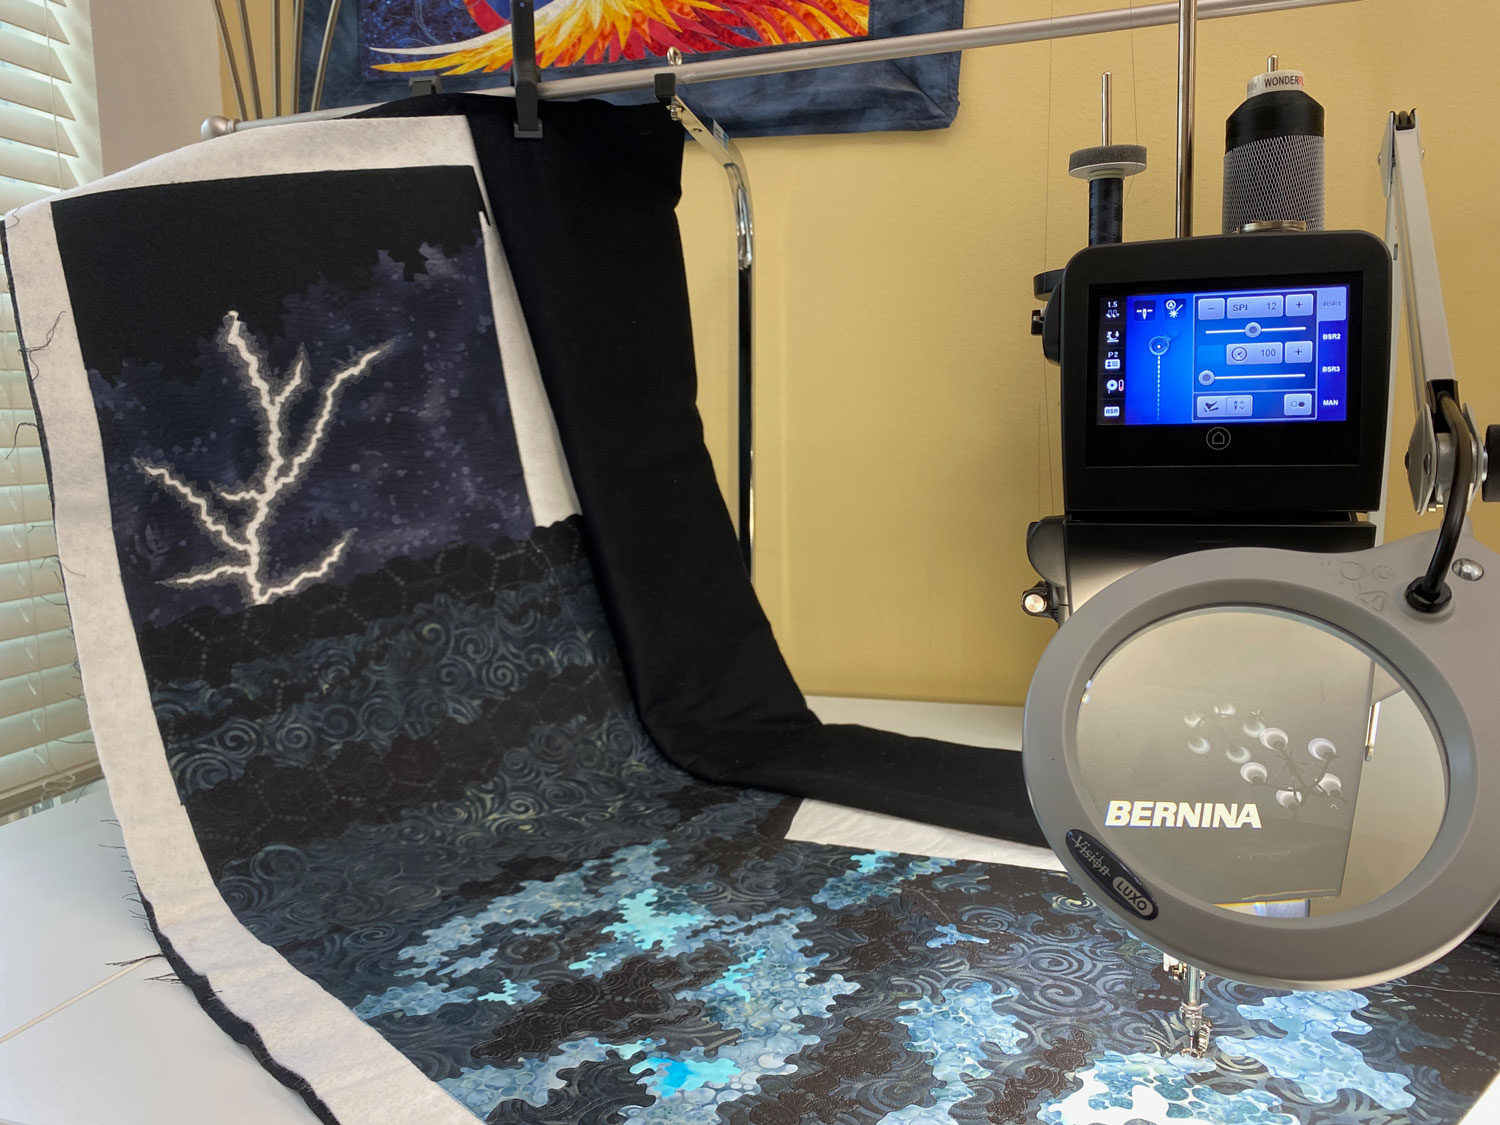
A suspension system is designed to take some of the weight of a quilt, making it easier for the artist to maneuver the quilt under the needle. I use two dog grooming arms connected by a curtain rod as a suspension system. To hold the quilt, I have several clamps that can be optionally attached to bungee cords. I've found this system to be incidentally useful. It's nice to have when I need it, but isn't helpful all the time.
Is it a good investment/addition to my sewing table? Yes. Is it absolutely necessary? No.
Thread
I use two different brands of 100wt thread: InvisaFil and MicroQuilter. My Q20 has no preference between them, so I choose whichever color is most appropriate for the fabric.
Wonderfil, InvisaFil's manufacturer, has published Hints & Tips sheets for sewing with all their threads. This is the Hints & Tips sheet for InvisaFil .
Cleaning and Maintenance
I have found my Q20 to be very sensitive to the presence of lint in the bobbin area and in the bobbin case itself. Fortunately, my polyester threads are pretty lint-free, but after hours of stitching there will be some lint presence in the bobbin area that has to be cleaned.
My regular routine when I first sit down to sew for the day is to clean the bobbin area and oil the hook. This video by Bernina shows how to clean the lint from the bobbin area and how to oil the machine:
Something not mentioned in the above video is that it's okay to use compressed air to blow out the bobbin area. I have a rechargeable, hand-held compressed air duster that I use to blow lint out of the bobbin area and bobbin case. Note that this is not safe to do on any domestic machines.
In addition to the brush provided by Bernina, I really like using disposable makeup applicators to clean the bobbin case. The lip brushes really pick up lint well. The mascara brushes can be wedged under the thread finger on the side of the bobbin case; when rotated, the stiff bristles get into the hole where the thread comes out and clean out any trapped pieces of lint.
As stated above, this is how I clean my machine whenever I sit down for the first time every day. I also clean the bobbin case anytime I change a bobbin and go through the entire routine again if I'm having thread breakage problems. Keeping my machine clean is very important, especially when sewing with delicate threads.
Thread Tension
My default upper thread tension for 100wt polyester thread is 1.5. This is what I use most of the time. Occassionally I'll have a thread that wants 1.0 or 1.25, and I adjust accordingly. If it seems like my 100wt thread needs a tension higher than 1.5, there's a good chance I've threaded the machine incorrectly, and so far that has always been the correct assumption. Re-threading is a simple fix.
Spools in the Top Thread
I purchased the entire color assortment of InvisaFil, which is about 60 threads. They came as a collection of spools. For a while I was having a problem with the thread from the spool getting caught on burs of the plastic spool itself. I solved this issue by putting the foam disk that came with my Bernina 790 upside-down on top of the spool. This upside-down disk forced the thread away from the spool itself, and since the thread was no longer rubbing against the rough plastic of the spool, the foam disk completely solved the problem.
You can see the spool and upside-down foam disk in the photo of my suspension setup above.
One other comment about the top thread: Make sure you are threading your machine correctly. If the thread isn't properly seated in all of the tension disks, you're going to have a bad time.
Bobbin Thread
I use InvisaFil in the bobbin. Having the same weight thread in the bobbin lets me keep a lower upper tension — a heavier weight thread in the bobbin would require the top tension to be higher to balance out the pull. A higher tension up top is going to put additional stress on my 100wt thread. I've tried 60wt and 80wt thread in the bobbin, but I've had the most success when my top thread matches the bobbin thread (100wt in both).
Bobbin Tension
I adjusted my bobbin case tension to ~240. This is slightly higher than what Bernina recommends as the standard tension (220).
This video demonstrates how to check and adjust the bobbin case tension using the gauge included with Bernina longarms.
For those of you who do not have Bernina machines, this article from Superior Threads talks about adjusting bobbin case tension using a TOWA gauge. This is the same gauge as in the Bernina video, just without the Bernina branding.
Sewing Speed
As with sewing on a domestic machine, consistency > speed. In other words, it's more important to move the fabric at a consistent speed than it is to go fast or slow.
My Q20's regulator helps smooth the transition when speeding up or slowing down. However, I have adjusted my machine to accommodate the slowest movement possible (100) because there are times where I find slow is necessary.
Needles
- 80/12 Microtex: This is my default sewing needle, and I use it probably 95+% of the time.
- 60/8 Microtex: This is the my backup needle, and usually the one I switch to if the 80/12 is giving me problems.
On the Q20, I've found my machine likes the 80/12 in almost all situations. The only time I've had to switch to the 60/8 is if I'm sewing through just 1-2 layers of fabric. As soon as I start adding layers, it's back to the 80/12. I've not yet found success with a 70/10 needle.
As a general rule, I get a fresh needle every 4ish hours of sewing. I also always start my day with a fresh needle.
Keep in mind that all of my fabrics are backed with Wonder Under fusible and treated with diluted Mod Podge. This absolutely causes them to behave differently than untreated materials.
Troubleshooting
Below are the processes I go through to troubleshoot two different thread problems.
Clean Breakage
A clean break is when I'm sewing along and suddenly the thread snaps. It has broken more or less cleanly. This is the less common problem I've encountered with my thread. When this happens, I've found that means I was moving the fabric too fast or inconsistently. The needle is probably fine. The solution is to re-thread the machine (entirely, not just the needle) and keep going.
Thread Frays
A thread fray is what happens when the thread starts to come apart as I'm sewing. It will start unravelling one strand at a time, usually (in my experience), bunching up inside the sewing mechanism above the needle. This is the far more common issue, for me, and is unfortunately harder to diagnose right away.
The following list are the steps I go through to troubleshoot what's causing the problem.
Change the needle (get a new one of the same size) and re-thread entire thread path (not just the needle). Keep sewing.
Clean the bobbin case using the makeup applicators. Keep sewing.
If the thread keeps breaking, the following options can be tried in any order.
Clean the entire bobbin area and apply new oil (especially if I have been sewing for a few hours). Keep sewing.
Lower upper tension to 1.25 or 1.0 (check the back of the quilt to make sure the top thread isn't coming through). Keep sewing.
Try a new needle size. Keep sewing. (If I'm using the wrong needle size, that will become apparent very quickly.)
This last one is not something I ever do, only because I always sew using the same type of materials: cotton quilting fabrics treated with Mod Podge and Wonder Under.
- Try a new type of needle. (Other types of fabrics might do better with something other than Microtex needles).
This final option is a last resort for me, and I've only had to resort to it one time. I'd tried everything else on the list and was still having fraying issues. That situation is where I adjusted my bobbin case slightly tighter to 240, and that totally solved my problem. I've kept it at 240 ever since.
- Check/adjust bobbin case tension using TOWA gauge.
Good luck!
