Kestrel's Method for Framing Quilts
- Published:
- Length: 2397 words
- Reading Time: 12 minutes
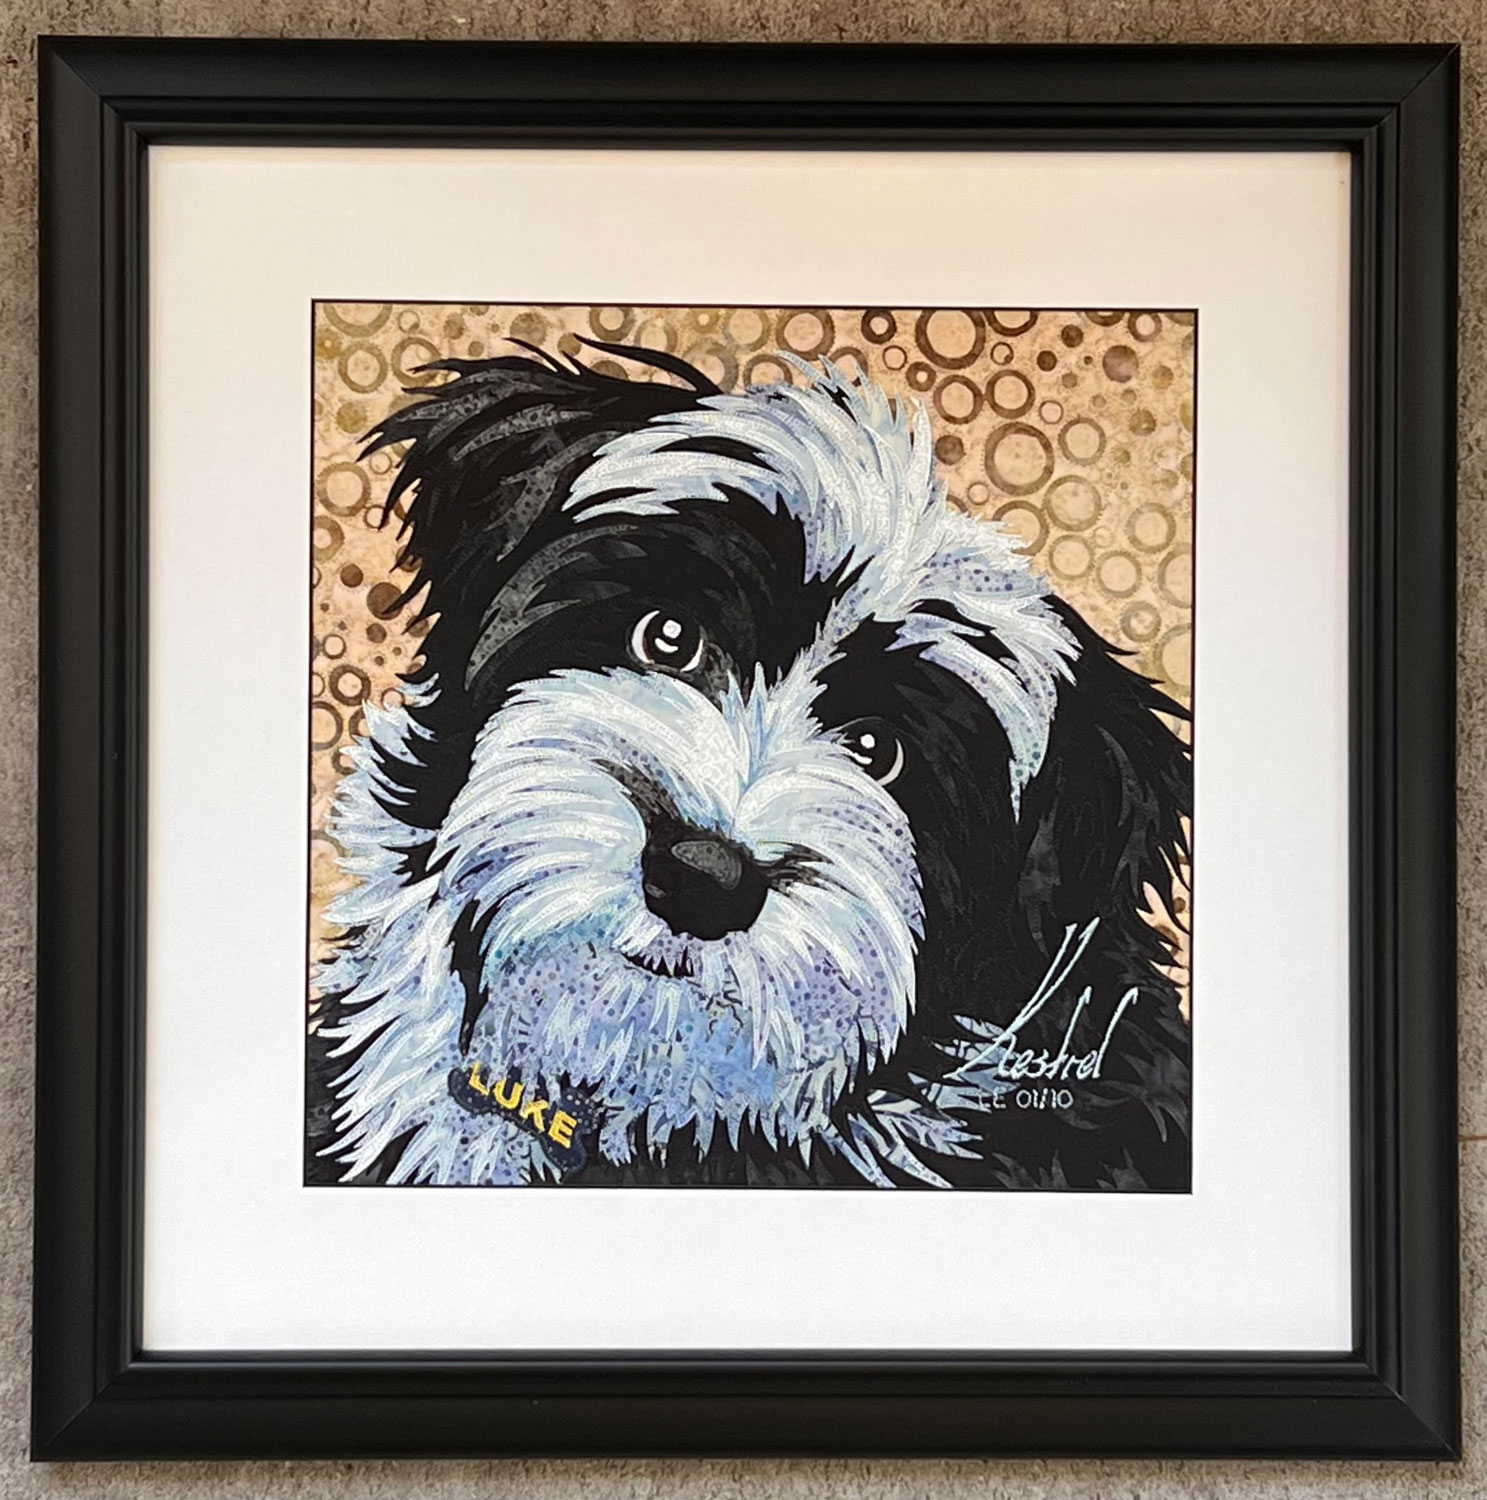
Sometimes we prefer to frame a quilt instead of attaching a hanging sleeve. When the situation calls for it, I use a method I developed years ago to frame my fabric pictures, but it works just as well for quilts. Here's one example of a quilt framed using the method illustrated through the rest of this post:
These instructions are written for Kestrel's process of preparing a quilt for a frame. There is a printable PDF of these instructions at the bottom of the post. Please share this post as you'd like, but crediting me as the author is appreciated.
Step 1: Determine size of mat
The size of the mat will influence how the framed art is perceived. Too thin could make the art feel crowded; too wide, the art could feel like it's lost. Whatever width you decide on will determine the size of the materials needed for the rest of the process.
The Luke quilt used in the following illustrations is 12" square. Here is how it would look in three different sizes of mat with a 1" black frame.
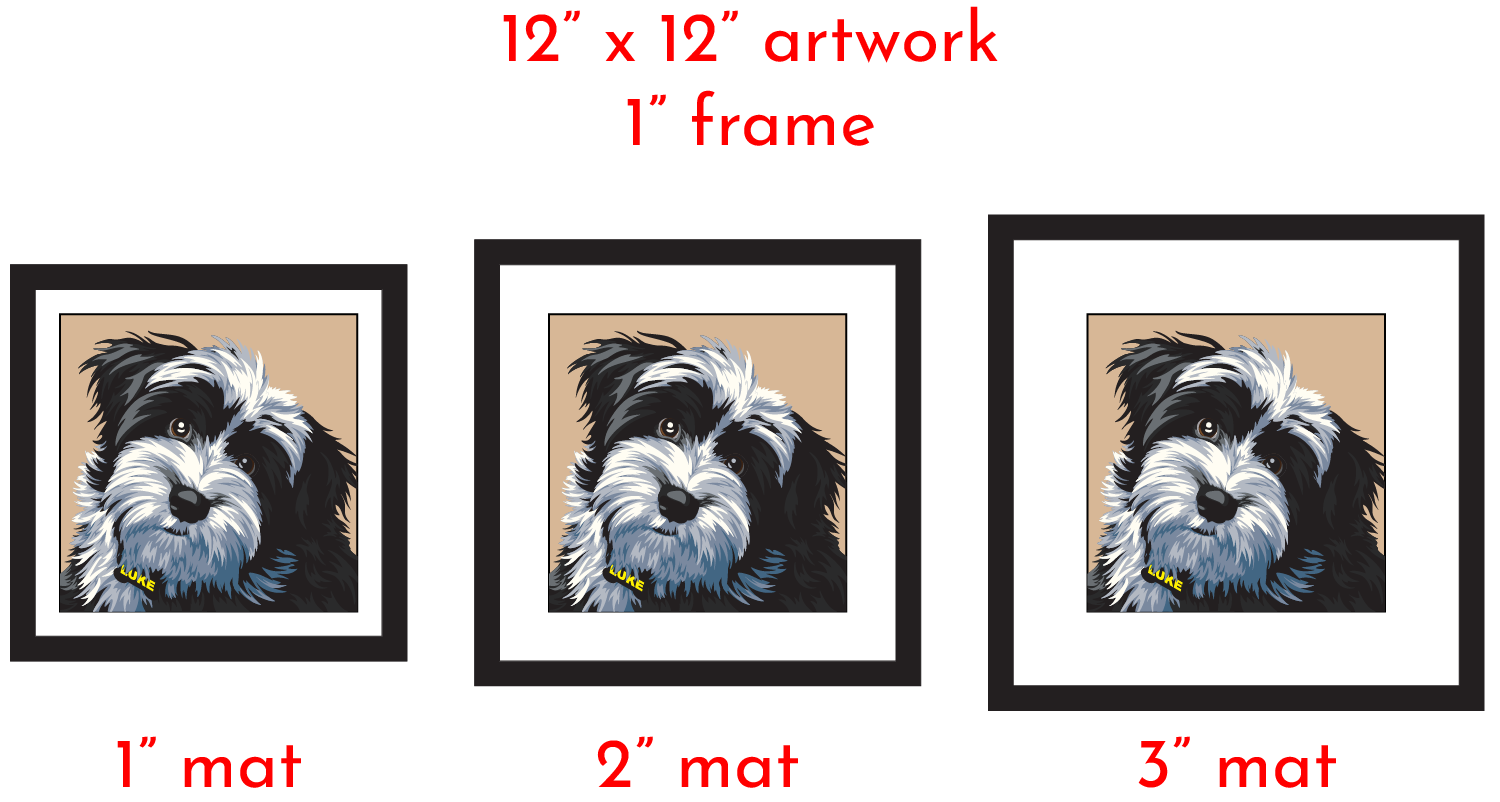
For the purpose of this guide, I'll be using a 2" mat.
Step 2: Gather materials
Here are the materials you will need.
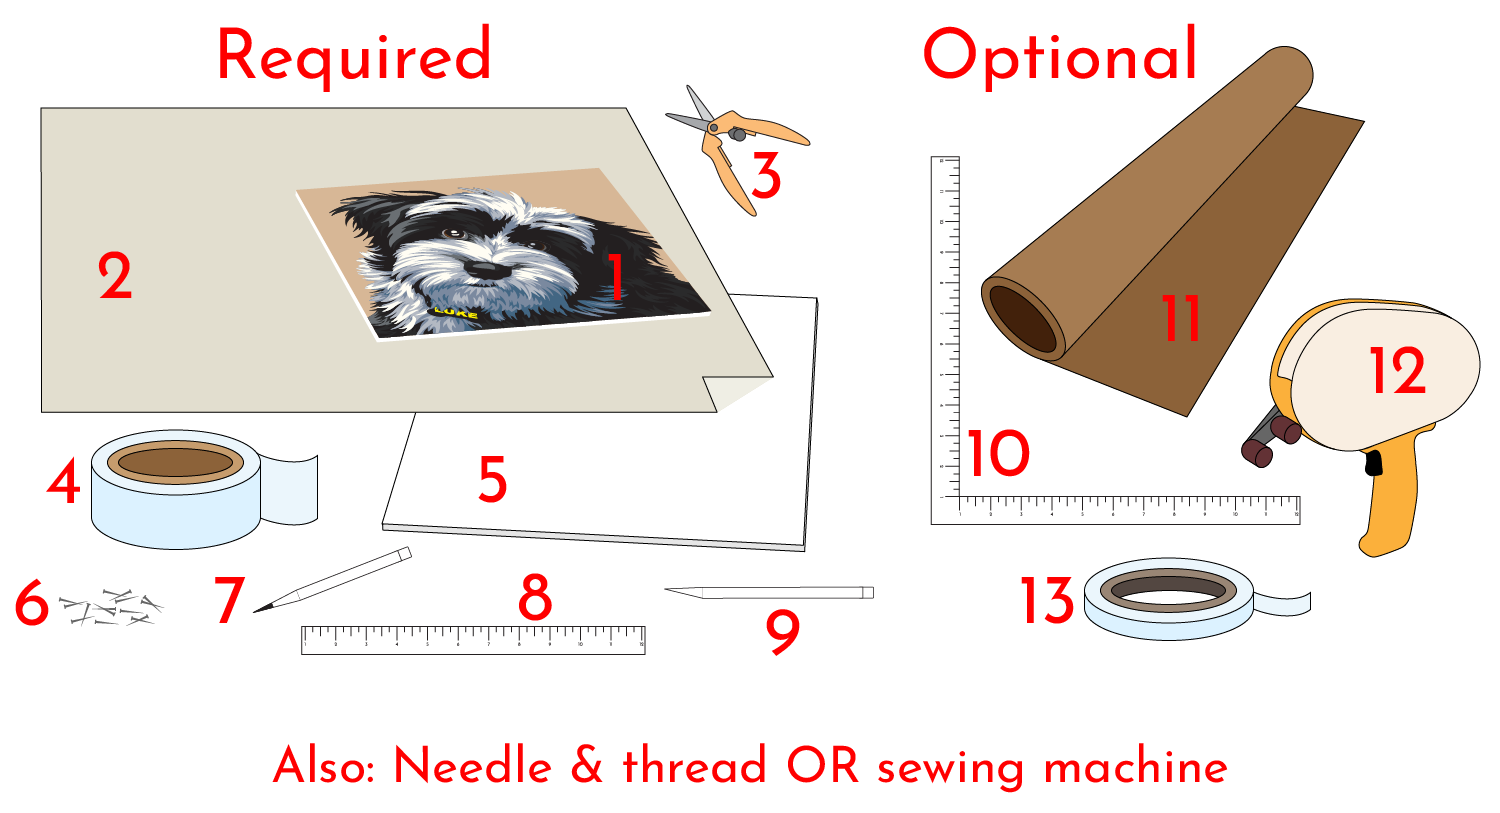
Required
- Quilt: The quilt's edges should be trimmed (if they will be covered by a mat) or finished (if they will be visible). More info in Step 5.
- Muslin Wrapping Fabric: I use muslin fabric for this because it's very inexpensive and will not be seen (I always have a mat cover the edges of my art). However, any solid cotton fabric will work. If you plan to have your quilt's edges visible, this fabric will also be visible to viewers.
- Fabric Scissors: For cutting the muslin or other wrapping fabric.
- Acid-free Linen Tape: Linen hanging tape is strong and acid-free. Lineco Hanging Tape
- Acid-free Foam Core Board: The size of the mat + size of artwork will determine how big of a foam core board you need. Get white, 3/16" thickness, acid-free foam core board. Not all foam core is acid-free. 1/8" thickness is okay, but 3/16" is best. These boards can be purchased online, from a local frame shop, or from most local art stores. If you buy online, you may have to buy in bulk; the following link is just one example. Jerry's Artarama
- Dressmaker Pins: These should be 1" straight pins. Dressmaker Pins
- Pencil: Will be used for marking the foam core.
- Ruler: Length of ruler is up to you. A longer ruler will be more useful for larger pictures.
- Xacto Knife: Will be used to cut the foam core.
Needle & Thread OR Sewing Machine: You will need a way to stitch your quilt onto the wrapping fabric. The specific method of stitching is up to you, and is discussed further in Step 5.
Optional
Although not required, these additional materials will either be helpful or allow you to present a clean, professional backing to your artwork that will be visible pre-framing.
- Square ruler: A square ruler will be helpful in measuring perfect right-angle corners.
- Backing Paper: Ideally, this paper should be acid-free. However, acid-free backing paper is expensive. Kraft brown paper can be used as an alternative, but keep in mind it will be close to touching the artwork, so use at your own risk. Lineco acid-free backing paper or Kraft brown paper
- Tape gun for picture framing: This is a special type of tape gun used for picture framing. It simulatneously peels off the backing and applies a double-sided tape. The gun in the link works with 1/2" and 3/4" wide picture framing tape. Scotch Adhesive Applicator
- 1/2" Picture Framing Tape: This specific type of acid-free tape is used in picture framing. The link is for 1/2" wide tape. Picture framing adhesive tape
- Grafix Picture Wrap: This clear, plastic acetate is ideal for protecting unframed art. Grafix Picture Wrap
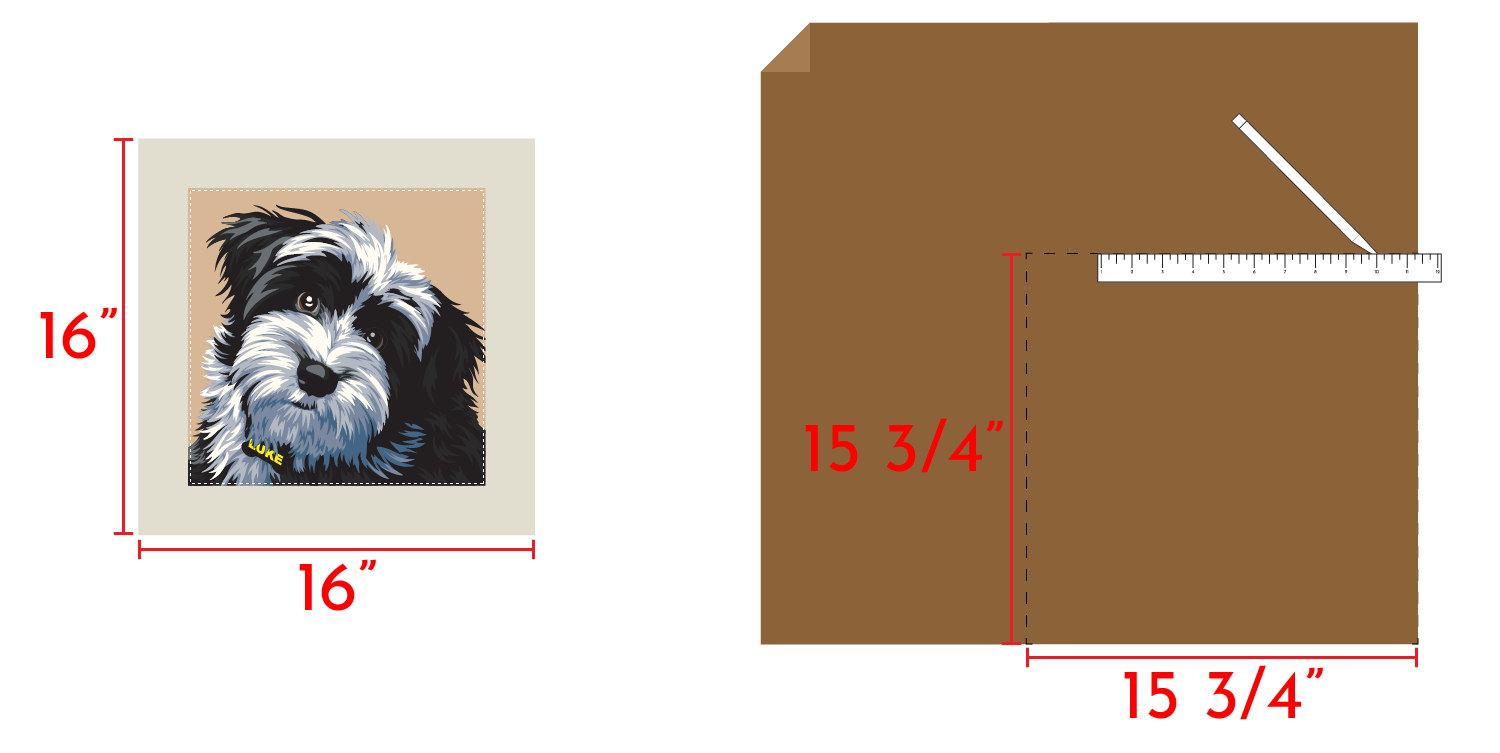
Step 3: Measure and Cut the Foam Core
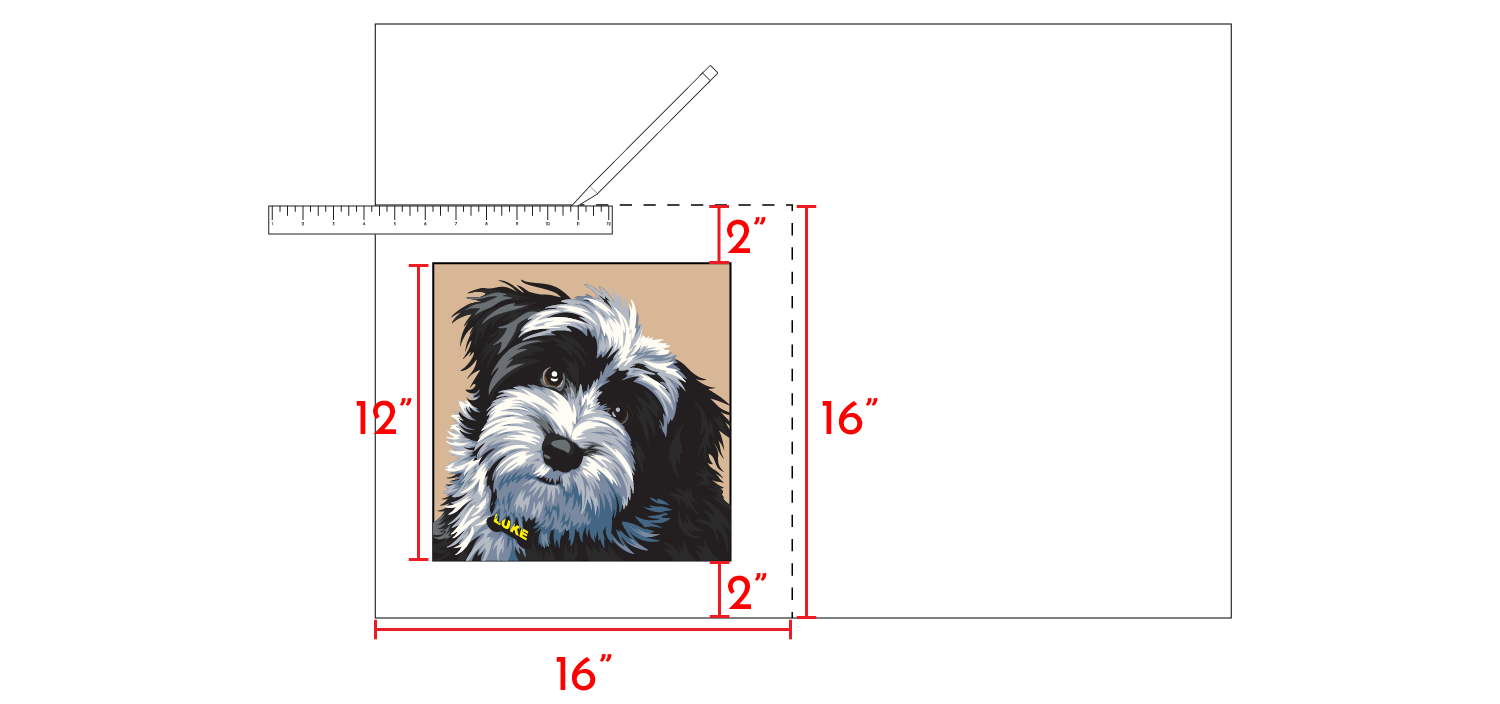
The size of the mat + the size of the artwork will determine how large of a foam core board is needed. Add the width of the mat to each dimension of the artwork to determine foam core dimensions.
(Width of mat * 2) + width of artwork = width of foam core (Width of mat * 2) + height of artwork = height of foam core
The example I'm using for these instructions is a 12" square quilt and 2" mat. Therefore:
(2" wide mat * 2) + 12" wide artwork = 16" width (2" wide mat * 2) + 12" high artwork = 16" height
I need a 16" square piece of foam core board.
Determine the dimensions of your foam core board. Measure and cut your foam core. (Optional: If you're purchasing from a local art store, they may be willing and able to cut the foam core for you.)
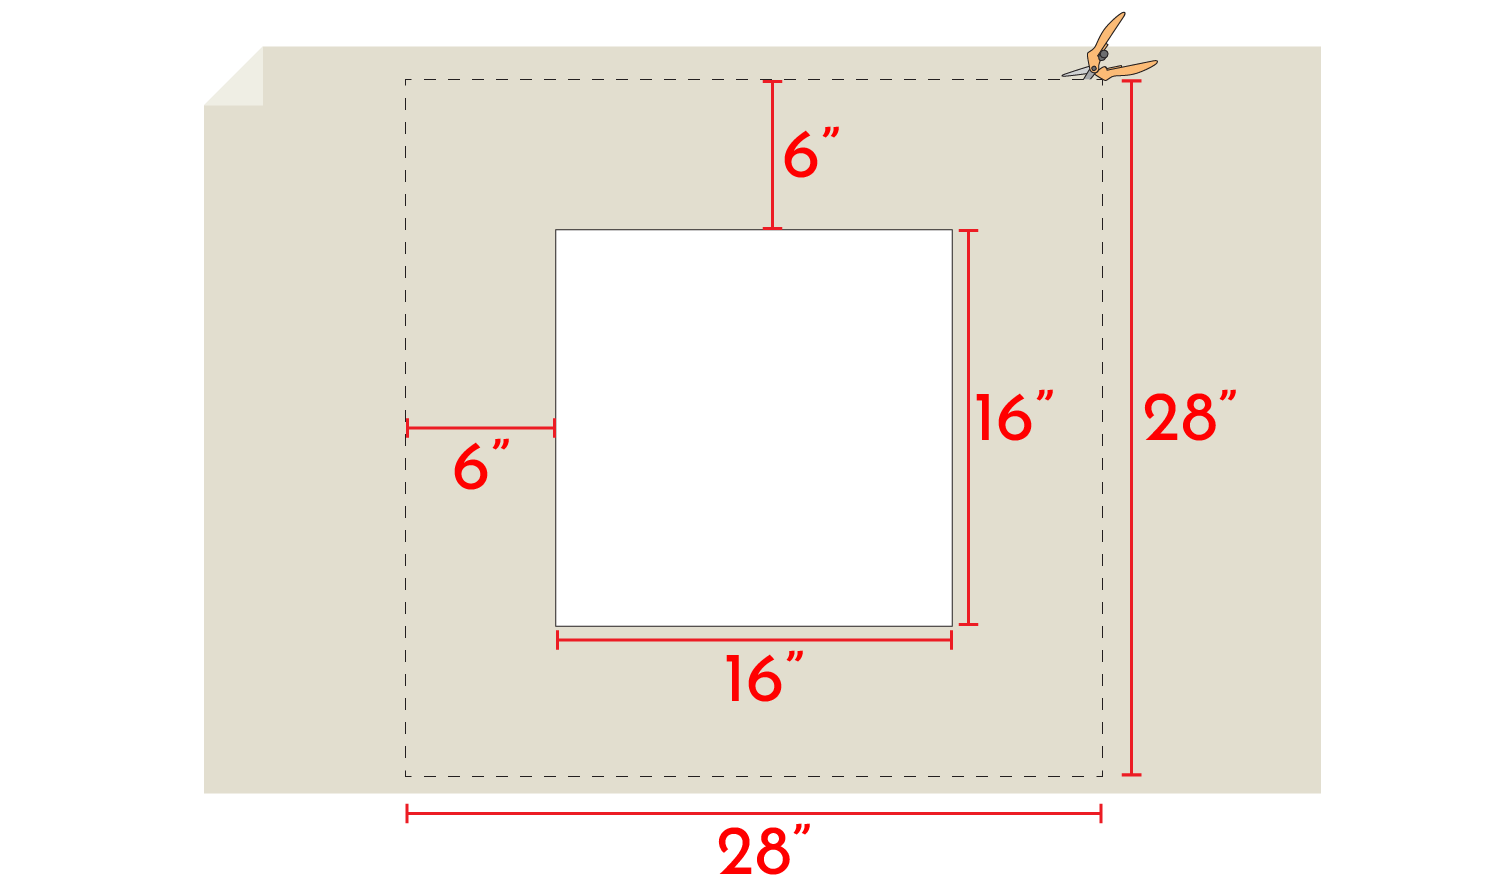
Step 4: Measure and Cut the Wrapping Fabric
You need approximately 6" of extra wrapping material to fold to the back of the foam core board. To determine the dimensions of the wrapping fabric, use this formula:
(6" * 2) + width of foam core = width of wrapping fabric (6" * 2) + height of foam core = height of wrapping fabric
The example I'm using for these instructions requires a 16" square foam core board. Therefore:
(6" * 2) + 16" wide foam core = 28" width (6" * 2) + 16" high foam core = 28" height
For this project, I need a 28" square piece of wrapping fabric.
Once you know how much wrapping fabric you need, measure and cut it to size.
Step 5: Stitch Quilt to Wrapping Fabric
Center your quilt to the wrapping fabric and stitch it in place. In this image, I've used a straight stitch on my sewing machine to sew my quilt to the wrapping fabric. (Note that the red dotted line is intended to indicate the line of stitching. In practice, match the thread color to the color of your quilt.)
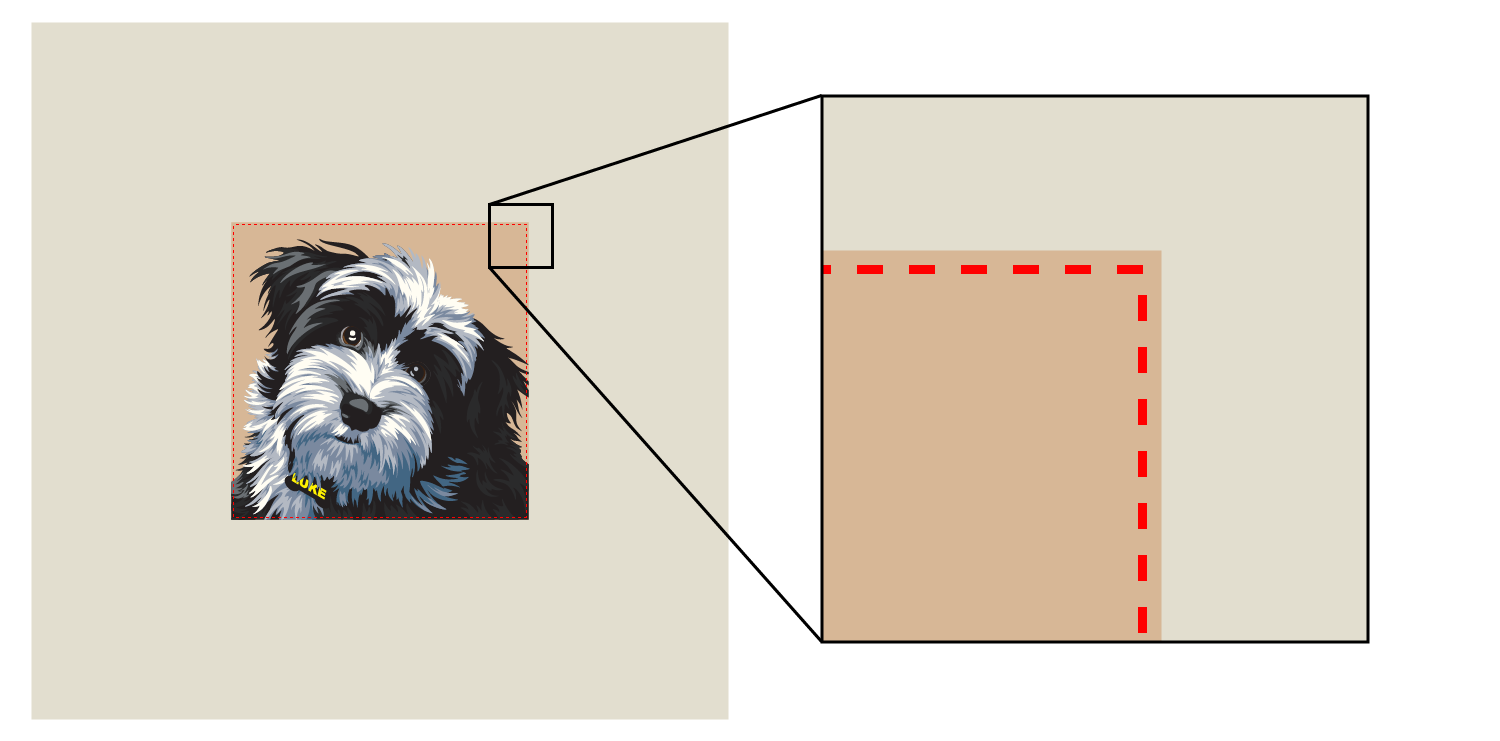
However, there are other ways to stitch your quilt to the wrapping fabric that may be more appealing. Such as:
- Straight Stitch: Demonstrated above, this stitch is a simple, straight-forward way to attach the quilt to the wrapping fabric.
- Slanted Ladder Stitch: This style of stitch is used in appliqué and may be more subtle than a standard straight stitch.
- Full Free-Motion Quilting: Treat the wrapping fabric as your quilt's backing fabric and do all of the quilting right through it. This would require knowing ahead of time that you plan to frame your quilt instead of free-hang it. Keep in mind there will be no way to finish the edges of the quilt. That’s not a problem if the mat will cover the edges, but is not recommended if the edges should be showing.
- Blind Stitch: If you plan to have your quilt's edges showing, a blind stitch may provide the cleanest look.
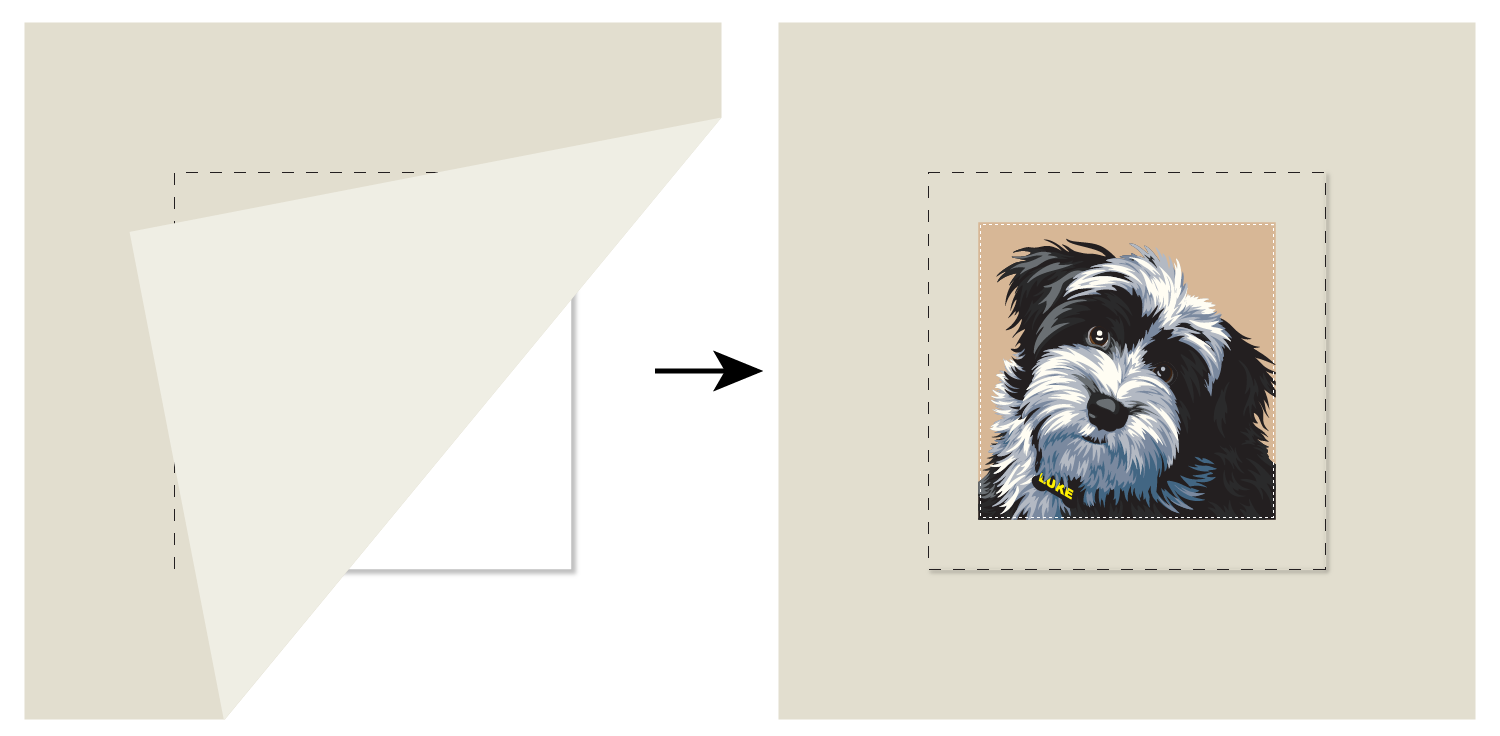
Step 6: Pin the Wrapping Fabric to the Foam Core
Begin by placing the foam core board on a flat surface. Cover the board with the wrapping fabric, quilt-side up. Center the board under the wrapping fabric to the best of your ability.
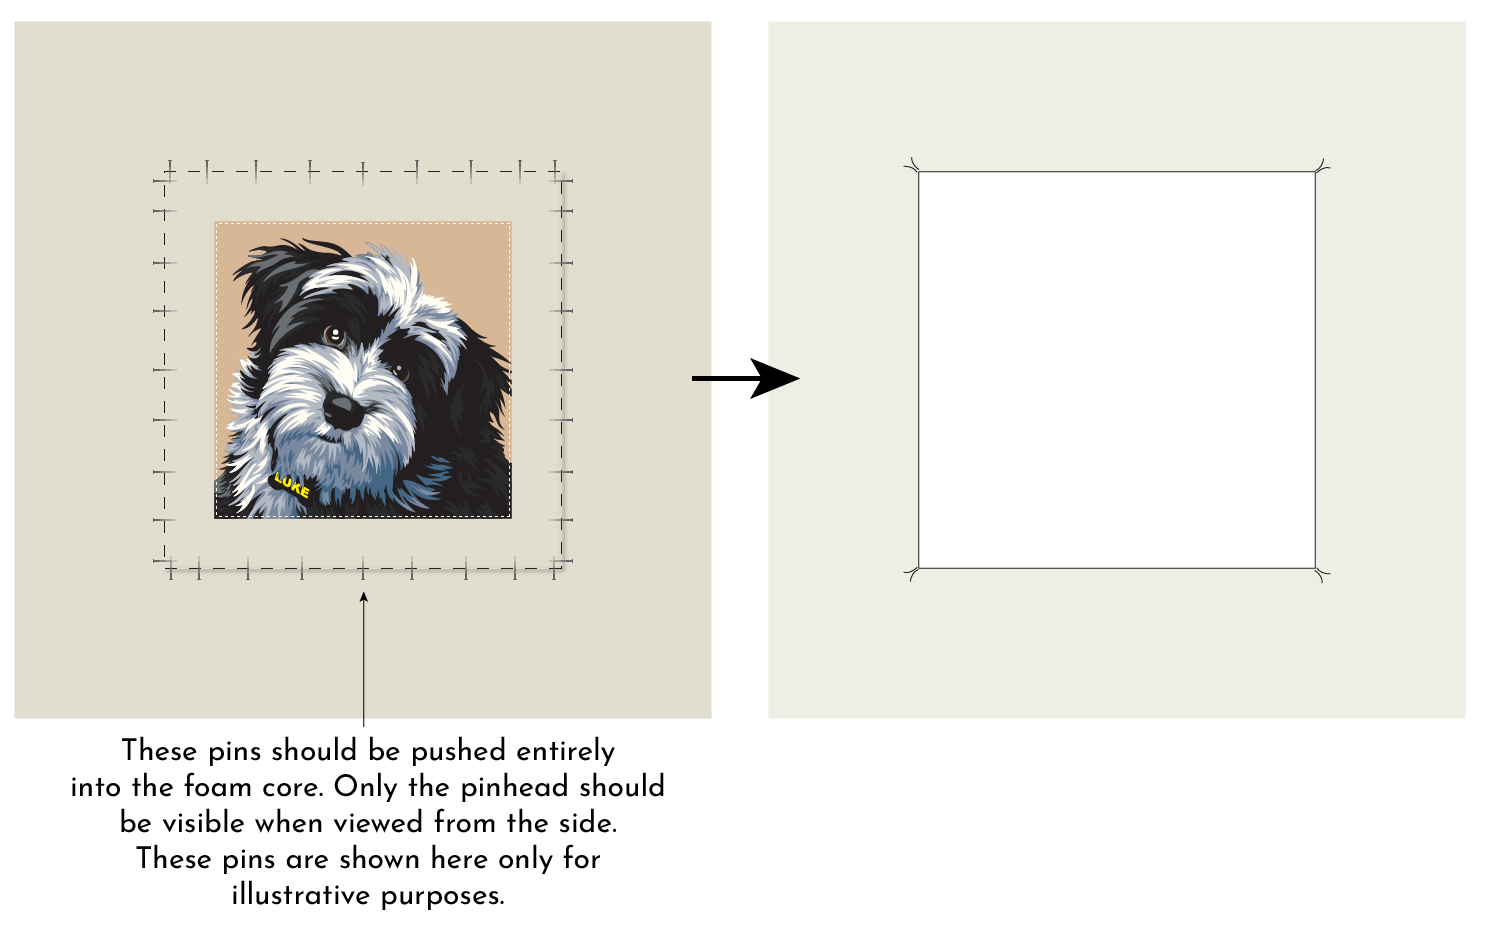
Measure to center the quilt on the foam core board. The width of the mat should be the distance between the quilt and the edge of the board. In this example, I'm planning for a 2" mat, so there should be 2" between the quilt and board edge on all sides.
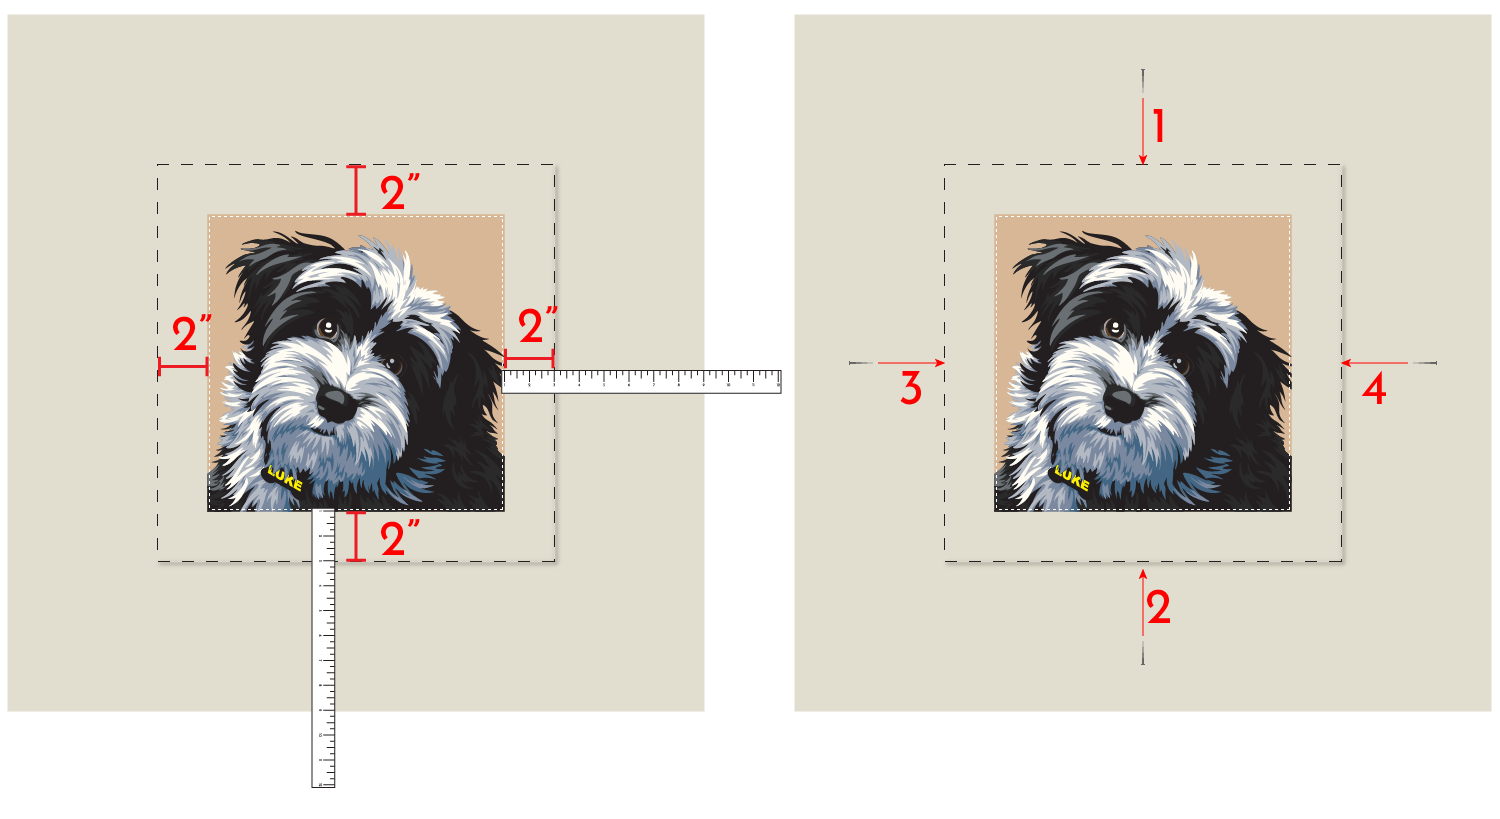
Push one straight pin through the wrapping fabric into the foam core. Repeat on the opposite side, directly across from the first pin. In the above diagram, the pins are numbered in the order they should be placed.
Here is a side view of where the pin should be pushed into the foam core.
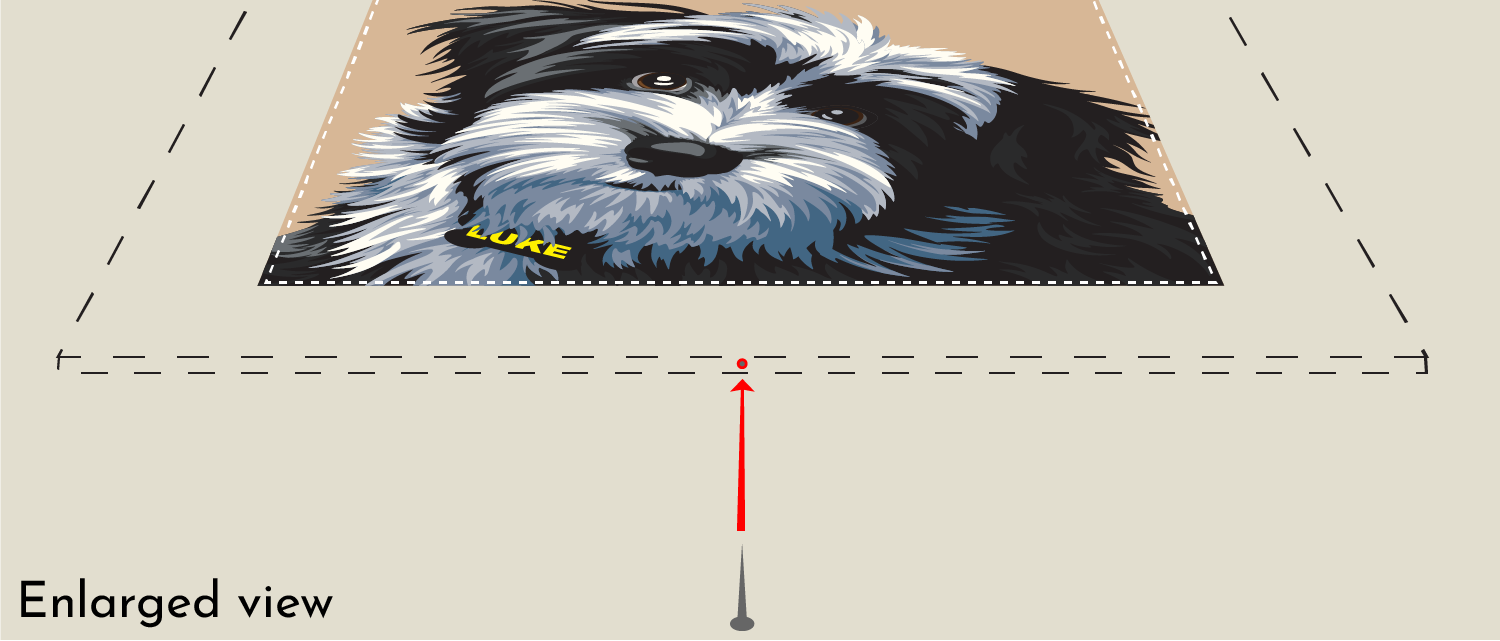
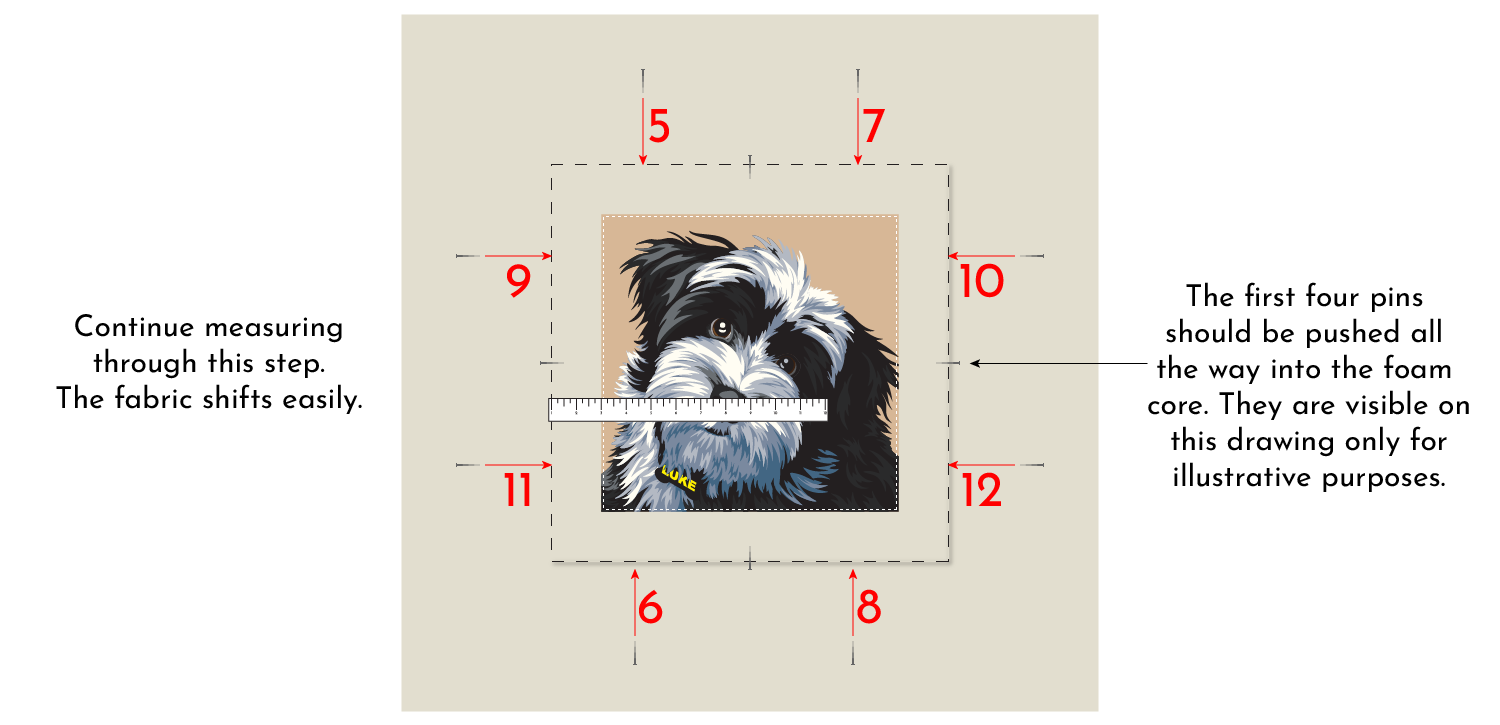
It is critical to continue measuring before and after each pin is placed. The fabric will shift very easily as it's pulled down over the edge of the board. The goal should be to pull the fabric enough that there are no wrinkles, but not so much that it really stretches. The fabric does not have to be super tight, just flat.
Continue measuring and adding more pins. New pins should always be placed halfway between other pins or the corner of the board, and always opposite each other. This diagram has the next eight pins numbered in the order in which they should be placed.
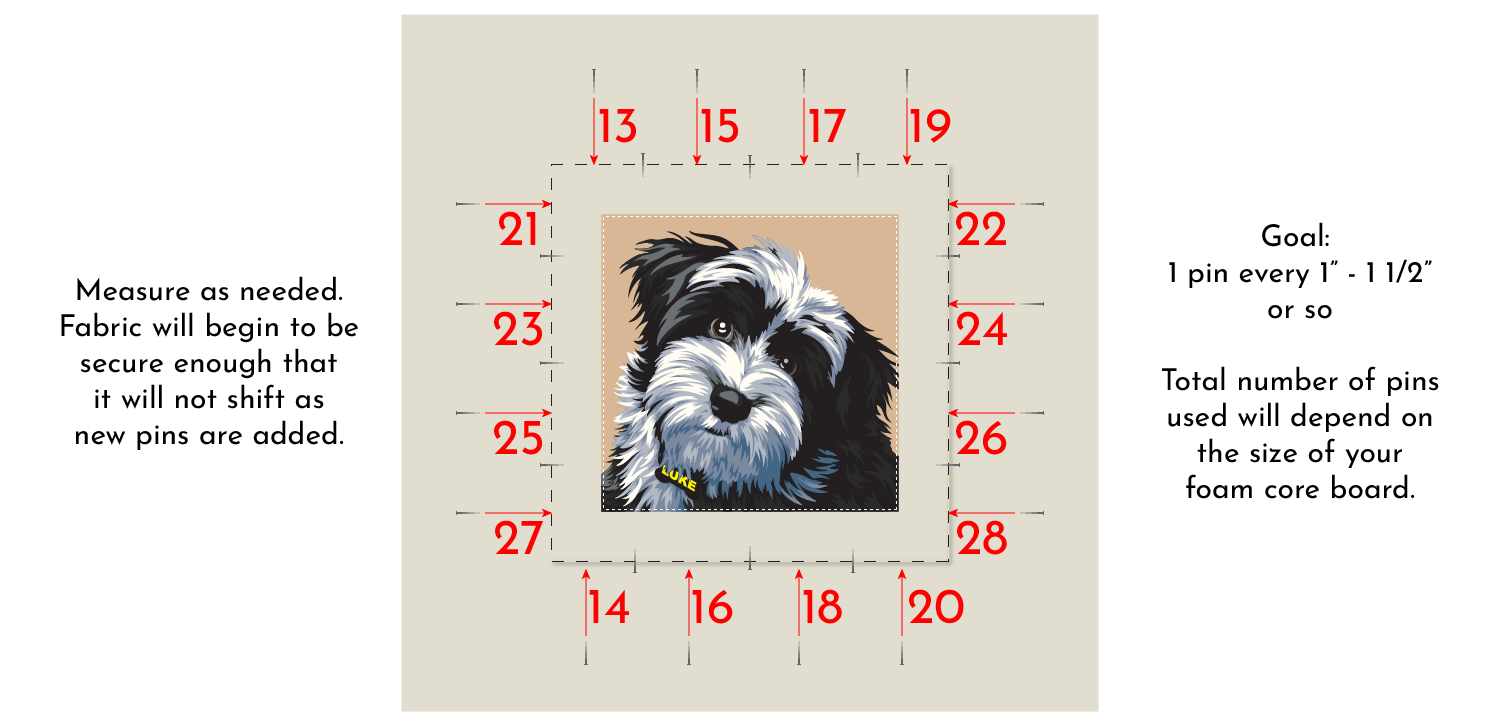
Continue adding pins. The goal is to have a pin approximately every 1" - 1 1/2" along all sides of the board.
Measure as needed; the more pins are in place, the less the fabric will shift.
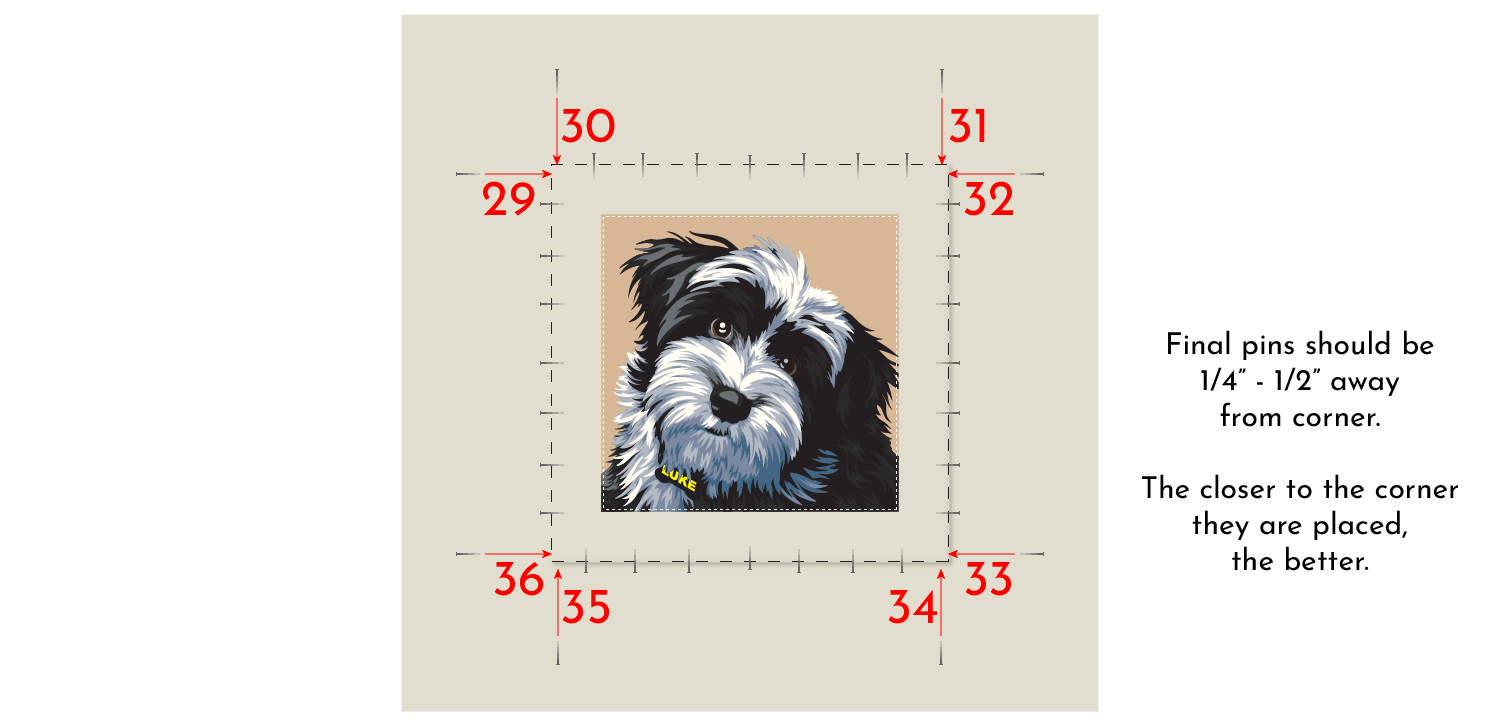
Once all other pins are in place, the final eight pins can be added. These pins should be placed within 1/4" of the corners if possible. By this point, the fabric will no longer shift around, so no measuring is needed. The corner pins should be placed two to a corner instead of on opposite sides. See the numbering below:
Step 7: Fold Wrapping Fabric to Back
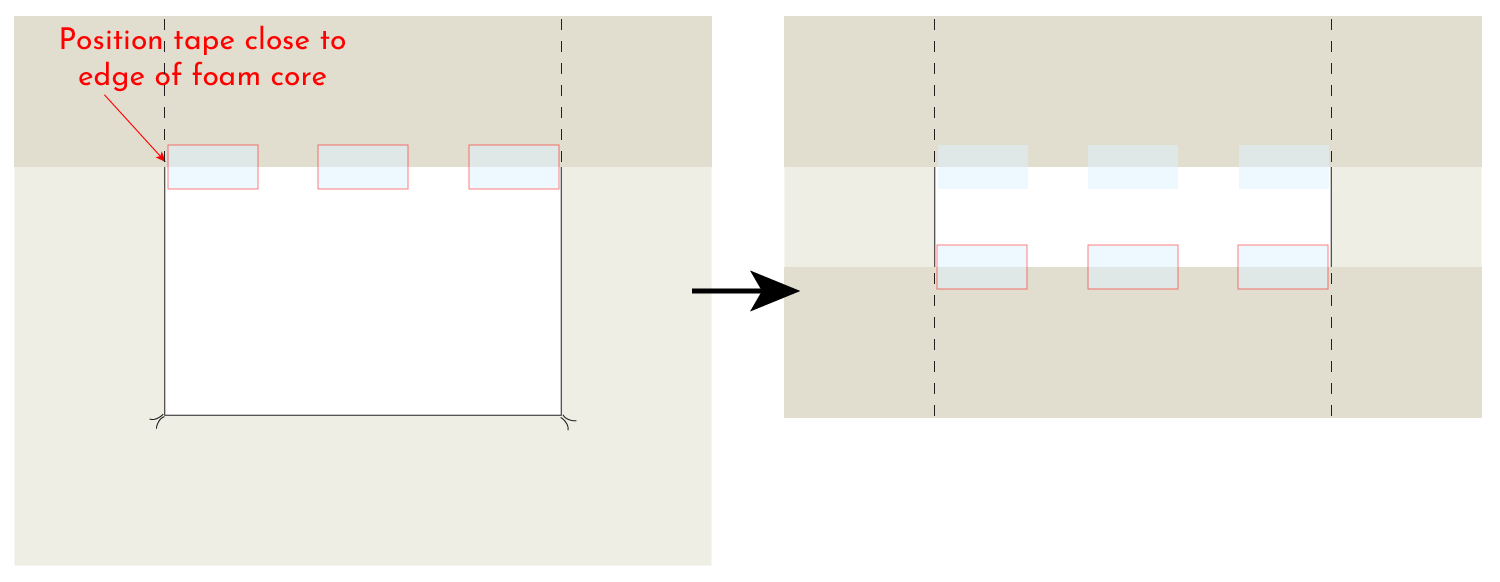
Turn the project over so the foam core is now visible.
Fold the top flap of fabric down. Use linen hanging tape to secure it in place. Place two pieces of tape as close to the edge of the board as possible (see diagram below). Use as much tape as needed to secure the rest of the fabric flap.
Repeat for bottom flap of fabric.
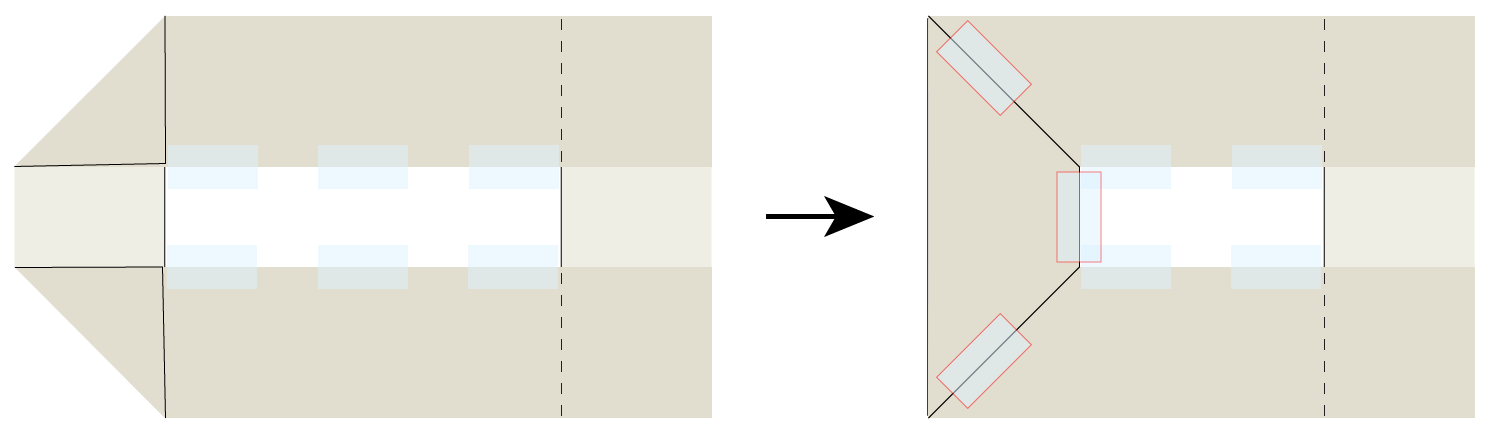
On the left flap of fabric, fold the corners in. Fold the now-triangular flap of fabric over onto the foam core and secure with tape. Pull tight; this fabric needs to be snug.
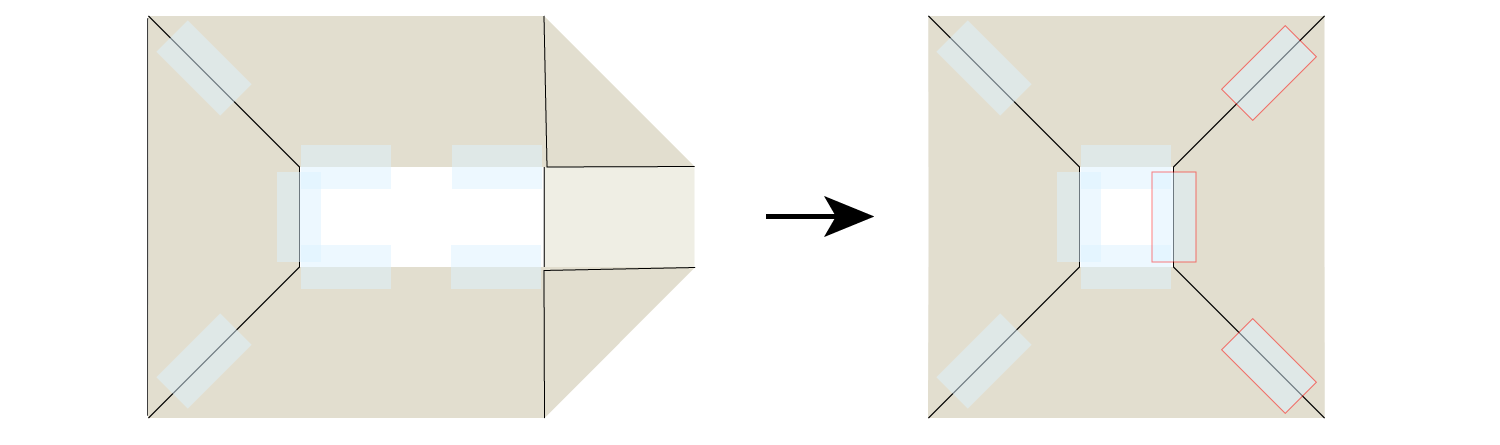
Repeat with the right flap of fabric.
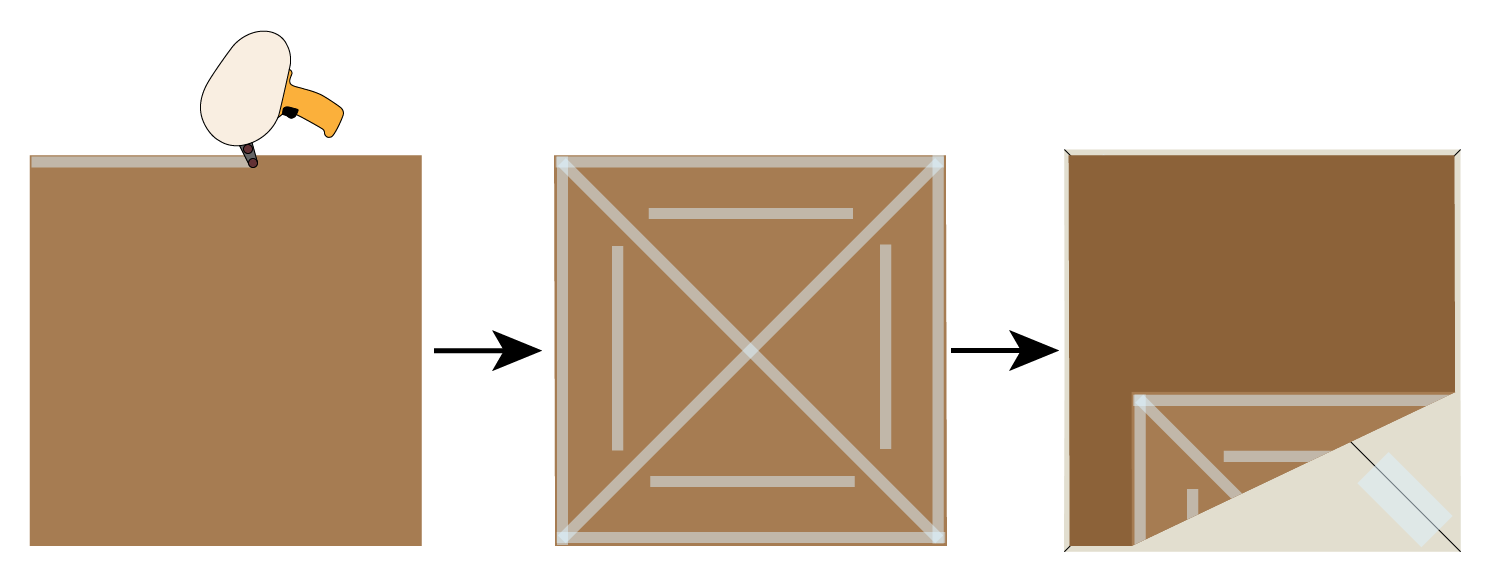
Step 8: Attach Paper Backing (Optional)
If you plan to immediately frame your art, you may choose to skip this step. However, if the intended recipient will see this project before it's framed, adding a paper backing will give it a clean, professional look.
On my own work, I never bothered adding a paper backing to projects I kept and framed for myself. However, any project that was intended to go out into the world without a frame (either as a gift or as an item for sale) always got a paper backing.
Cut a sheet of backing paper that is 1/4" shorter than the dimensions of the foam core board. In this example, I used a 16" square foam core board. Therefore, I needed a 15 3/4" square sheet of backing paper.
Use the tape gun to apply double-sided adhesive tape around all four edges of the paper and in an X across the center. Depending on the size of your paper, you may need to add more in the open, triangular areas.
Center and press the backing paper to the back side of your foam core board and folded-over wrapping fabric.
Here is an example of one of my works prepared for framing using this process:
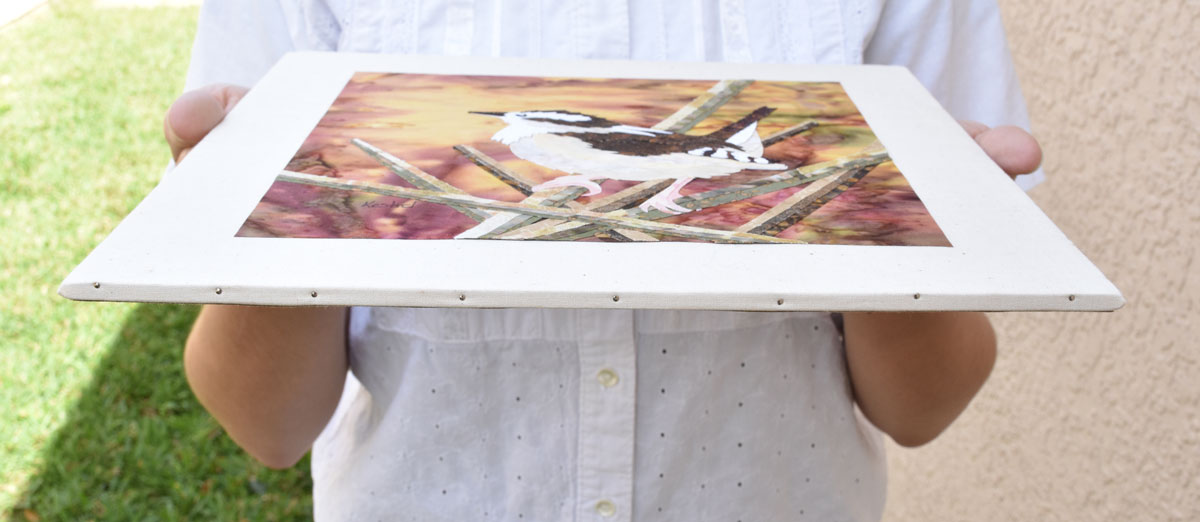
Wrap your project with Grafix Picture Wrap to protect it until it's ready to frame.
Mats and Framing
Here is a cutaway view to show everything that should go in your frame and the order it should be placed.
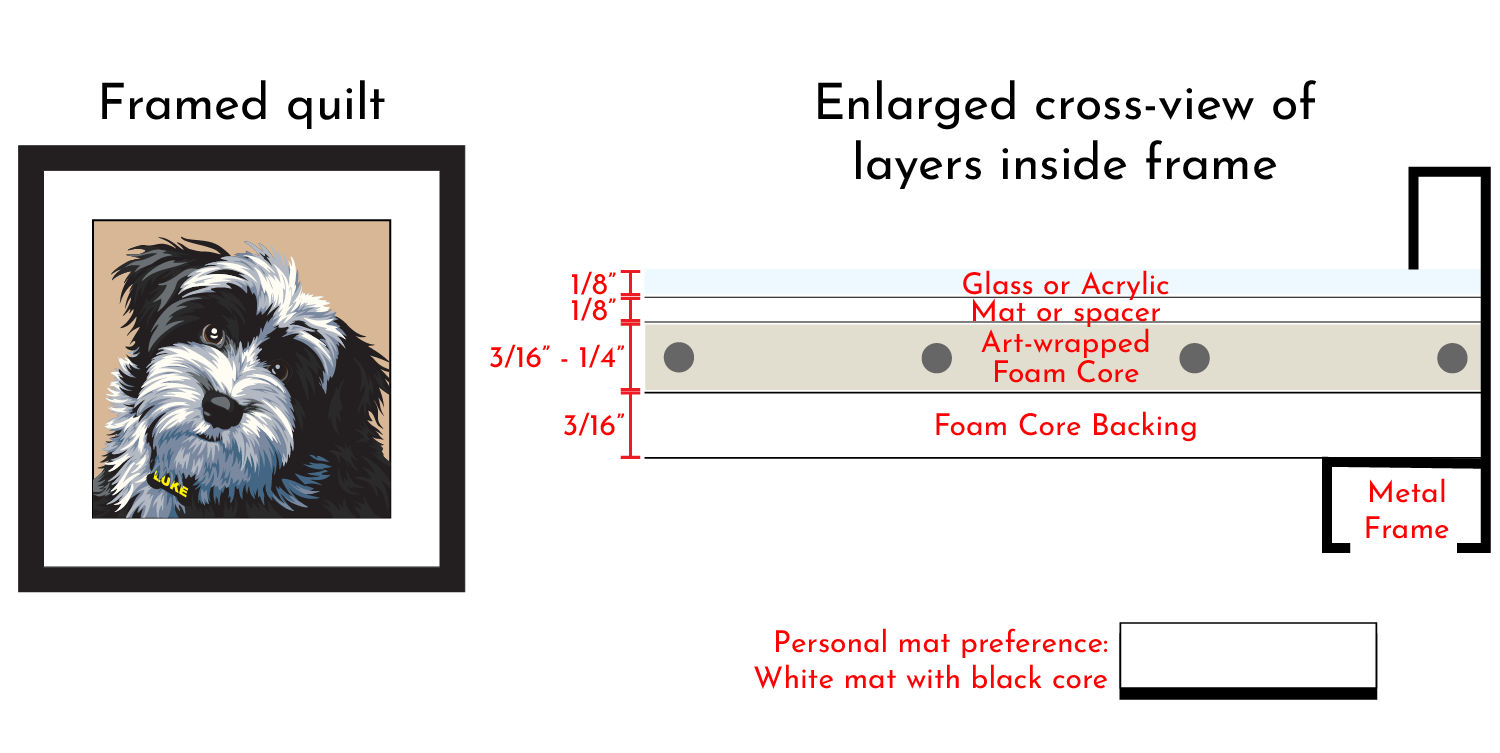
Note that this process will require a frame with a deeper rabbet than typical.
I personally prefer to use a white mat with black core. The photo of the Luke quilt at the beginning of this blog post has this style of mat. However, there are many, many mat colors and styles available, and a local frame shop will have samples to view in person.
If you do not want to use a mat, you will instead need a spacer (which is essentially a very thin strip of foam core that runs the edge of the frame.) A spacer is not visible to viewers and is used only to separate artwork from touching the glass. Fabric can physically bond to glass over time, so it's important the two do not touch.
Instruction PDF
I've prepared a PDF with the instructions from this post. Please use and share it freely.
Kestrel's Guide on How to Frame a Quilt
The PDF allows high-resolution printing but no copying or modification to protect my intellectual property. Thank you for understanding.
