Not Today Process
- Published:
- Length: 1475 words
- Reading Time: 8 minutes
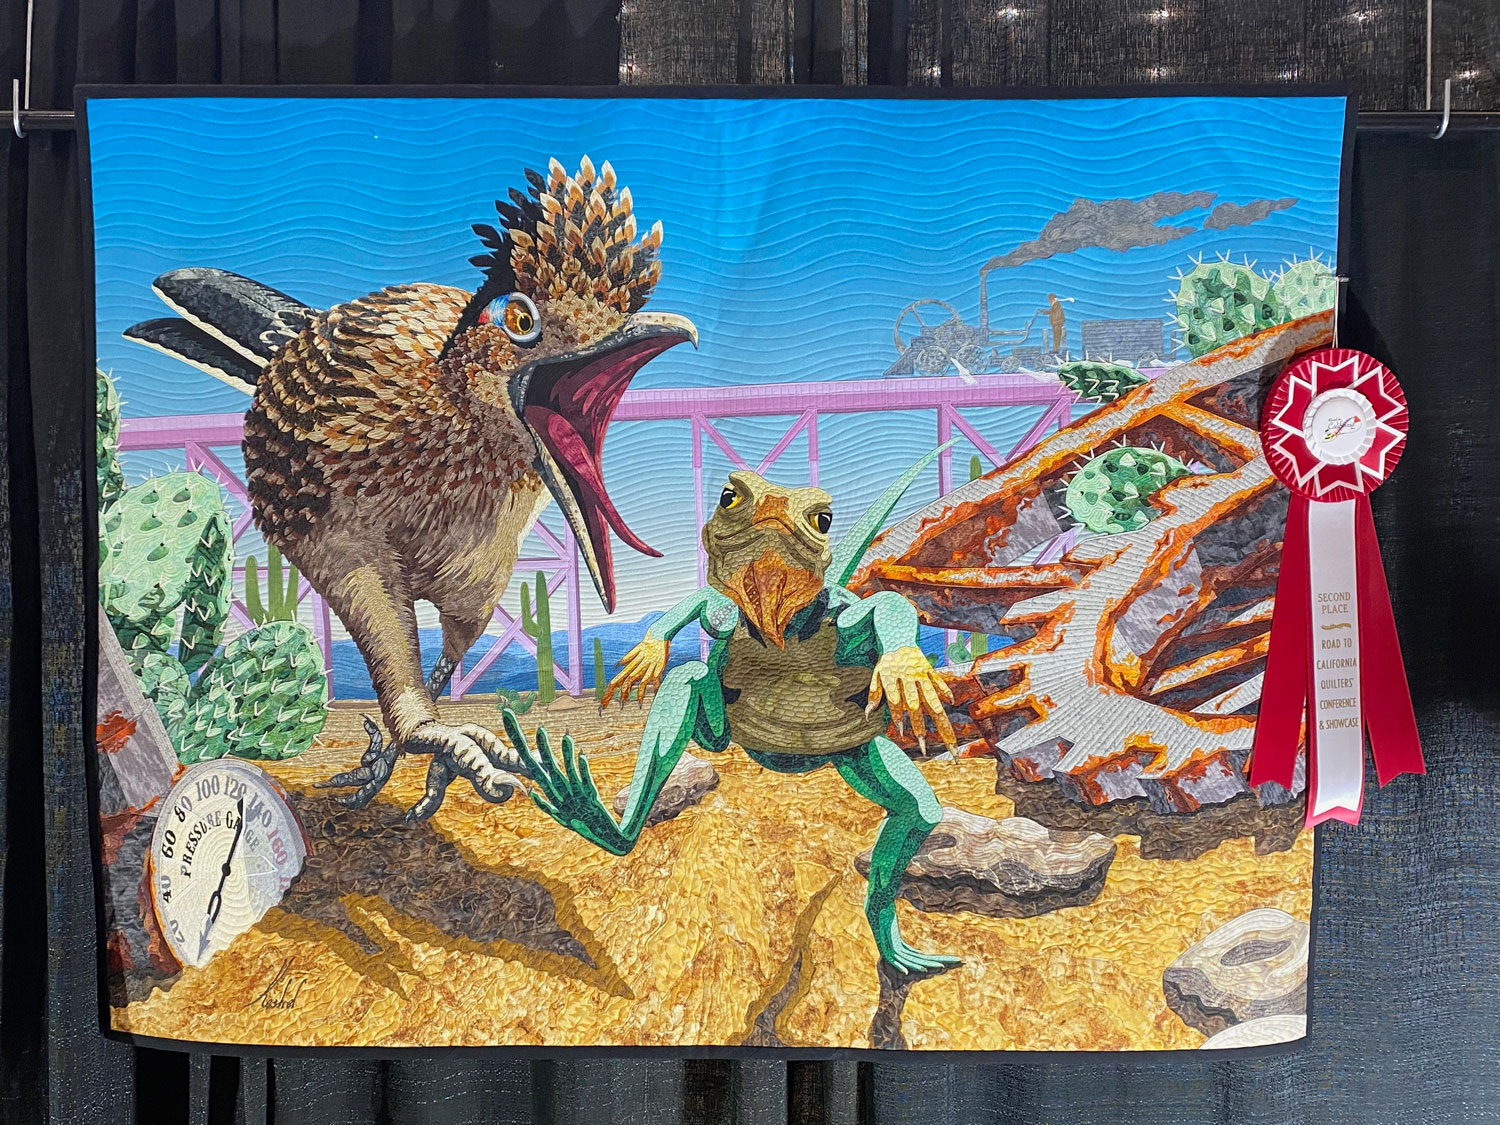
The chase is on! The Greater Roadrunner is after his next meal, chasing a Common Collared Lizard through a steampunk junkyard. The desert is a favored dumping ground for the detritus of progress, even in a fantasy world. A steam-powered industrial revolution creates iron refuse and pieces of broken machinery have been left to decay in dry desert air. That doesn’t bother these critters. To them, this is home. Will that lizard wind up as dinner? Not today!
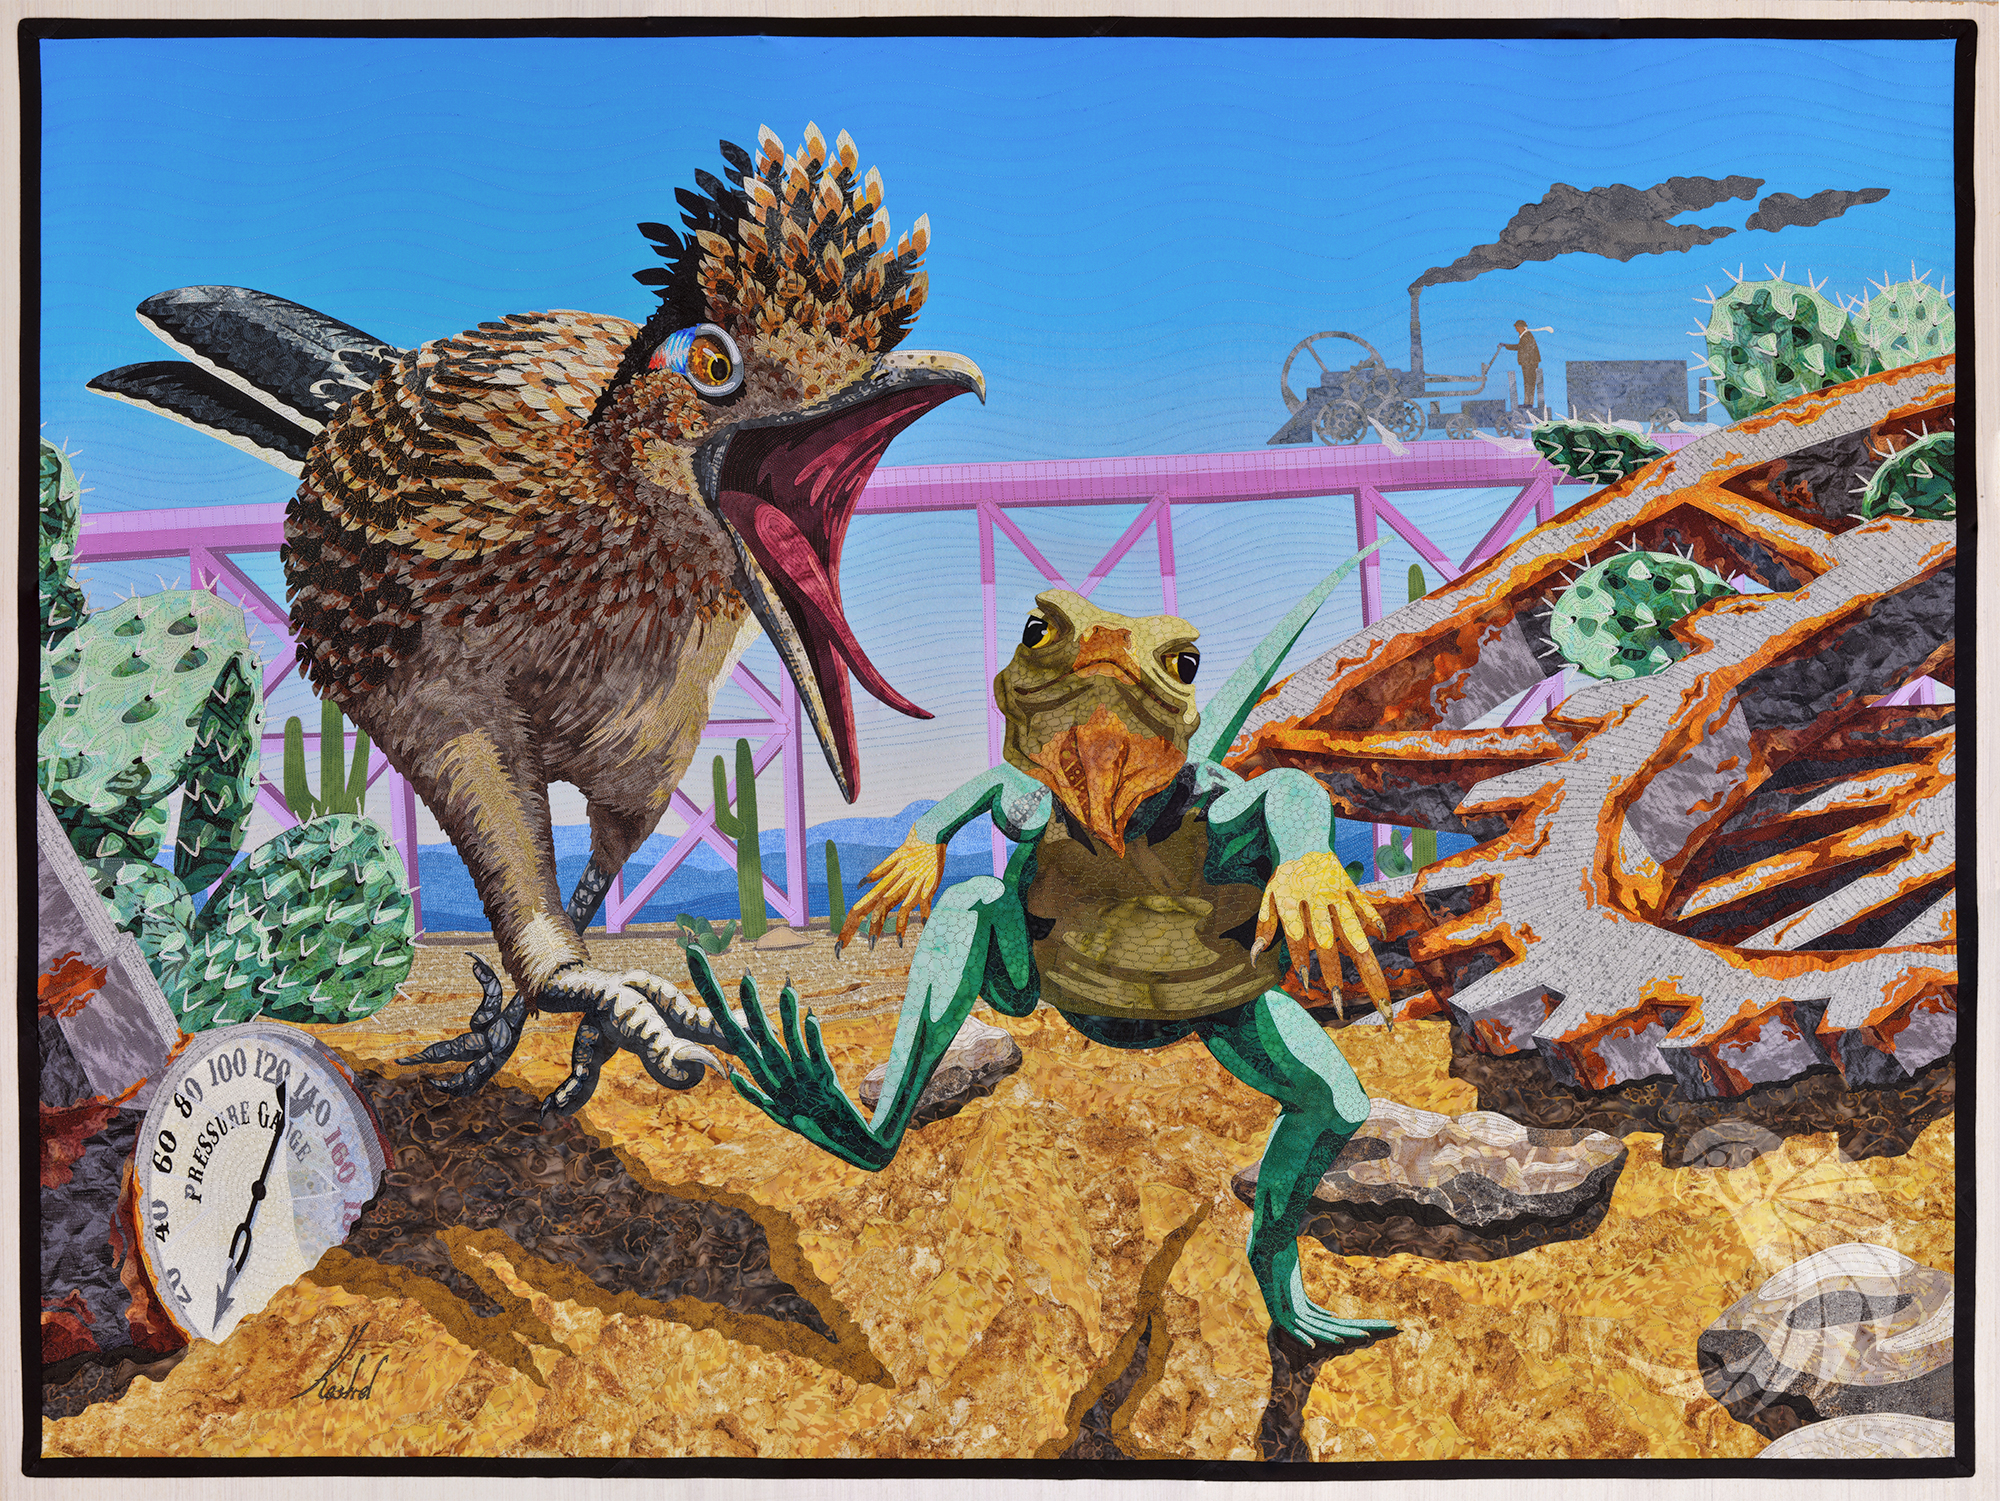
Not Today is a 51" x 39" fused, raw-edge appliqué quilt. In just a few days, it will be on display at the 2022 International Quilt Festival in Houston, TX, where it won First Place in the Small Pictorial category. Keep reading for a peek behind the scenes at how I made this quilt.
An Idea Sparks to Life
When my imaginative realism images spark to life in my brain, my usual first course of action is to find reference photos that are relatively close to the idea in my head. In this case, I scoured the internet looking for photos of lizards, roadrunners, cactuses and deserts, and collaged them together into a frankenstein-esque composite.
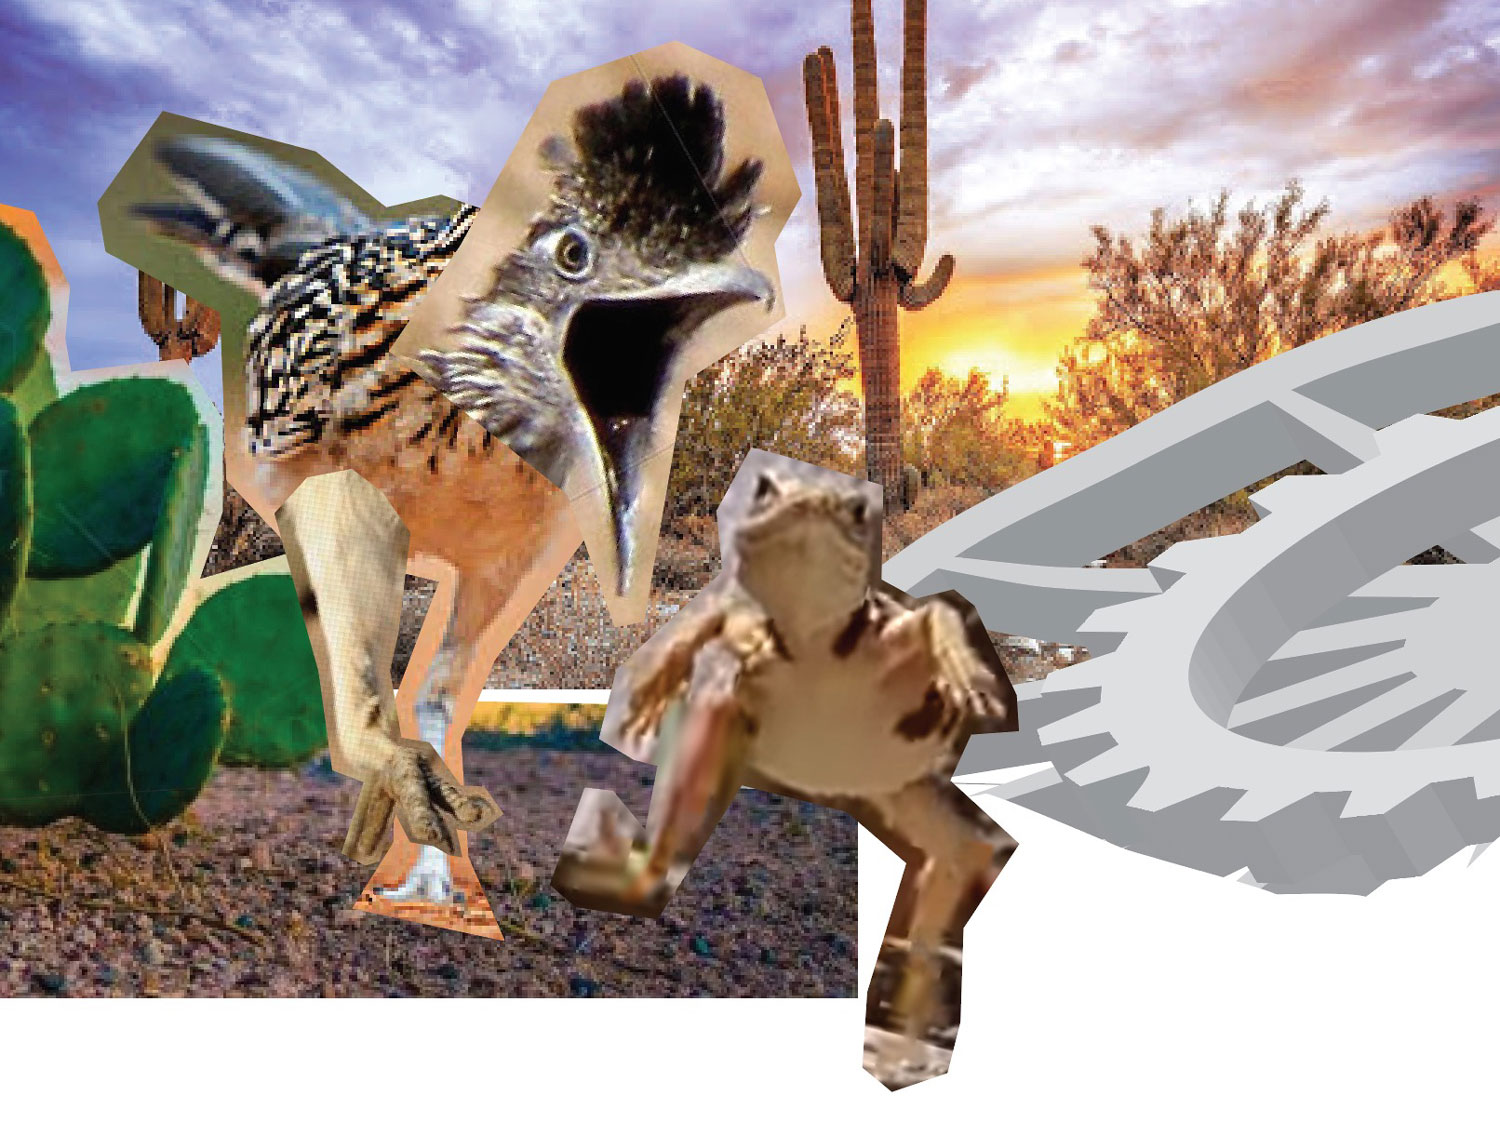
Doing this is helpful to me, because I get to start working through my ideas in a corporeal form. It also lets me start sharing my idea in a visual way with my family members.
Sketch It Out
The composite is a good start, but it's still pretty far away from the idea in my head. In order to capture my exact mental composition, I have to draw it by hand.
I use a drawing app called Concepts on my iPad Pro. I start by drawing a loose sketch of my idea to get all the major components in place:
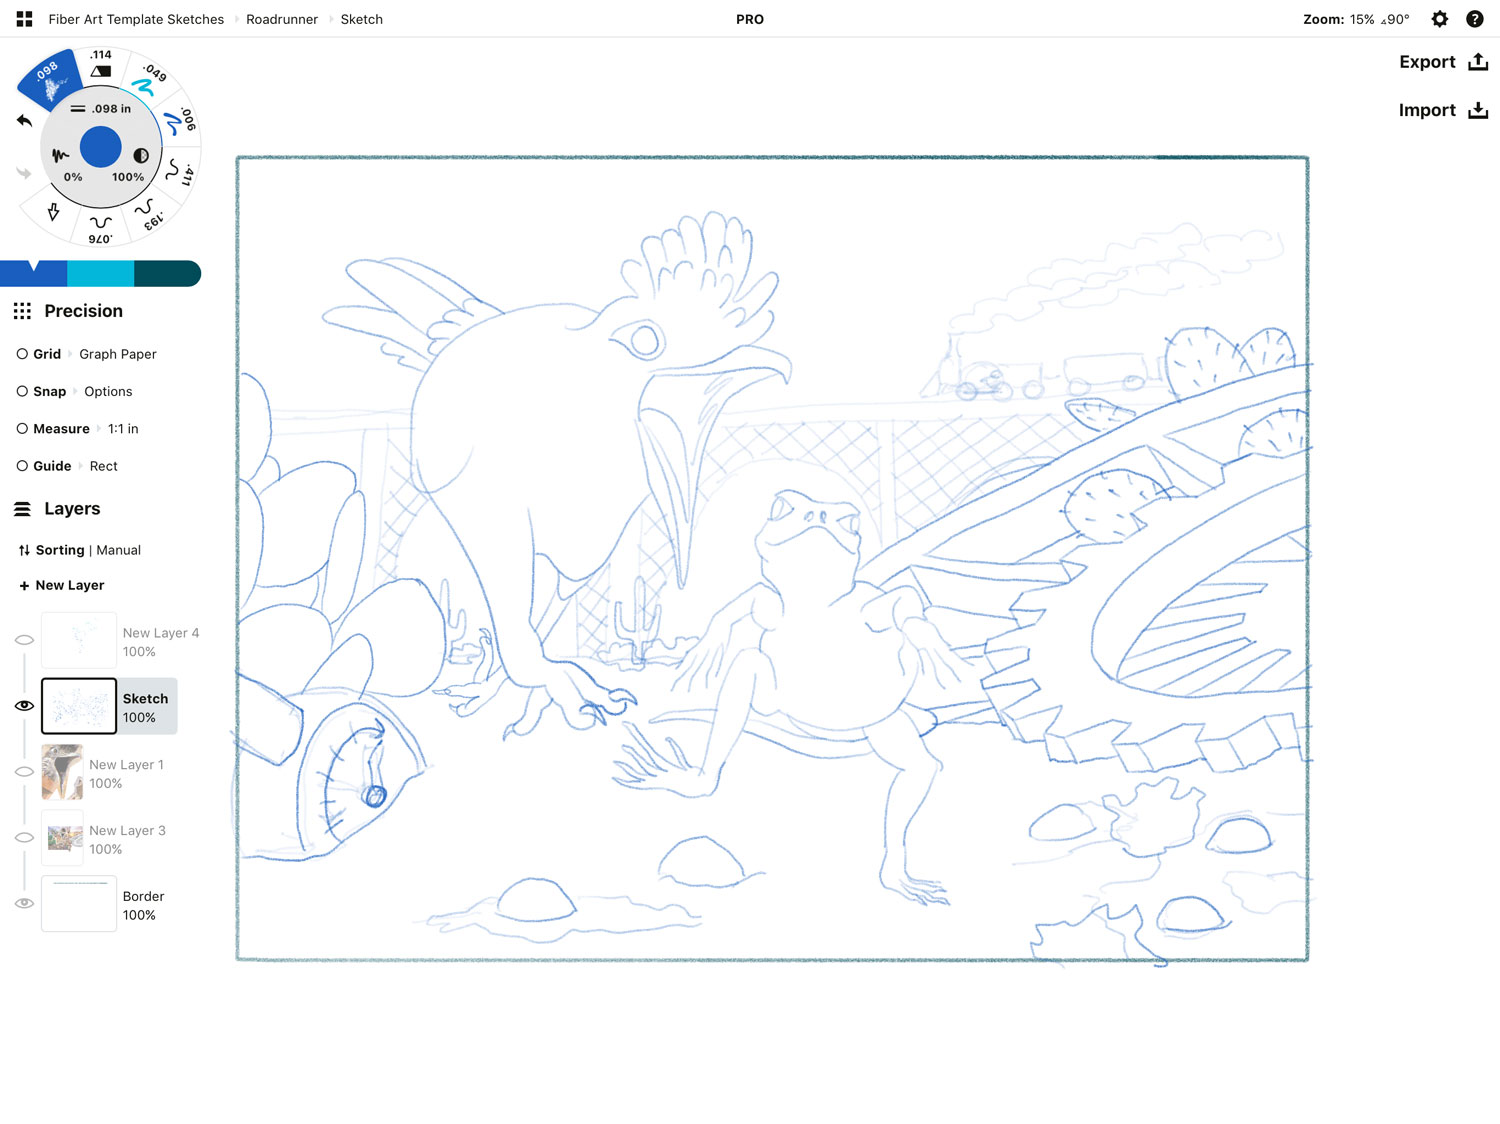
Then I add more and more detail. Every line I draw in Concepts represents the edge of a piece of appliqué fabric in the finished quilt, so things get quite complicated.
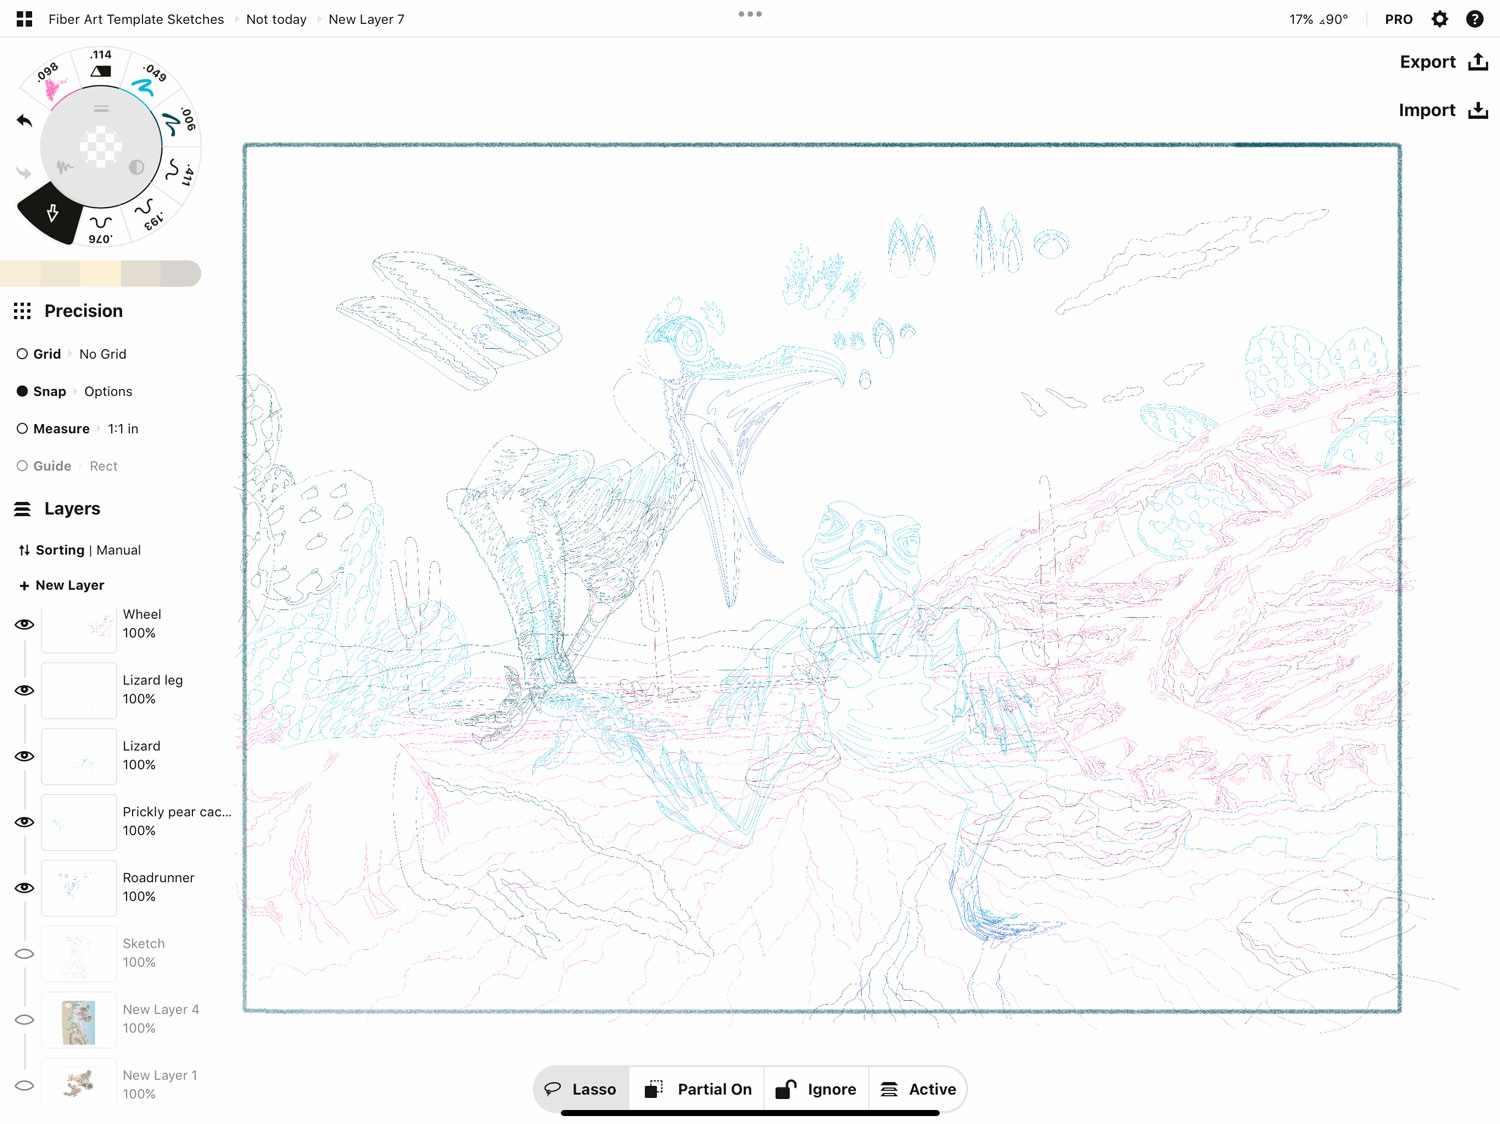
Create the Template
Once all of the outlines are drawn in Concepts, I take the detailed sketch into Adobe Illustrator and create a full-size, full-color rendering of my design. I call this rendering my template, although it's essentially my appliqué-by-number pattern (you'll see why in a moment).
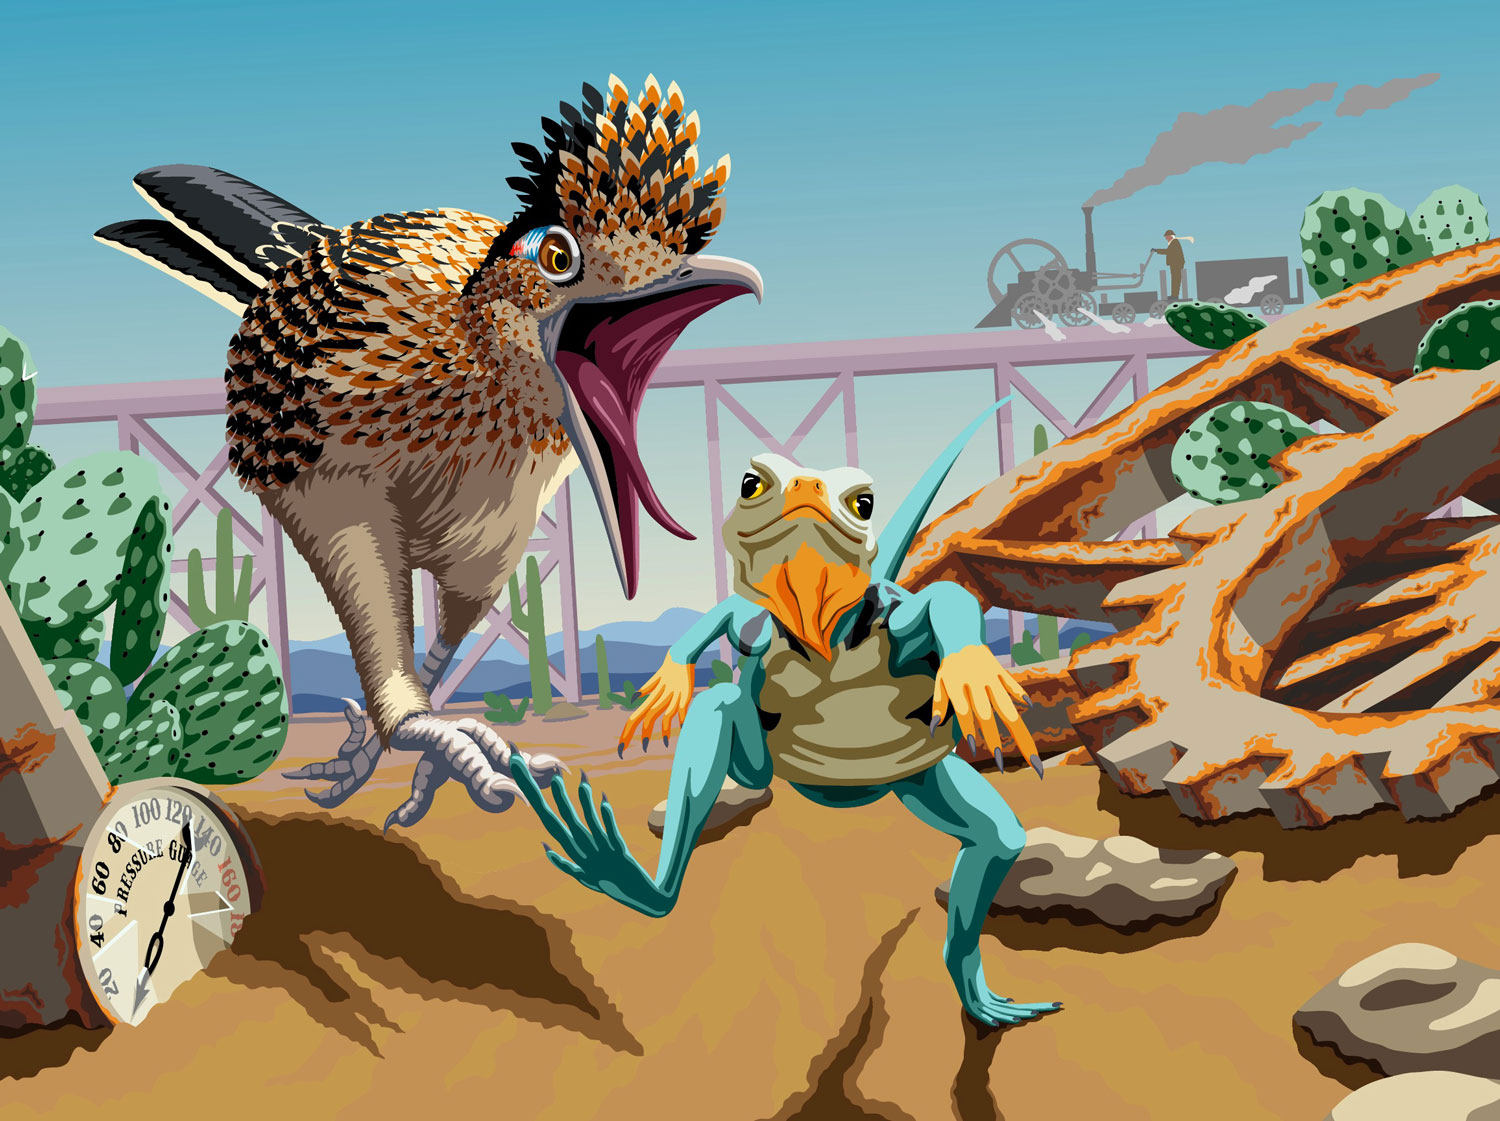
Design Overlap
My quilts are made using a technique called fused, raw-edge appliqué. Basically, that means my quilts are made from hundreds of individual pieces of fabric that are glued (fused) in place and quilted with their cut edges showing.
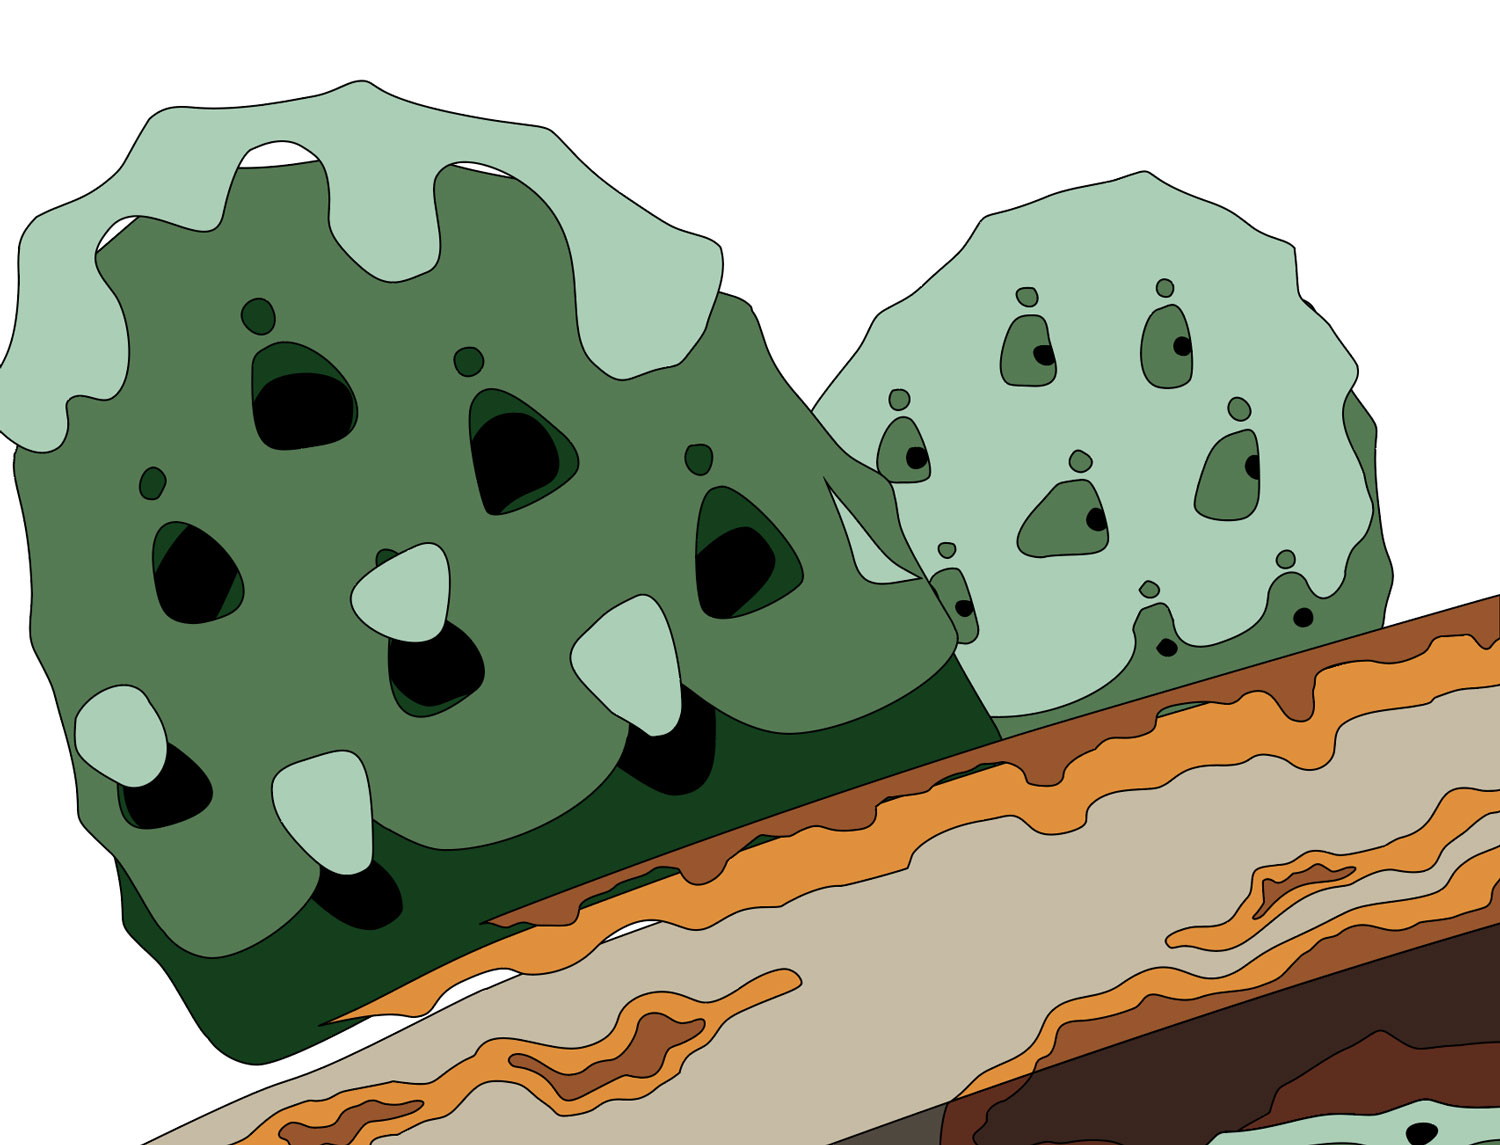
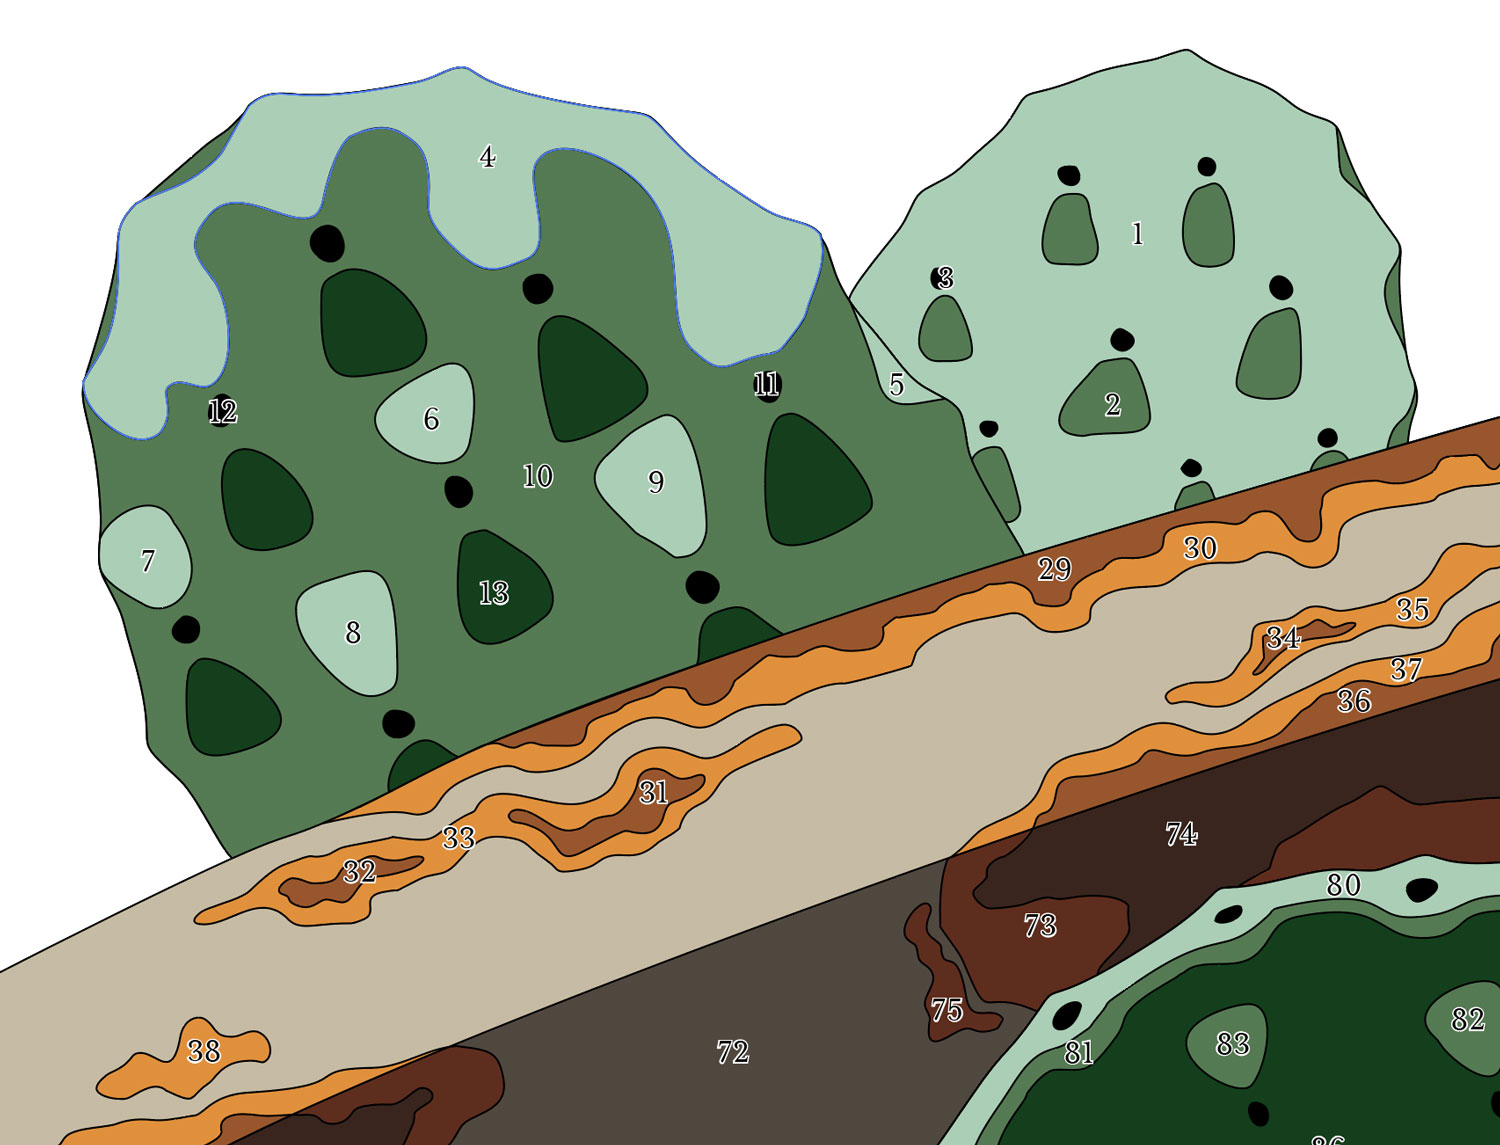
Each area of color in the template above represents one piece of fabric. Unfortunately, there's a catch: At this point of the process, the template is essentially a giant jigsaw puzzle. Each piece shares an edge with its neighbor; none are over or under any other piece. Here's what I mean:
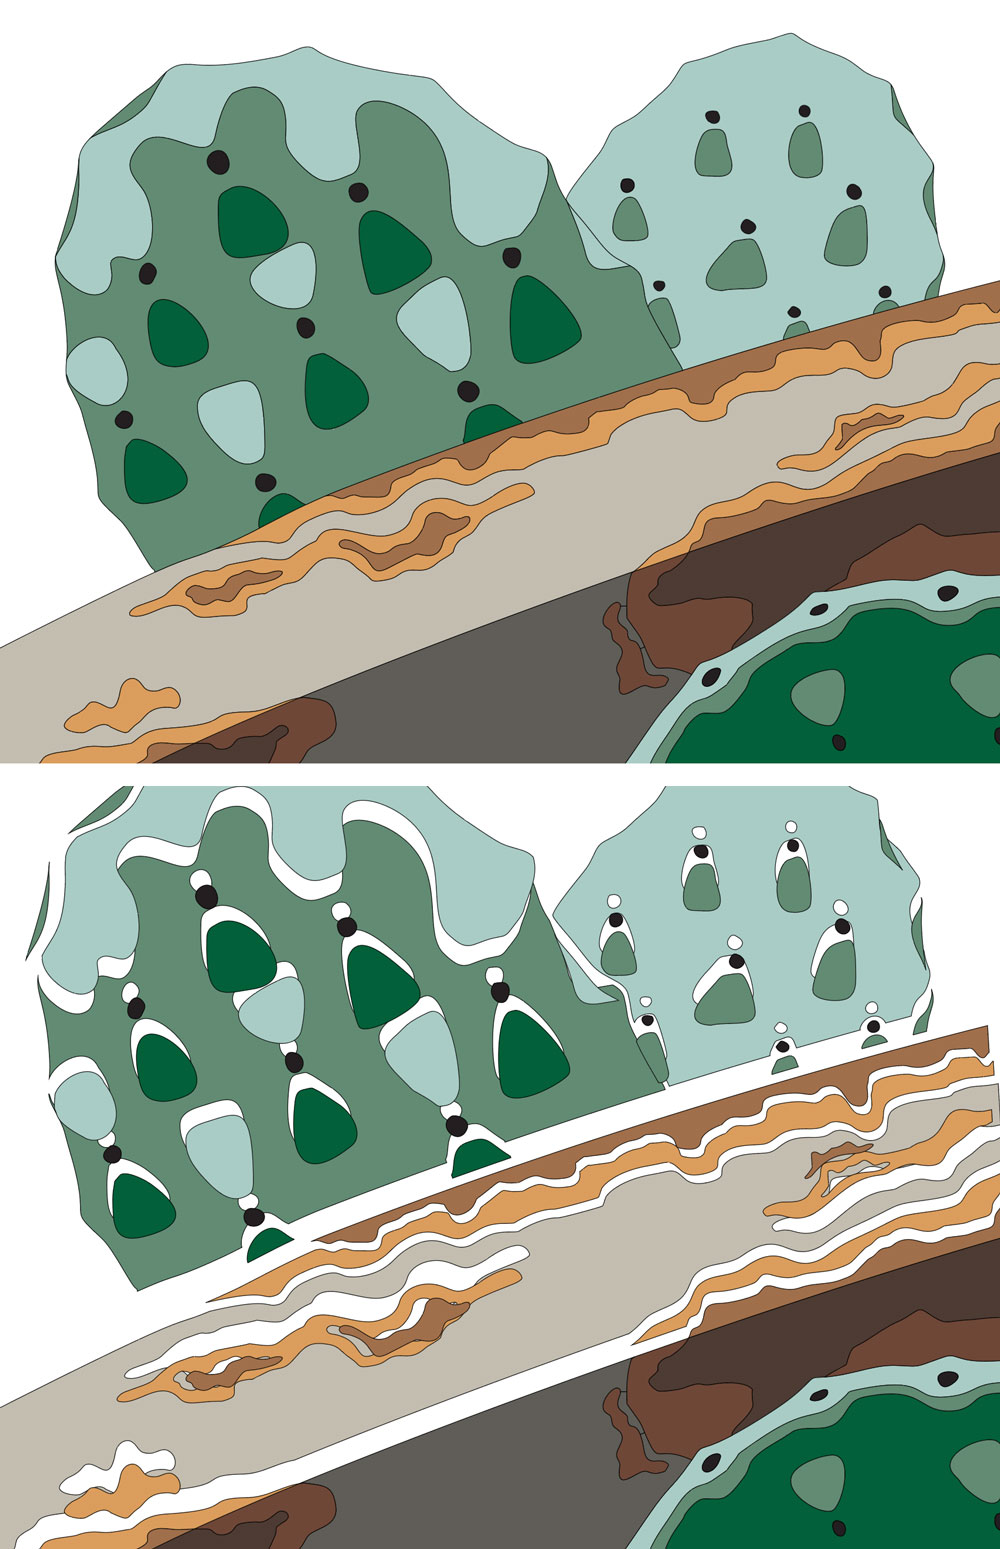
The prickly pears in the top image are aligned correctly. But if I move the pieces, as shown in the bottom image, it becomes clear that none of the individual pieces overlap. They just perfectly matched up to each other.
This is a problem for me, because I need the pieces to overlap so they can be fused together. Pieces that don't overlap each other also can't be glued together. The solution is that I manually go through each and every piece in the entire design — all 2034 of them, in this quilt — and add overlap wherever it's needed.
Add Numbers
At the same time I add overlap to my template, I also assign each piece a number. The number helps me re-align the fabric pieces according to the template after I cut them from fabric.
Prepare for Cricut Cutting
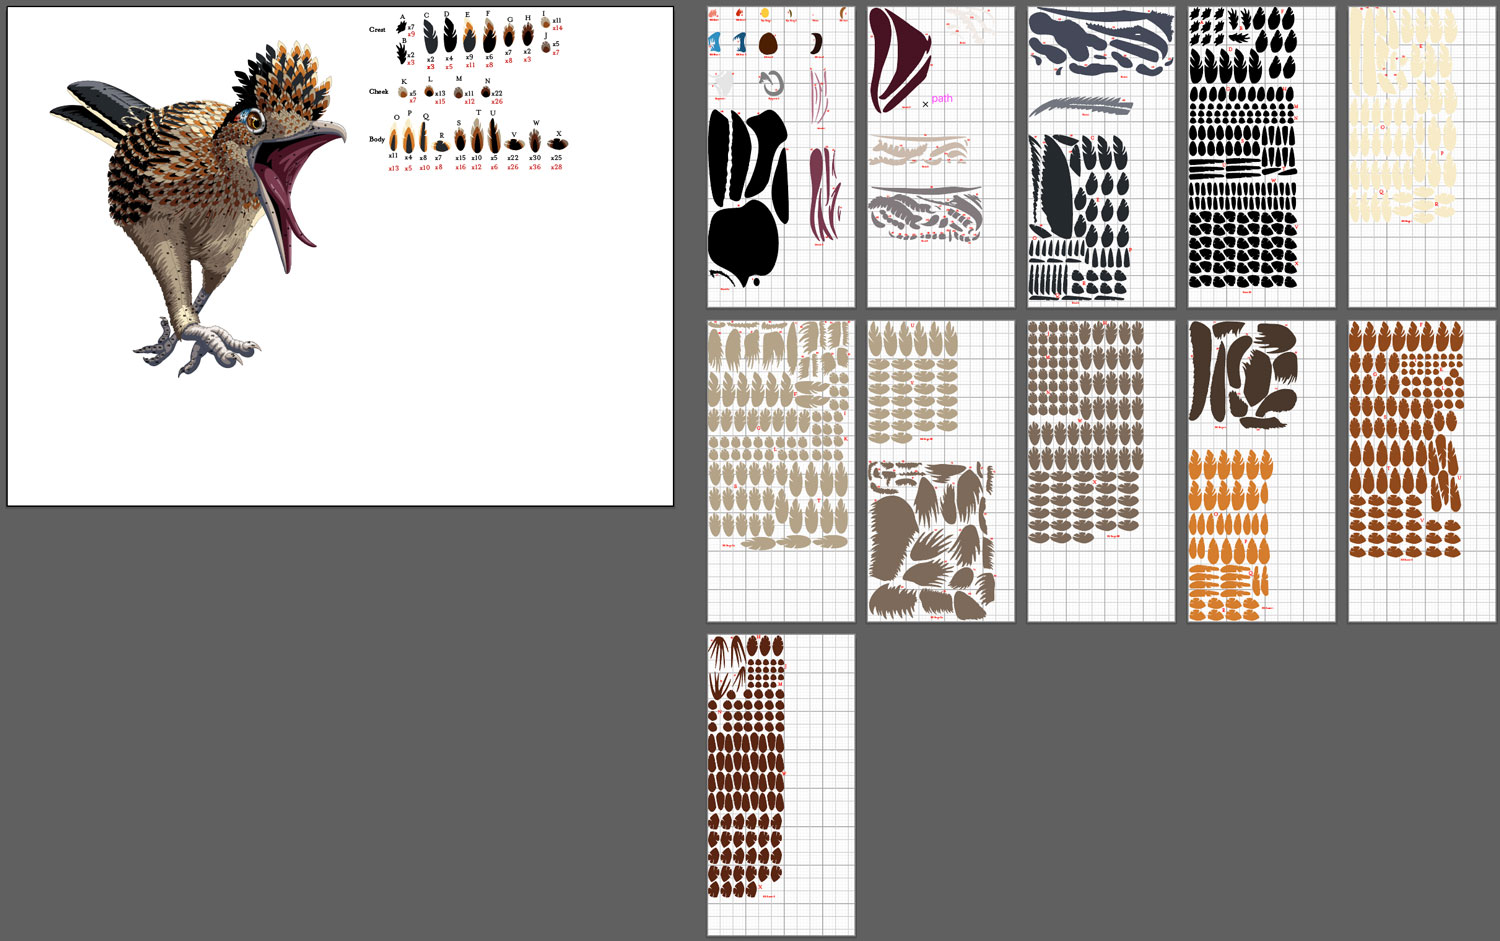
The last part of my digital design process is to prepare my pieces for Cricut cutting. I use a Cricut Explore Air 2 to cut all my fabric pieces, and that requires arranging my pieces by color on specific artboards (pages) that match the size of a Cricut sticky cutting mat.
In the image below, the roadrunner's full-size, numbered template is on the left. All of the pieces that make up the roadrunner's body and feathers have been arranged by color onto the tall, skinny artboards on the right. After arranging my pieces like this, I export each artboard as an SVG file. These SVG files will be uploaded to the Cricut software for cutting.
By this point in the process, I'm 40-50% finished with the entire project. And it's finally time to start looking at fabric.
Picking Fabric
In the course of designing the template, I keep track of what colors I'm using for what areas. Those colors are shown as colored squares to the right of the template:
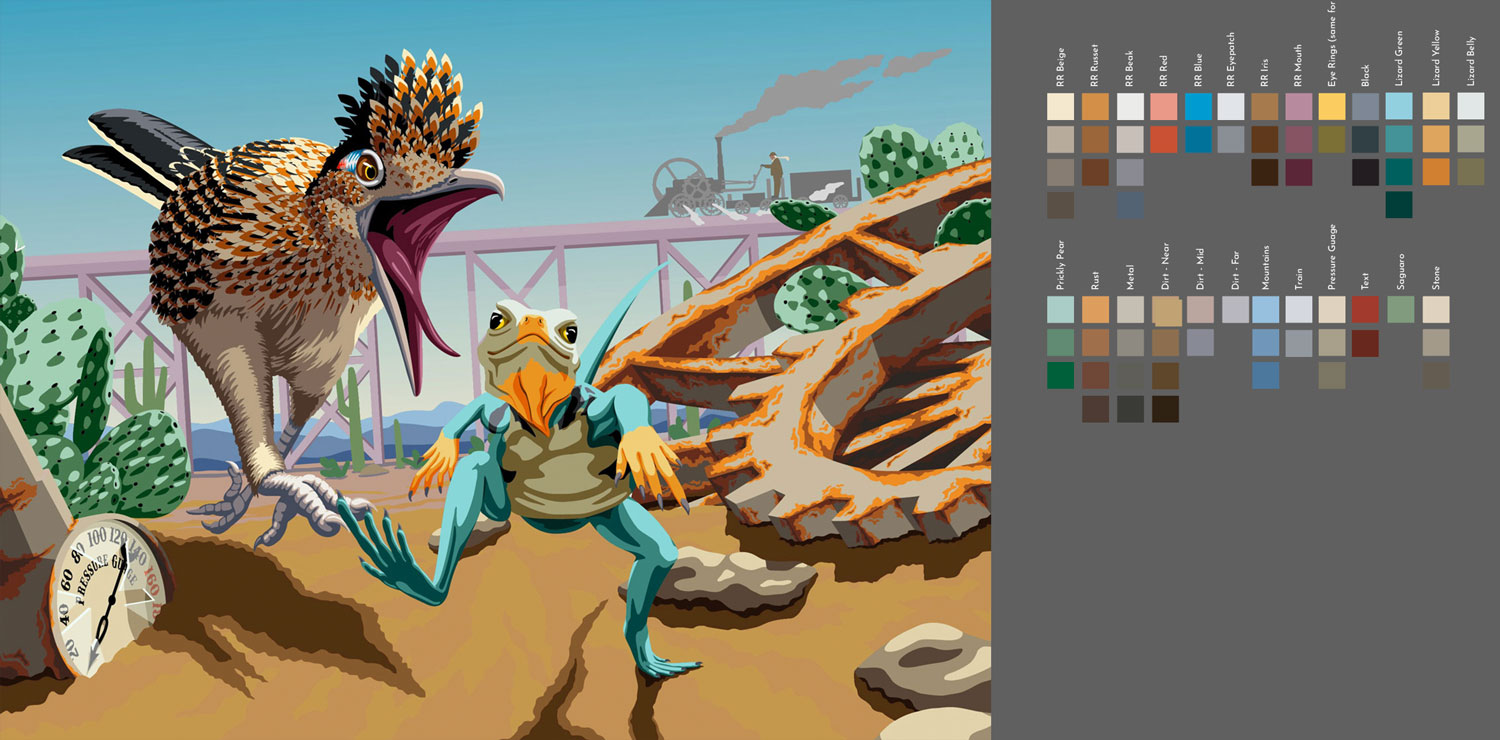
Each of the colored squares is one fabric I'll need for the quilt. I print those colors as little paper swatches and match them to fabric, using my cellphone's camera to check the value.
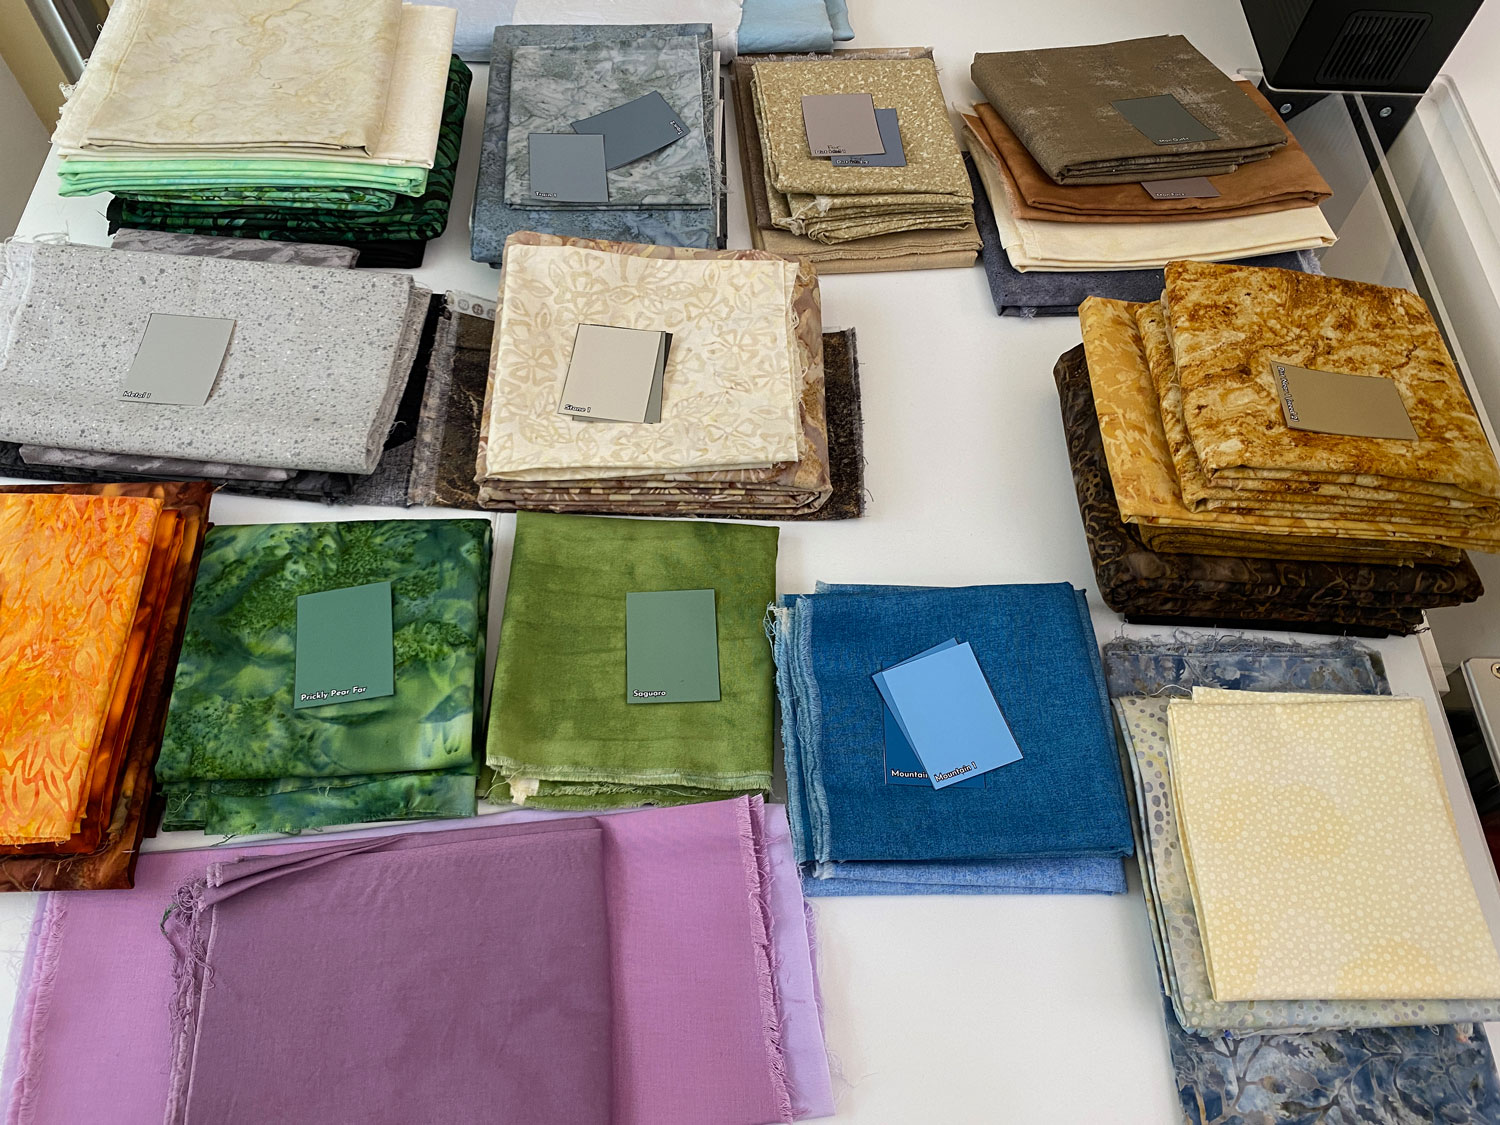
Here is a photo of some of the fabrics I used in Not Today along with their paper swatches.
Attach the Fusible
Thanks to arranging all of my pieces into orderly rectangles on the Cricut artboards for cutting, I know exactly how much fabric I need for every color. I keep track of those dimensions and cut a swatch of Wonder Under fusible for each.
Here is a photo of all of my fusible-backed fabrics stacked in front of my Cricut cutting machine.

Treat the Fabric
After years of experimenting with many different anti-fray products, I finally developed a method of using Mod Podge that is the most effective and least expensive option. I coat all of my fusible-backed fabrics with a diluted solution and let them dry overnight. Here they are arranged on the floor of my guestroom to dry.

Once dry, they'll be ready to cut.
Cricut Cutting
I upload the SVGs I exported back in the "Prepare for Cricut Cutting" step to my Cricut software. Those SVGs are the exact layouts that my Cricut Explore Air 2 will cut. Here's what my setup looks like:
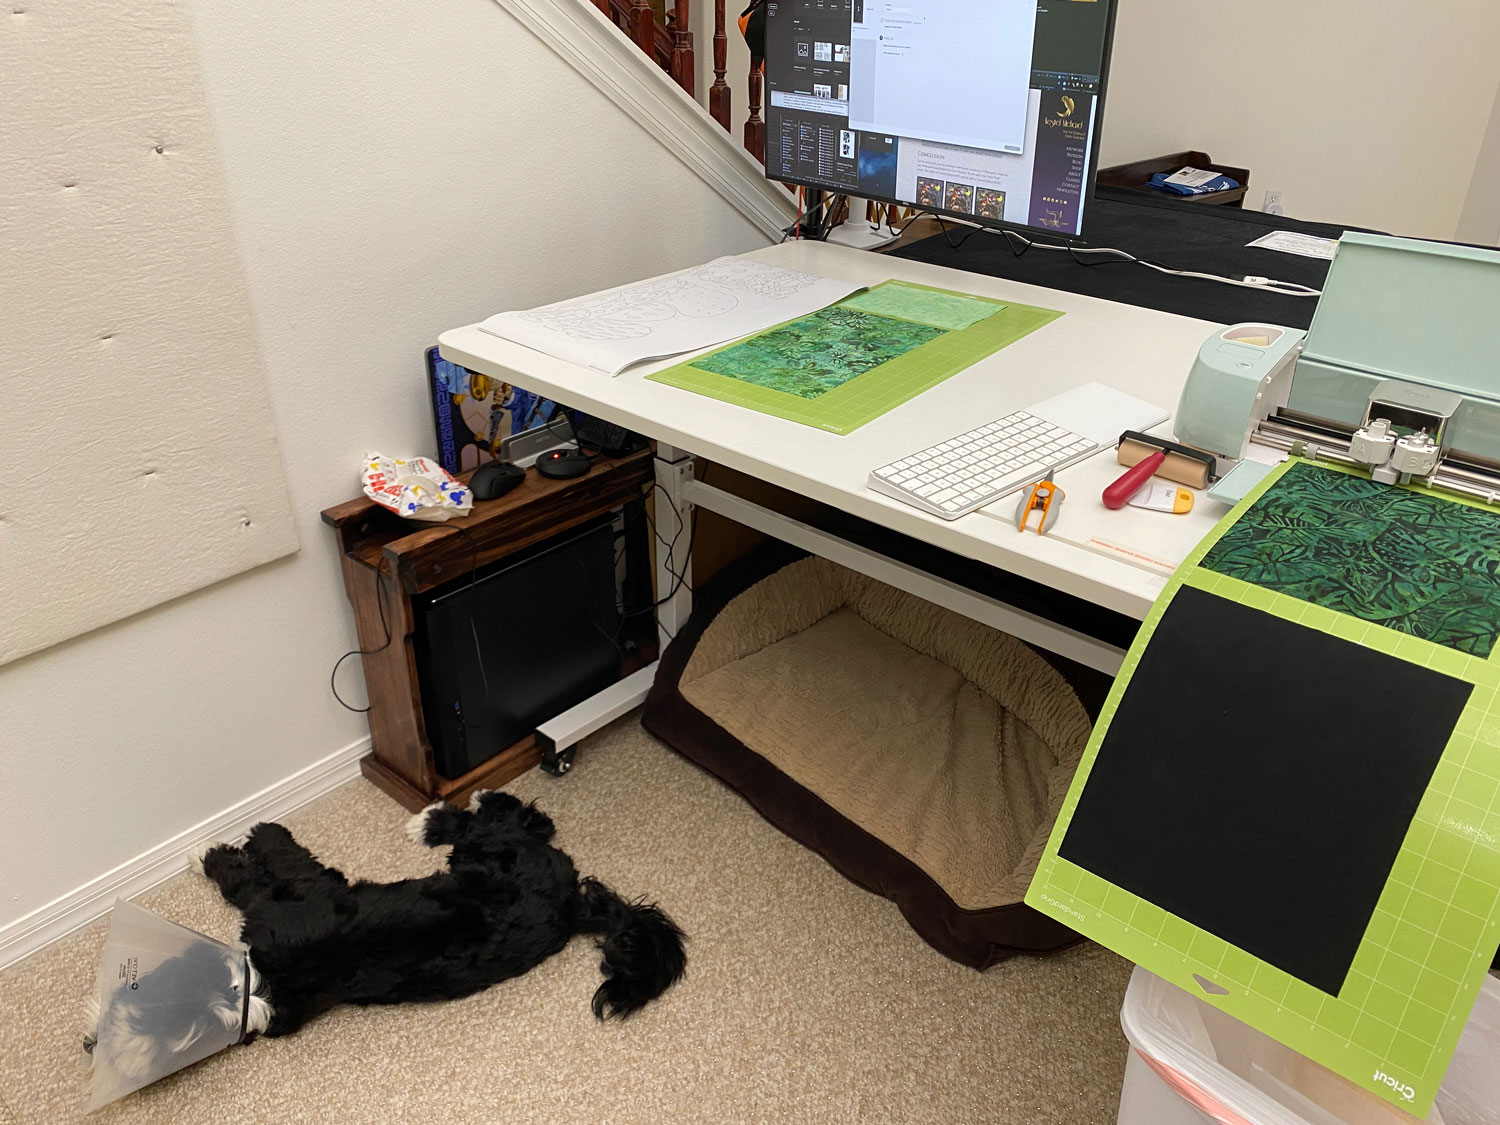
Note: My boy, Luke, had been neutered the day before I took this photo, which is why he's in the cone of shame.
And here's a close-up of what the fabric pieces look like after they're cut:
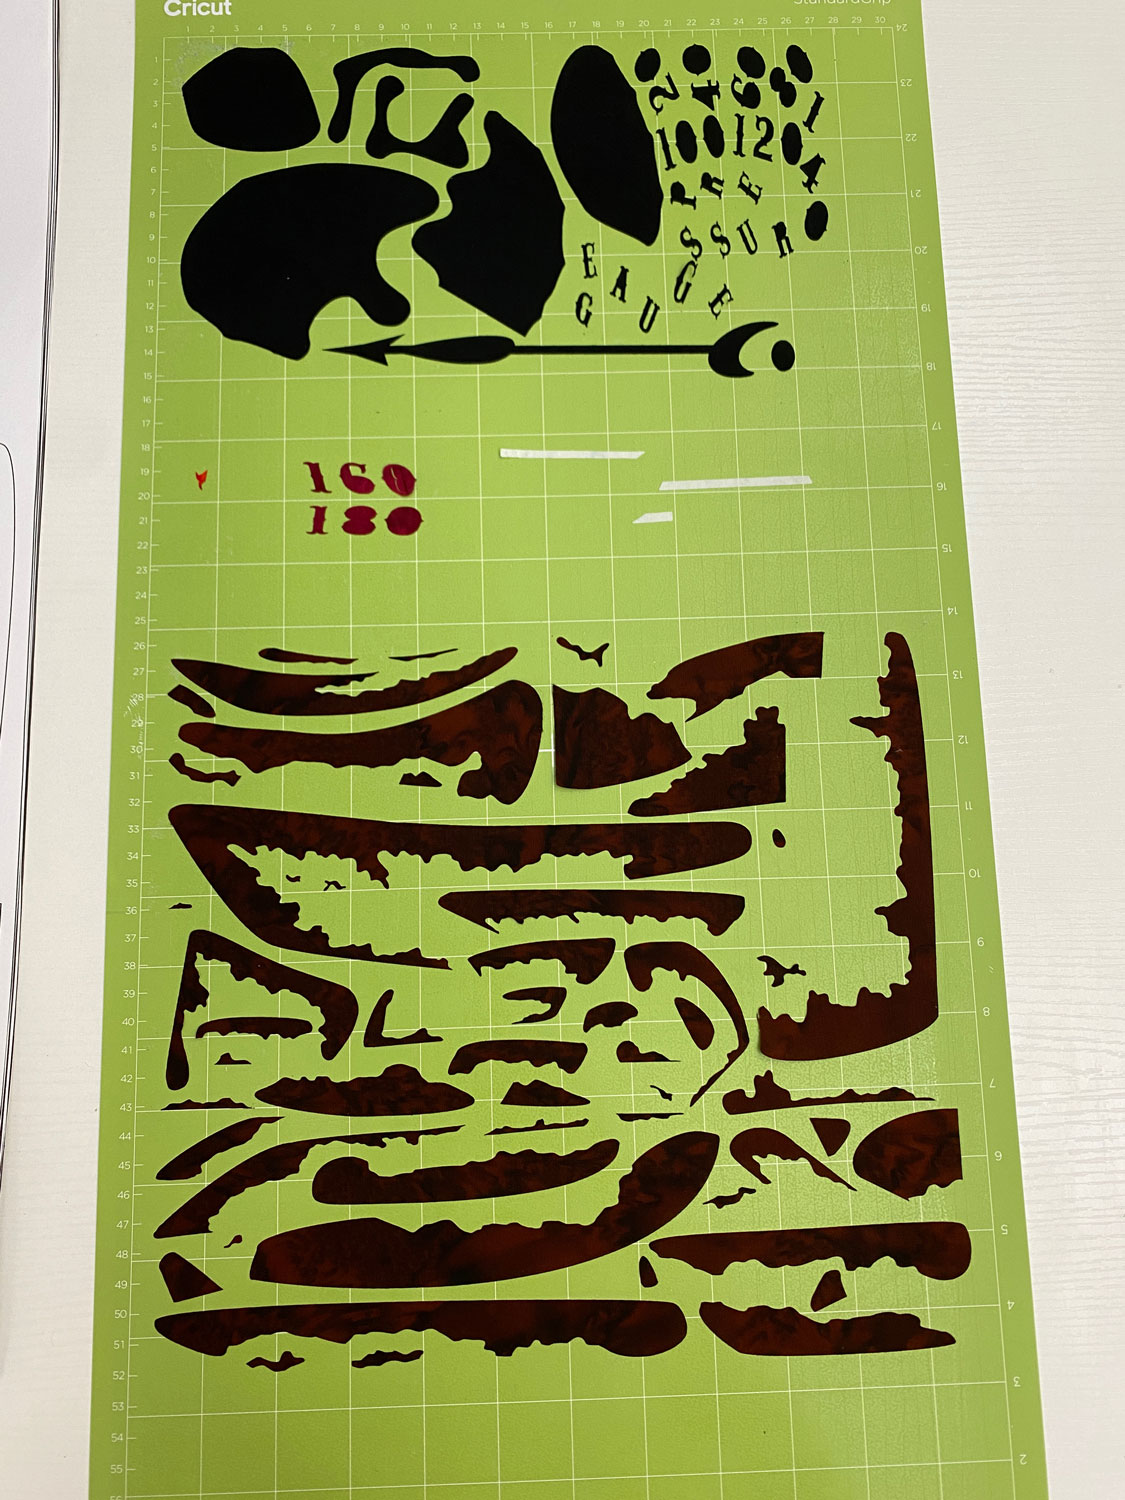
For the record, I own and use a Cricut machine, but I am not a Cricut Ambassador. The SVG files I design are usable by any cutting machine that can accept custom files.
Assembly
I print my numbered templates full-size and place them on my ironing table underneath a clear, non-stick Teflon sheet. Then I match each cut piece of fabric back to its number on the template before ironing it in place.
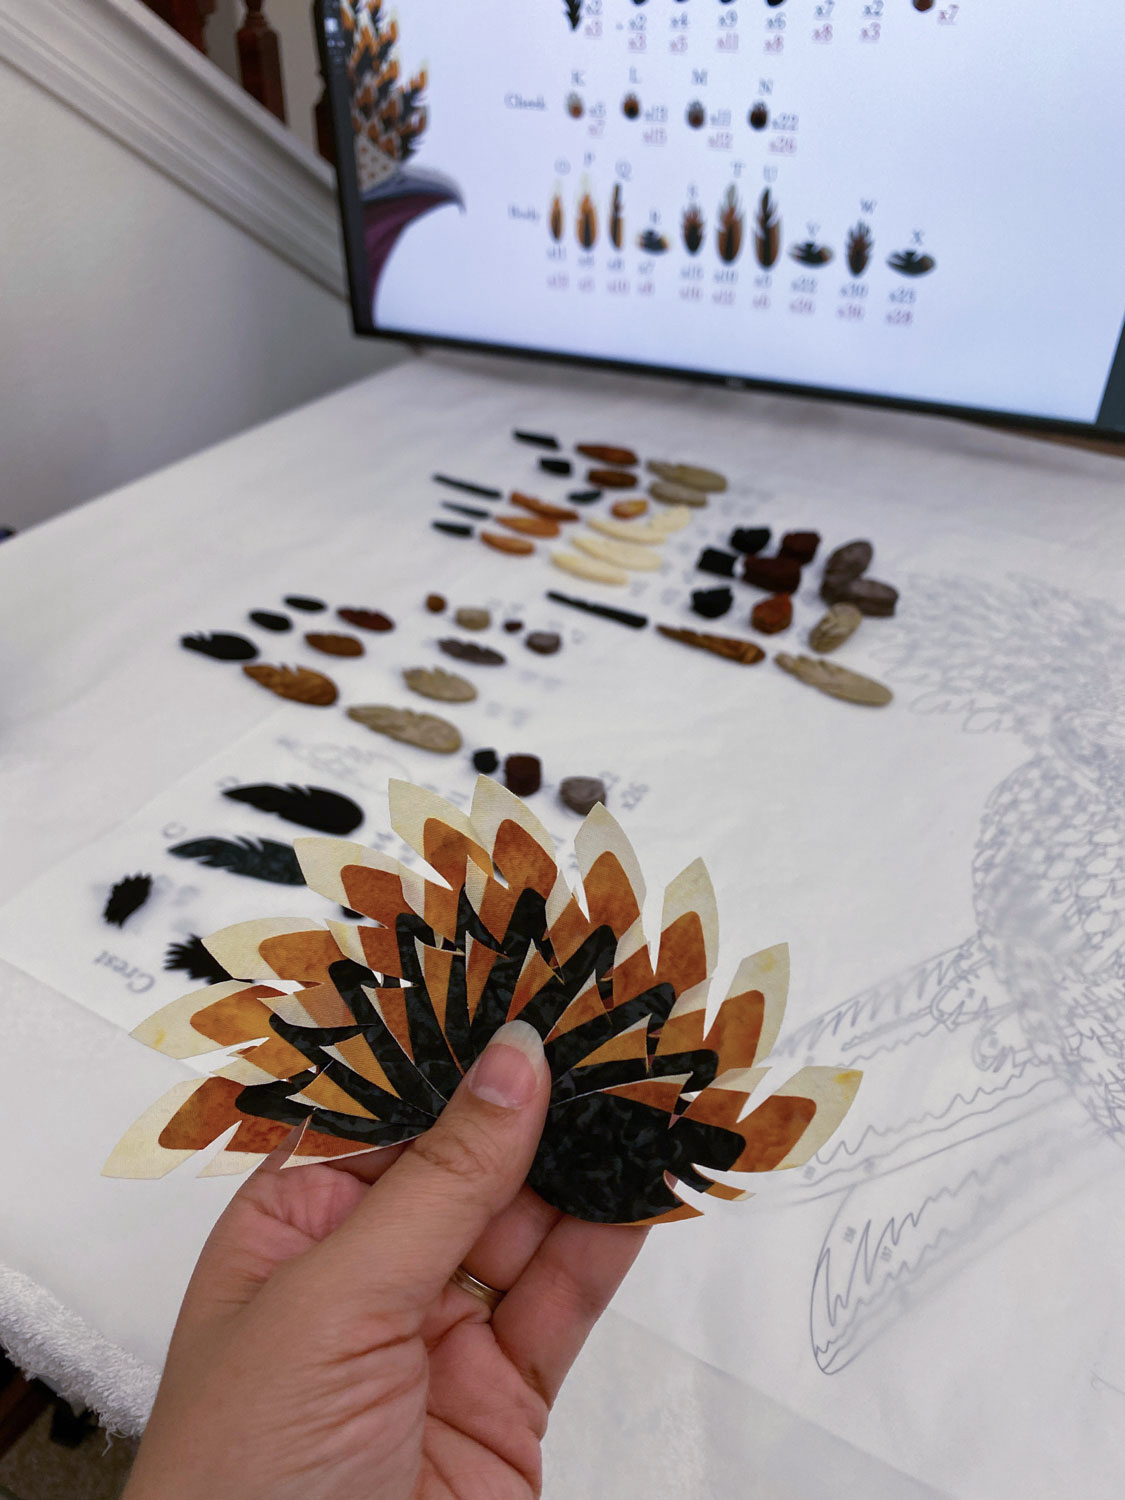
The roadrunner was a little different than normal, because each of his feathers needed to be assembled before I could put the full bird together. Here I am, holding a few of his feathers in front of the other stacks of feather pieces:
And here is the roadrunner partially assembled. His template is clearly visible through the teflon sheet:

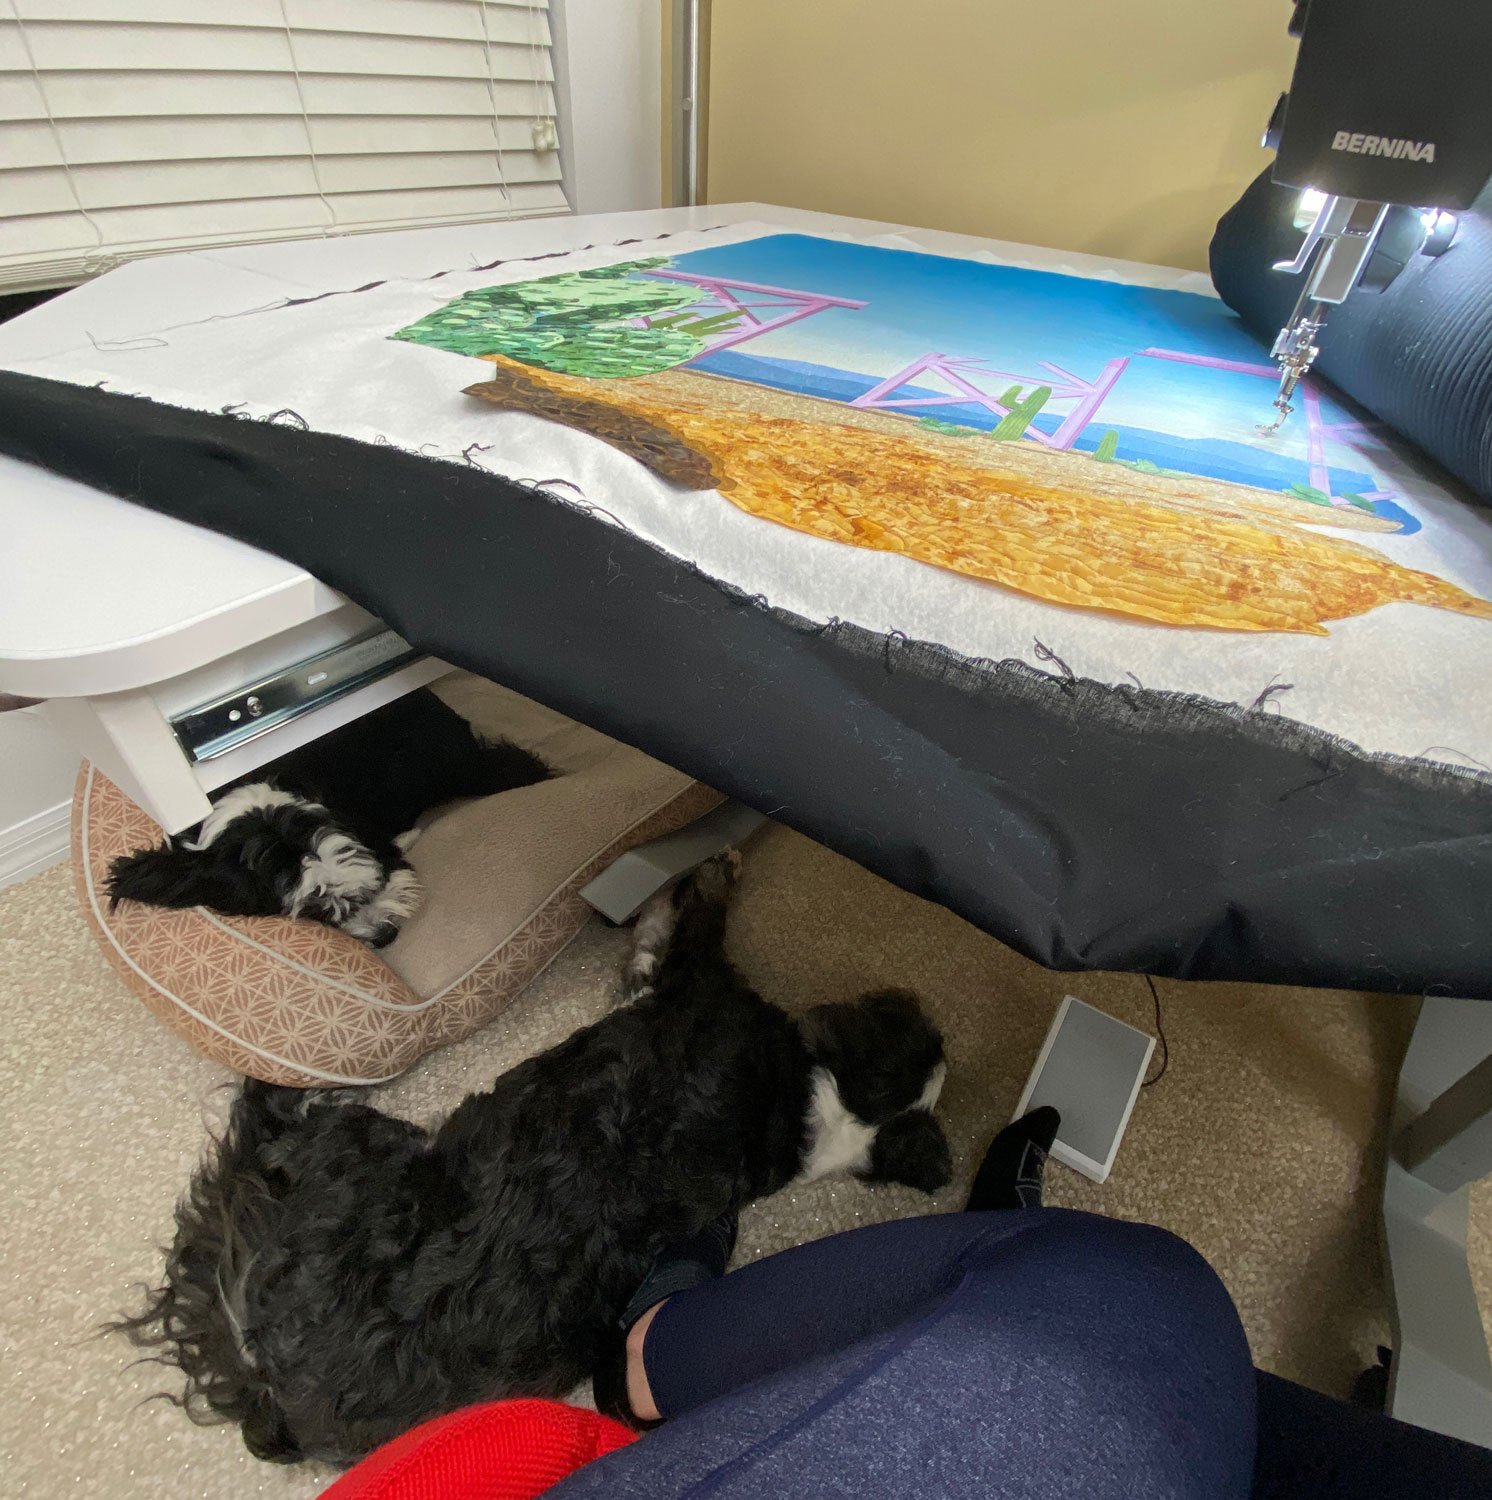
Stitching
The final step of the process is to quilt the quilt. I use a sit-down Q20 for all of my free-motion quilting. Here's Not Today on the sewing table while I try to dodge fuzzy "helpers".
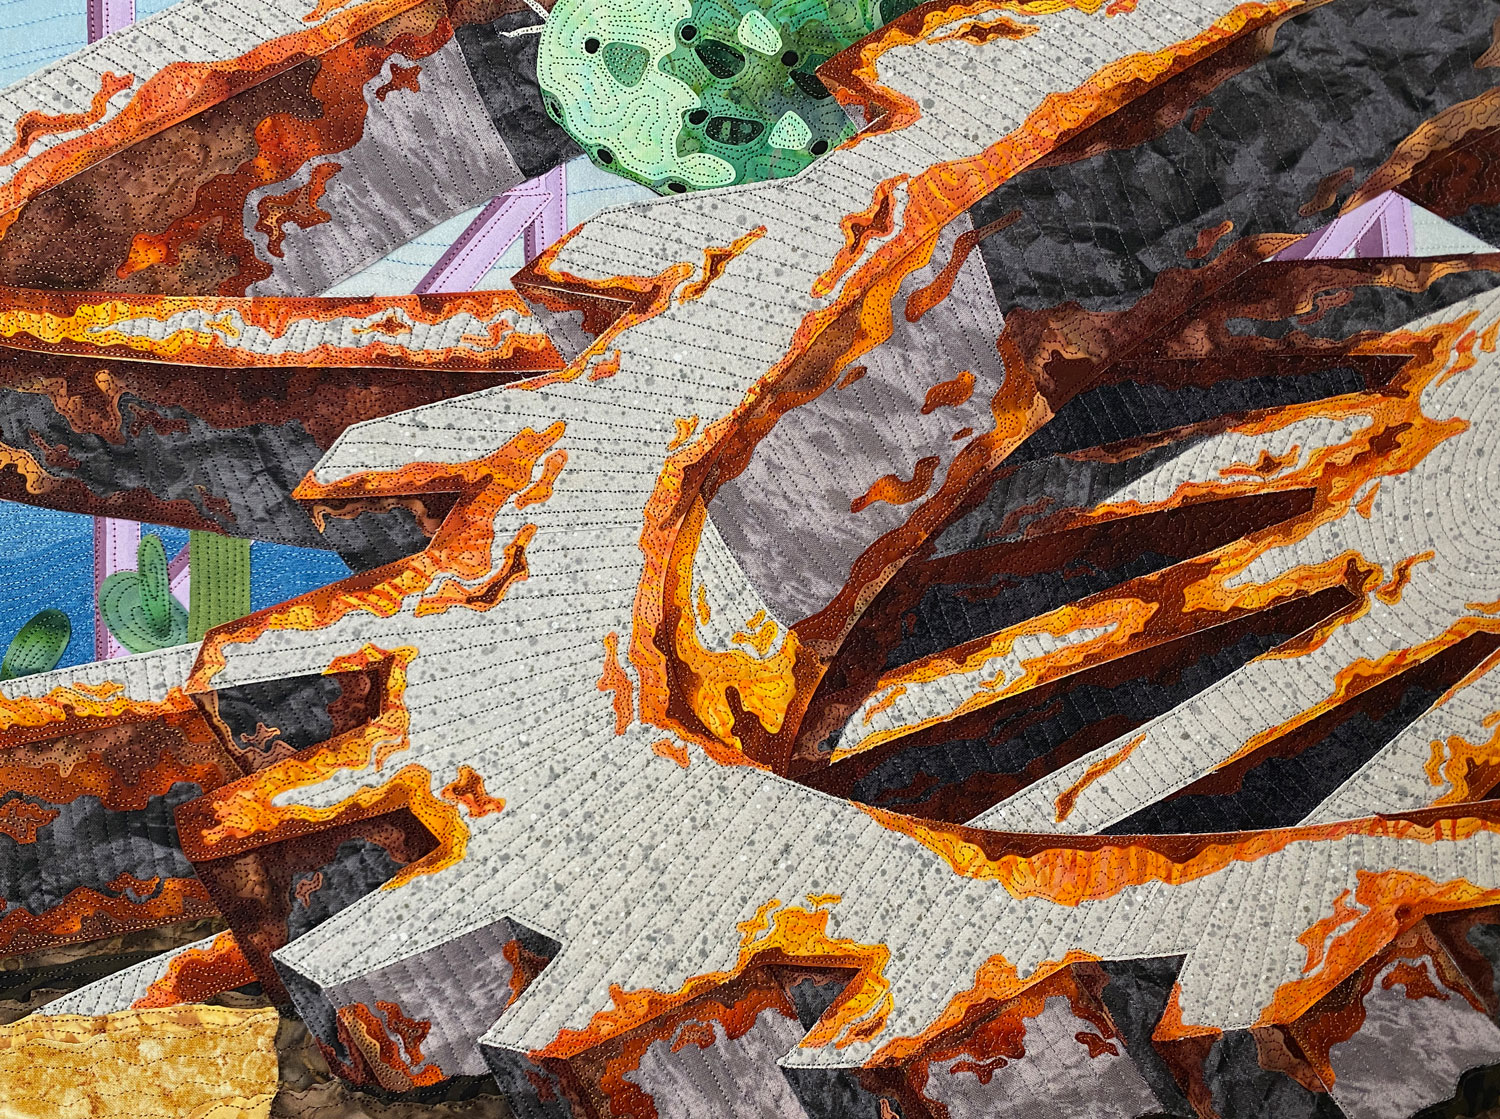
Quilts I plan to exhibit competitively get dense quilting — not so dense to be considered thread painting, but definitely in the range of 1/16"-1/8" apart. Here's a close-up of the rusted wheel to show some of this stitching:
What the Future Holds
Not Today will continue to exhibit competitively through the end of 2023. At that point, this quilt will travel one last time to its permanent home in the collection of Mr. Frank Klein.