It's Okay To 'Waste' Fabric
- Published:
- Length: 1004 words
- Reading Time: 6 minutes
I abhor "wasting" fabric, and I'm confident that this is a mentality with which most quilters sympathize. Especially with the cost of fabric increasing along with everything else, it feels like throwing money away any time a scrap of unused material winds up in the trash.
I used to do anything I could to prevent errant shreds of fabric from ending up in my bin, but that changed a few years ago. Or perhaps I should say that I amended my thinking. I realized that sometimes I was okay "wasting" a small amount of fabric if it meant I was able to save time in the long run.
There is one specific situation I routinely encounter that made me change my thinking. This post is about how I learned that lesson.
Ye Olde Days
Back when I used to make my artwork before discovering cutting machines, it was all done by hand. I'd carefully trace each piece in the template onto Wonder Under, iron that Wonder Under to my fabric, and cut the fabric with scissors.
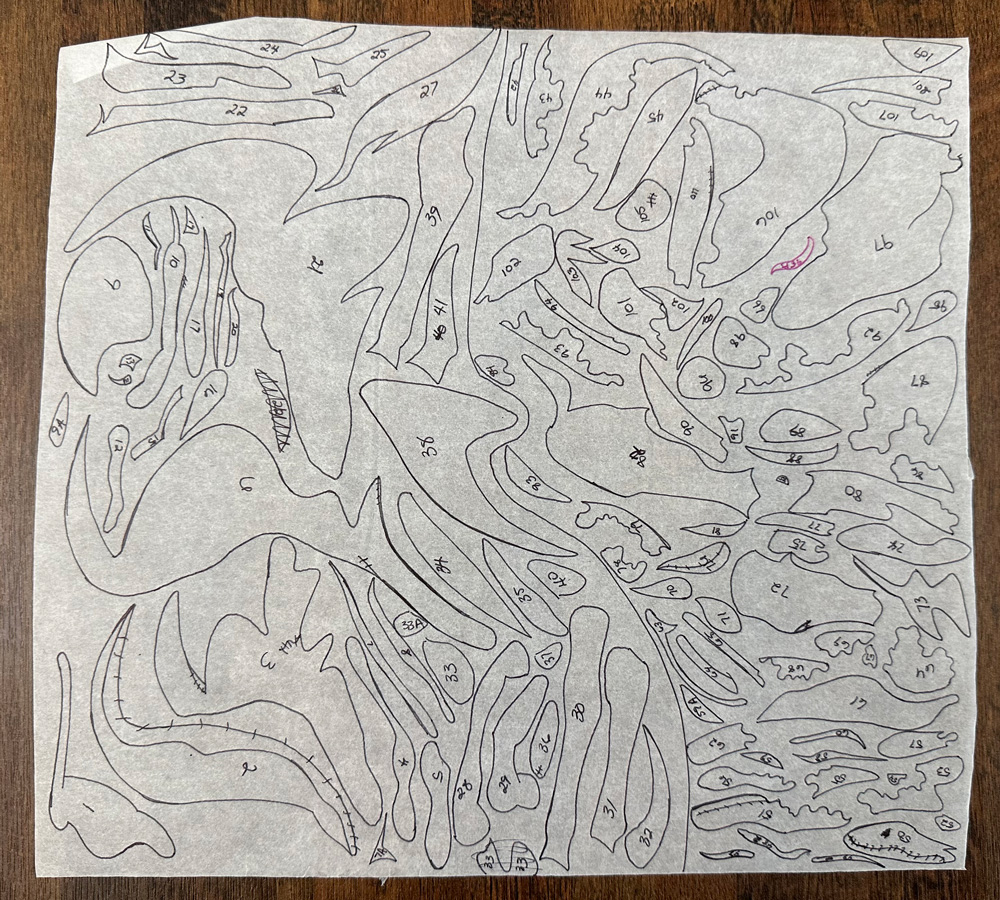
I hated wasting Wonder Under just as much as fabric, so I used to cram as many pieces as I could possibly get onto each swatch of Wonder Under. I'd pack them in there like sardines. Here's a photo of one of my old sections of Wonder Under onto which I'd traced a bunch of pieces so you can see what I mean:
The really crazy thing about that swatch of Wonder Under is that it was intended to be split onto two different fabrics. There's a line going down the middle (highlighted in red, below). The left half was for one fabric; the right half was for another.
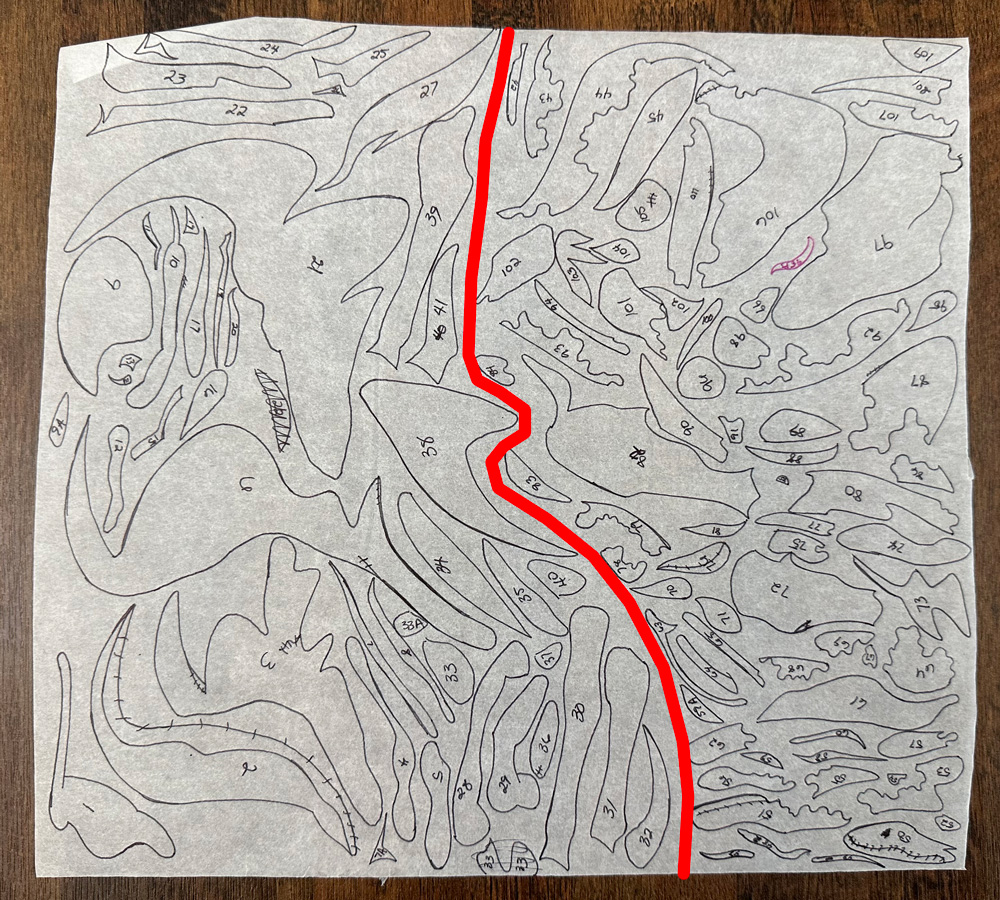
You really get the idea of how I used to operate. Just about every square inch of Wonder Under real estate has been used.
Well that was all well and good while I was cutting by hand. But then I discovered cutting machines and bought a Cricut Explore Air 2.
The Cricut
The way a Cricut cutting machine works is that the machine is controlled by software on the computer. Material is affixed to a sticky cutting mat, which holds it in place while a blade drags along to cut the design.
The sticky mat has a grid printed on it. The software has a preview of cutting mat, showing where the design is positioned relative to the grid. It's up to the human to make sure the material is lined up correctly on the physical cutting mat. Simple, right?
I hadn't yet figured out how to do all of the design digitally, so I fell back on my tried-and-true method of tracing by hand, this time on a sheet of paper instead of fusible.
(Side note: I traced those pieces in the same fashion of cramming as many on to the paper as I could possibly fit. It occurred to me much later in the process that a condensed rectangle was much more conducive to a grid-based cutting system than the wonky shapes my method had yielded, and I spent a considerable amount of time rearranging the traced pieces in Photoshop.)
Here is an example of one section. These are all the pieces I needed to cut from a single color of fabric:
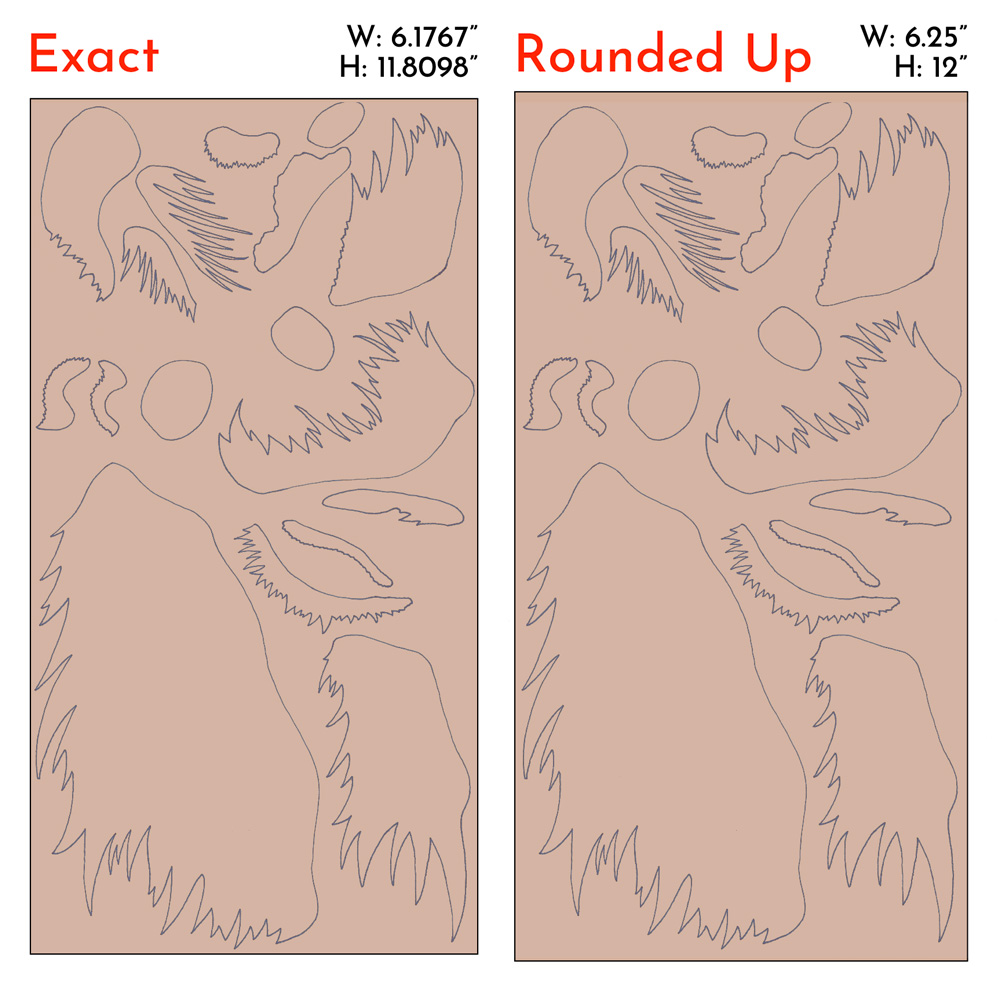
The left shows the exact dimensions. This was the bare minimum size of fabric I would need to cut the pieces. I graciously increased the dimensions by rounding up to the nearest quarter inch to make it easier for me to pre-cut the swatch of fusible and fabric that would then get stuck to the sticky mat. That would technically "waste" some fabric, but I thought that would be an acceptable sacrifice, considering how difficult it would be for me to try and cut 6.1767" by 11.8098" with a ruler.
I prepared my fusible-backed fabric and uploaded my cutting file to the Cricut software. Here is the preview showing where the pieces would line up on the sticky mat:
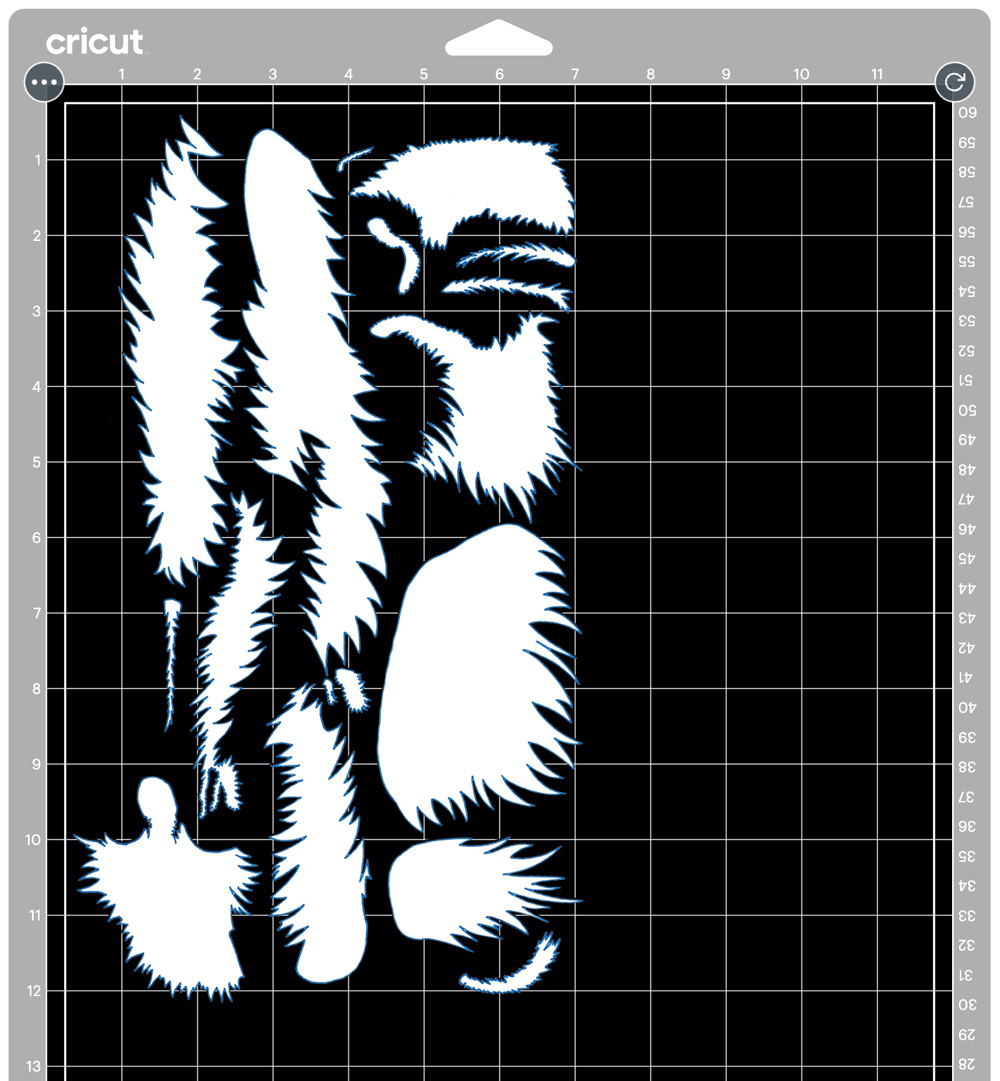
Actually...not quite. I Photoshopped the above image so you, dear reader, could clearly see what was going on. The actual preview (what I saw) in the Cricut software looked like this:
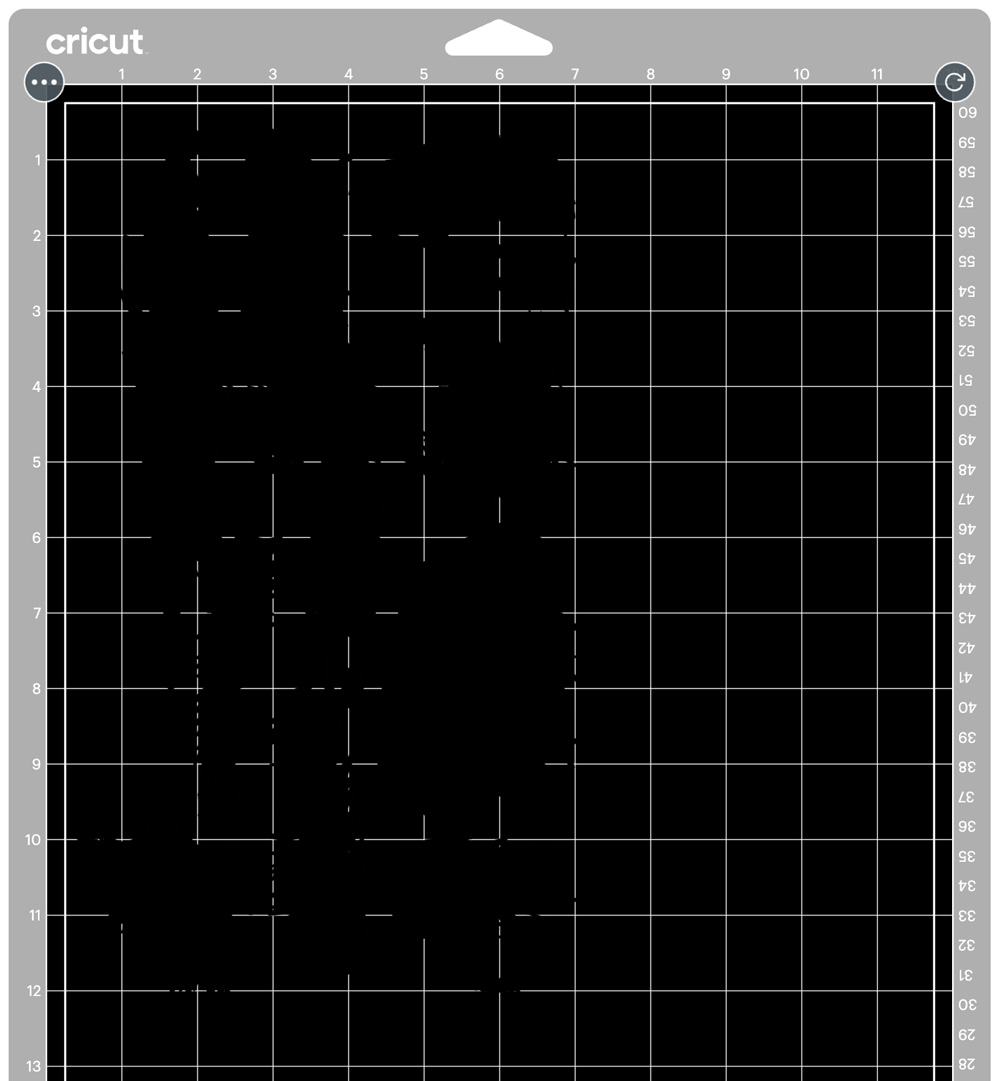
Yeah.
As you can imagine, it was really tough to line up my fabric swatch to the sticky mat, because there was almost no wiggle room. Unfortunately, I don't have a photo of the actual fabric post-cutting. But here's a visual example of what happened:
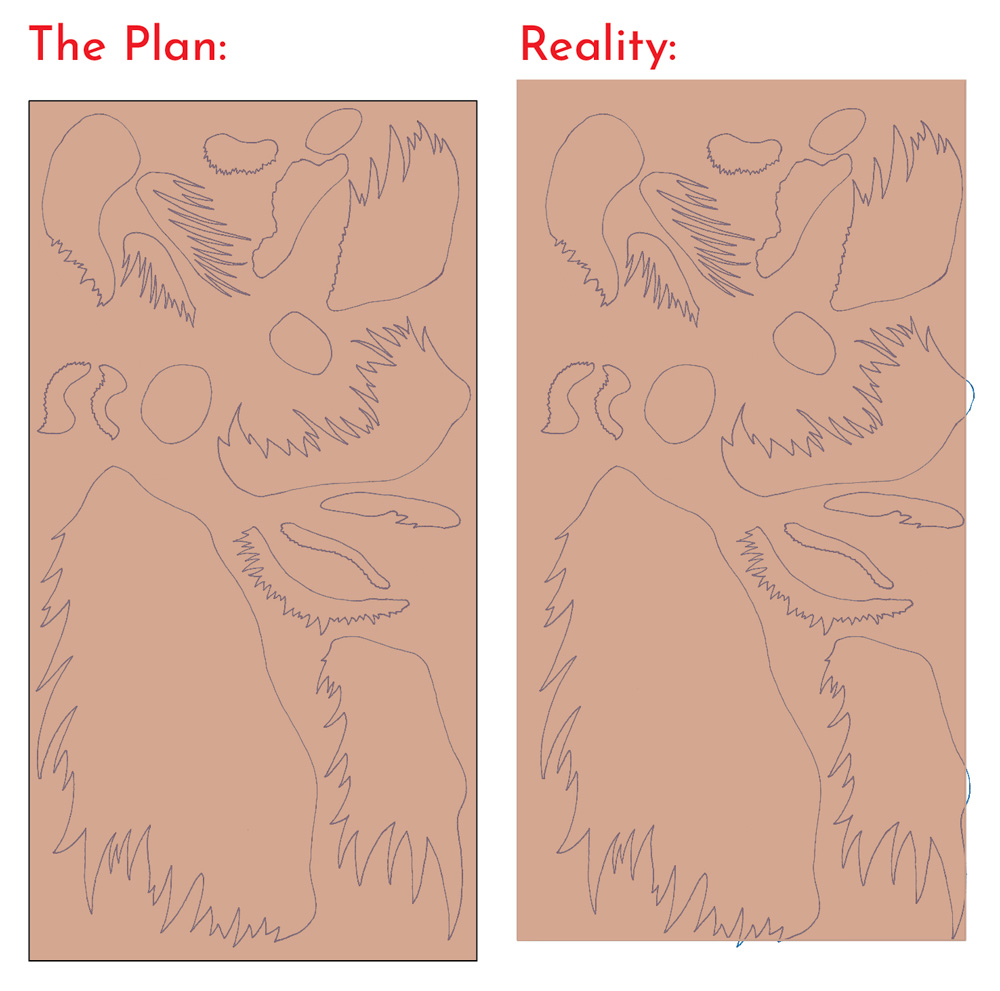
See how some of the pieces are peeking off to the side on the far right? Those are the lines that hung out past the fabric. Not good!
Although I initially freaked out, this situation was not as catastrophic as I'd first thought. Overall it turned out to be the perfect balance of fixable mistake and teachable lesson. I learned the importance of having extra fabric to play with when lining it up to a sticky mat without needing to completely redo my project with larger swatches of fabric.
The New Rule
As a direct result of this experience, I came up with a formula for determining how big my fabric swatches should be. Here it is:
(Actual dimension, rounded up to nearest 1/2") + 1/2" = Width or Height
Using the actual numbers from the example above:
Width: (6.1767 rounded up to 6.) + .5 = 7" Height: (11.8098 rounded up to 12) + .5 = 12.5"
If I'd used this formula to calculate the fabric for that first project, none of the cuts would have gone off the edge:
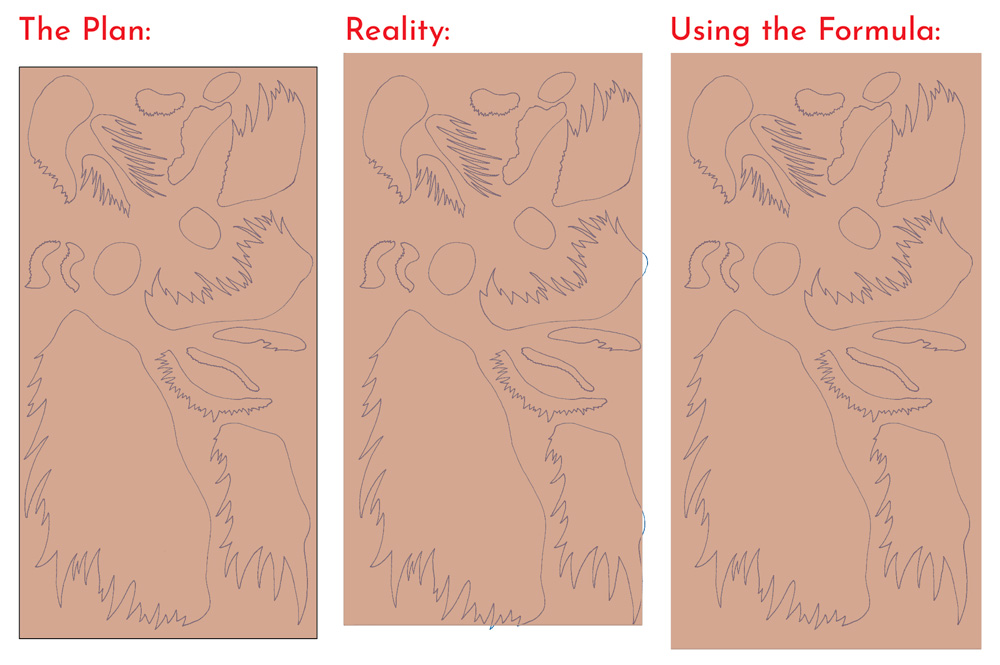
The ultimate takeaway from this experience was that sometimes, "wasted" fabric actually has a purpose.
