Echoes of Time and Magic Process
- Published:
- Length: 1686 words
- Reading Time: 9 minutes
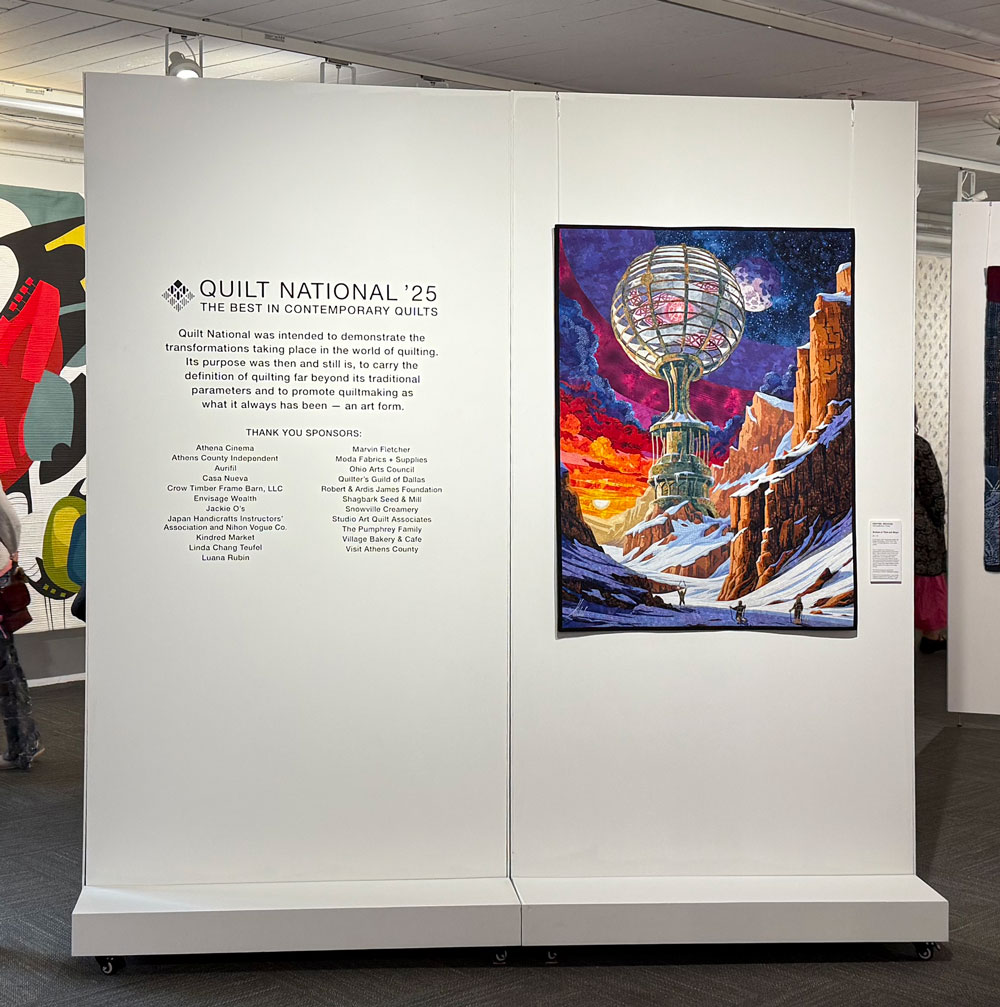
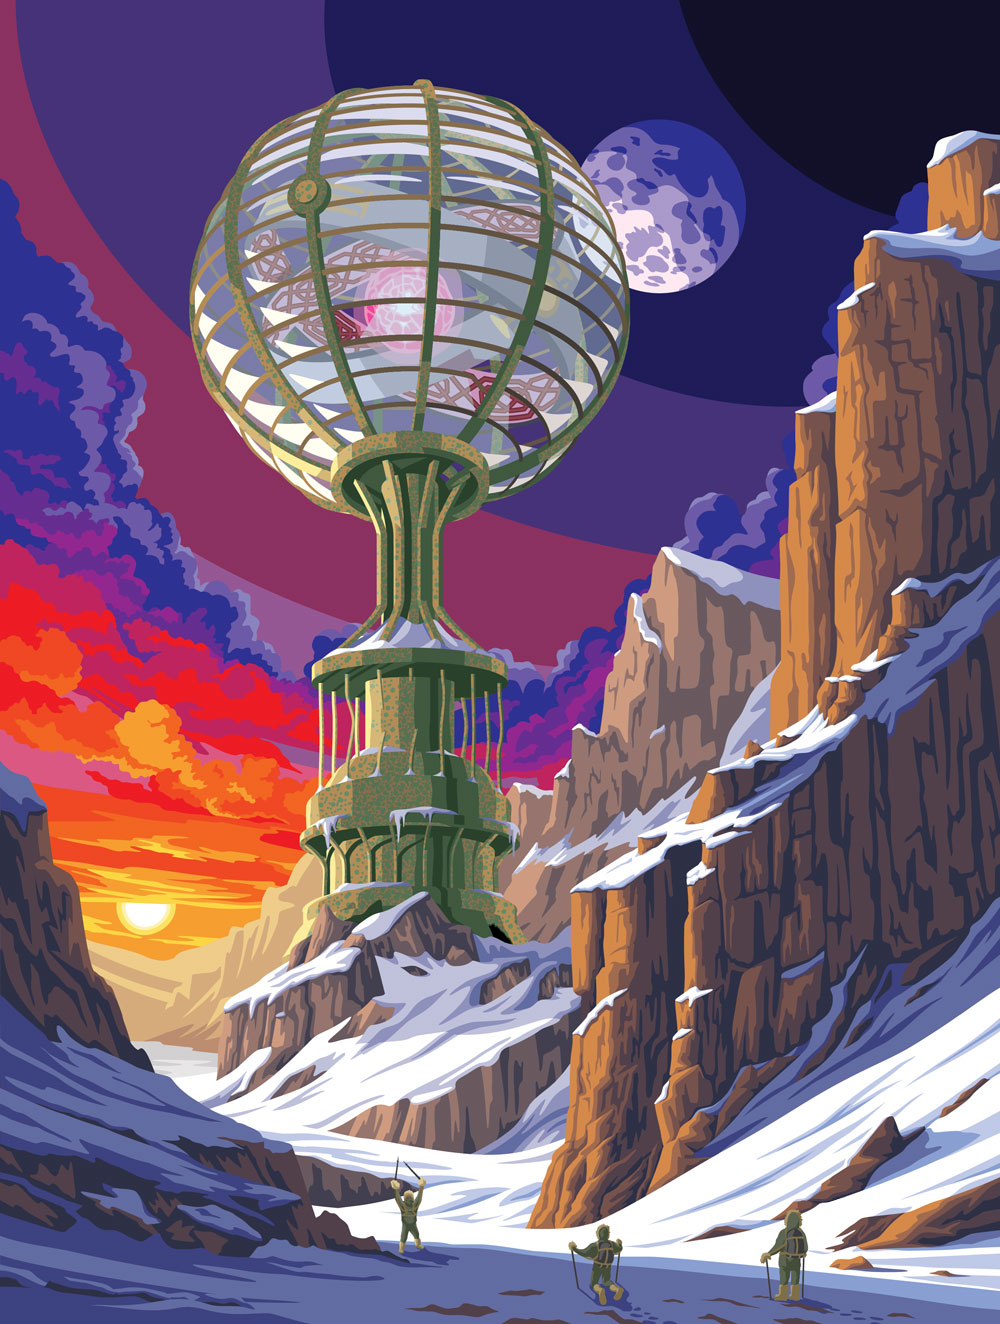
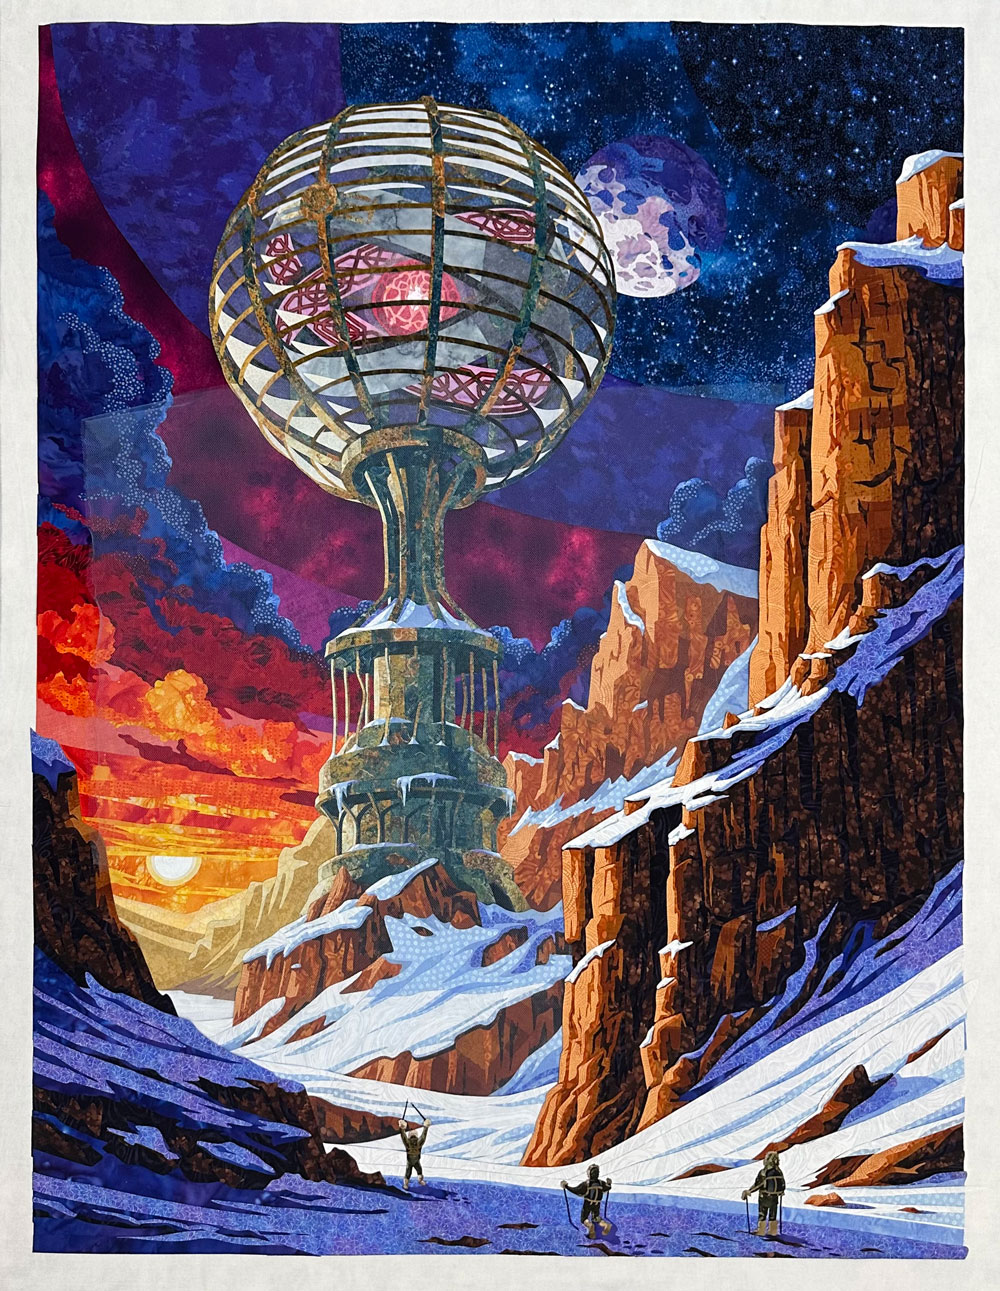
Echoes of Time and Magic is a quilted landscape capturing the moment a group of three intrepid explorers make the discovery of a lifetime. While making their way through the forgotten, inhospitable recesses of the frozen north, they have discovered an abandoned device from a civilization that disappeared long ago. Although our brave explorers don't know it yet, this device will ignite an industrial revolution and change the course of humanity's future.
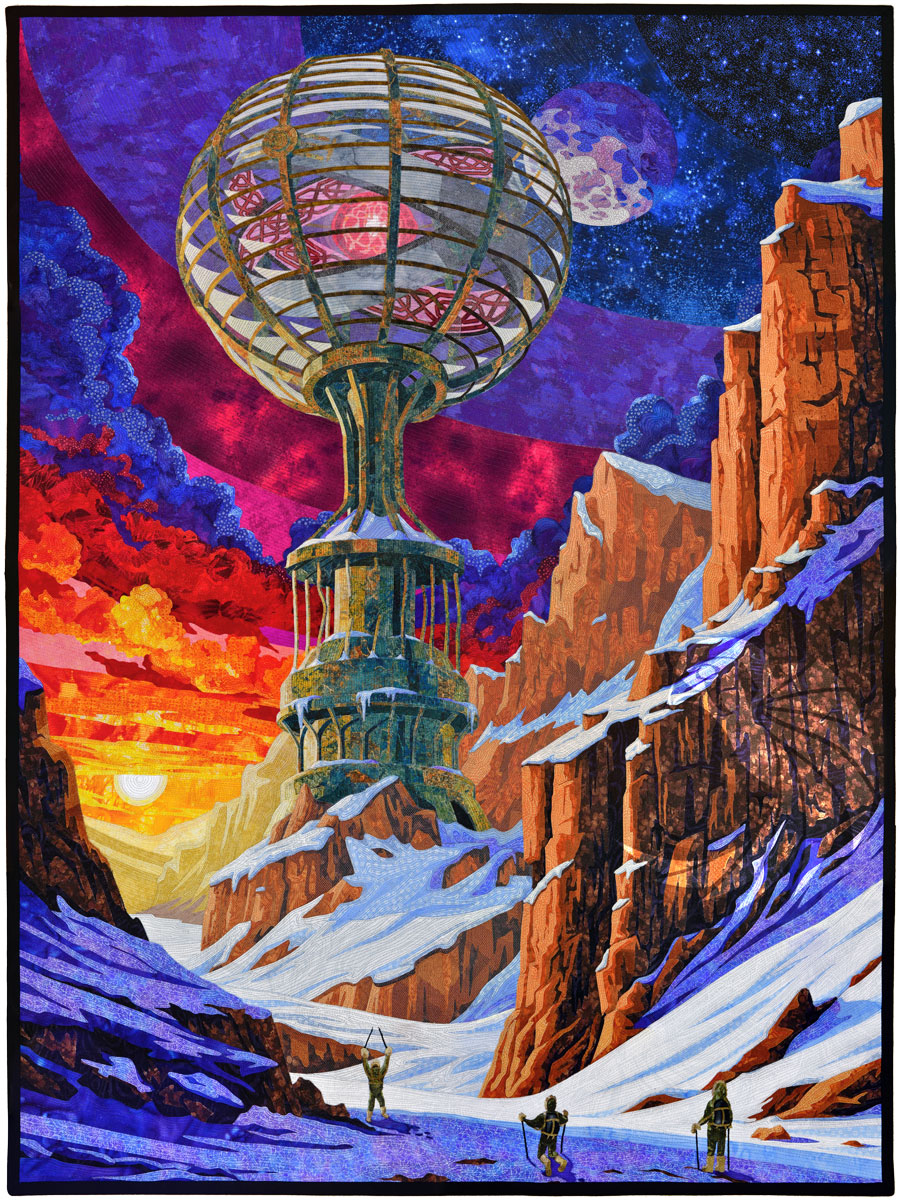
This quilt is 36" x 48", which has come to be a pretty standard size for my work. And of course, I took photos every step of the way while making it.
The Idea
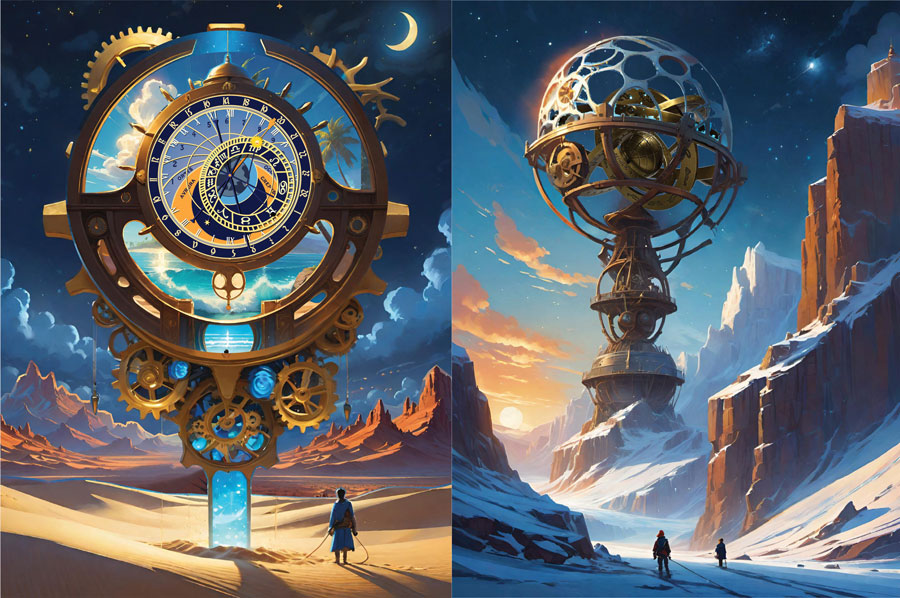
I dreamed up this idea of a broken device that combined magic and machine, and I used AI to very quickly prototype some design concepts. I went through many generated design concepts, as well as incorporating my own photographs of various props, before I worked out a composition that would effectively tell the story as I saw it.
The full video documenting that development process is on my Patreon.But to give a quick preview, here is where I began (left) vs where I ended up (right).
Draw a Design
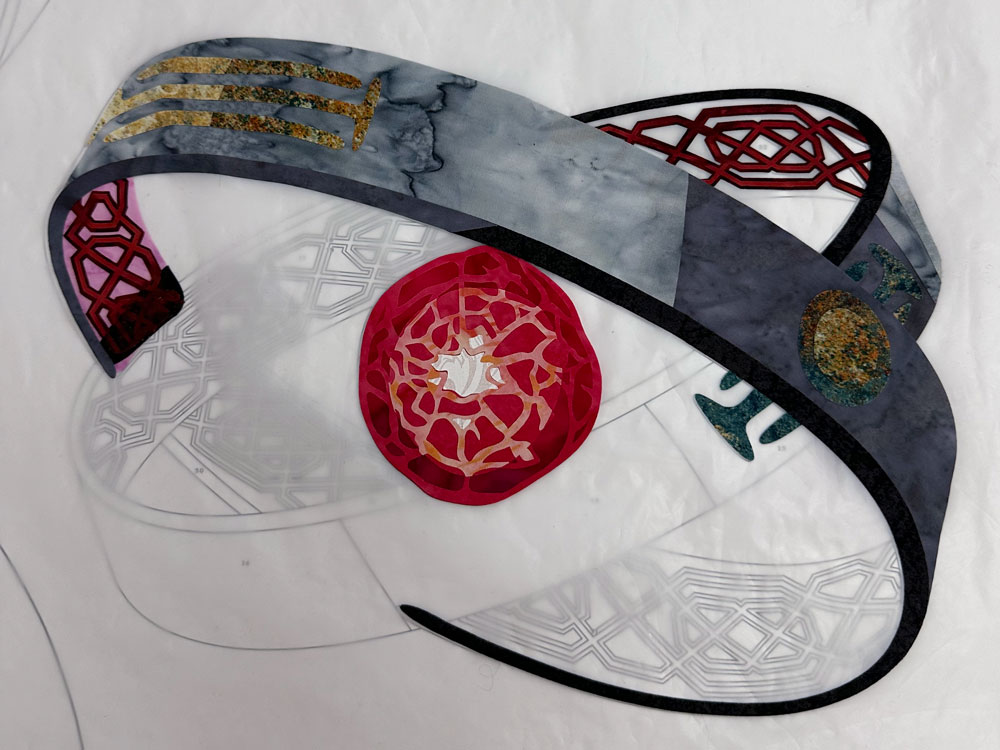
Now that I had my concept, it was time to start drawing the template. I use a vector-based drawing app on my iPad to hand-draw my illustrations. Every piece that will eventually get cut out of fabric gets drawn in this step, so the line art is understandably complex. Here is a close-up of the castle and some of the surrounding scenery:
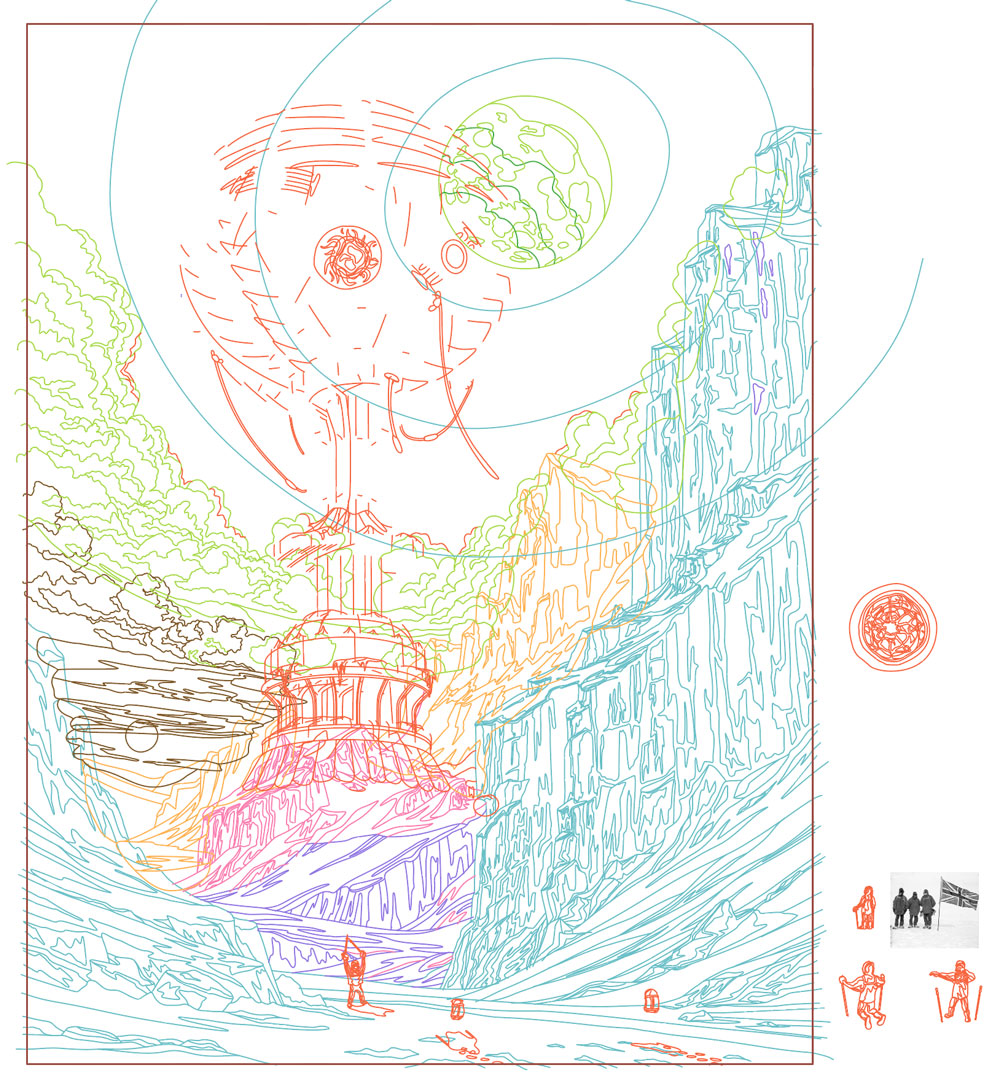
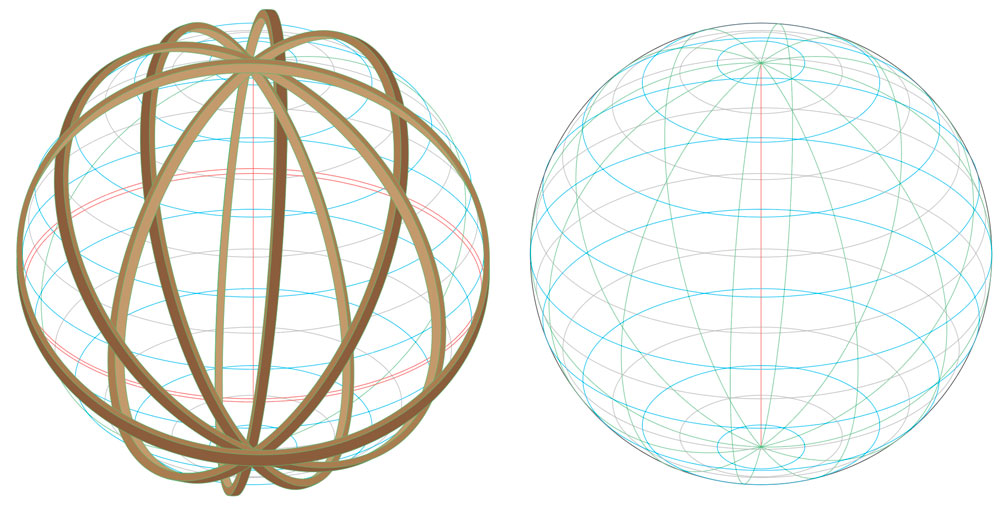
You'll notice the tower looks incomplete in that screenshot. The reason is that I drew the upper globe of the tower in Adobe Illustrator because I didn't want it to have a hand-drawn feel. I felt more comfortable using some Illustrator tools to get a rigid, evenly-spaced series of struts and supports. Here is a progress photo showing some of the globe's development.
Create the Template
I take my digital drawing into Adobe Illustrator to create a full-size, full-color template. The template is my pattern for making the quilt out of physical fabric.
Here is the template for Echoes of Time and Magic.
Design Overlap
I use a technique called fused, raw-edge appliqué to create my quilts. In a nutshell, it means I cut fusible-backed pieces of fabric (fusible is a heat-sensitive glue) and iron them together collage-style to create a complete picture. All of the cut edges of the fabric remain visible.
Unfortunately, there's a catch: The template I designed in the previous step does not have any of this overlap. The pieces fit together perfectly, like a jigsaw puzzle. In order to get them to overlap, I have to manually design in the overlap for each and every piece.
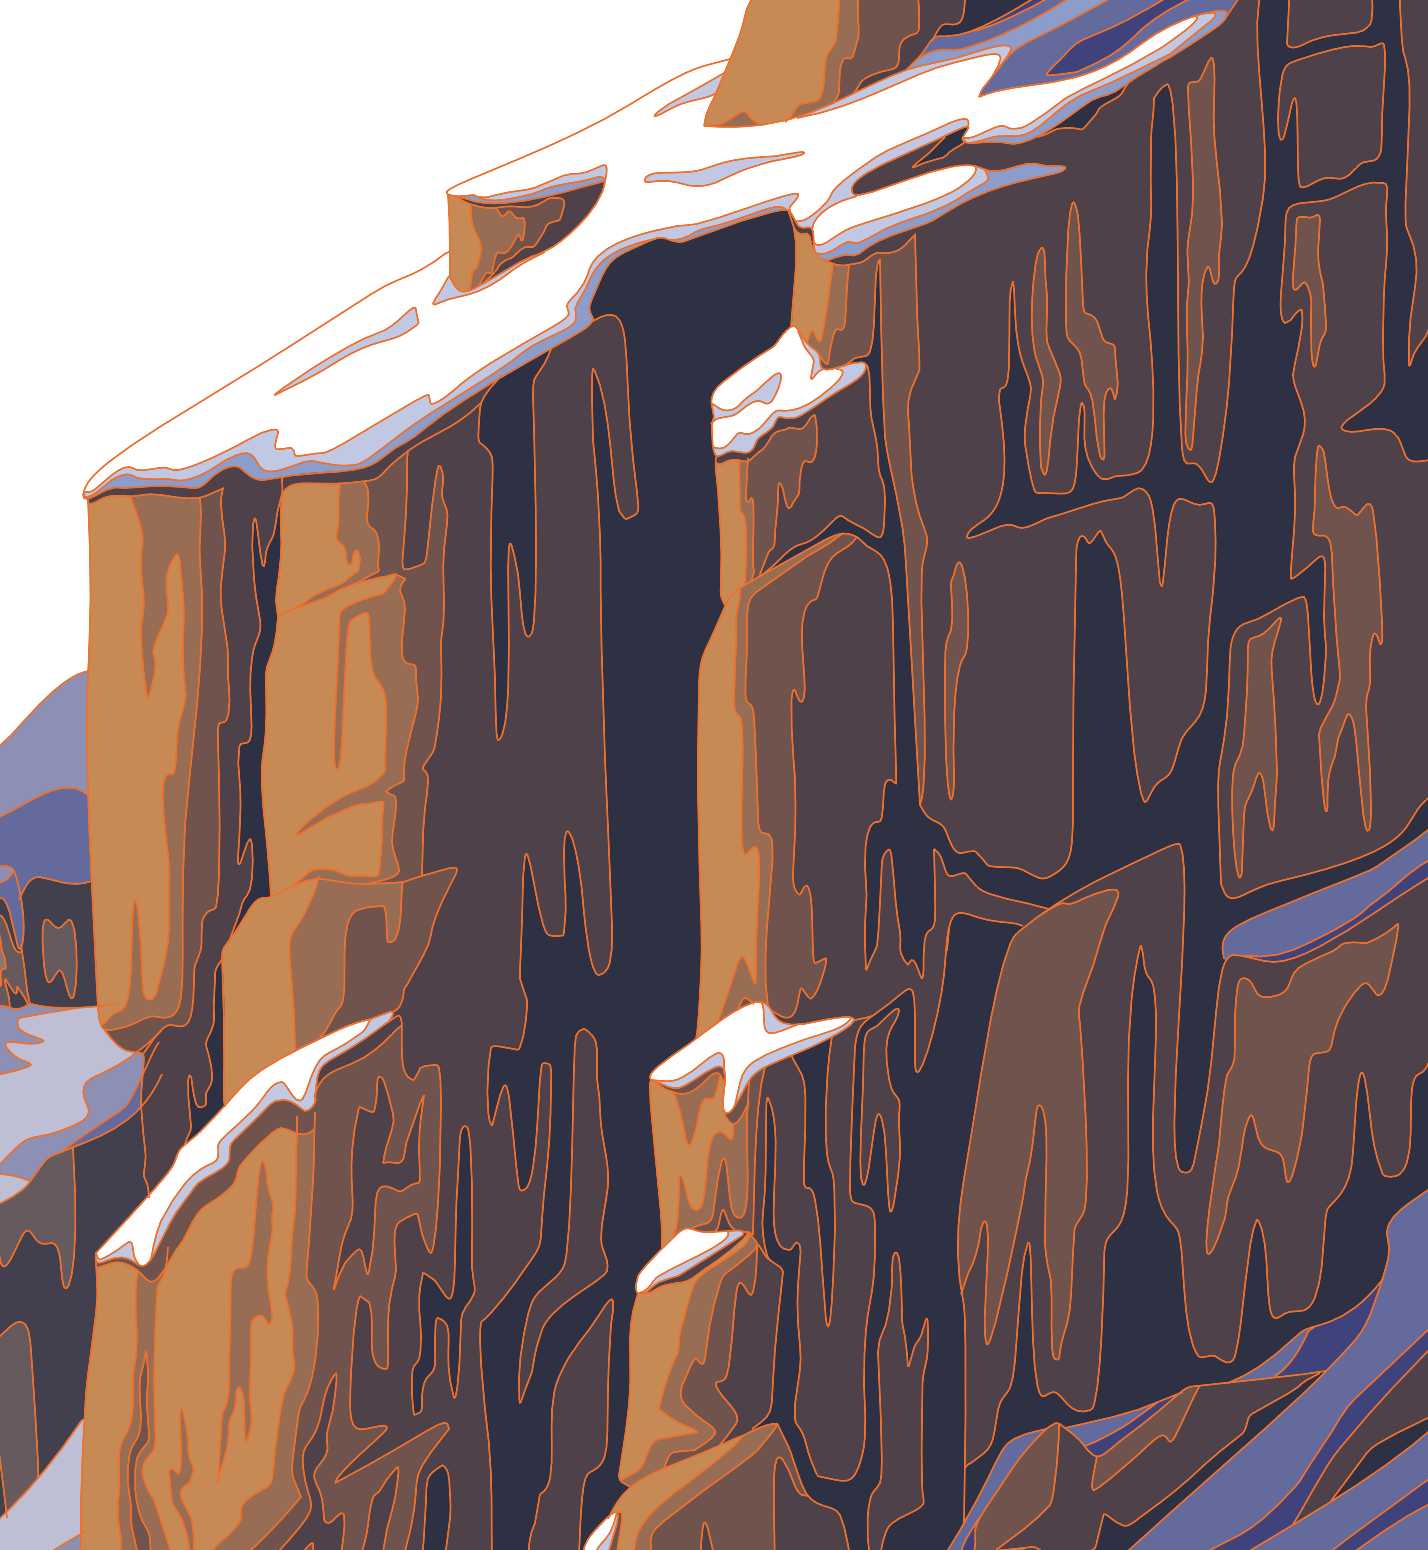
Take a look at the image below. It's a close-up of some of the rocky mountains on the right side of the design. The orange lines indicate the outer edge of each piece, and because they don't overlap, all of those lines perfectly line up with each other. There is no overlap—yet.
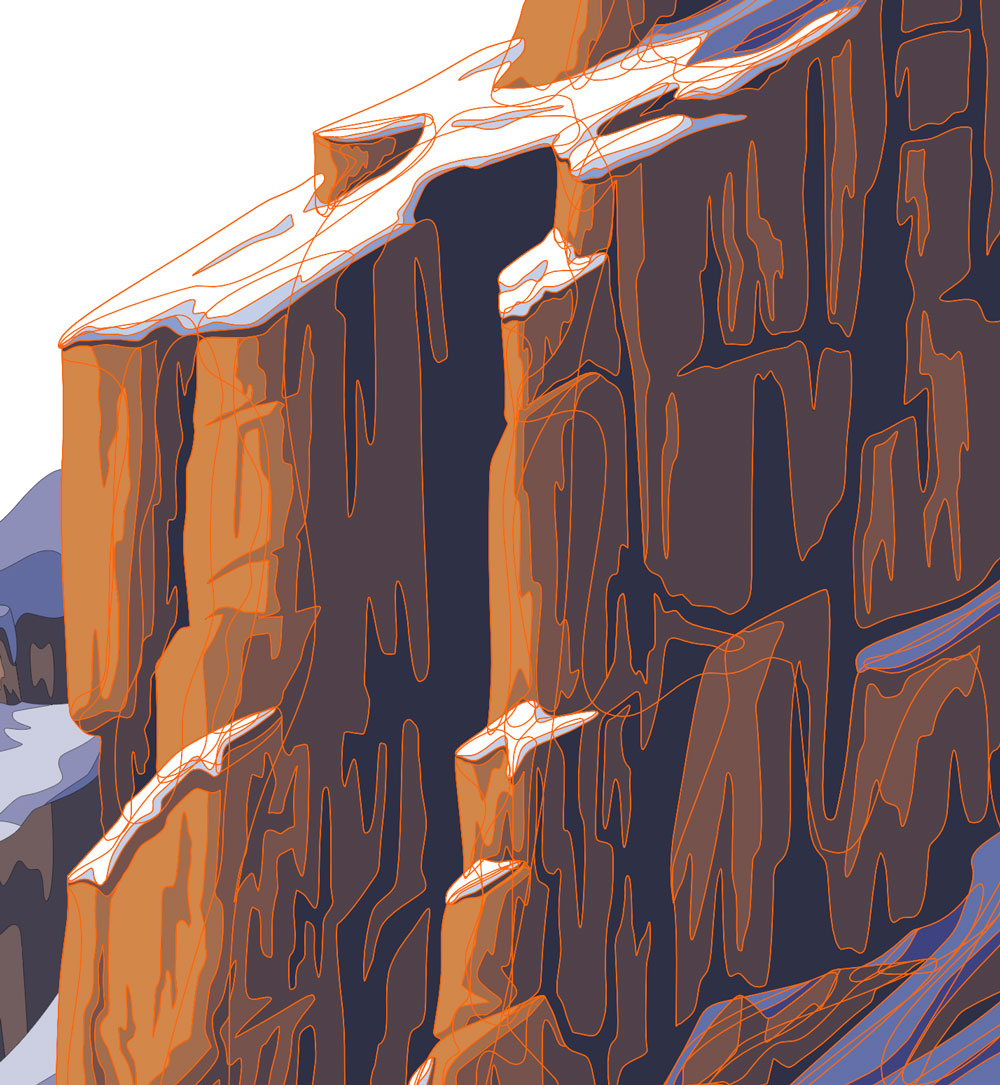
Now look at this image. This screenshot shows the same close-up, but this one was taken after I'd added overlap. The orange lines are all over the place. Each area of color is one piece, and those pieces now extend under and over each other. This is the overlap that is required in order for the cut fabric pieces to fuse together, and I design it all myself, one piece at a time.
Add Numbers
At the same time I add overlap to the template, I also assign each piece a number. The number acts as a guide, telling me where to re-align each fabric piece after it’s been cut.
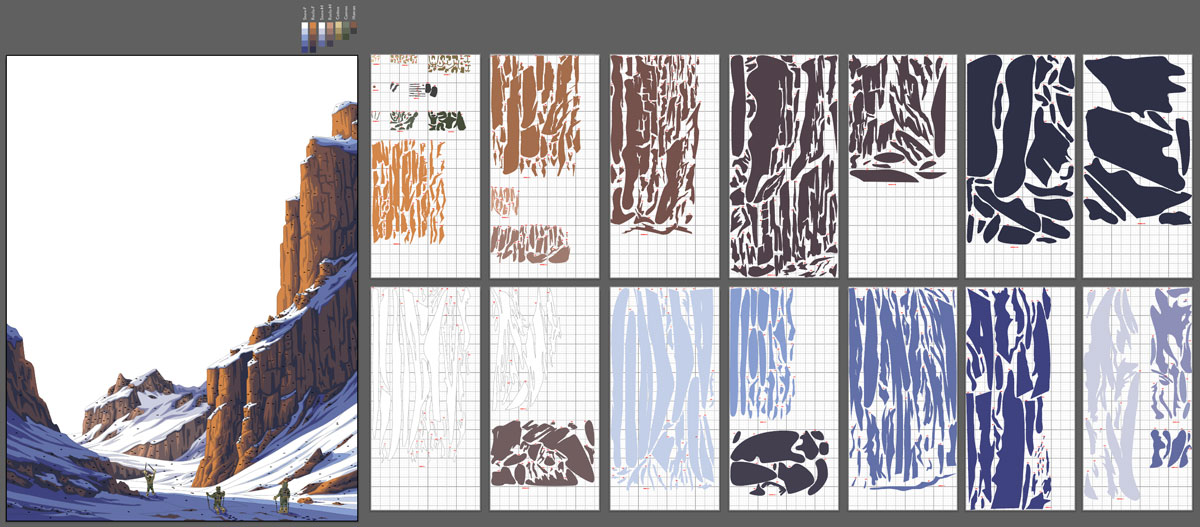
Here's one more look at those rocky cliffs, this time with assigned numbers. This quilt in total has over 1300 pieces.

Prepare for Cricut Cutting
The last part of my digital design process is to prepare my pieces for Cricut cutting. I use a Cricut Explore Air 2 to cut all my fabric pieces, and that requires arranging my pieces by color on specific artboards (pages) that match the size of a sticky cutting mat.
I break my big quilts (like this one) into smaller, more manageable portions. The screenshot below is of just the foreground part of the composition. The full-size template of the landscape and explorers is on the left. All 600ish pieces that make up this part of the design have been arranged by groups of color on the tall, skinny artboards to the right. Those artboards get exported as SVGs and are the exact files I upload to my Cricut software for cutting.
Once I've done this for every piece in the entire design, I'm finally done with the digital stuff. It's time to start looking at fabric.
Picking Fabric
Because I design a full-color template, I know exactly what colors I need to find in fabric to make the quilt. I print my own color swatches and match those swatches to fabric in order to make my selections. Here are all of the fabrics I chose for this project:
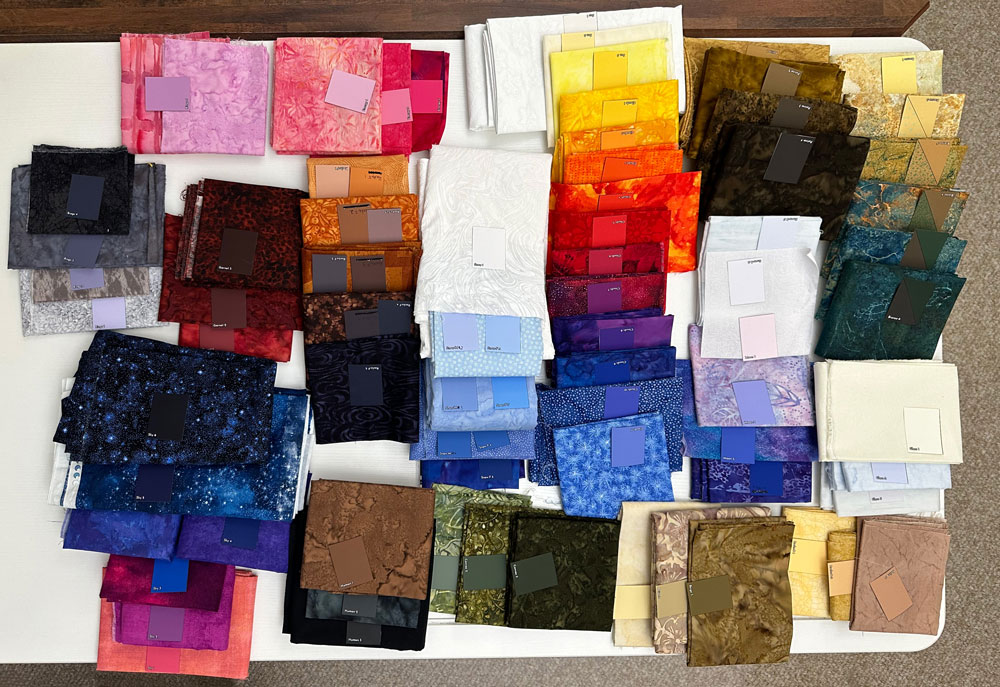
I match both the color and value of the printed swatch to the fabric. Matching color is easy to do visually, but I use the assistance of my phone or iPad to help check the value of my fabrics.
Prepare the Fabric for Cutting
Since all of my fabrics' cut edges will be visible, preventing frays is critical to having a clean-looking quilt. I use a diluted Mod Podge solution to completely prevent fraying, even after the fabric is quilted. After coating the fusible-backed fabrics with the solution, I spread them out on the floor of my studio to dry overnight.
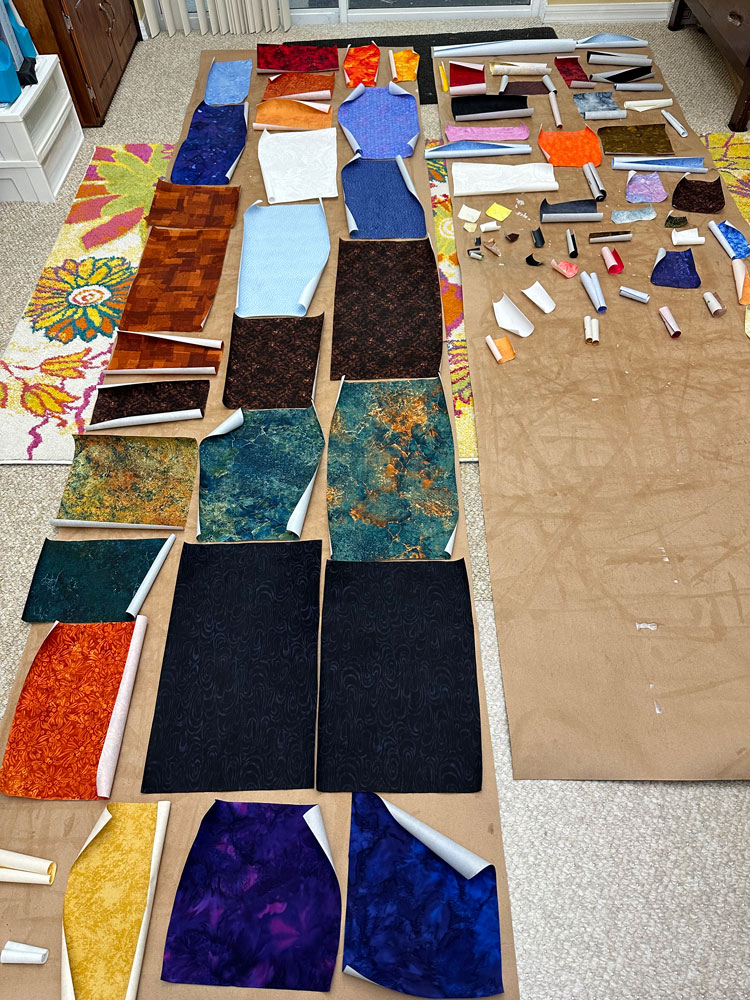
The fabrics curl up when wet, but completely uncurl as they dry. At that point, they're ready to cut.
Cricut Cutting
I upload the SVGs I exported back in the "Prepare for Cricut Cutting" step to my Cricut software. Those SVGs are the exact layouts that my Cricut Explore Air 2 will cut.
Take a look at these two photos. On the left is a close-up of my Cricut cutting one of the layouts. These pink and red fabrics are for the runes on the armillary sphere inside the glass globe. The photo on the right shows what the Cricut cut.
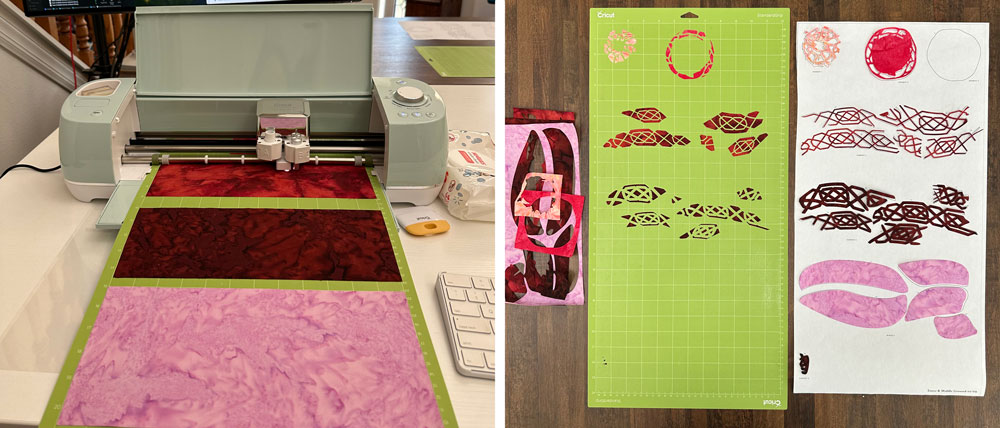
All of the shapes have been transferred to number match sheets for safe storage until I'm ready to iron everything together. The fabric that remains on the green sticky mat is scrap and will be discarded.
Assembly
I print my numbered templates full-size. Then, I place them on my ironing table underneath a clear, non-stick Teflon sheet. I match each cut piece of fabric to its number on the template before ironing it in place.
Here is a close-up of the partially-assembled armillary sphere on the Teflon sheet. The printed template is visible underneath.
This is my favorite part of the entire process. I love seeing how the artwork I designed on my computer comes together in fabric.
Using Tulle
Sometimes I incorporate tulle (lightweight netting) into my work to achieve various effects. In this picture, I used tulle to simulate the glass in the globe. This picture shows the tulle overlaid on the design before I trimmed it around the globe.

I also used tulle to give the impression of atmospheric perspective. The middle ground mountains are made from the same fabrics as the foreground mountains. By putting the middle ground under a layer of tulle, it helps "push" them into the distance.
Stitching
The last thing to do is also the longest part of the process: Quilting!
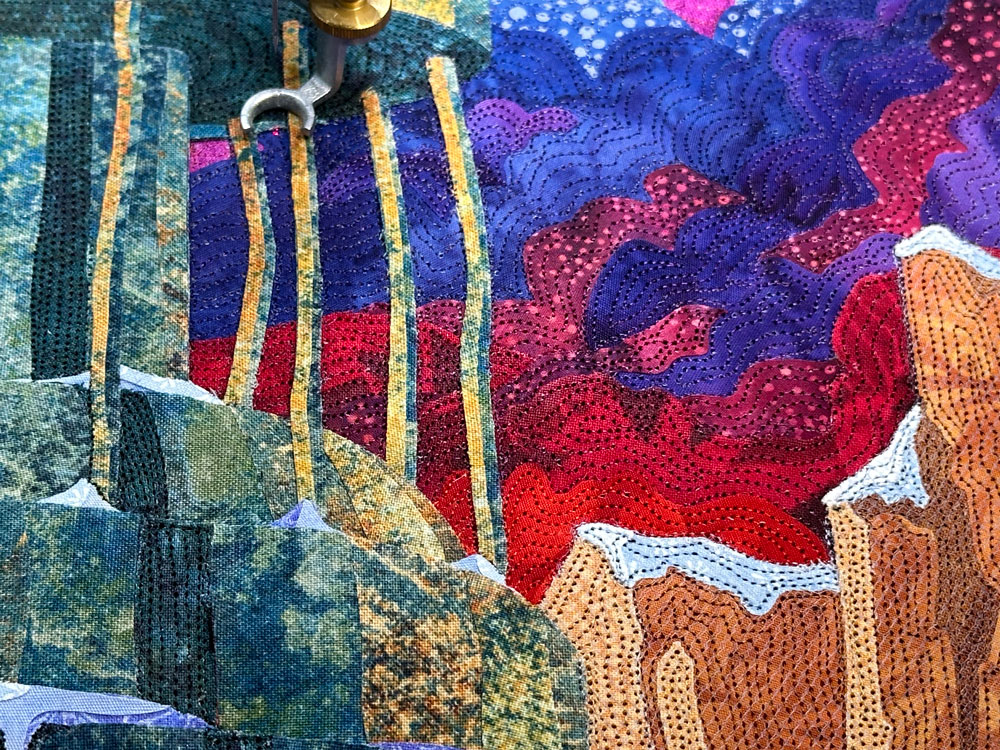
I use a Q20 sit-down sewing machine for all of my free-motion quilting. Here is a close-ups of partially-quilted areas:
I did a little bit of experimentation while quilting the sky. A few of the clouds I quilted in AR.
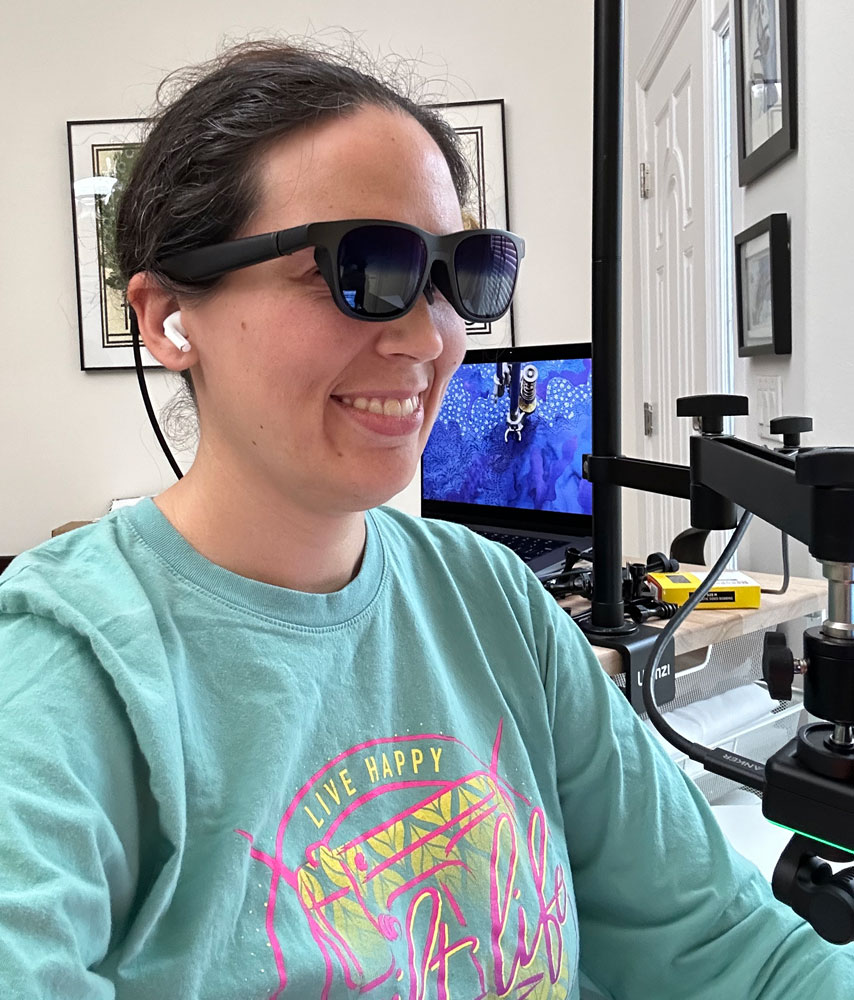
It was more of a proof of concept, but I'm happy to have tried it. This experience has led me to make a few changes to the setup and keep working at it.
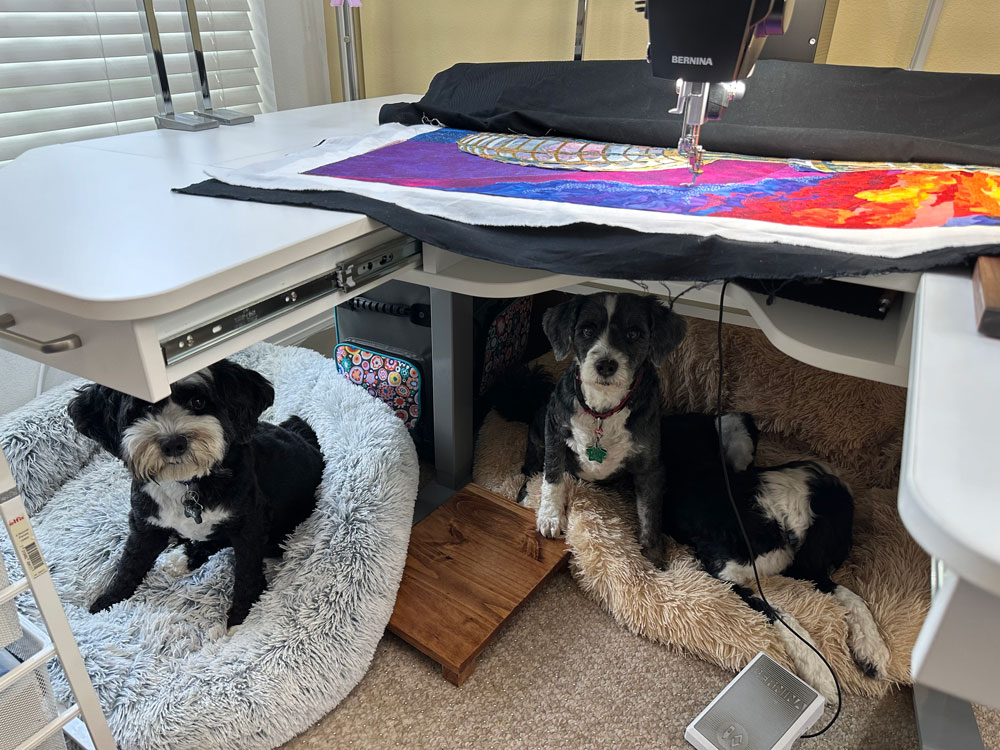
Last but not least, there's always a puppy party happening under my quilt table while I'm working.
Finished
Echoes of Time and Magic debuted at Quilt National '25 at the Dairy Barn Arts Center in Athens, Ohio.