Oliso Irons
- Published:
- Length: 1176 words
- Reading Time: 6 minutes
I have been making fused appliqué fabric art for more than two decades. Up until last year, I had been using a basic Sunbeam iron. It was $10 when I first bought one back in 2004, and $20 when I finally had to buy a replacement in 2018.
If I'm honest, I never understood what all the fuss was about with the more expensive irons. I had one single requirement when it came to irons, and that was to make sure no fusible would stick to it. My search for an iron stopped and ended with the cheapest option that had a Teflon-coated soleplate.
But, as you may have already guessed from the title of this post, my opinion changed last year. I had the pleasure of speaking to Michele Muska at the Oliso booth at a quilt show, and she offered to send an Oliso mini iron to me. I accepted. And let me tell you, I get it now. I get what the deal is with more expensive irons, at least when it comes to Oliso.
Full disclosure: I did receive an M3Pro Iron, along with a carry case and two wool pressing mats, from Oliso for free. However, I was so happy with that mini iron that I have since purchased one of their full size ProPlus irons, quite a few more wool mats, and a few other accessories with my own money.
The point of this post is to give a real-talk review of my irons, based on my own personal experience using them.
What I Like
This review will cover both irons together, but I'm going to separate the photos to break up what would otherwise be a large wall of text. Here is my M3Pro. Link to Oliso website
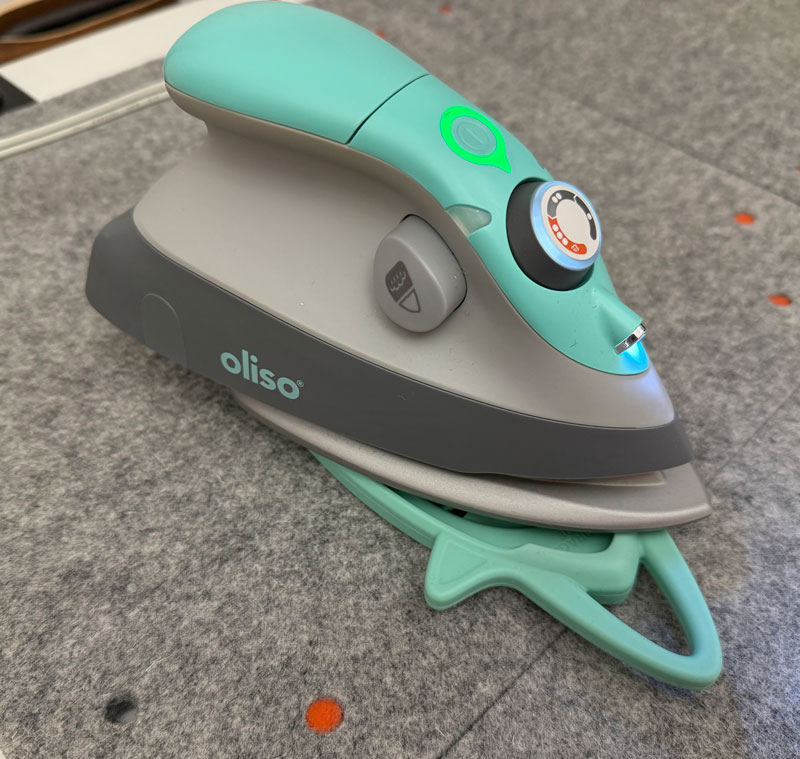
- Left-handed friendly: The first thing I did when I unpacked my iron was follow the included instructions for changing the cord position for left-handed use. This did require unscrewing two screws, but it was not a difficult procedure. Although I am right-handed, I use the iron in my left hand because I'm always holding small pieces of fabric with tweezers in my right. Having the cord positioned out the left side of the iron is wonderful.
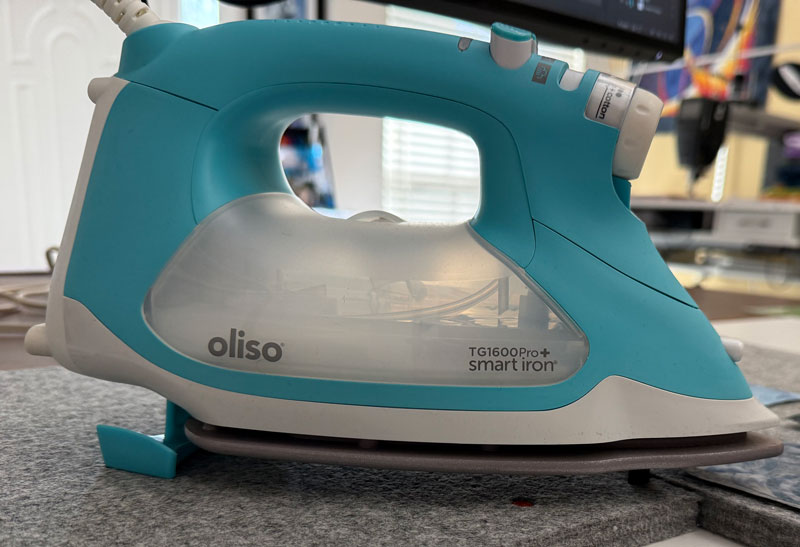
The cord on the ProPlus is connected to the iron via a ball socket, so it rotates easily and does not need to be configured for one hand or the other.
- The Soleplate: Oliso irons are made with a "Diamond Ceramic Flow" soleplate. I don't know what kind of magic sorcery that is, but holy smokes does it work. I have even accidentally ironed the wrong side of my Hotfix fusible—as in I placed the iron directly onto the fusible instead of the paper backing—and the fusible didn't stick to the iron. It was all warped and melty, but the glue stayed on the paper! As an artist who works exclusively with fused appliqué, this fact alone is worth the entire cost of the iron.
- Heat: Both irons get super hot. A hot iron melts fusible quickly, which I really appreciate. My past irons have always been cranked all the way up, but I've found that's not necessary with the ProPlus to achieve similar results.
- The headlight: I love the light on the front of the M3Pro. I use it for my most detailed projects, and having that extra light on the front is a nice added benefit.
- Designed to be horizontal: The M3Pro came with a silicone soleplate cover. When working on a project, I can rest the M3Pro on that soleplate cover to keep it horizontal without worrying I'm going to burn whatever is underneath. The ProPlus has a lift feature which automatically raises the iron off the surface so it can stay horizontal without burning anything (see the image below).
Until I had these irons, I never realized how sore my wrist was getting after working at my table for a few hours. Or rather, I knew how sore my wrist was, but I didn't know there was anything I could do about it. When I'm in the zone, I iron hundreds of pieces of fabric each hour. In between each one, I used to set my iron on its end so it wouldn't burn anything while I got the next piece ready. Not having to rotate my iron has been incredible.
Here is my ProPlus. Link to Oliso website
- Wool mats: I love the wool mats. Each mat is 14" square, but it has eight holes (two in each corner) and four silicone strips that fit into those holes. They're designed to be modular. I can connect twelve of these mats into one giant iron-safe surface on my work table while I'm putting a project together, but the whole thing can be collapsed down to easily get stored in a drawer when not in use.
- Safe storage: Between the soleplate cover and the wool carry bag, I don't have to worry about my iron still being hot before I pack it up.
Wishlist
I have two wishlist items when it comes to these irons.
- Longer cord: I wish the M3Pro had a slightly longer cord. Its cord is 8ft, but two more feet would be perfect. I use a standing height work table, and my power strip is on the floor. This means I don't have as much distance to use the M3Pro, which is a challenge for large projects. (The ProPlus has a wonderfully long cord, so no complaints there.)
- On-off button: The M3Pro as an on-off button, which is great. I wish the larger ProPlus iron had one as well. I'd like to be able to walk away from my table and know that my iron is off without having to unplug it or hit the switch on the power strip.

What About Steam?
To be honest, I have never used the steam function with either of my Oliso irons. I've never even put water in them. I only use steam during one part of my process, and that is at the very end after the quilting is finished but before I put the binding on.
I have a steam-dedicated iron specifically for that part of the process , and it's the only iron that gets water in my studio. I use it so infrequently that it will probably last for years. But when the time comes to replace it, I'll be buying another Oliso.
